
BMC Helix ITSM
BMC Helix ITSM is a predictive service management system for managing IT resources, infrastructure, and applications. By combining xMatters and BMC Helix, you can automatically find and notify the right people to respond before an issue becomes an incident.
This workflow lets you send actionable alerts to on-call resources when xMatters gets a signal from BMC Helix. Responders can initiate an incident with the press of a button, or you can build on the flow to perform automated resolution tasks.
How it works
When an alert is generated in BMC Helix, it sends a JSON-formatted webhook to xMatters, based on user-defined business rules. A BMC Helix ITSM Incidents trigger in xMatters parses the webhook based on whether a BMC Helix ticket has an assigned user or group, and initiates a flow that either creates a new incident or updates an existing one.
Install the workflow
- Go to the Workflow Templates page and click the BMC Helix ITSM tile.
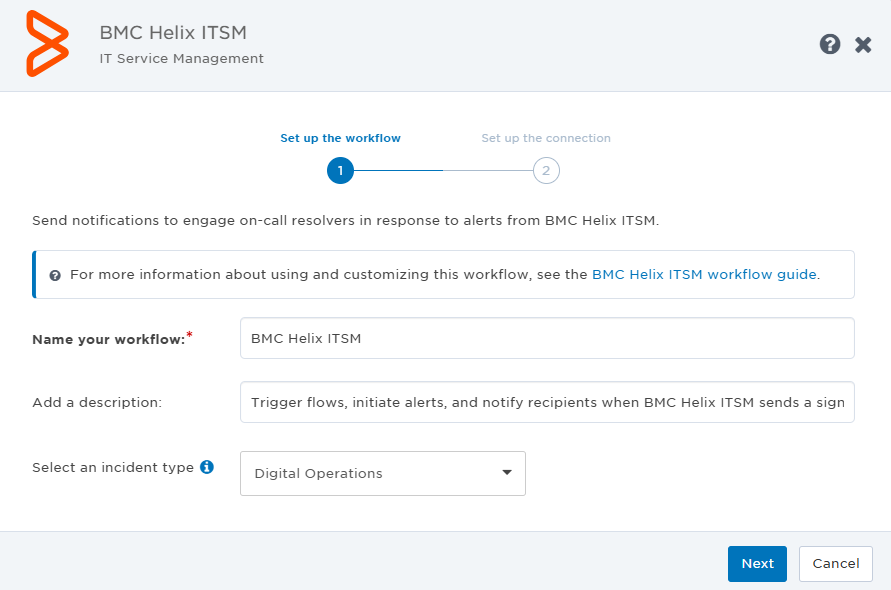
- On the Set up the workflow tab, give the workflow a name that identifies its purpose (this must be unique in your instance), add an optional description, and set the default incident type (if applicable). Any built-in Initiate Incident steps in the workflow will automatically be set to the selected incident type.
- You can edit these later, if needed.
- You can edit these later, if needed.
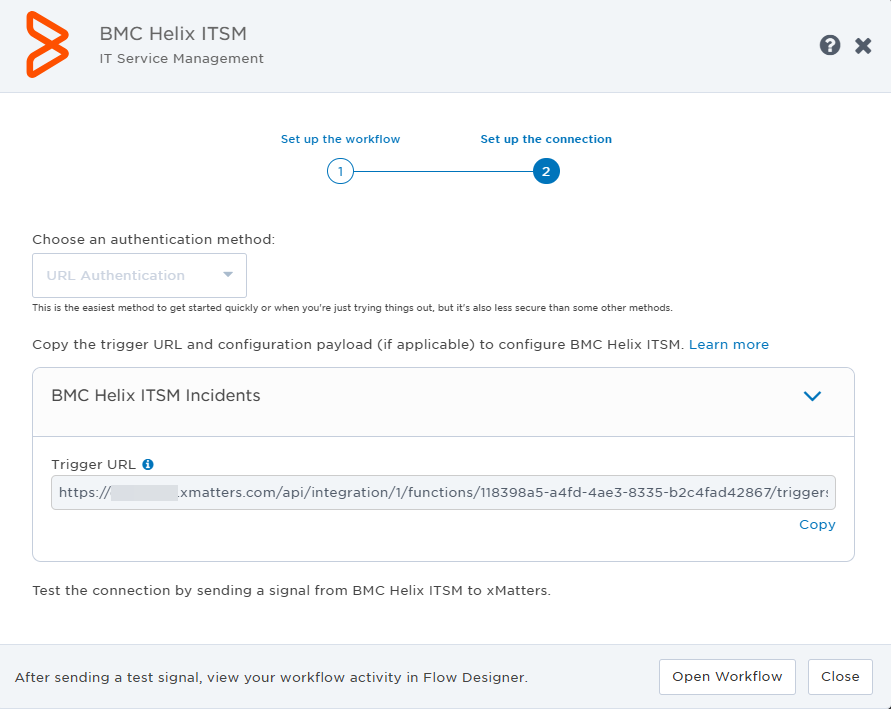
- Click Next to set up the connection.
- Copy the trigger URL — you’ll use it to configure the webhook in BMC Helix.
- The trigger URL includes the recipients parameter, which specifies who should be notified. By default, this parameter is set to notify you (the logged in user), but you can set it to target any user or group you want.
- The trigger URL includes the recipients parameter, which specifies who should be notified. By default, this parameter is set to notify you (the logged in user), but you can set it to target any user or group you want.
- Click Open Workflow.
- Go to Components > Endpoints and create a new endpoint for the authenticating user. See HTTP endpoints for instructions on creating a BMC Helix ITSM endpoint.
Configure BMC Helix ITSM to send requests to the trigger URL
To have BMC Helix ITSM send alerts to the flow trigger, you need to configure two webhooks and set them to use the trigger URL. The first webhook creates incidents, the second one updates them with information from BMC Helix ITSM. You can either configure the webhooks using the BMC Helix ITSM user interface, or the BMC Helix ITSM API.
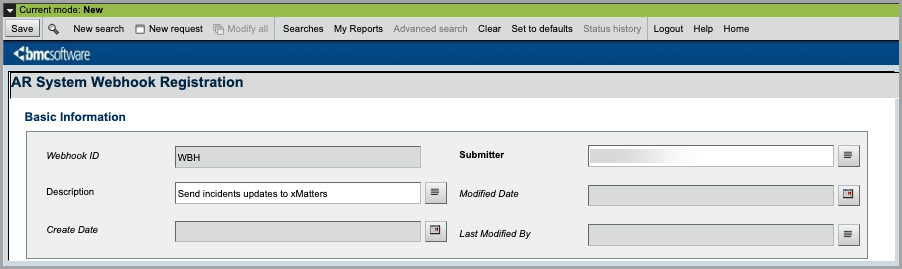
To configure the webhooks using the BMC Helix ITSM user interface:
- Go to the AR System Webhook Registration page in Administrator View. You can use this link to get there: https://<BMC helix base URL>/arsys/forms/onbmc-s/AR+System+Webhook/Default+Administrator+View.
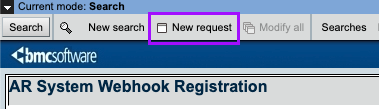
- Click New request to create a new webhook.
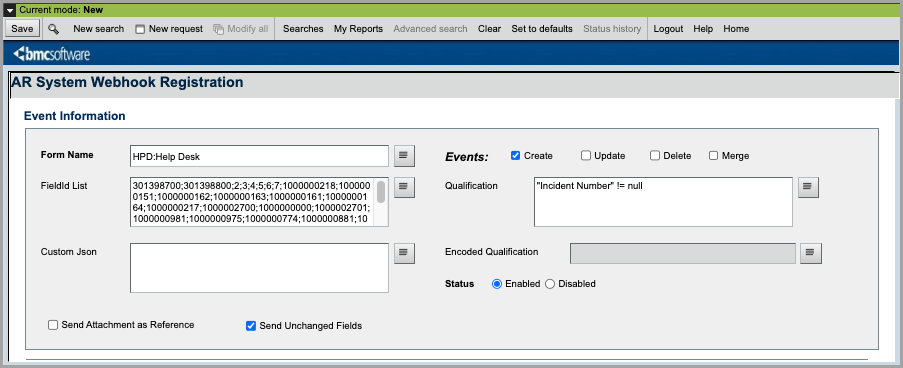
- In the Event Information section, fill in the following fields:
- Form Name: Enter HPD:Help Desk.
- Events: Select the Create check box.
- Field ID List:Copy
301398700;301398800;2;3;4;5;6;7;1000000218;1000000151;1000000162;1000000163;1000000161;1000000164;1000000217;1000002700;1000000000;1000002701;1000000981;1000000975;1000000774;1000000881;1000000156;1000000014;1000000251;1000000019;1000000018;1000000215;1000000150;1000000079;1000000099 - Qualification: Enter "Incident Number" != null.
- Custom Json: Leave this field blank.
- Status: Select the Enabled radio button.
- Send Attachment as Reference: Leave this check box disabled.
- Send Unchanged Fields: Click the check box to enable it.
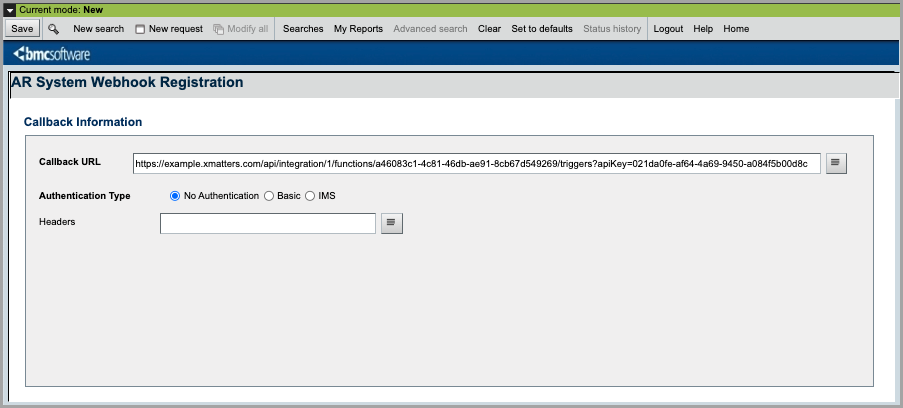
- In the Callback Information section, fill in the following fields:
- Callback URL: Enter the trigger URL you copied earlier from Flow Designer.
- Authentication Type:
- No Authentication: Select if using URL authentication on the Flow Designer trigger.
- Basic Authentication: Select if using Basic Authentication on the Flow Designer trigger and supply the xMatters username and password, or API Key and Secret.
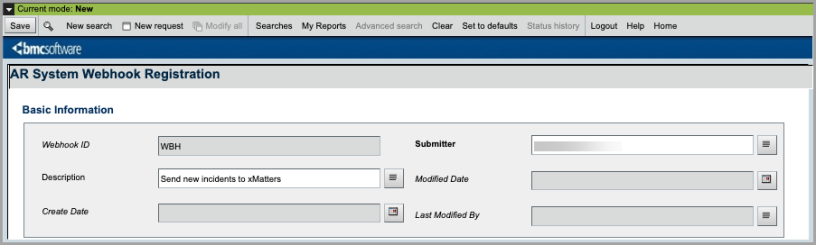
- In the Basic Information section, fill in the following field:
- Description: Enter Send new incidents to xMatters.
- Description: Enter Send new incidents to xMatters.
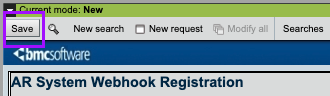
- Click Save.
Now create a second webhook that sends incident update information to xMatters.
- Click New request to create a new webhook.
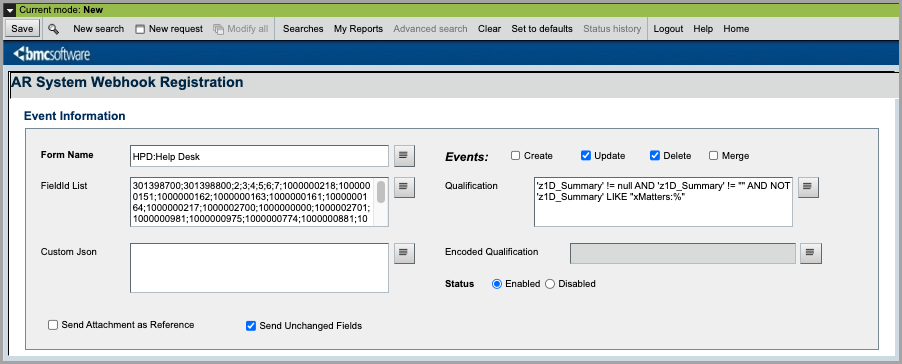
- In the Event Information section, fill in the following fields:
- Form Name: Enter HPD:Help Desk.
- Events: Select the Update and Delete check boxes.
- Field ID List:Copy
301398700;301398800;2;3;4;5;6;7;1000000218;1000000151;1000000162;1000000163;1000000161;1000000164;1000000217;1000002700;1000000000;1000002701;1000000981;1000000975;1000000774;1000000881;1000000156;1000000014;1000000251;1000000019;1000000018;1000000215;1000000150;1000000079;1000000099 - Qualification:Copy
'z1D_Summary' != null AND 'z1D_Summary' != "" AND NOT 'z1D_Summary' LIKE "xMatters:%" - Custom Json: Leave this field blank.
- Status: Select the Enabled radio button.
- Send Attachment as Reference: Leave this check box disabled.
- Send Unchanged Fields: Click the check box to enable it.
- In the Callback Information section, fill in the following fields:
- Callback URL: Enter the trigger URL you copied earlier from Flow Designer.
- Authentication Type:
- No Authentication: Select if using URL authentication on the Flow Designer trigger.
- Basic Authentication: Select if using Basic Authentication on the Flow Designer trigger and supply the xMatters username and password, or API Key and Secret.
- In the Basic Information section, fill in the following fields:
- Description: Enter Send incident updates to xMatters.
- Description: Enter Send incident updates to xMatters.
- Click Save.
To create the webhooks that send create and update information from BMC Helix ITSM to xMatters:
- Obtain an access token with the API:
Copy
curl -X POST -H "Content-Type: application/x-www-form-urlencoded" -d
"username=<BMC Helix username>&password=<BMC Helix password>"
"https://<BMC Helix base URL>/api/jwt/login" - Create the Create Incident webhook.
Ensure you replace placeholder values with valid values for your system: Copy
curl -X POST -H "Authorization: AR-JWT <access_token>" -H "Content-Type: application/json" -d
"data {
  "description": "Send new incidents to Flow Designer",
  "form_name": "HPD:Help Desk",
  "condition": "‘Incident Number’ != null"
  "entry_events": [
    "Create"
  ],
  "payload_fields": [
    "Assigned Group",
    "Assigned Group ID",
    "Assigned Support Company",
    "Assigned Support Organization",
    "Assignee",
    "Assignee Login ID",
    "Event Details",
    "Event Summary",
    "Event Type",
    "First Name",
    "Form Name",
    "Impact",
    "Last Name",
    "Modified",
    "Modified By",
    "Notes",
    "Number",
    "Priority",
    "Recipients",
    "Reported Source",
    "Resolution Note",
    "Service Type",
    "Status",
    "Status Reason",
    "Submitted",
    "Submitted By",
    "Summary",
    "Urgency",
    "Webhook ID"
  ],
  "enabled": true,
  "callback": {
    "url": "https://example.xmatters.com/api/integration/1/functions/94118330-0853-467e-b325-81628726ed77/triggers?apiKey=52962b2c-7e6f-4df3-9e7d-fee480f8af5d",
    "authentication": {
      "type": "NO_AUTH",
      "username": null,
      "password": null,
      "accessKey": null,
      "accessSecretKey": null,
      "tenantId": null,
      "authBaseUrl": null,
      "authAccessTokenPath": null,
      "authRefreshTokenPath": null,
      "authHeaderTokenName": null
    }
  },
  "send_attachment_as_reference": false,
  "send_unchanged_fields": true
}"
"https://<BMC Helix base URL>/api/arsys/v1.0/webhook" - Create the Update/Delete incident webhook. The following placeholder values must be replaced with valid values for your system:
- access_token
- url
- BMC_Helix_Base_URL
Copycurl -X POST -H "Authorization: AR-JWT <access_token>" -H "Content-Type: application/json" -d
"data {
"description": "Send incident updates to Flow Designer",
"form_name": "HPD:Help Desk",
"condition": "'z1D_Summary' != null AND 'z1D_Summary' != \"\" AND NOT 'z1D_Summary' LIKE \"xMatters:%\""
"entry_events": [
"Update",
"Delete"
],
"payload_fields": [
"Assigned Group",
"Assigned Group ID",
"Assigned Support Company",
"Assigned Support Organization",
"Assignee",
"Assignee Login ID",
"Event Details",
"Event Summary",
"Event Type",
"First Name",
"Form Name",
"Impact",
"Last Name",
"Modified",
"Modified By",
"Notes",
"Number",
"Priority",
"Recipients",
"Reported Source",
"Resolution Note",
"Service Type",
"Status",
"Status Reason",
"Submitted",
"Submitted By",
"Summary",
"Urgency",
"Webhook ID"
],
"enabled": true,
"callback": {
"url": "https://example.xmatters.com/api/integration/1/functions/94118330-0853-467e-b325-81628726ed77/triggers?apiKey=52962b2c-7e6f-4df3-9e7d-fee480f8af5d",
"authentication": {
"type": "NO_AUTH",
"username": null,
"password": null,
"accessKey": null,
"accessSecretKey": null,
"tenantId": null,
"authBaseUrl": null,
"authAccessTokenPath": null,
"authRefreshTokenPath": null,
"authHeaderTokenName": null
}
},
"send_attachment_as_reference": false,
"send_unchanged_fields": true
}"
"https://<BMC Helix base URL>/api/arsys/v1.0/webhook"
You're ready to use the webhook to trigger automated flows, including steps such as sending alerts and initiating incidents, though we always recommend testing before putting things into use.
Configure xMatters to send updates to BMC Helix
To send updates to BMC Helix, the workflow requires an authenticating user for both User Assignment, and Group Assignment. The following instructions describe how to create a constant for the authenticating user in your xMatters workflow.
The BMC Helix ITSM workflow comes with three pre-configured constants. The first constant for Active Priorities defines the priorities when xMatters should send an alert. The default values are Critical and High, but you can add other values if required. The second constant for Active Statuses defines which incident statuses triggers an alert. You can add or delete values as required. The third value is for the Flow Designer BMC Helix ITSM User. This is where you set the value of the authenticating user.
To obtain the authenticating user value and set it as a constant:
- Open your BMC Helix ITSM workflow.
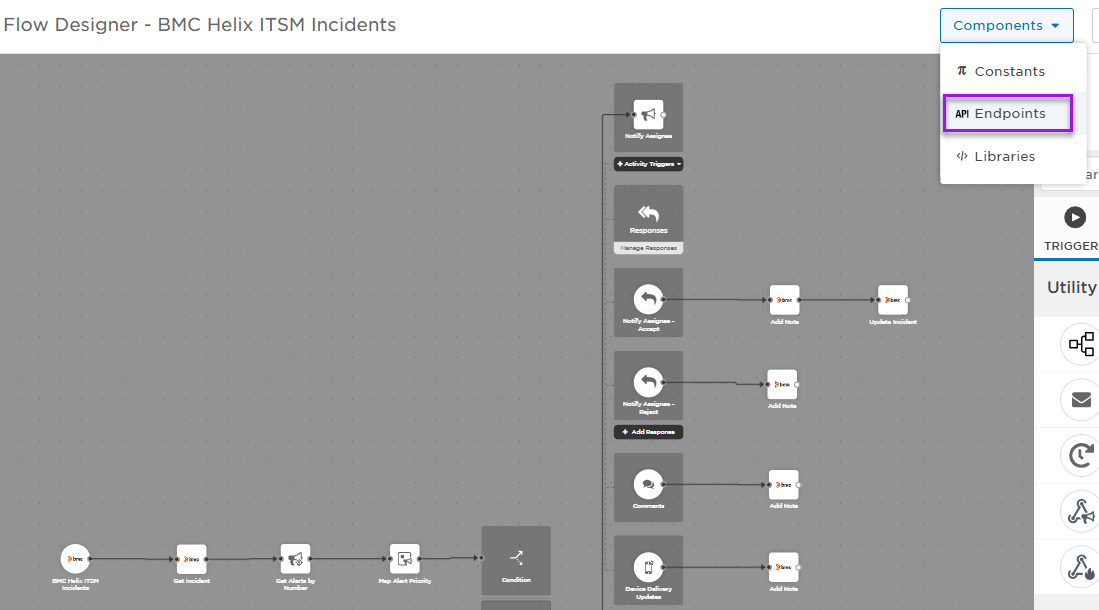
- Click the Flow Designer tab, and open the BMC Helix ITSM Incidents canvas.
- Expand the Components menu and select Endpoints.
- Select the BMC Helix tab, then scroll to the bottom of the Settings screen.
- Copy the value in the Username field.

- Click Close.
- Go to Components > Constants.
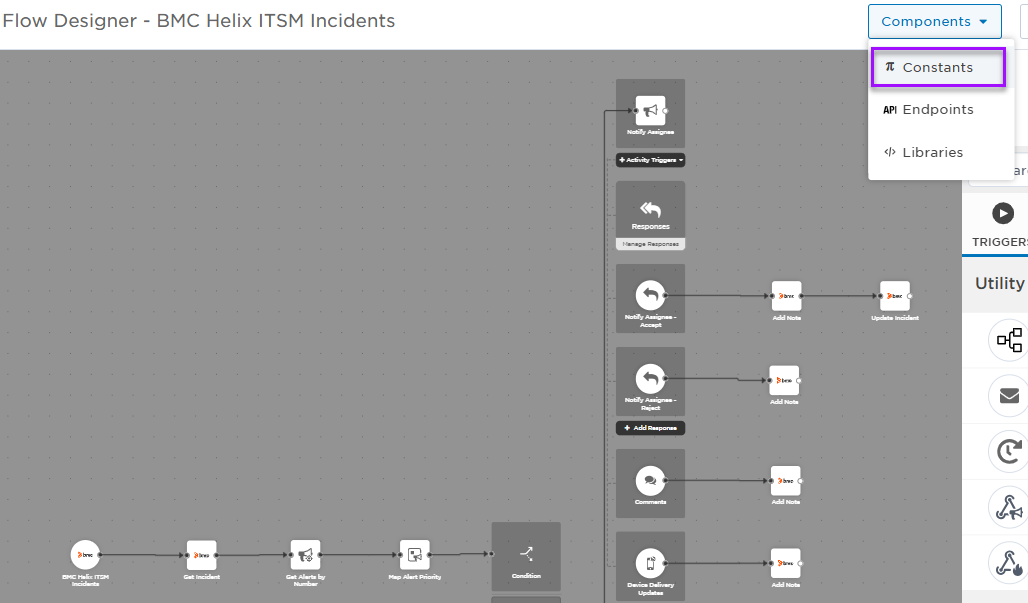
- Select the Flow Designer BMC Helix ITSM User constant.
- Go to the Value field and replace the default value of xMatters with the name you copied from the endpoints menu. While the value fields of other constants can contain multiple values, the BMC Helix ITSM User constant can only contain one value.
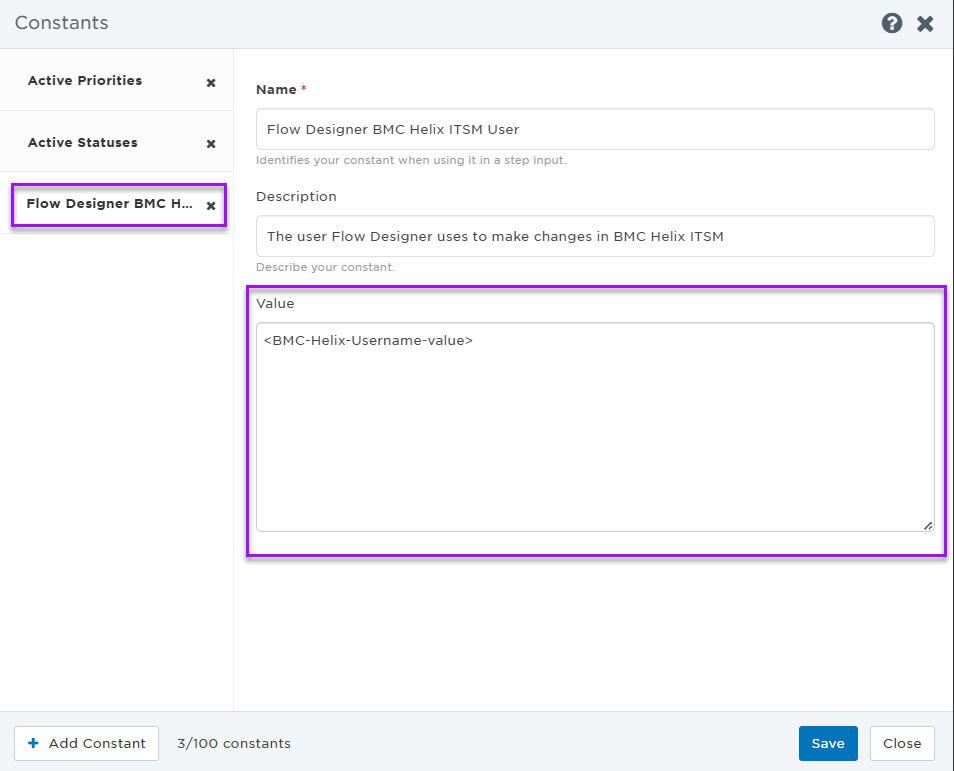
- Click Save, then Close.
The constant values are used in various steps throughout the workflow.
Set recipients in the trigger URL
The trigger expects the recipients in the trigger URL. When you copy the URL from xMatters, it includes the recipients parameter: recipients=<yourname>. Of course, you don’t want to receive all the alerts.
To change the recipients for alerts from this webhook, swap out your name for the people or groups you want to target.
- For URL authentication, use an ampersand to attach recipients. For example, if you want to notify Emma Pearson and the on-call members in the group responsible for the Antares service, you'd add &recipients=epearson,antares to the URL.
- For other authentication types, use a question mark to attach recipients. For example, if you want to notify Barry Gull and the on-call members in the group responsible for the Cassiopeia service, you'd add ?recipients=bgull,cassiopeia to the URL.
Remember to URL-encode any special characters, including spaces, in your group names.
We recommend using groups so you can take advantage of the xMatters group features — rotations, escalations, and absences — to reach the right on-call people to jump on an issue.
How to use the workflow
The BMC Helix ITSM workflow performs two-way communication between xMatters and BMC Helix. When condition you've set fires, it sends a signal to xMatters, which either creates a new incident or updates an existing one. When there is a change to the incident in xMatters, an update is sent back to BMC Helix.
When a signal is received from BMC Helix ITSM and a new incident is created, the person responding to the notification has the following response options available:
- Assign to me: Acknowledges the notifications and stops escalations. The BMC Helix ITSM incident is updated with a note containing the xMatters incident ID and information about the authenticating user.
- Escalate: Immediately escalates the alert to the next on-call resolver in a targeted group.
- Resolve: Ends the xMatters alert and stops notifying all targeted recipients. The BMC Helix ITSMincident is resolved and a note is added for the change in status.
- Close: Ends the xMatters alert and stops notifying all targeted recipients. Both the xMatters and BMC Helix ITSM incidents are closed and a note is added for the change in status.
Next Steps
Now that you've installed the workflow, you can use it as-is, or customize it to suit your needs better. Here are some examples of things you can add to the workflow to customize it:
- Use Slack, Zoom, and Microsoft Teams steps to add collaboration channels to the flow.
- Change the severity of incidents created when a recipient selects the Initiate Incident response.
- Update the message sent to resolvers to include the information most relevant to your team.
- Use the BMC Helix ITSM Incidents trigger to build your own custom flows.