
Freshservice
Freshservice is a cloud-based software that helps streamline customer support. Coupled with the power of xMatters, this workflow:
- Quickly notifies the agent or group that they've been assigned to a ticket using their preferred devices.
- Automatically updates the ticket with information about the notification, including who responded and how, and includes any comments they added.
How it works
When a ticket meets a specified threshold in Freshservice, it sends a JSON-formatted webhook to xMatters. A Freshservice trigger in xMatters parses the webhook and initiates a flow. The webhook includes essential alert data you can use to enrich notifications to users or when building automated tasks. Freshservice agents are targeted based on mapping that connects their Freshservice email address to their xMatters work email address. If these addresses are not the same, you will need to open the workflow in Flow Designer and update the Find User step in the Alert Agent flow.
Install the workflow
- Go to the Workflow Templates page and click the Freshservice tile.
- On the Set up the Workflow tab, give the workflow a name that identifies its purpose (this must be unique in your instance), add an optional description, and set the default incident type (if applicable). Any built-in Initiate Incident steps in the workflow will automatically be set to the selected incident type.
- You can edit these later, if needed.
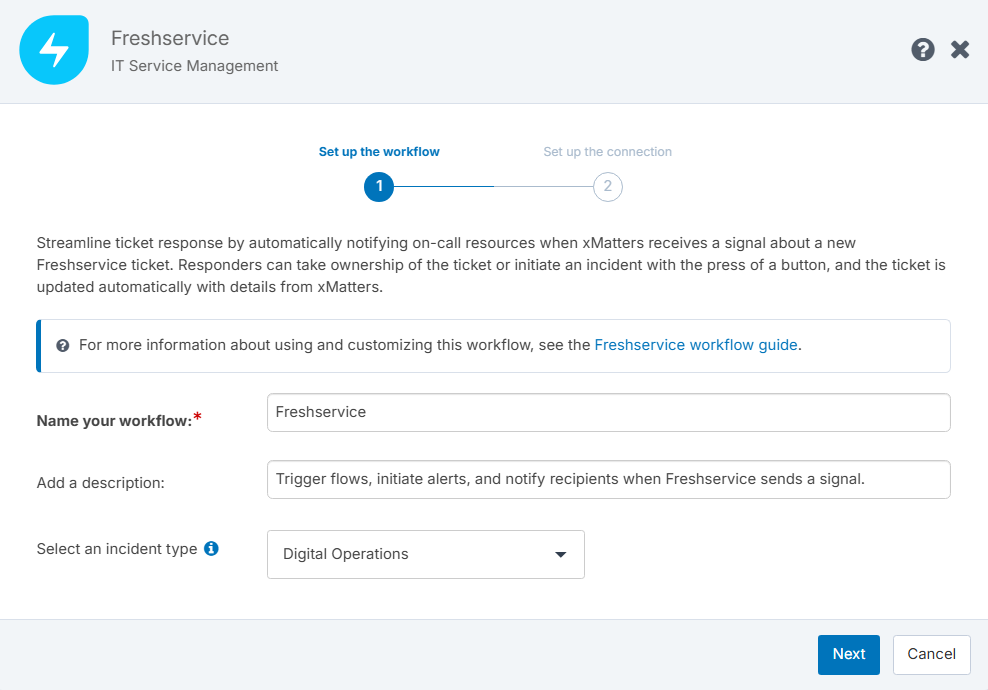
- You can edit these later, if needed.
- Click Next to set up the connection.
- Select the Authentication method from the list of available options.
- Copy the trigger URL — you’ll use this to configure the webhook in Freshservice.
- You can copy the Configuration Payload to configure the signal in the source application.
- Click Open Workflow to make modifications to the workflow, or Close to complete the install.
Now that the workflow is installed, let's to go to Freshservice and configure it to communicate with xMatters.
Configure Freshservice to send requests to the trigger URL
To have Freshservice send alerts to the flow trigger, you need to configure an automation and set a webhook use the trigger URL.
 Create a Freshservice workflow automation and webhook
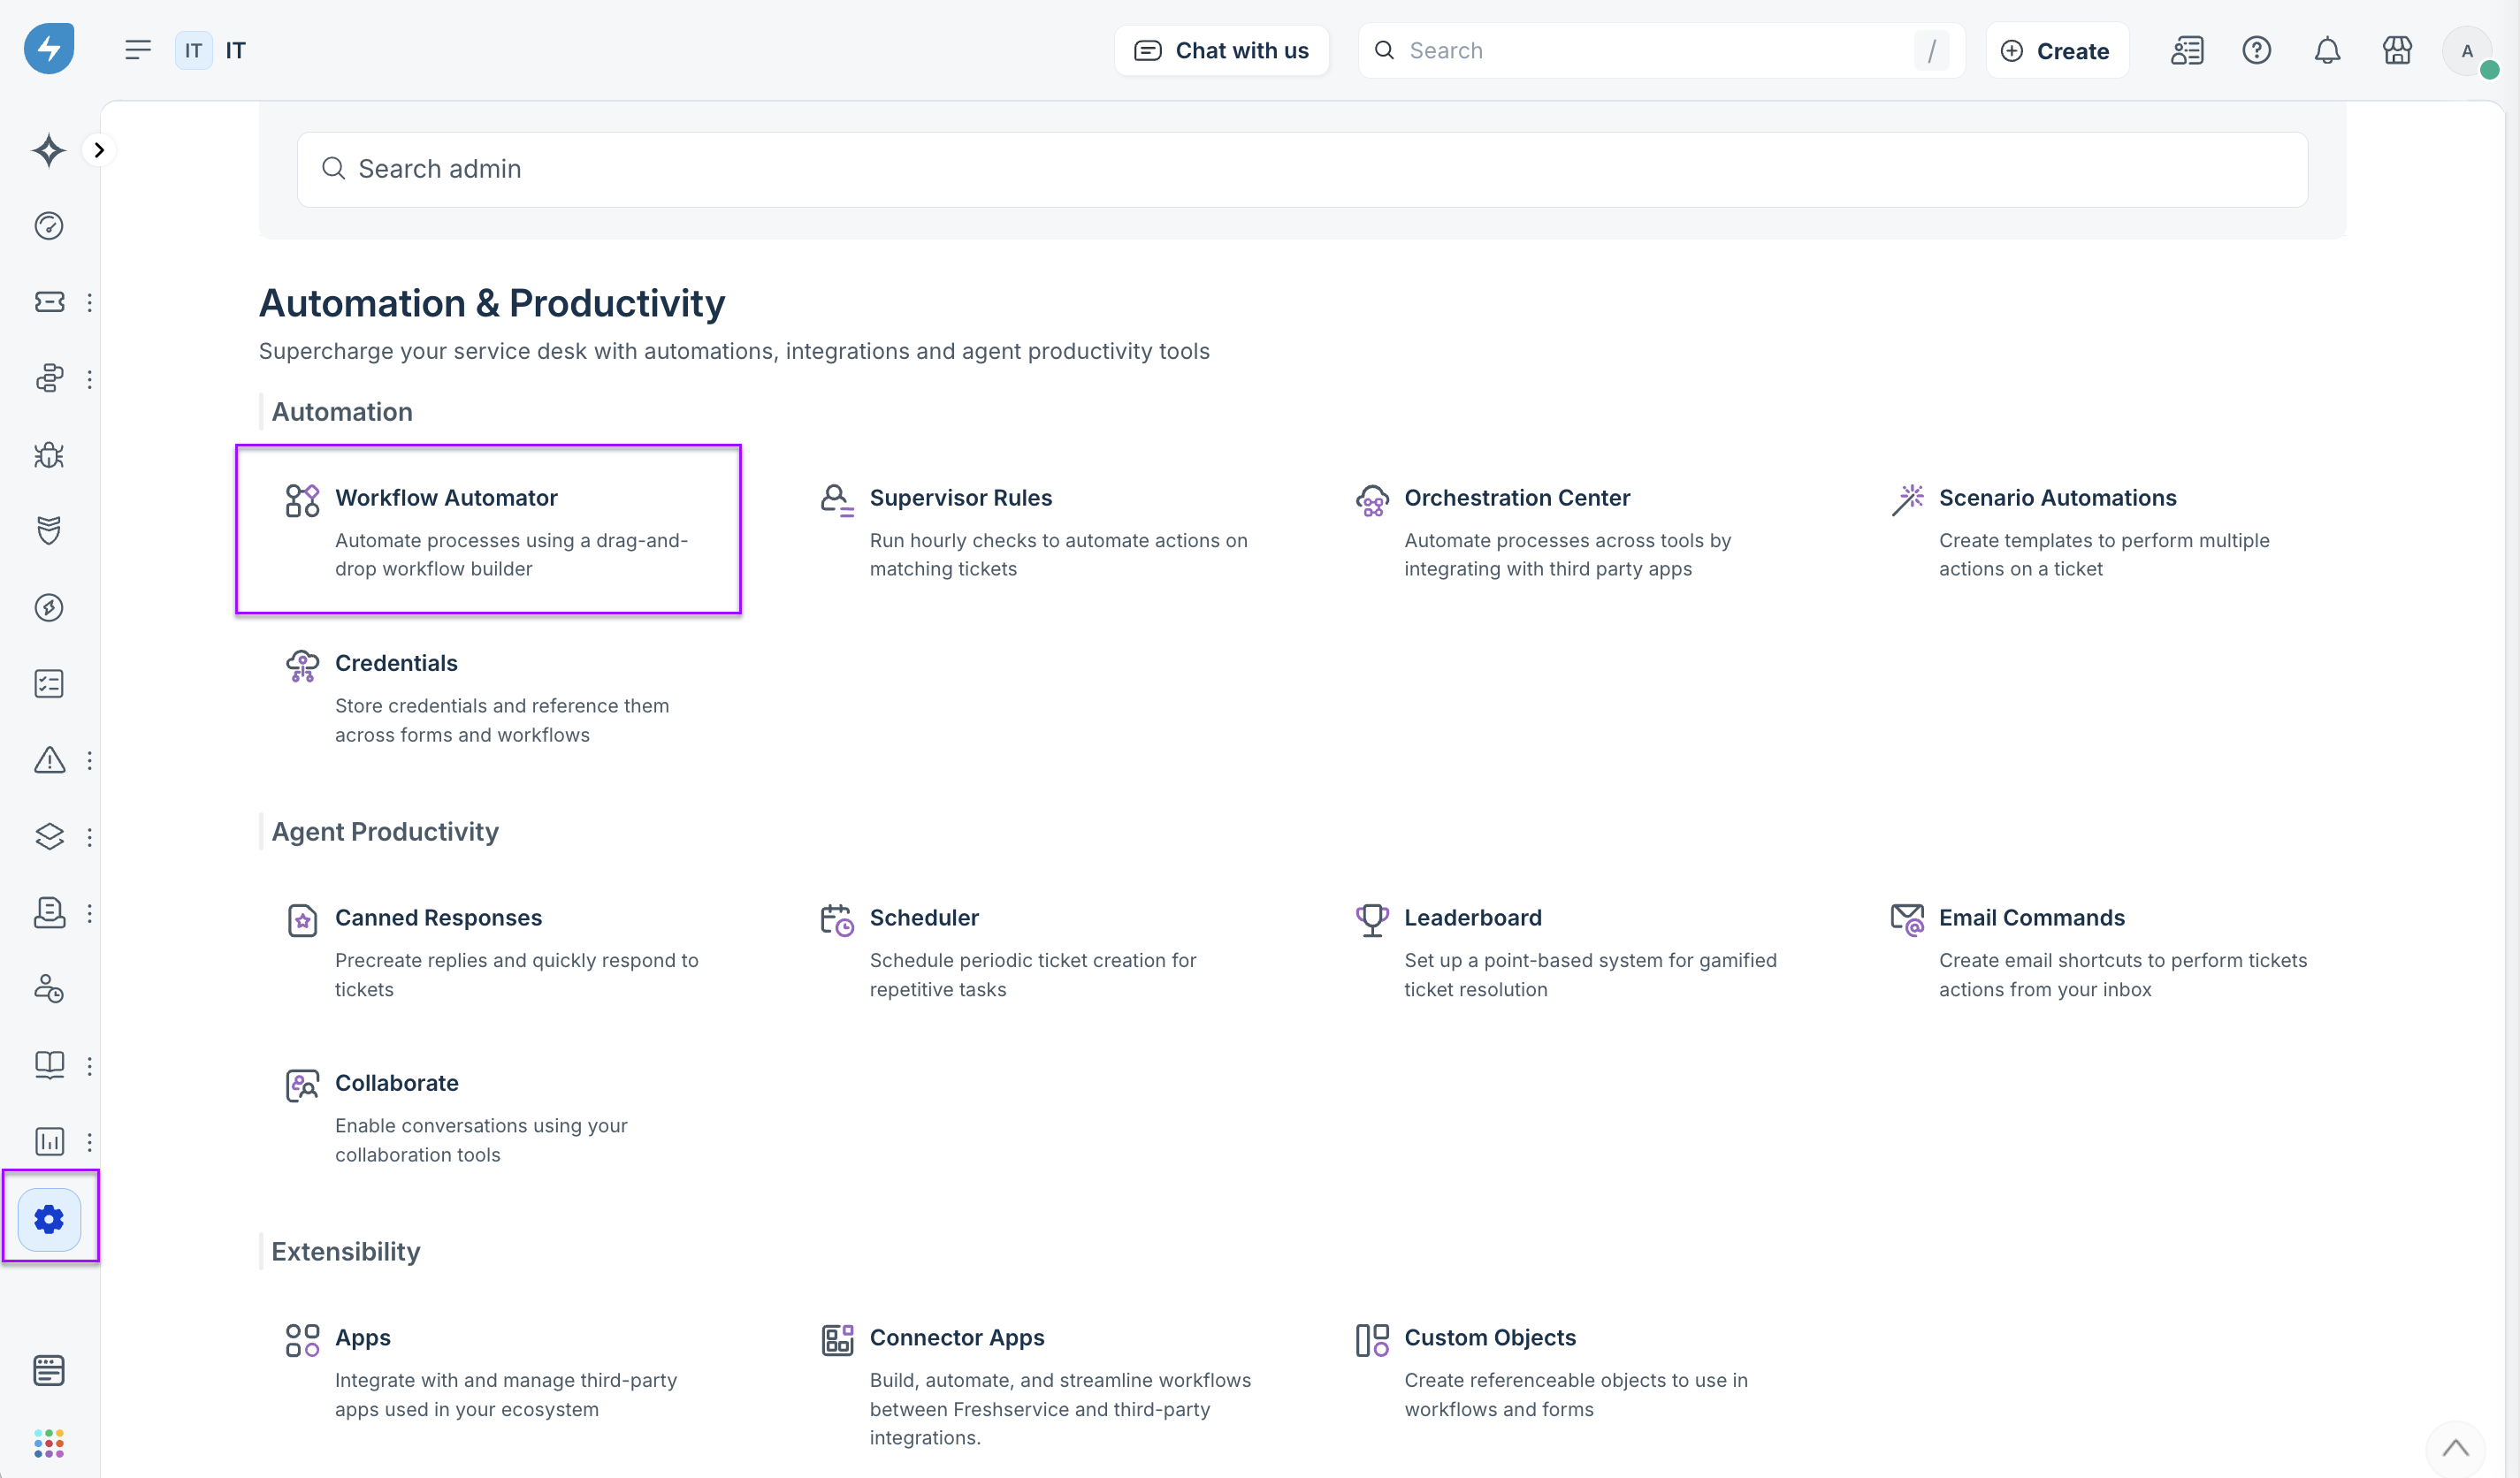
- In Freshservice, go to the Admin menu.
- In the Automation & Productivity section, select Workflow Automator.
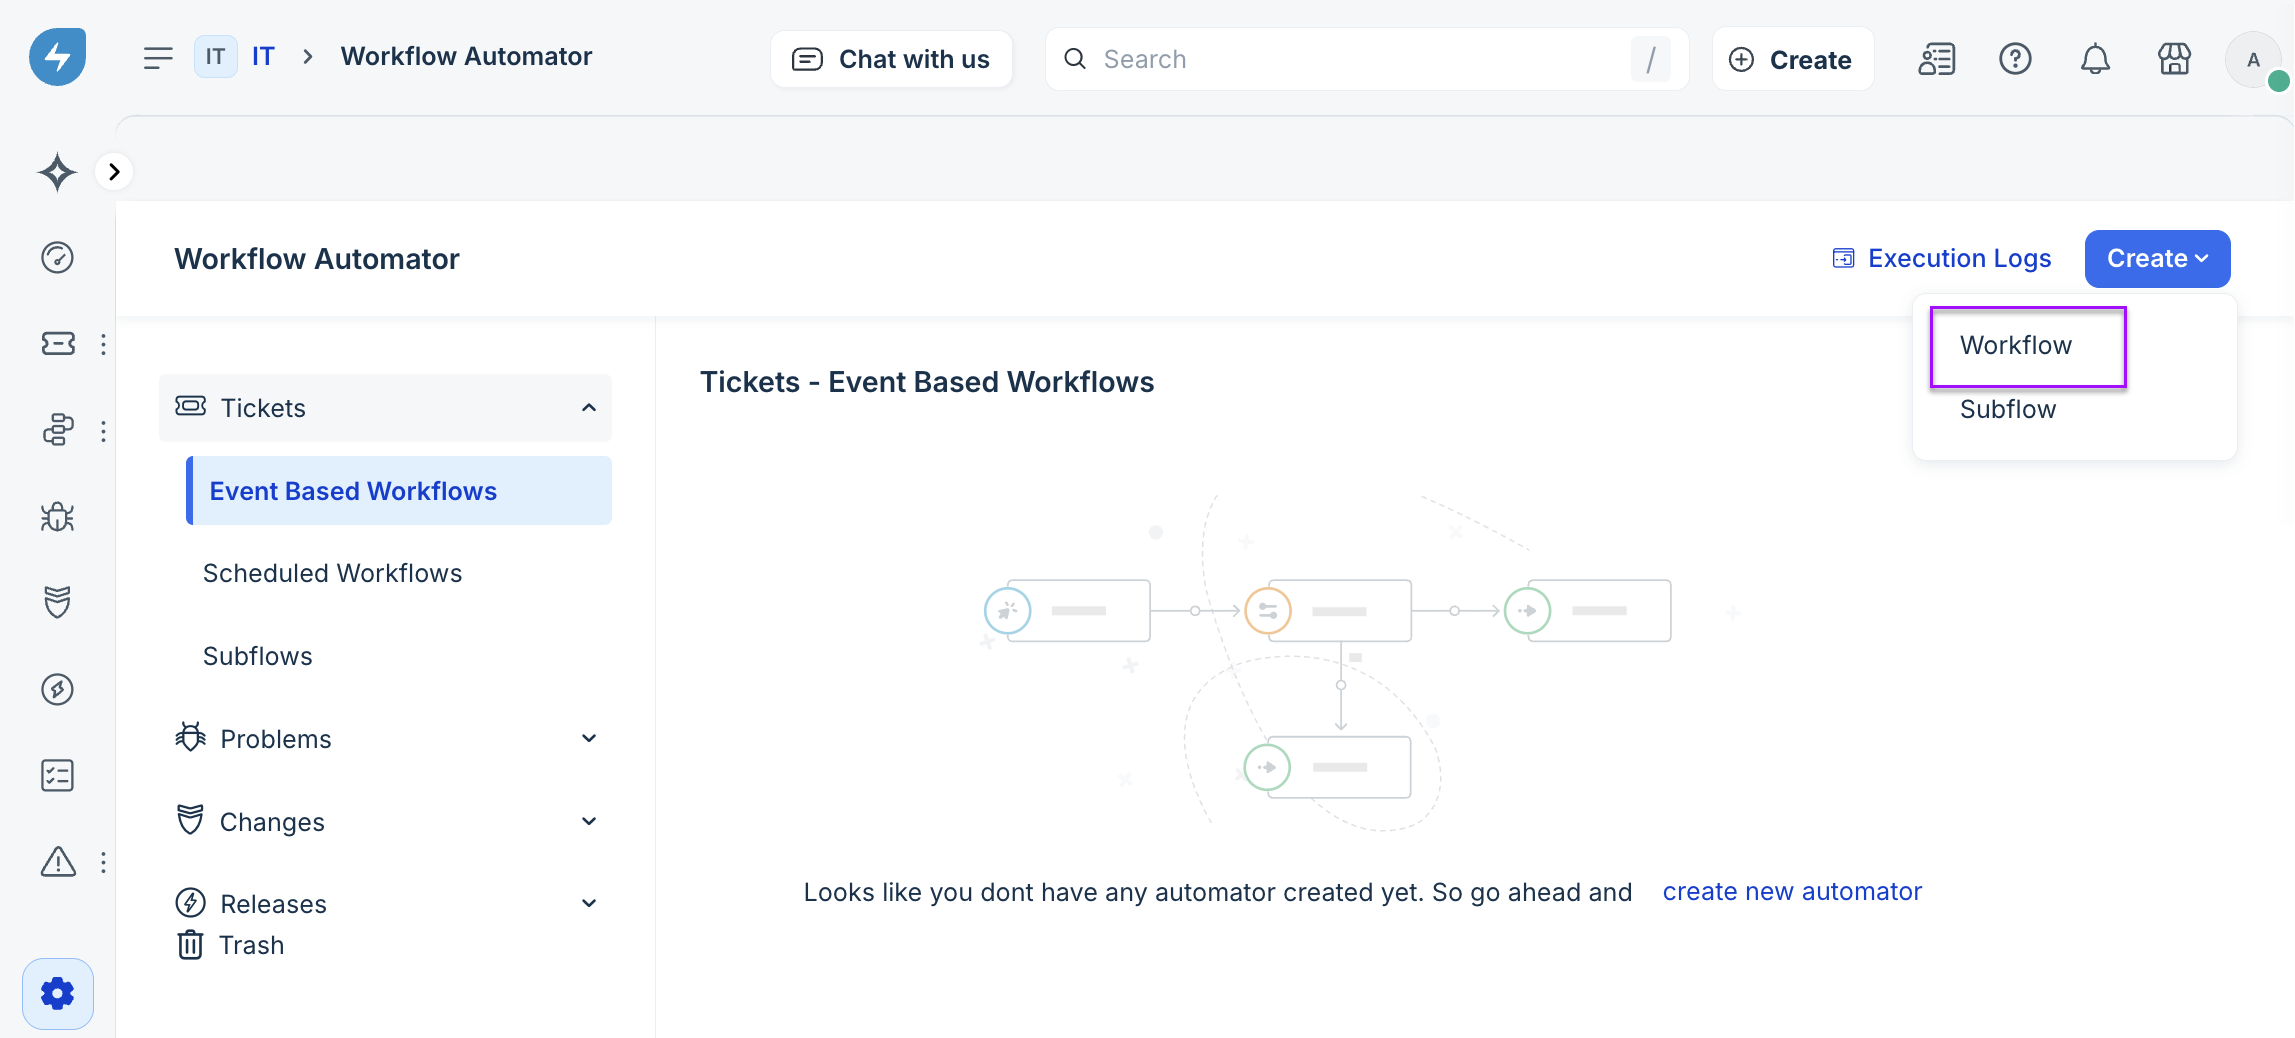
- From the Create menu in the top-right corner, select Workflow.
- On the Create Workflow modal, fill in the following fields:
- Title: Add a unique name for the xMatters workflow.
- Module: Select Tickets from the list of options.
- Workflow Type: Select Event Based Workflow from the list of options.
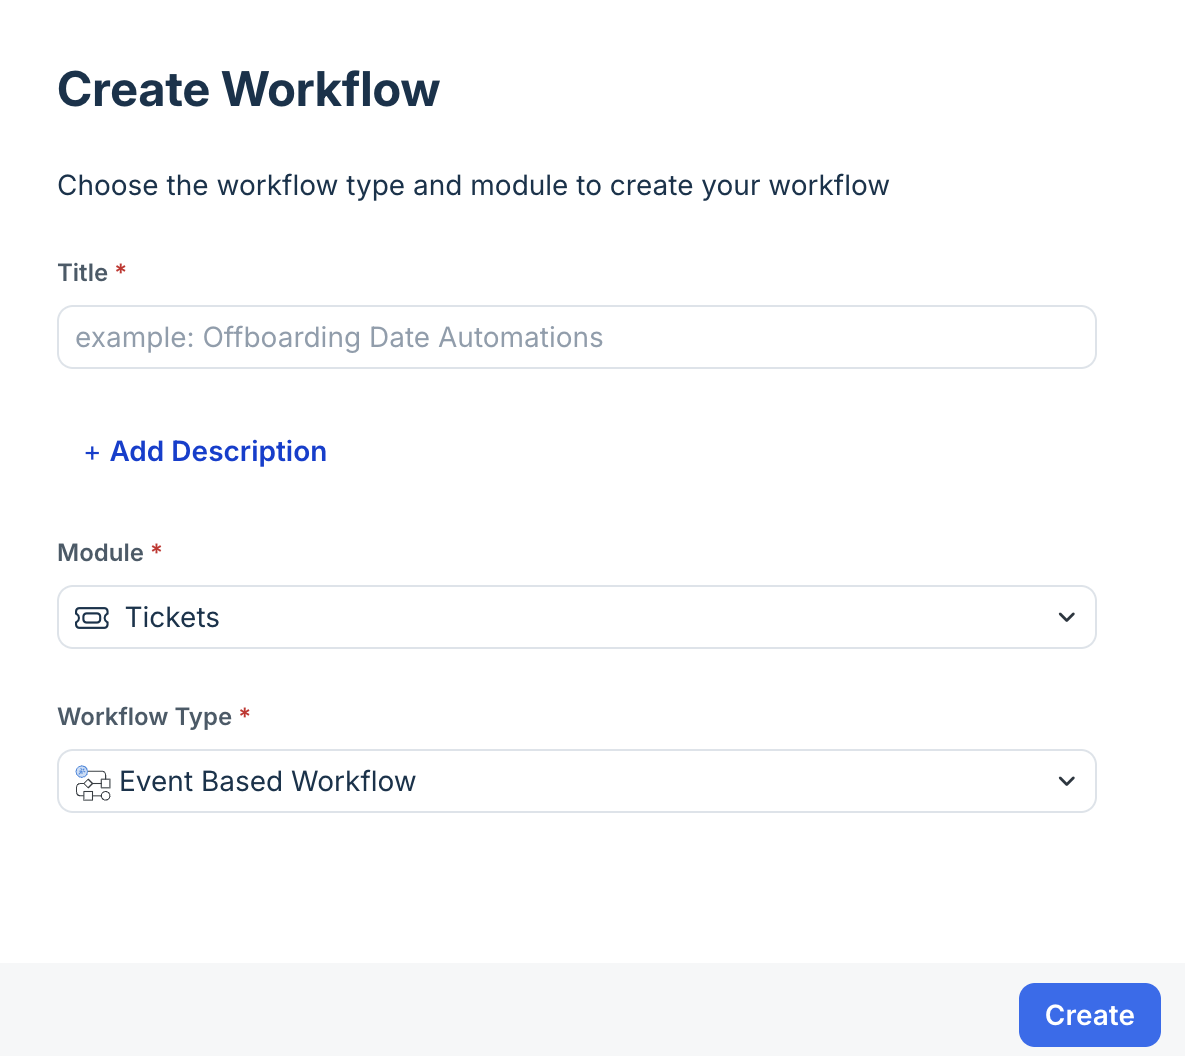
- Click Create.
- The Event step configuration modal will automatically open. Fill in the following fields:
- When any of these events occur: Ticket is raised
- These events can be performed by: Anyone
- Step label field (optional): The step label is identical to the event occurrence labels. You can overwrite the step label if a more descriptive one is required.
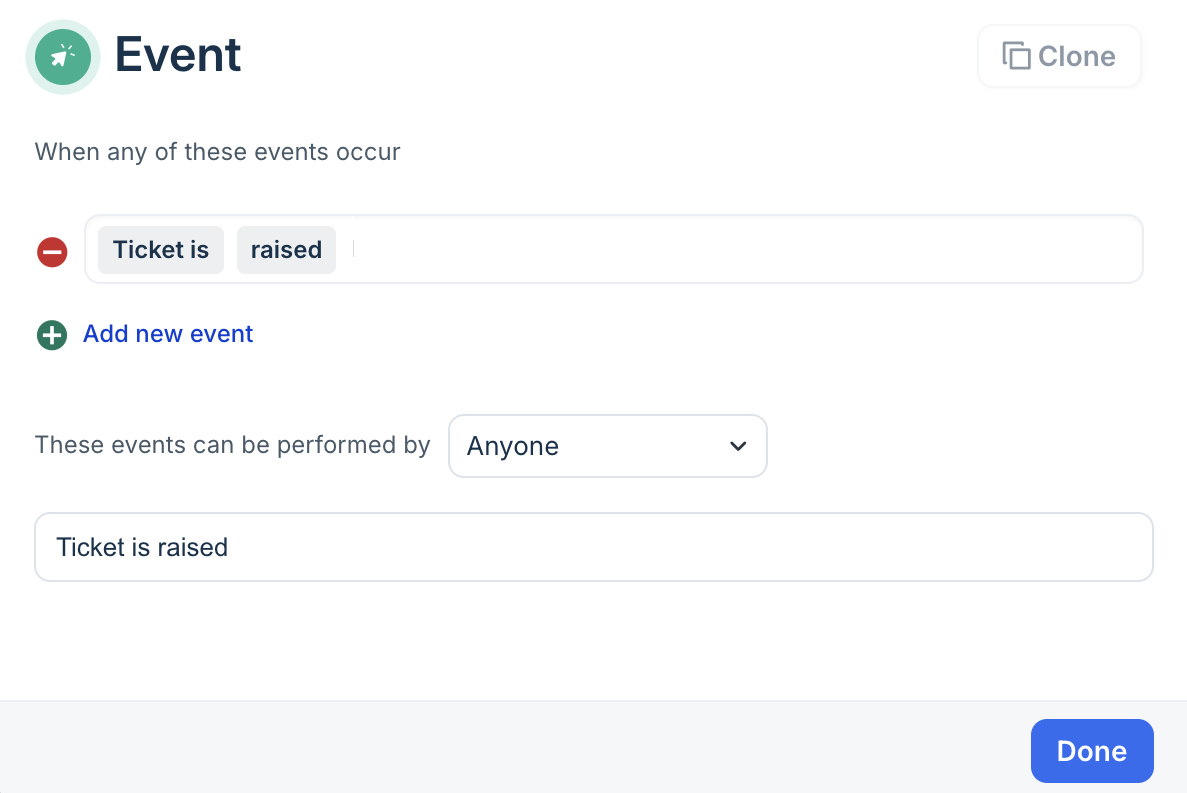
- Click Done.
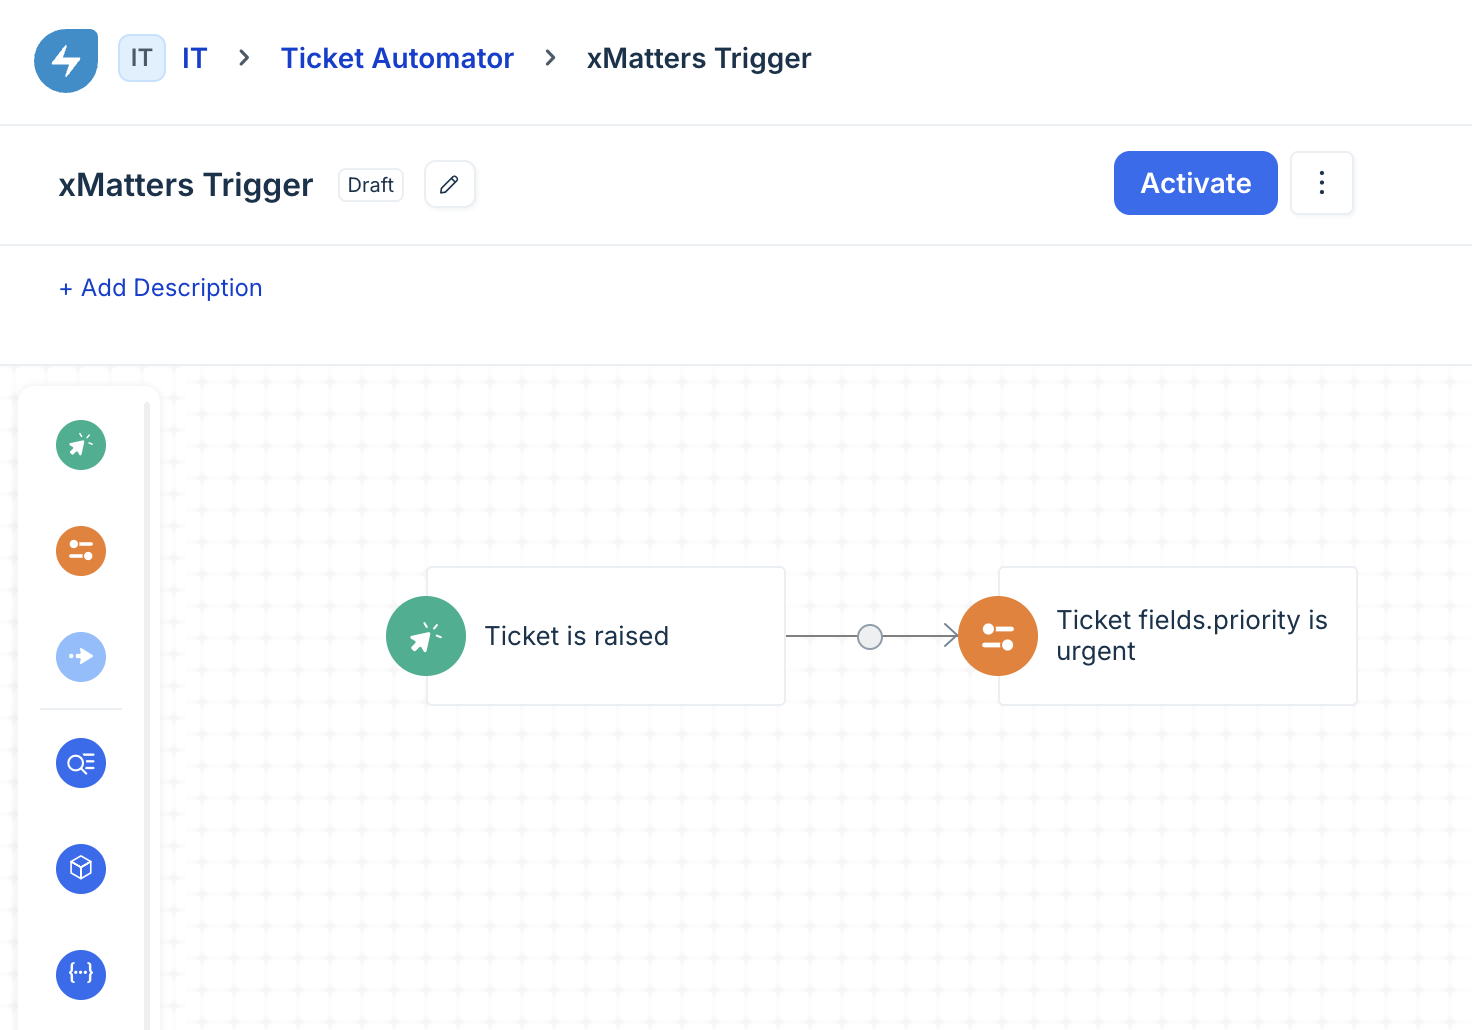
- Drag and drop a Condition step onto the canvas and connect it to your 'Ticket is raised' event.
- Configure the step for the conditions that are important for your organization.
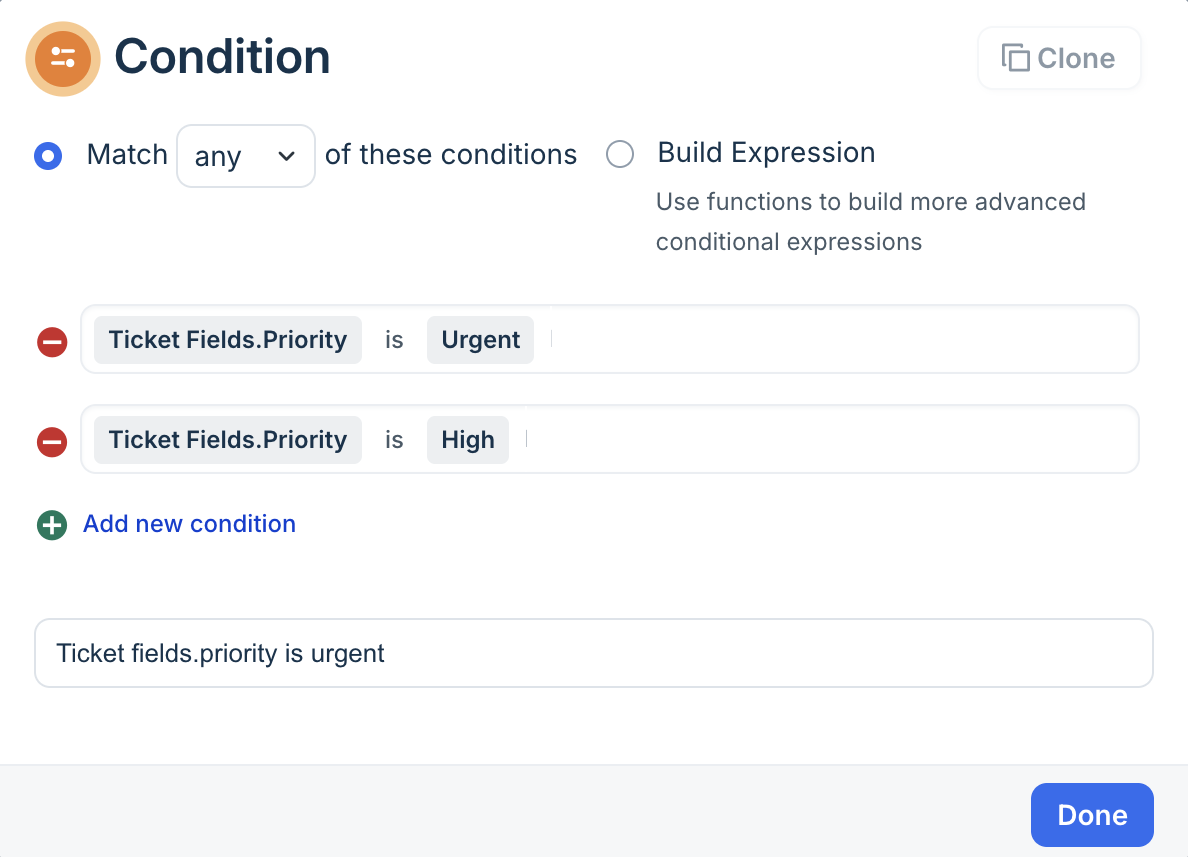
- Click Done.
- Drag and drop an Action step onto the canvas, and attach it to the 'YES' branch of the condition step.
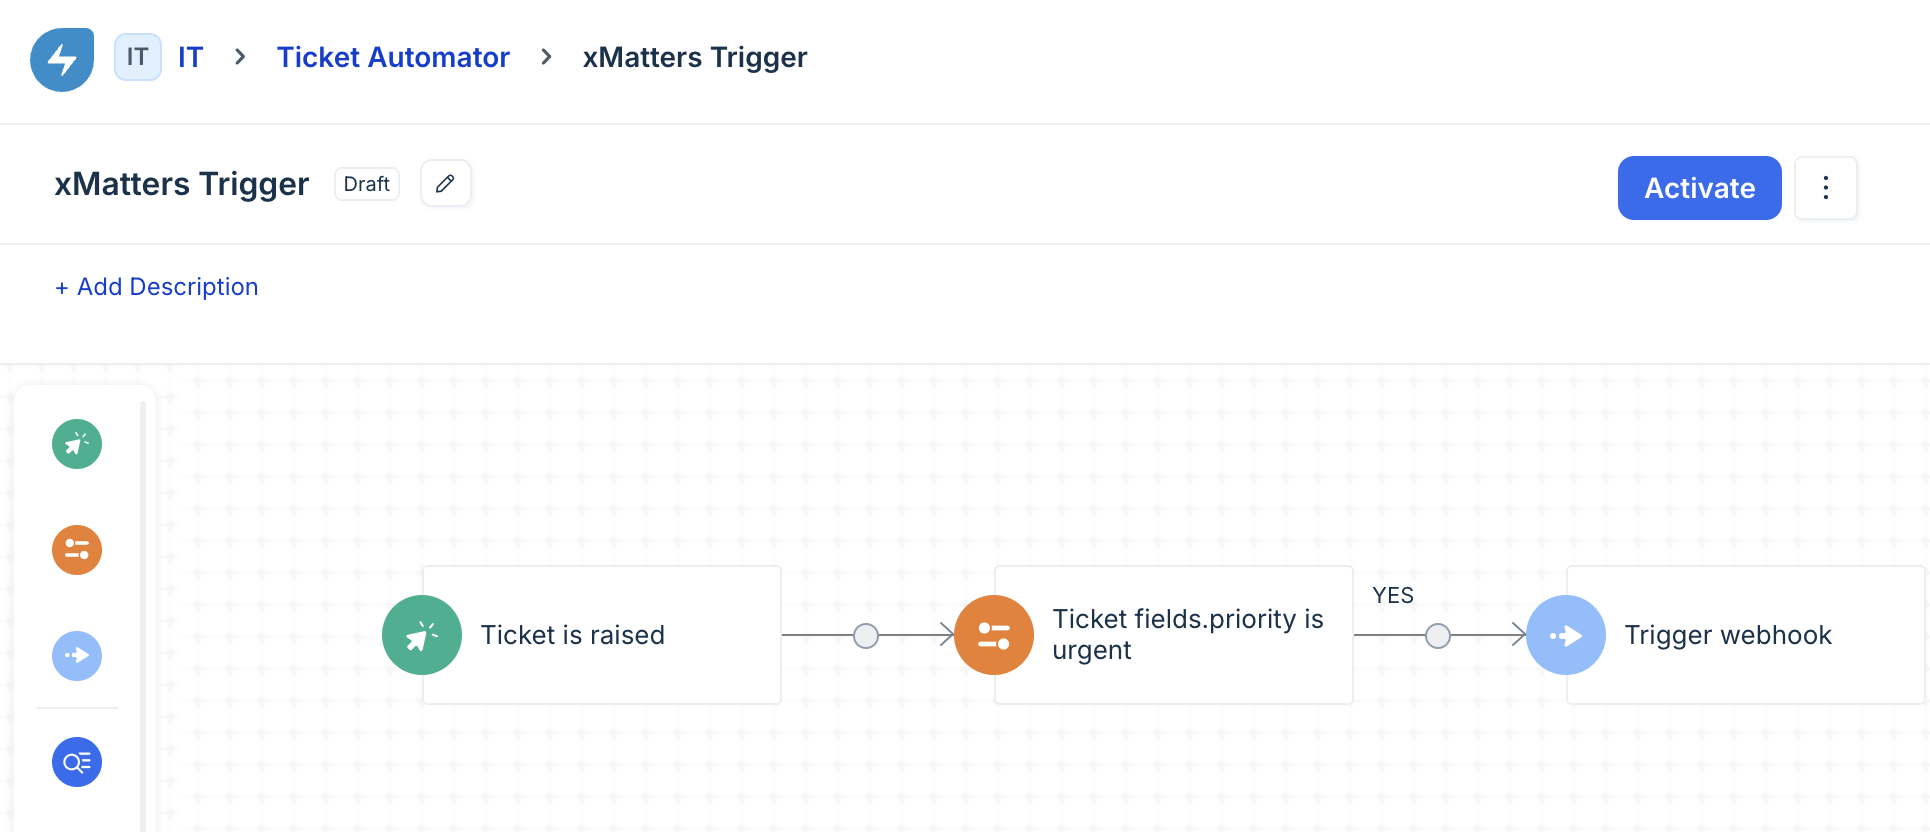
- Configure the action:
- Perform these actions on drop-down menu: Ticket
- Perform these actions on field: Trigger Webhook
- Request type: POST
- Callback URL: Paste the URL you copied from the trigger in Flow Designer.
- Credentials: Select the credential type from the list of options, then enter your Freshservice credentials.
For Basic authentication:
- Credentials: Select Inline Credentials from the drop-down menu.
- Authentication Type: Select Basic Auth from the drop-down menu.
- Username: Username of the authenticating user.
- Password: Password of the authenticating user.
For OAuth authentication:
- Credentials: Select Inline Credentials from the drop-down menu.
- Authentication Type: Select No Auth from the drop-down menu.
- Enable the Custom headers check box.
- Key: Set as Authorization.
- Value: Enter the bearer token.
- Encoding: Select JSON and Advanced.
- Content: Paste the configuration payload you copied from the trigger in the Flow Designer.
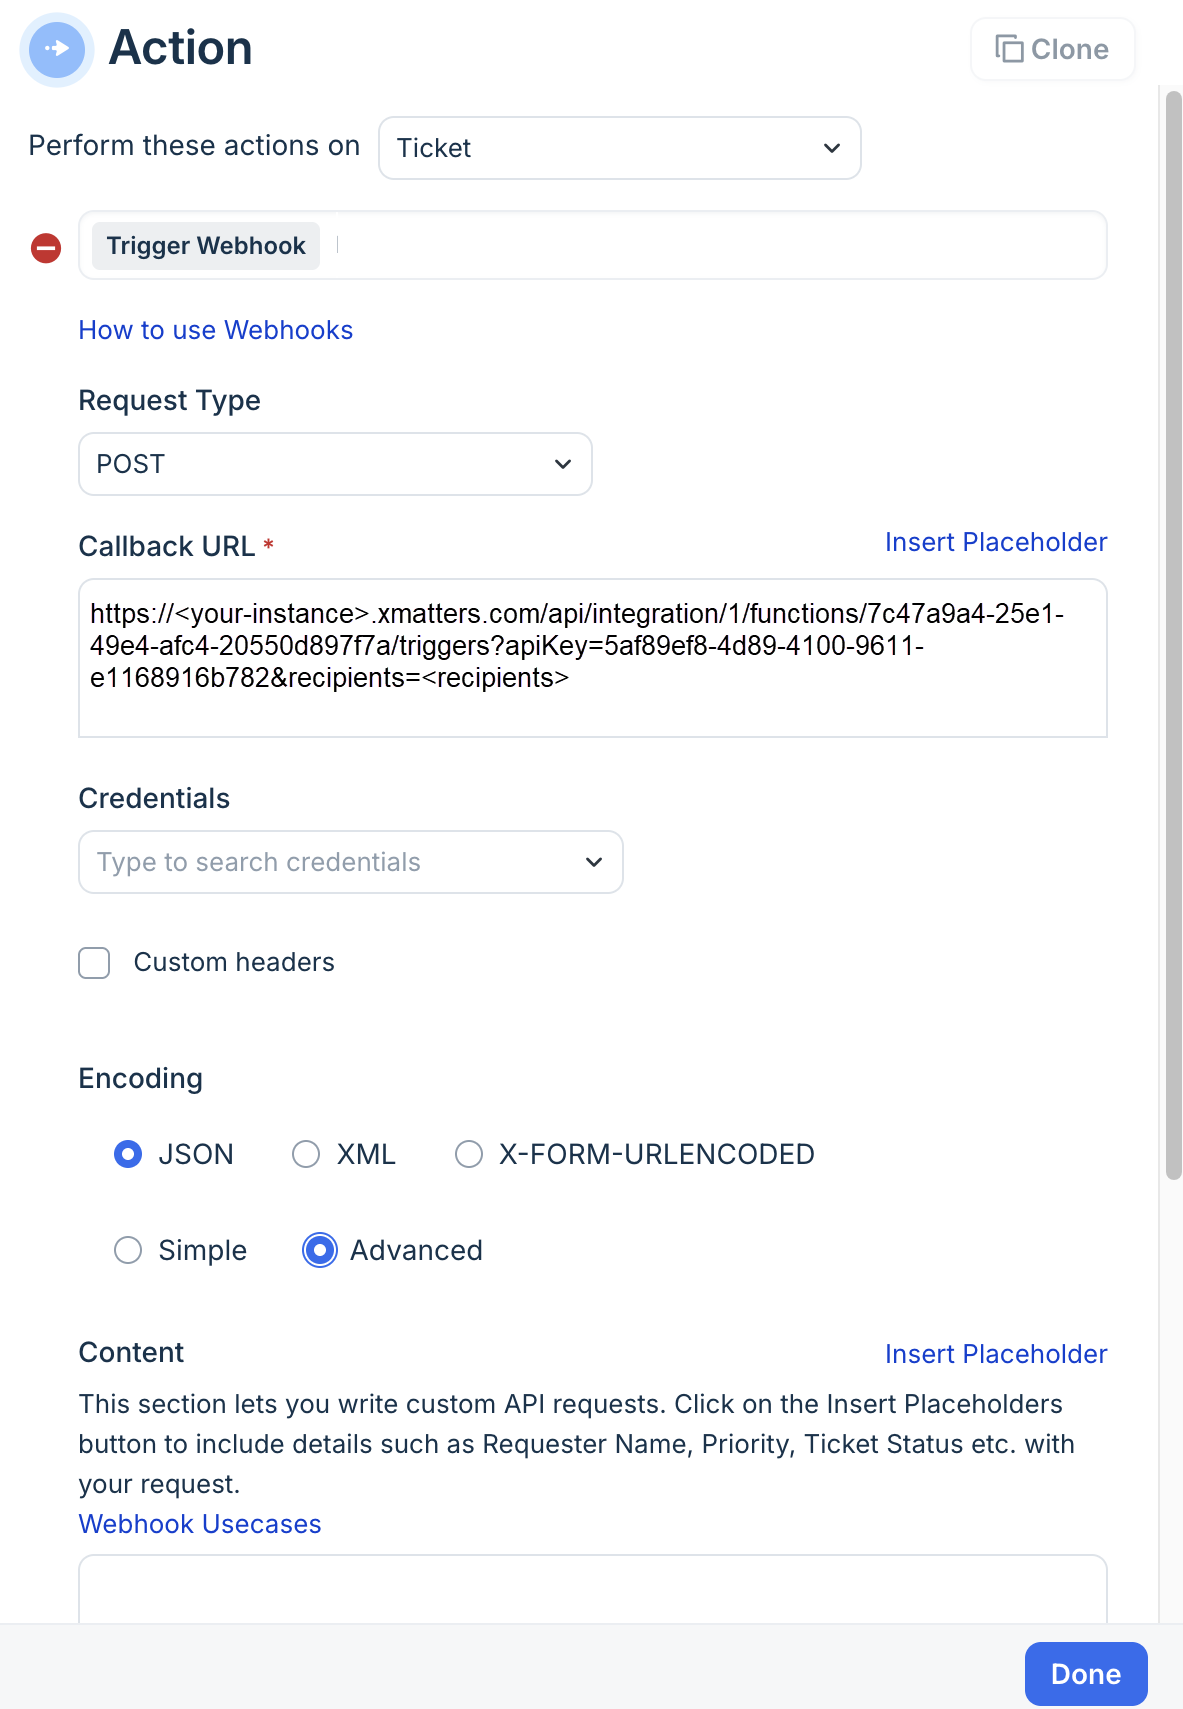
- Click Done.
- On the workflow canvas, click Activate.
The workflow is created and you're taken to the workflow canvas with an Event step already on the canvas.
The next two steps use a Condition step to determine when Freshservice should trigger the webhook and contact xMatters. For example, you can have Freshservice trigger the webhook based on the ticket's priority level, or a specific ticket status. While the steps describe setting the priority of a ticket, you can set the condition step based on your organization's requirements.
Once the workflow is activated in Freshservice, you're ready to use the webhook to trigger automated flows, although we always recommend testing before putting things into use.
How to use the workflow
When a condition you've set fires, it sends a signal to xMatters, which creates an alert and notifies the individual or the on-call members of groups you set as recipients in the webhook URL. When the trigger receives a signal saying the issue is resolved, it automatically terminates related alerts in xMatters.
Notification responses and associated actions
The person responding to the notification has the following response options:
- Acknowledge: Acknowledges the notifications and stops escalations.
- Add Note: Add a note to the Freshservice ticket.
- Initiate Incident: Initiates an incident in xMatters.
- Resolve: Resolves and closes the Freshservice ticket, the xMatters alert. and stops notifying all targeted recipients.
The group responding to the notification has the following response options:
- Assign to me: A group member takes ownership of the ticket. The Freshservice ticket is updated with the group member's name.
- Add Note: Add a comment to the ticket.
- Escalate: Immediately escalates the alert to the next on-call resolver in the group.
- Initiate Incident: Initiates an incident in xMatters.
- Resolve: Resolves and closes the Freshservice ticket. the xMatters alert and stops notifying all targeted recipients.
Next Steps
Now that you've installed the workflow, you can use it as-is, or customize it to suit your needs better. Here are some examples of things you can add to the workflow to customize it:
- Use Slack, Zoom, and Microsoft Teams steps to add collaboration channels to the flow.
- Update the message sent to resolvers to include the information most relevant to your team.
- Use the Freshservice trigger to build your own custom flows.