Kaseya
This integration combines an xMatters workflow with the Kaseya Virtual System Administrator (VSA) IT systems management platform to streamline and automate IT services across disciplines. It extends Kaseya's email capabilities to multi-channel notifications, provides self-service and managed subscriptions to keep stakeholders informed of relevant incidents, and allows you to tailor message content for different device types.
The instructions cover the following topics:
- Before you begin: review application requirements and download the integration archive
- Configure xMatters: create a REST Web Services User and import the workflow
- Configure Kaseya: add the Procedure, configure Procedure variables, and deploy the Shell Script
- Troubleshooting the integration: print debug information to the log file
Before you begin
Before you start configuring the integration in xMatters and Kaseya, you'll need to review the application requirements, then download the workflow and related integration components:
| Application | Version |
|---|---|
| xMatters | 5.5.57+ |
| Kaseya VSA Service Desk* |
7.0.0 |
*This integration was designed and built for Kaseya's on-premise product.
The .zip file contains all of the components required by xMatters and Kaseya. Download the workflow .zip file to a location on your local machine, and extract the contents.
If you navigate through the folders, you will find another .zip file called Kaseya.zip. This is the workflow which contains pre-configured forms, properties, and messages specifically designed for Kaseya. Do NOT extract the contents of the workflow .zip file — you'll import it directly into xMatters.
If you're a Linux user, download the xM-Kaseya_1_0.tar.gz file and store it in an easy-to-find location on your local machine.
Integration components
| Name | Description |
|---|---|
| Kaseya.zip | The workflow to import into xMatters |
|
procedure +- xMProcedure.xml |
The procedure to import into Kaseya |
|
shell_script +- xMatters.ps1 +- xMFunctions.ps1 |
The PowerShell script and Function library to generate the REST request to xMatters |
|
shellcommanddef +- xMCommandDef.xml |
The command definition file that serves to map the parameters from the procedure to the shell script |
Configure xMatters
The first step in configuring this integration is to set up the components on the xMatters side:
This integration requires a user who can authenticate REST web service calls when working with alerts. These permissions are provided by the "REST Web Service User" role in xMatters. See Create an integration user for more information.
Keep the user ID and password of this user handy — you'll need them when configuring other parts of this integration.
The next step is to import the workflow which contains information specifically designed for Kaseya.
- In xMatters, click the Workflows tab, and then click Import.
- Browse for the components\xmatters\Kaseya.zip file you downloaded, or drag it onto the Import Workflow dialog box.
- Click Import Workflow.
- Once the import is finished, the workflow should be automatically enabled. If it isn't, click the Disabled toggle to enable it.
- Click the gear icon beside the workflow, and select Editor Permissions.
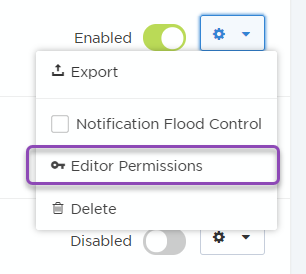
- Add the integration user, and then click Save.
- Click the workflow name to open the Forms tab.
- For the first form in the list, click the Web Service drop-down, and then select Sender Permissions.
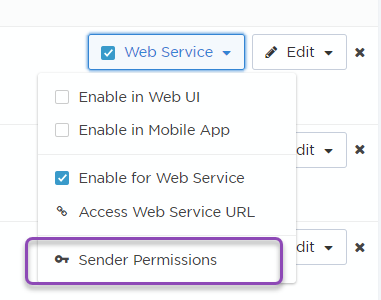
- Add the integration user, and then click Save Changes.
- Repeat steps 7-8 for each of the other forms.
Configure Kaseya
Next, you'll need to configure Kaseya so it can communicate with xMatters using REST Web Service calls:
- Copy the \components\kaseya\shellcommanddef\xMCommandDef.xml to the C:\Kaseya\xml\SDProcShellCommand\0 folder. This contains the script name and parameters and makes them available to the procedure.
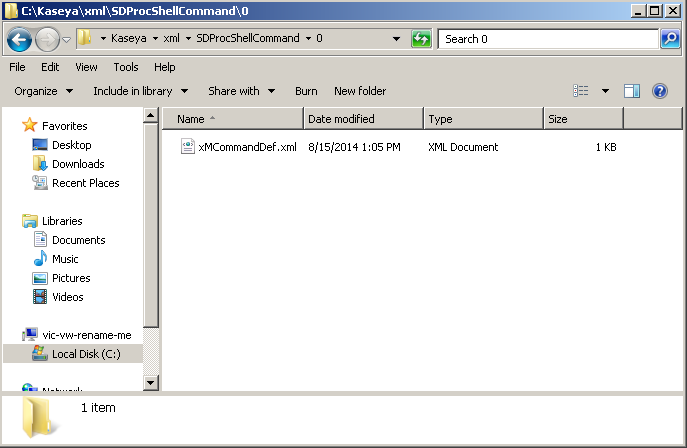
- Log in to the Kaseya application: http://servername/vsapres/web20/core/login.aspx where "servername" is the hostname of the Kaseya 7.0 server.
- Navigate to Service Desk > Procedures Definition > Stage Entry or Exit. Click on the appropriate folder and click Import Folder/Procedure:
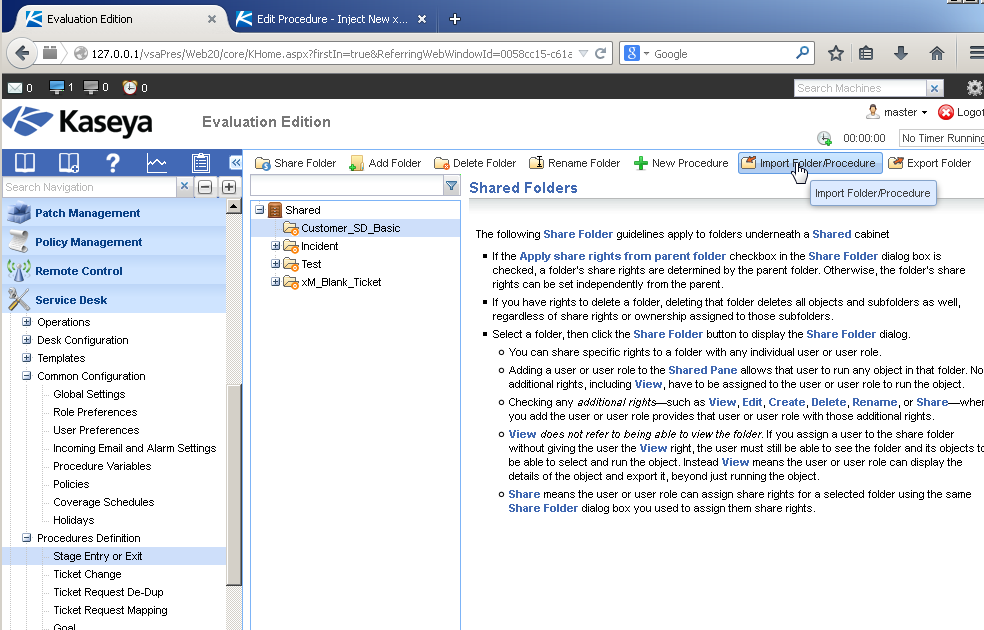
- Either navigate to components\kaseya\procedure\xMProcedure.xml in the extracted .zip file, or paste in the contents and click Save.
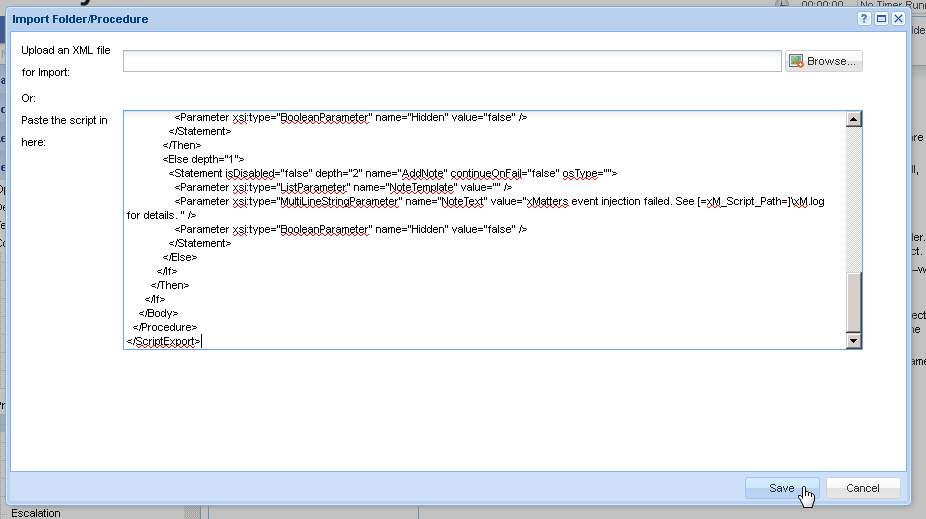
By default, this will fire for tickets with an Urgent priority. Update the procedure to match your business needs:

- Next, go to Service Desk > Desk Configuration > Desk Definition and select the appropriate desk. Click on the Processing tab and then the Stage sub-tab:
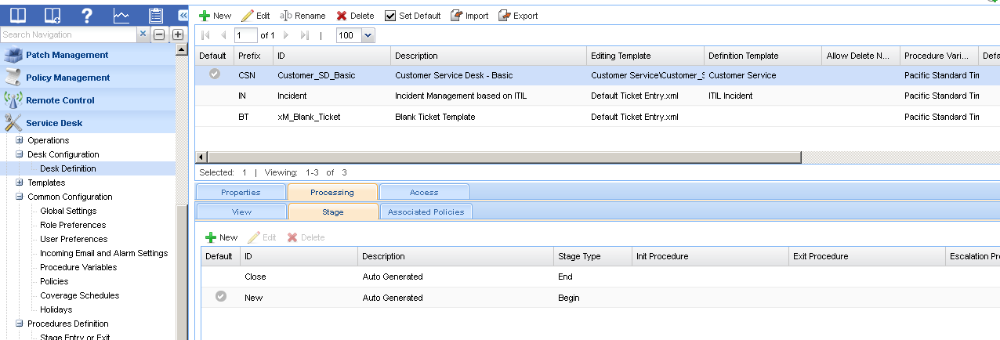
- Click on the New stage and click Edit to bring up the Edit Stage dialog box.
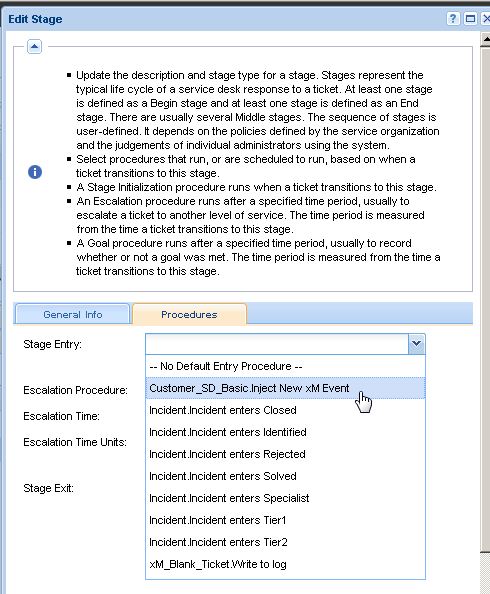
- On the Procedures tab in the Stage Entry box, select the newly created procedure and click Save:
Navigate to the Service Desk > Common Configuration > Procedure Variables and add variables for each item with the corresponding value below:
| Name | Description | Example | Description | |
|---|---|---|---|---|
| xM_Default_Group | The default group to notify if the Ticket does not have a Pool nor an Assignee | All | Kaseya Service Desk | |
| xM_Host | The hostname including https of the xMatters system | All | https://acme.na1.xmatters.com | |
| xM_Pass | Password for authenticating to xMatters | All | passwordhere | The password can also be stored on the Kaseya server in the xM_Script_Path folder in a file called xMPassword.txt. |
| xM_Script_Path | The path to the xMatters script file | All | C:\xMScripts | See the section below on granting privileges to this folder |
| xM_User | The username used to authenticate to the xMatters endpoint | All | kaseya | The user created above. |
The Windows Powershell script facilitates the communication between Kaseya and xMatters through the REST web service calls and consequently, this script must reside on the Kaseya server.
For on-premise installations, copy all the ps1 files in components\kaseya\shell_script to a folder on the Kaseya server. Note the install directory and update the xM_Script_Path appropriately. The xM.log file will be created automatically.
For on-demand instances, contact Kaseya for help with this step.
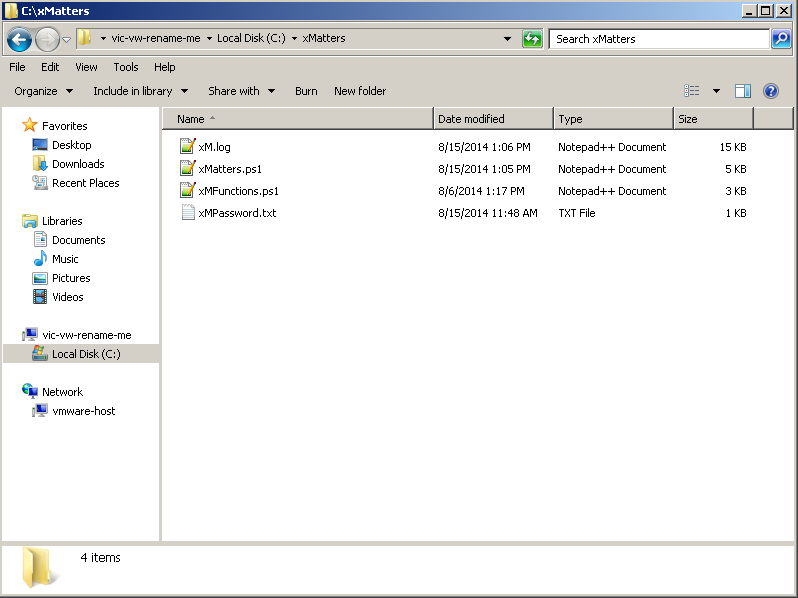
Update folder permissions
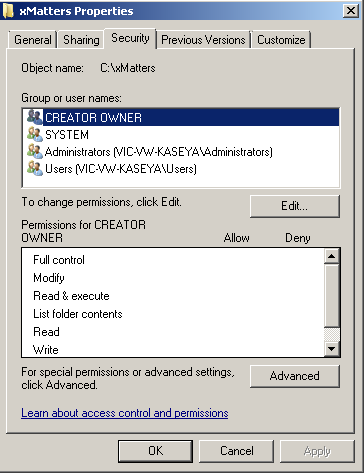
The permissions on this folder must be updated to allow Kaseya to read and write to the folder.
To update the folder permissions:
- Right click on the folder and click Properties to display the folder properties dialog box. Click the Security tab:
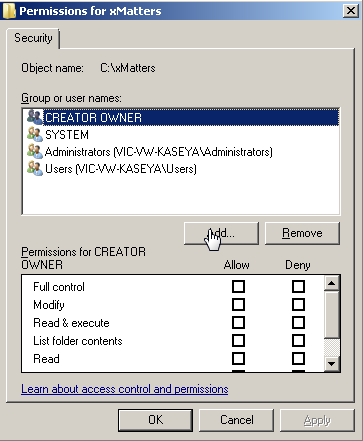
- Click the Edit button to display the Permissions dialog box, then click Add:
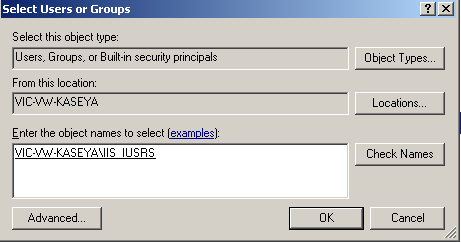
- Enter IIS_IUSRS and click Check Names:
- Click OK.
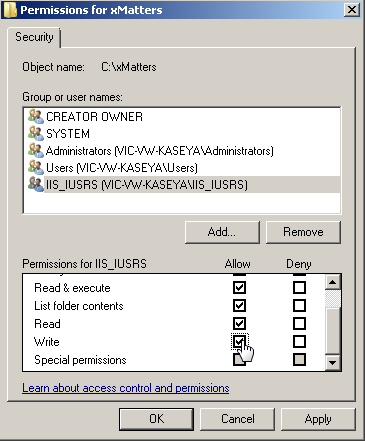
- The Permissions dialog box is re-displayed with the IIS_IUSRS added. Make sure the Write permission has a check under Allow:
- Click OK.
Troubleshooting the integration
The xMatters.ps1 file contains a $debug variable that will print detailed information about the REST request to the xM_Script_Path\xM.log file. Inspect this file for any errors.
