
BMC Remedyforce
This article provides you with the installation and configuration details you need to integrate xMatters with Remedyforce on the force.com platform.
These instructions cover the following topics:
- The Overview: How it works and Features and updates
- Before you begin: Download the workflow, set up xMatters as a connected app
- Configure xMatters: Set up an integration user, create users and groups to receive notifications, import the workflow, configure the endpoints, and copy the inbound integration URLs.
- Configure the integration: Install the package, configure Remedyforce
- Test the integration
- Troubleshooting
- Advanced Setup
How it works
The integration is written primarily in Salesforce's Apex programming language, is built off of the BMC Incident records, and fires when they are created or updated. A configuration page contains the group and individual endpoints, as well as authentication information. It also contains the list of incident fields to include in the payload.
Signal injection endpoints, user response handling, alert status, and delivery updates are implemented using xMatters Integration Builder.
This version of the integration is closed-loop. It adds notes to the incident detailing alert status changes, notifications delivery updates (if Enable Delivery Updates flag is set), and user responses. It also updates the ownership of the incident upon 'Assign to me' user response.
Features and updates in this version
This version of the integration (version 2.6) includes a number of enhancements to the installation process. It also included the features and updates from previous versions, including:
During the "Assign to me" flow, the integration updates the Remedyforce-specific "Staff" field, instead of the record's owner.
Added new instructions and explanation for adding an integration-specific user in Remedyforce (see Configure Remedyforce, below).
Before you begin
Before you get started configuring the integration, there are a few things you can do ahead of time to make it easier:
- Download the workflow
- Set up xMatters as a connected app in Remedyforce
- Create a user for xMatters in Remedyforce
The workflow contains information specifically designed for Remedyforce. Download the workflow .zip file to a location on your local machine but don't unzip it — you'll import it directly into xMatters.
To enable OAuth2 communication between Remedyforce and the xMatters Integration Builder, you must first configure xMatters as a connected app within Remedyforce.
To set up authentication:
- Select or create a Remedyforce user account for xMatters to use in OAuth2 connections to Remedyforce.
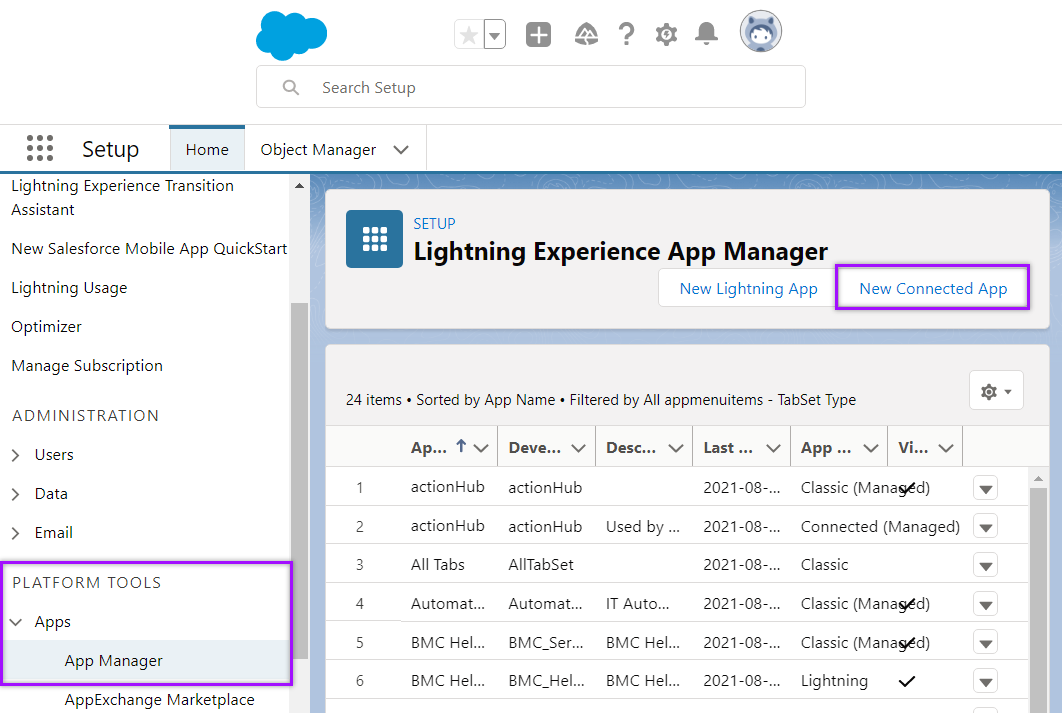
- In Remedyforce, at the top-right corner of the screen, click Setup (the gear icon).
- In the menu on the left, navigate to Platform Tools > Apps > App Manager and click New Connected App.
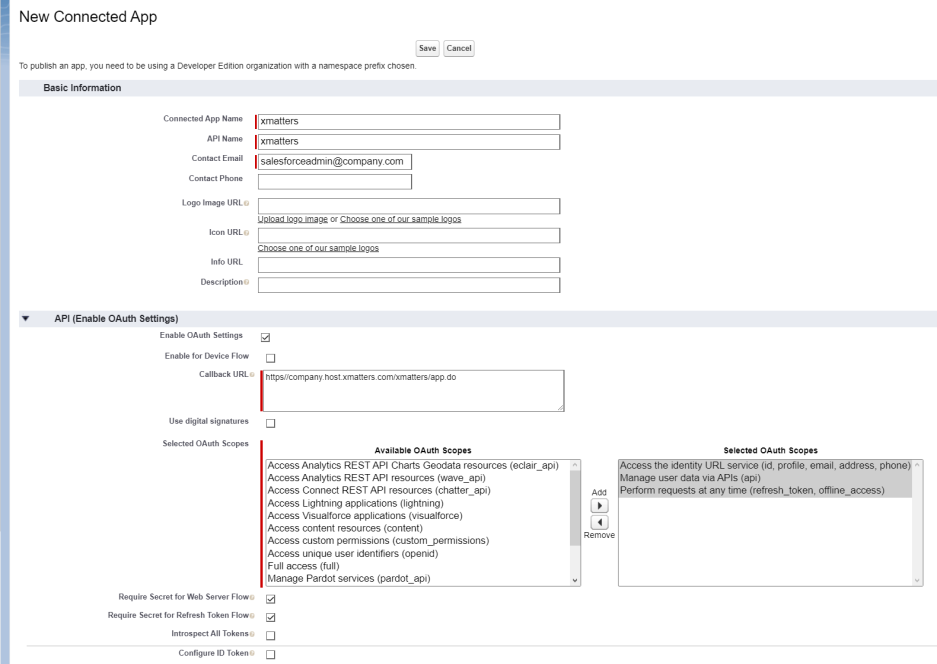
- Under Basic Information, enter the following:
- Connected App Name: xMatters
- API Name: xMatters
- Contact Email: Your email address, or the person at your company about this app.
- Expand API (Enable OAuth Settings), and then select the Enable OAuth Settings check box.
- In the Callback URL field, enter the URL of your xMattersinstance; for example: https://company.host.xmatters.com/xmatters/app.do
- In the Selected OAuth Scopes list, select the following items and click Add:
- Access your basic information (id, profile, email, address, phone)
- Access and manage your data (api)
- Perform requests on your behalf at any time (refresh_token, offline_access).
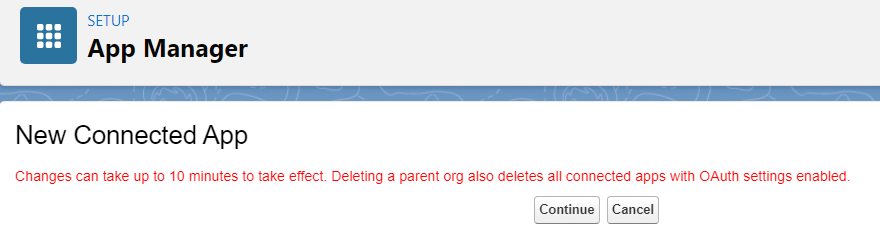
- Click Save.
- It may take up to 10 minutes for your changes to take effect. Click Continue.
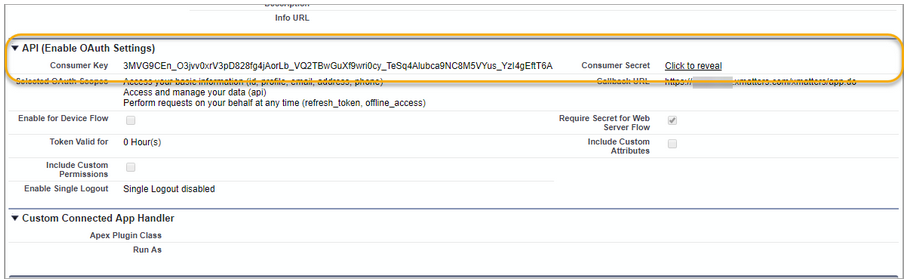
- On the resulting Connected App Name screen, in the API (Enable OAuth Settings) section, note or copy your Consumer Key and Consumer Secret values. (These are required when configuring your Remedyforce Endpoint in xMatters.)
- From the Home screen, navigate to Platform Tools > Apps > Manage Connected Apps.
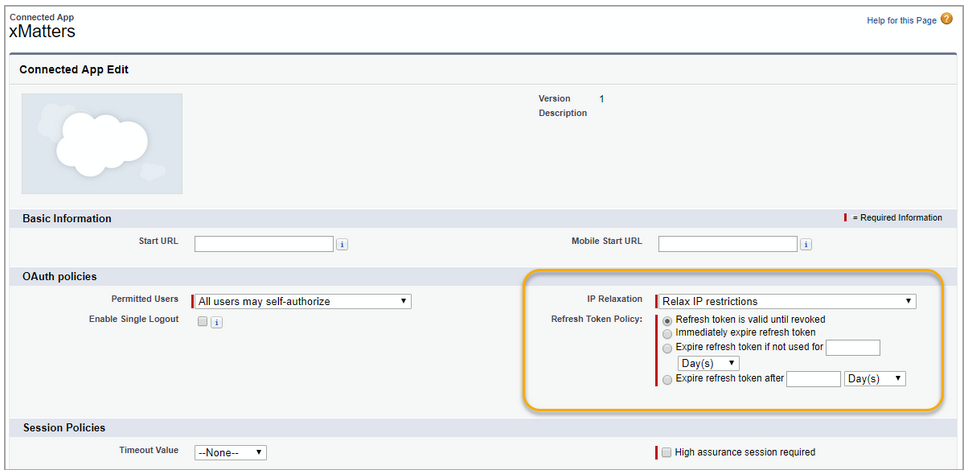
- Beside the xMatters app, click Edit.
- For IP Relaxation in the OAuth policies section, select Relax IP restrictions and click Save.
- If you don't select this option, you might need to append the user's security token to the password when configuring the endpoint.
You need to create a Remedyforce user specific to xMatters, and make note of the username and password – you'll need these when you configure xMatters.
To guarantee that the user is able to write to and assign incidents in Remedyforce, we recommend giving them administrative privileges.
To create a user for xMatters in Remedyforce:
- From the Home screen, navigate to Administration > Users > Users.
- Click New User, and then enter the following details in the General Information section (giving the user a first and last name that identifies it as the xMatters integration user):
- First Name: xMatters
- Last Name: Integration
- Alias: xMatters
- Email: An email address that you can access.
- Username: A unique username in email format.
- Nickname: xMatters
- User License: Salesforce
- Profile: ServiceDesk System Administrator
- Make sure you select ServiceDesk System Administrator, not just System Administrator.
- Role: Any available role. For example, "IT Director".
- In the BMC Remedyforce section, select Remedyforce Administrator.
- In the Approver Setting sections, select Generate new password and notify user immediately.
- Fill in the other fields as appropriate, then click Save.
- On the resulting user screen, locate the Permission Set Assignments section, and click Edit Assignments.
- In the Available Permission Sets list, select Remedyforce Administrator, click Add, and then click Save.
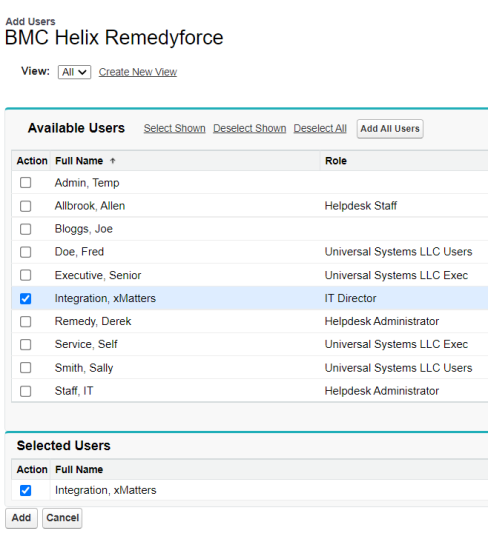
- To assign the user to the Remedyforce license, navigate to Platform Tools > Apps > Packaging > Installed Packages.
- In the Installed Packages section, locate the BMC Remedyforce package name then click Manage Licenses in the Action column.
- Click Add Users, locate your integration user, and then click Add.
Configure xMatters
Before configuring anything else in Remedyforce, you need to configure xMatters.
- Set up an integration user
- Create users and groups to receive notifications
- Import the workflow
- Configure the endpoints
- Copy the inbound integration URLs
This integration requires a user who can authenticate REST web service calls when working with alerts. These permissions are provided by the "REST Web Service User" role in xMatters. See Create an integration user for more information.
Keep the user ID and password of this user handy — you'll need them when configuring other parts of this integration.
When you assign a ticket to a user or queue in Remedyforce, the integration sends a notification to the corresponding user or group in xMatters. You need to create a user or group in xMatters for each Remedyforce user or queue you want to be able to notify. The integration expects usernames in xMatters and Remedyforce to match.
To create a new group, see Create a new group.
To create a new user, see Add a new user.
The next step is to import the workflow you downloaded.
- In xMatters, click the Workflows tab, and then click Import.
- Browse to the .zip file you downloaded, or drag it onto the Import Workflow dialog box.
- Click Import Workflow.
- Once the import is finished, the workflow should be automatically enabled. If it isn't, click the Disabled toggle to enable it.
- Click the workflow name to open the Forms tab.
- For the Notifications to Groups form, click the Web Service drop-down, and then select Sender Permissions.
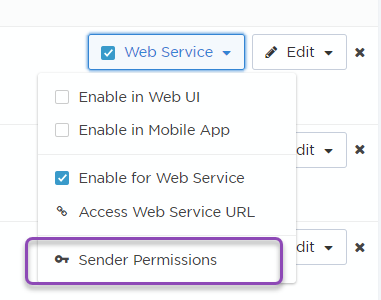
- Add the integration user, and then click Save Changes.
- Repeat steps 5 and 6 for the Notifications to Individuals form.
After you have imported the workflow, you need to set the authentication for the xMatters and Remedyforce endpoints in the Integration Builder.
Before configuring the endpoints, make sure you have set up xMatters as a connected app in Remedyforce. You'll need the information from the connected app configuration to set the endpoints in xMatters.
To configure the endpoints:
- Click the Integration Builder tab, and then click the Edit Endpoints button to display the endpoints for the integration.
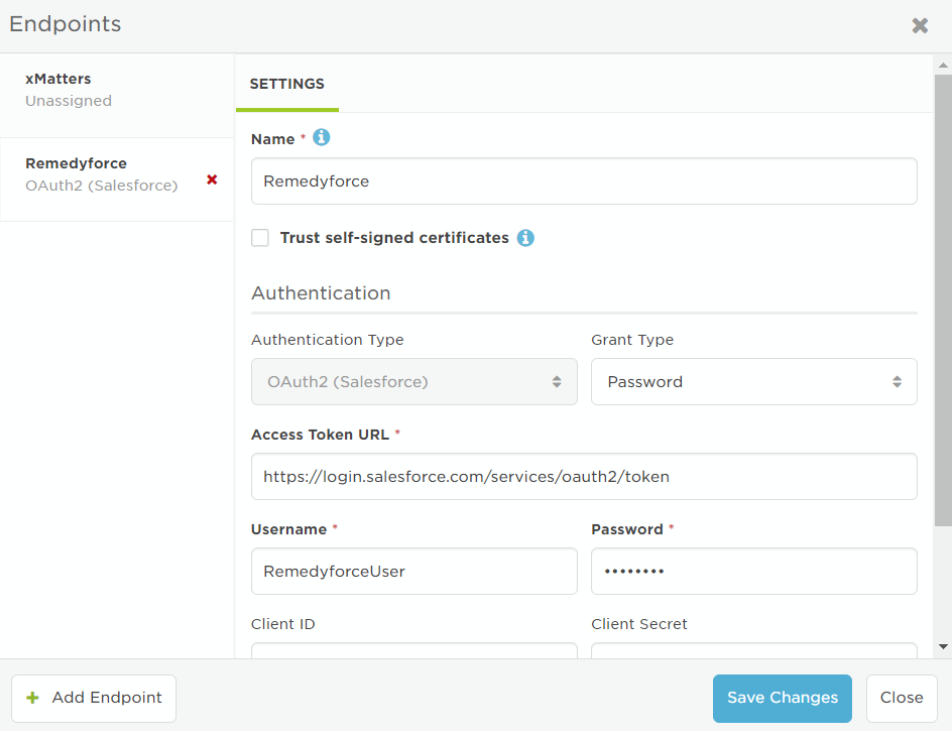
- Click the Remedyforce endpoint. The Authentication and Grant Type are pre-set to OAuth2 (Salesforce) and Password. Set the other settings as follows:
- Access Token URL: https://login.salesforce.com/services/oauth2/token
- If you are installing in a sandbox, the Access Token URL must be: https://test.salesforce.com/services/oauth2/token
- Username and Password: The login credentials for the Remedyforce user account that xMatters will use in OAuth connections. Depending on the settings you configured in Remedyforce, you might need to append the user's security token to the password.
- Client ID: Enter the Consumer Key you copied when configuring the connected app.
- Client Secret: Enter the Consumer Secret you copied when configuring the connected app.
- Access Token URL: https://login.salesforce.com/services/oauth2/token
- Click Save Changes.
Signal injection endpoints are implemented as inbound integrations. Each inbound integration has its own URL that you can use to target it from Remedyforce.
To copy the URL for an inbound integration:
- In the Integration Builder, expand the list of inbound integrations.
- Click the Inbound for Groups integration to view its details.
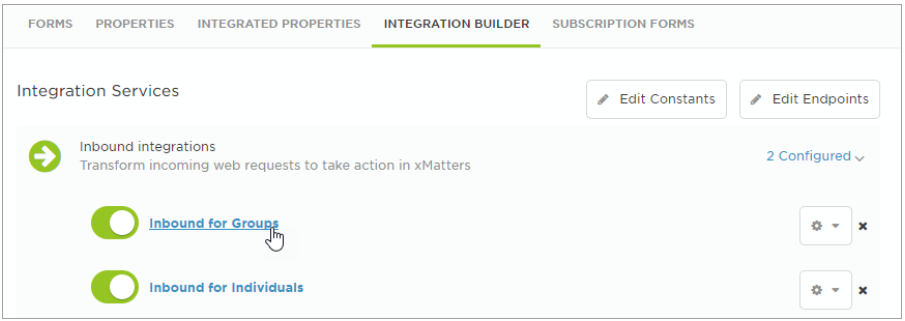
- Scroll down to the bottom of the page, and click Copy beside the field (you'll need this later to configure the Remedyforce integration).

- Repeat steps 2-5 for the Inbound for Individuals integration.
Configure the Remedyforce integration
Now that you've configured xMatters, it's time to configure the rest of the integration. Here's what you'll need to do:
- Install the package
- Configure Remedyforce
The installation package within Remedyforce contains all of the components required for the integration.
To install the package:
- Click the following link to retrieve the xMatters installation package: https://login.salesforce.com/packaging/installPackage.apexp?p0=04t5Y000001MdUY and provide the username and password for your Remedyforce instance when prompted.
- If you are installing into a sandbox organization, you must replace the initial portion of the URL with: http://test.salesforce.com
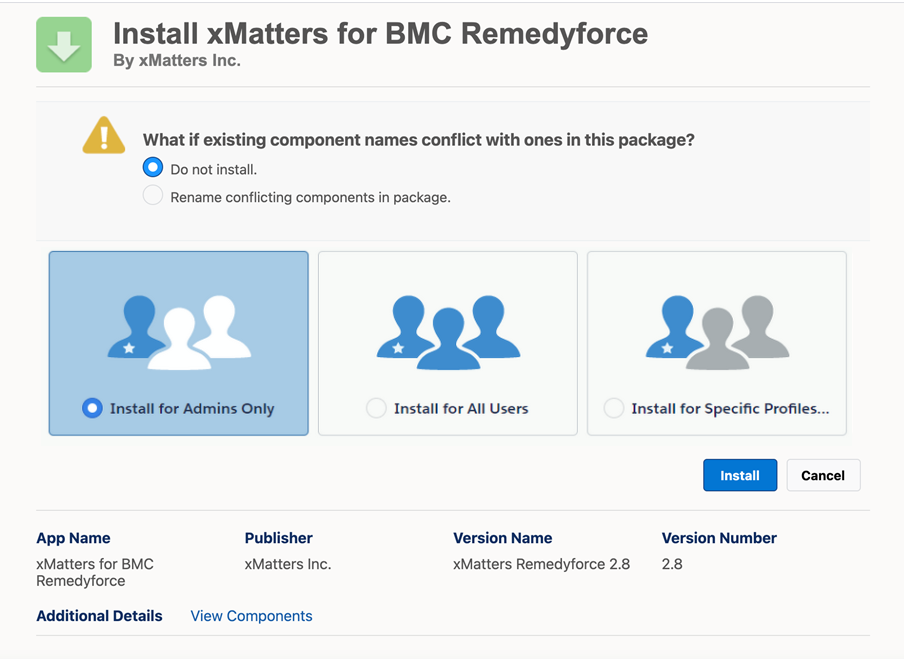
- On the main Install xMattersinstallation screen, select Install for Admins Only, and then click Install.
- End users should not use the xMatters Configuration page.
- The installation can take several minutes. During installation, the system might say that it can continue installing in the background, and notify you by email when it's finished.
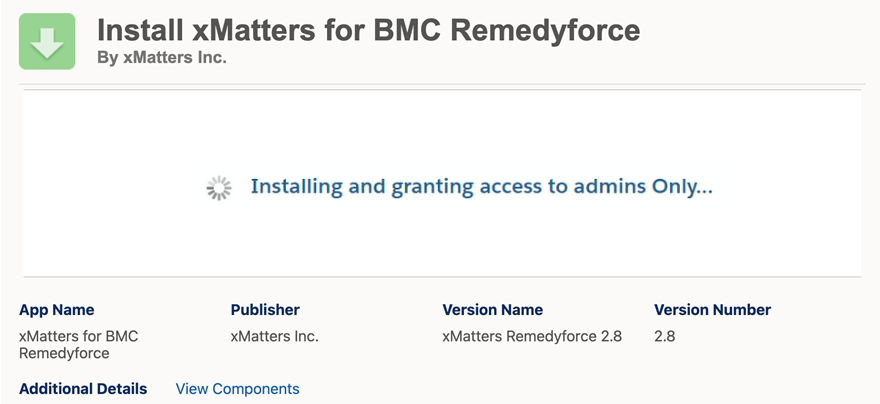
- After installation is complete, click Done.
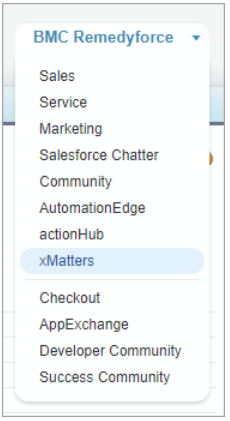
- When complete, you'll see a new xMatters application in the BMC Remedyforce drop-down list:
Now that you've installed the package, it's time to configure Remedyforce on your system. You need to create a configuration record for the xMatters application in Remedyforce.
To create a configuration record:
- In the top-right corner of the screen, click the gear icon and select Setup.
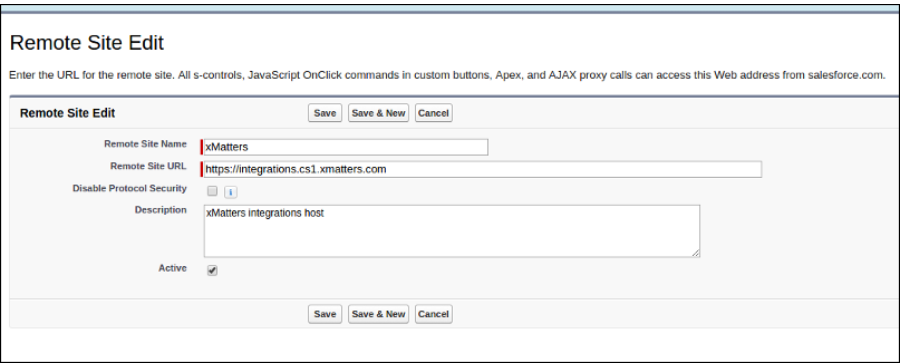
- Navigate to Security > Remote Site Settings.
- Click New Remote Site.
- Enter the appropriate information for your xMatters environment, and then click Save.
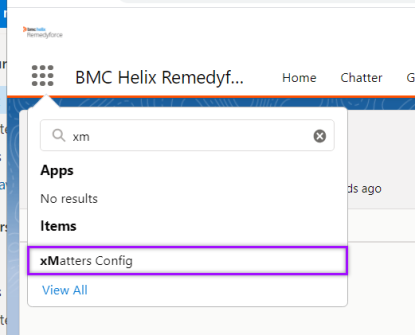
- Select the xMatters application in the application selector in the upper right corner.
- Click the menu in the top-left corner of the screen, then search for and select xMatters Config.
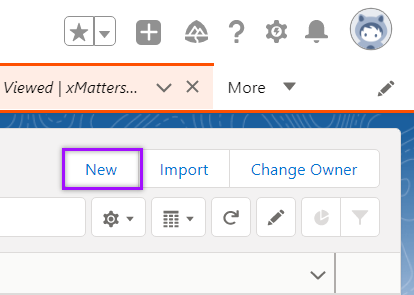
- In the top-right corner, click New.
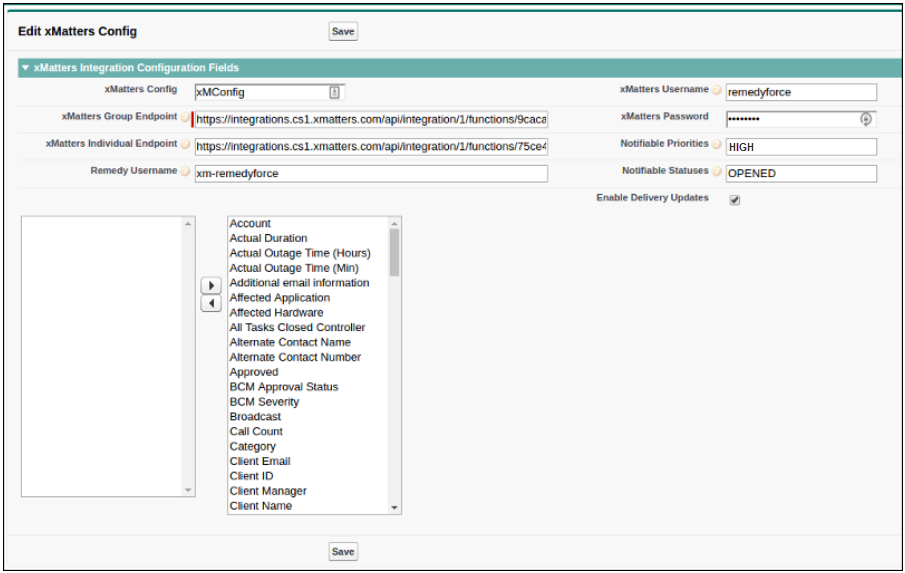
- In the blank configuration record, enter the appropriate information.
- xMattersConfig: This field must be set to xMConfig for the integration to find this record.
- For details about the fields found on this page, see the Field Descriptions table, below.
- Note the value you set for the Notifiable Priorities field – you'll need this later when you test the integration.
- Click Save.
- To confirm the information you entered was saved correctly, click xmConfig in the top menu to view its details.
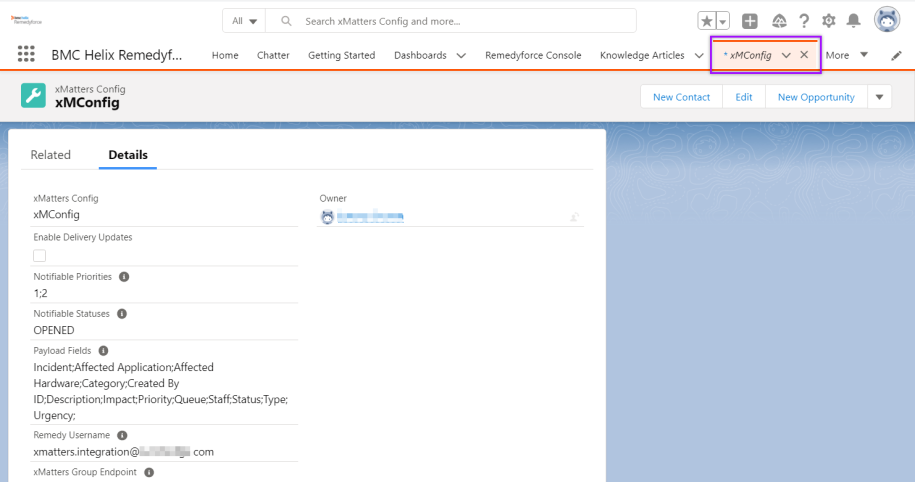
Field descriptions
| Name | Description |
|---|---|
|
xMatters Config |
The name of the configuration record. This MUST be xMConfig (which is also case-sensitive), otherwise the code will not be able to find the record and the integration will fail. |
|
xMatters Group Endpoint |
The integration URL of the Inbound for Groups integration, available on the Integration Builder tab in the Remedyforce workflow. |
|
xMatters Individual Endpoint |
The integration URL of the Inbound for Individuals integration, available on the Integration Builder tab in the Remedyforce workflow. |
|
Remedy Username |
The username you used for the Remedyforce endpoint in xMatters. |
|
xMatters Username |
The username for your integration user. |
|
xMatters Password |
The password for your integration user. |
|
Notifiable Priorites |
A semicolon-separated list of priority levels that determines which notifications are sent. For example, if you specify only priority level '1' on this list, only notifications of priority '1' are sent. Note: For this feature to work, the specified priority must already be a part of the incident. Citing a priority here that does not appear in the incident has no effect. |
|
Notifiable Statuses |
A semicolon-separated list of statuses that determines which notifications are sent. For example, if you specify only the status "OPENED" on the list, only notifications set to "OPENED" are sent. Note: For this feature to work, the specified status must already be a part of the incident. Citing a status here that does not appear in the incident has no effect.
|
|
Enable Delivery Updates |
Select if you want notification delivery updates to be added to the incident as notes. |
|
(fields) |
A list of available fields that you can select to include in the payload. To include a field, select it in the list on the left and use the arrow buttons to move it to the right. |
Test the integration
You can test the integration by sending a notification email from within Remedyforce.
To test the integration:
- On your Remedyforce homepage, from the app selector in the upper left corner, select the BMC Remedyforce application.
- On the Remedyforce Console tab, click New and wait for the page to load.
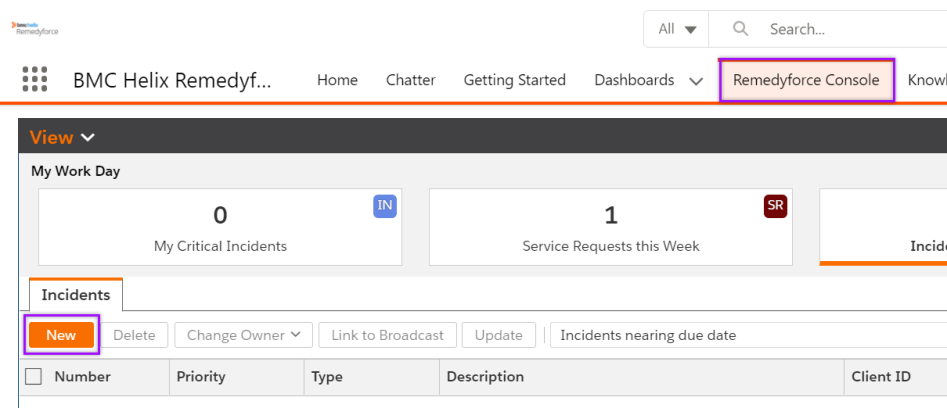
- On the New Incident page, enter the appropriate information.
- Set the Impact and Urgency fields to match the 'Notifiable Priorities' you set earlier.
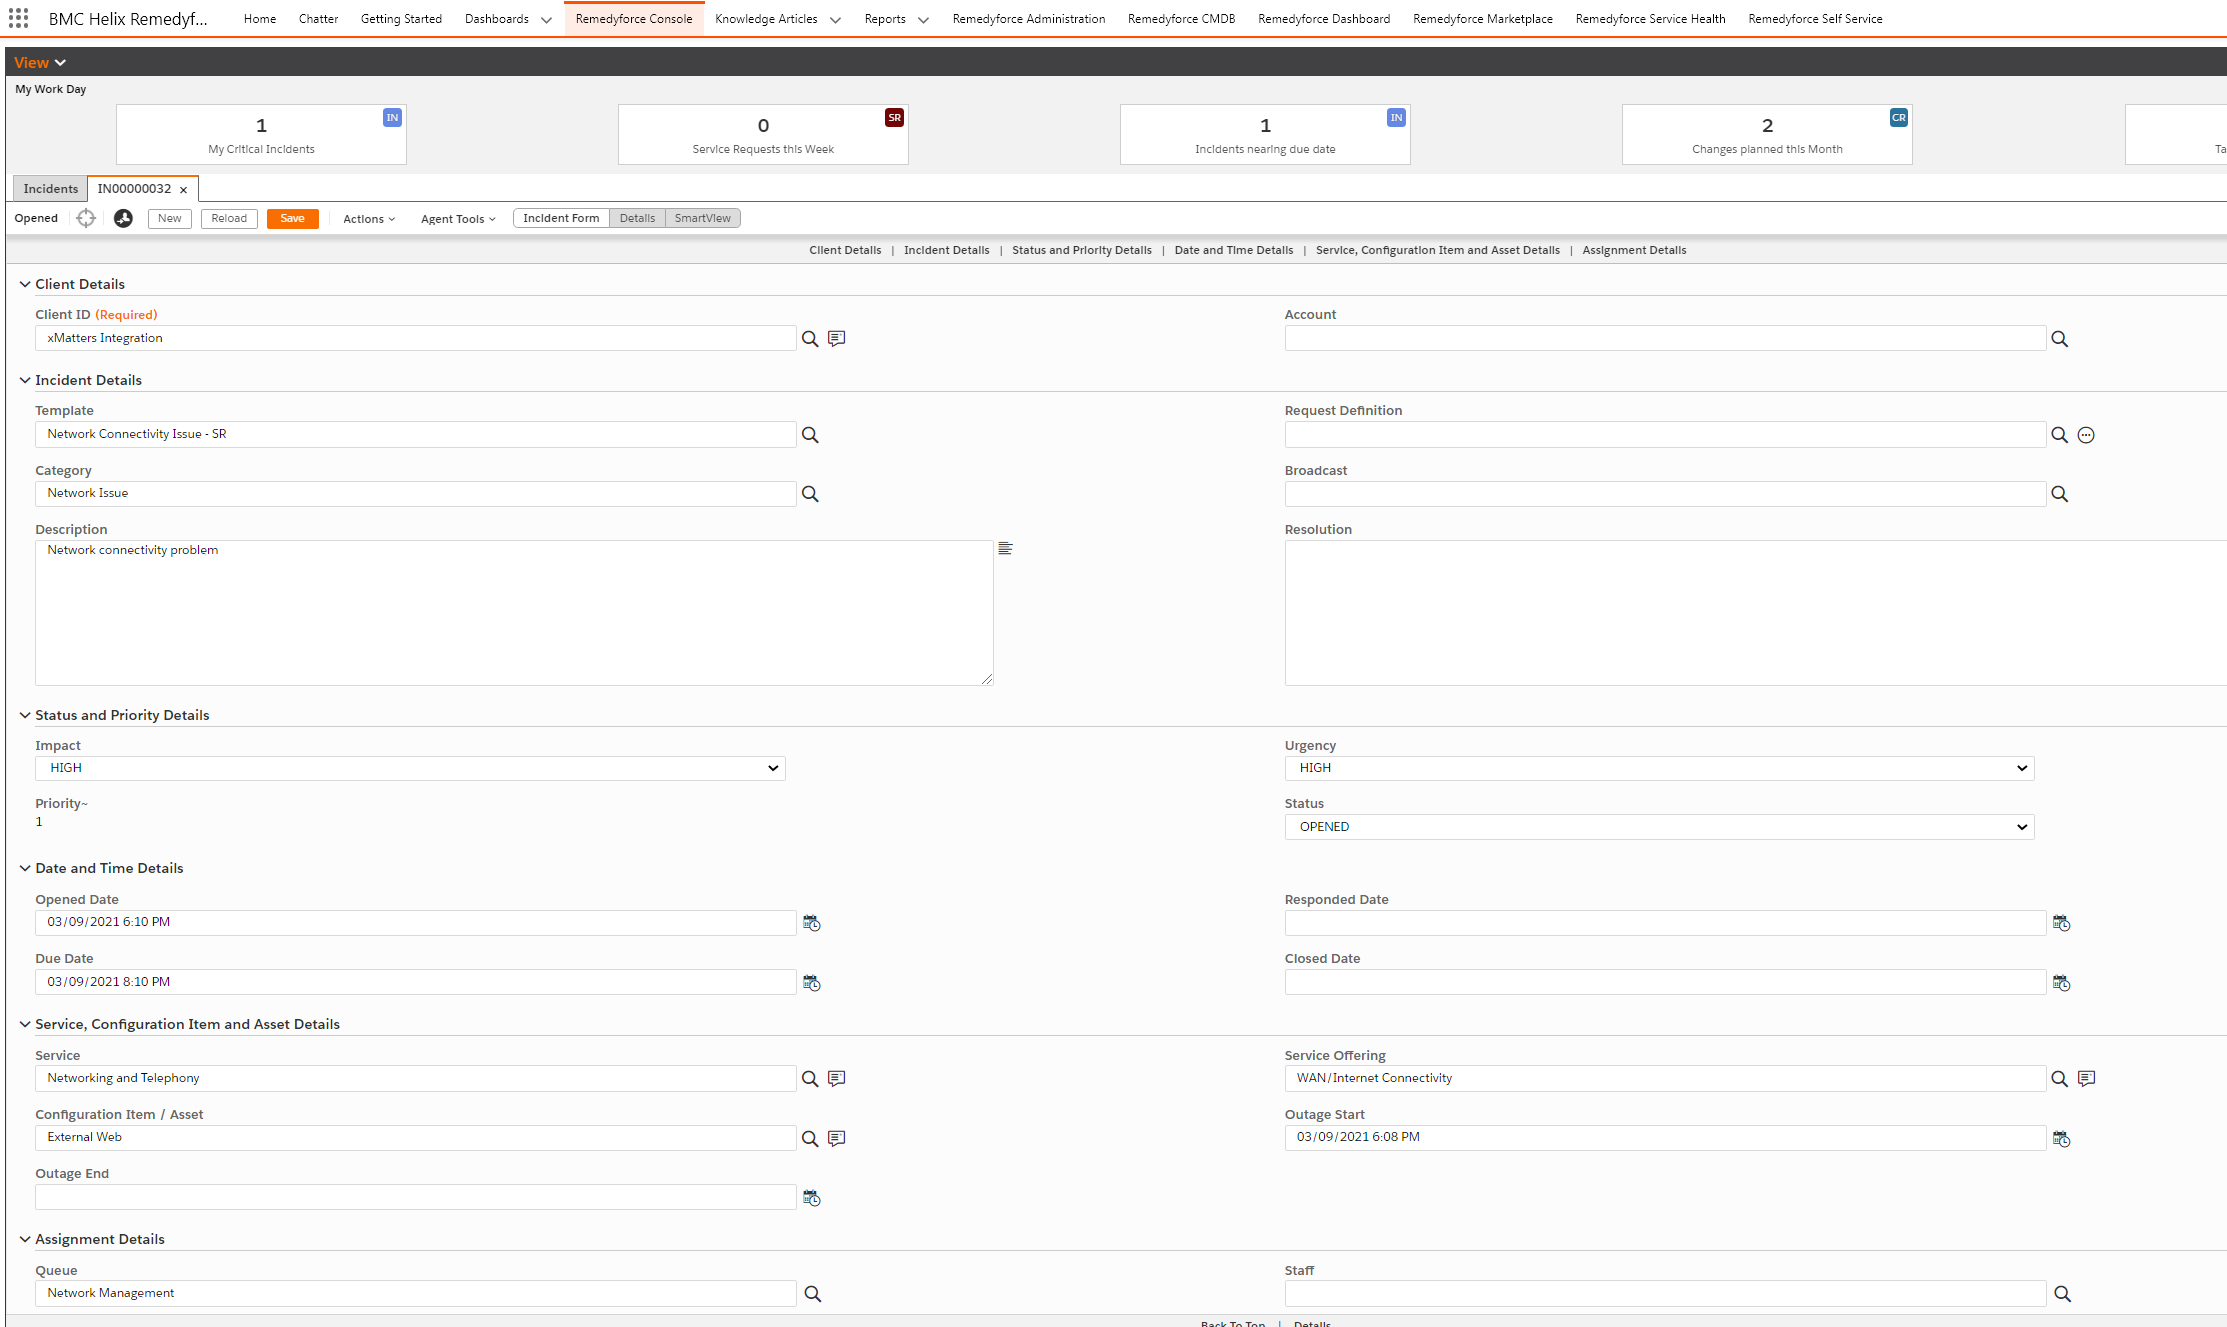
- At the bottom of the page, under Assignment Details, enter the name of the queue (group) or staff (user) you want to assign the incident to. You can also click the Search icon to see a list of available groups and users.
- The user or group must exist in both xMatters and Remedyforce for notifications to be delivered in xMatters.

- Click Save to commit the changes.

You can view the requested notification from xMatters in the Notes & Attachments section on the Record Details tab. If you don't see this section, you can add it to your Record Details.

Troubleshooting
The Developer Console shows activity in the environment. In the screenshot below, you'll see a field included in the payload. However, that field is not yet added to the engine or the layout of the forms.

- The "/apex/bmcservicedesk__ConsoleIncidentDetail" operation shows the incident being saved and should show the call to the xMattersTrigger code.
- The "FutureHandler" makes all the HTTP requests to xMatters.
Advanced Setup
Adding Notes & Attachments to your Record Details in Remedyforce
If you don't see the Notes & Attachments section in your Record Details, you can add it.
To add the Notes & Attachments section:
- At the top-right, click Setup.
- In menus on the left, expand Build > Create and click Objects.
- Select Incident from the list of Custom Objects.
- In the Page Layouts section, next to "Remedyforce Incident Console" click Edit .
- Select Related Lists, then drag and drop Notes & Attachments to where you want it to appear in your Record Details (for example, above the Action History section).
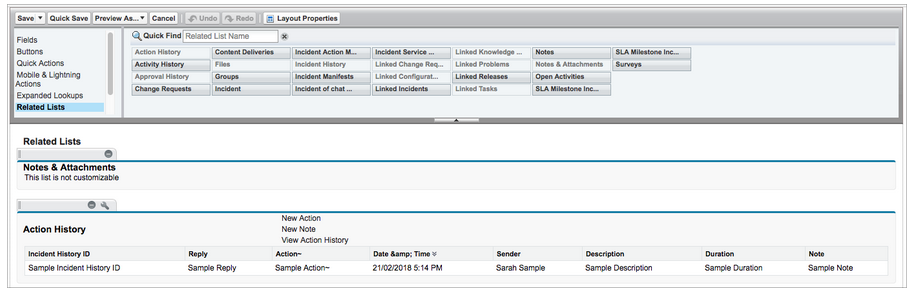
- Click Save.