
Zendesk Alerts
Zendesk is a cloud-based customer service platform that helps streamline customer support with little to no coding. Use this workflow to automatically notify on-call resources and allow your agents to take ownership of tickets from any mobile device.
How it works
When a new alert is created in Zendesk, it sends a JSON-formatted webhook to xMatters. A Zendesk trigger in xMatters parses the webhook and initiates a flow. The webhook includes essential incident data that xMatters uses to generate an alert and send notifications to groups or assignees. Users can respond to add a comment to the originating alert in Zendesk, or even resolve the alert with the tap of a button.
Install the workflow
The following instructions describe how to install the workflow through the xMatters one-click installation process.
- Go to the Workflows Templates page and click the Zendesk tile.
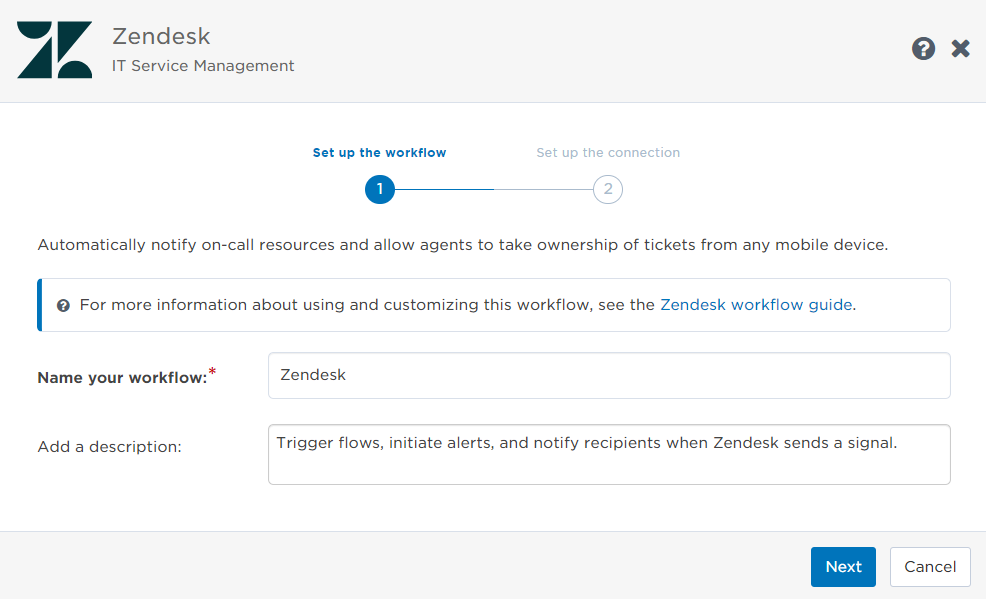
- On the Set up the Workflow tab, give the workflow a name that identifies its purpose (this must be unique in your instance), add an optional description, and set the default incident type (if applicable). Any built-in Initiate Incident steps in the workflow will automatically be set to the selected incident type.
- You can edit these later, if needed.
- You can edit these later, if needed.
- Click Next to set up the connection.
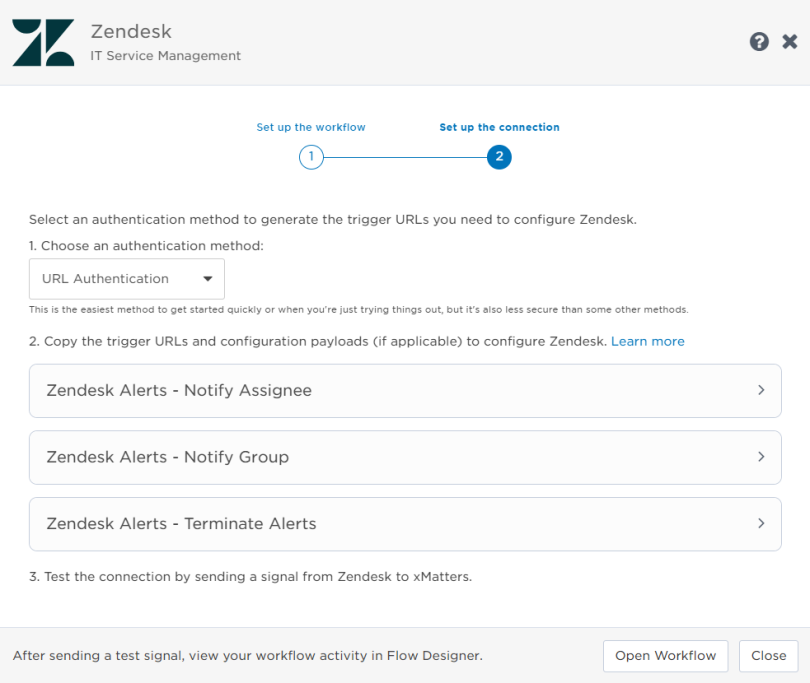
- Choose Basic Authentication from the drop-down list of authentication methods. Zendesk currently requires Basic authentication using API tokens.
- Copy all three trigger URLs — you’ll use them to configure the webhooks in Zendesk.
- The trigger URLs include the recipients parameter, which specifies who should be notified. By default, this parameter is set to notify you (the logged in user), but you can set it to target any user or group you want.
- The trigger URLs include the recipients parameter, which specifies who should be notified. By default, this parameter is set to notify you (the logged in user), but you can set it to target any user or group you want.
- Click Open Workflow to view and customize the workflow, or Close to return to the Workflows page.
Now that the workflow is installed and you have the trigger URL, let's to go to Zendesk and configure it to communicate with xMatters.
Configure Zendesk to send requests to the trigger URL
The following sections provide detailed instructions on how to configure Zendesk to send alerts to xMatters.
To configure Zendesk to send alerts to xMatters, you need to create a webhook for each Zendesk trigger on your canvas: Notify Assignee, Notify Group, and Terminate Alerts.
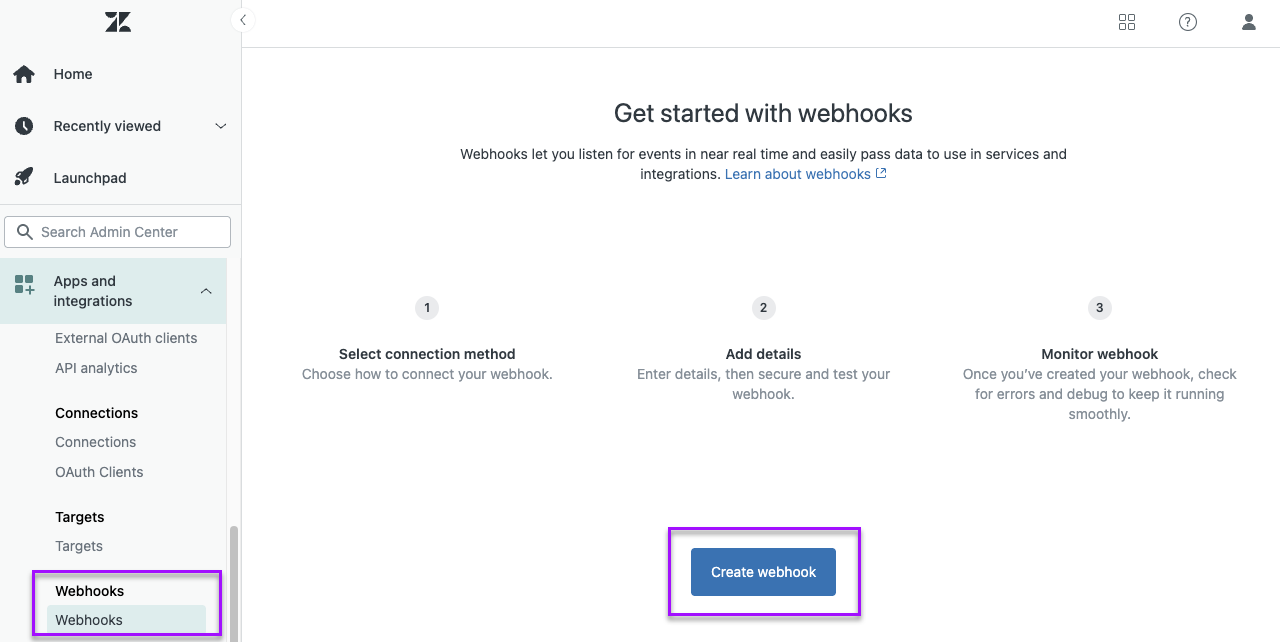
- Open the Zendesk Admin Center, expand Apps and Integrations, then select Webhooks.
- Click Create webhook.
- On the Create webhook page, select Trigger or automation as the way to connect.
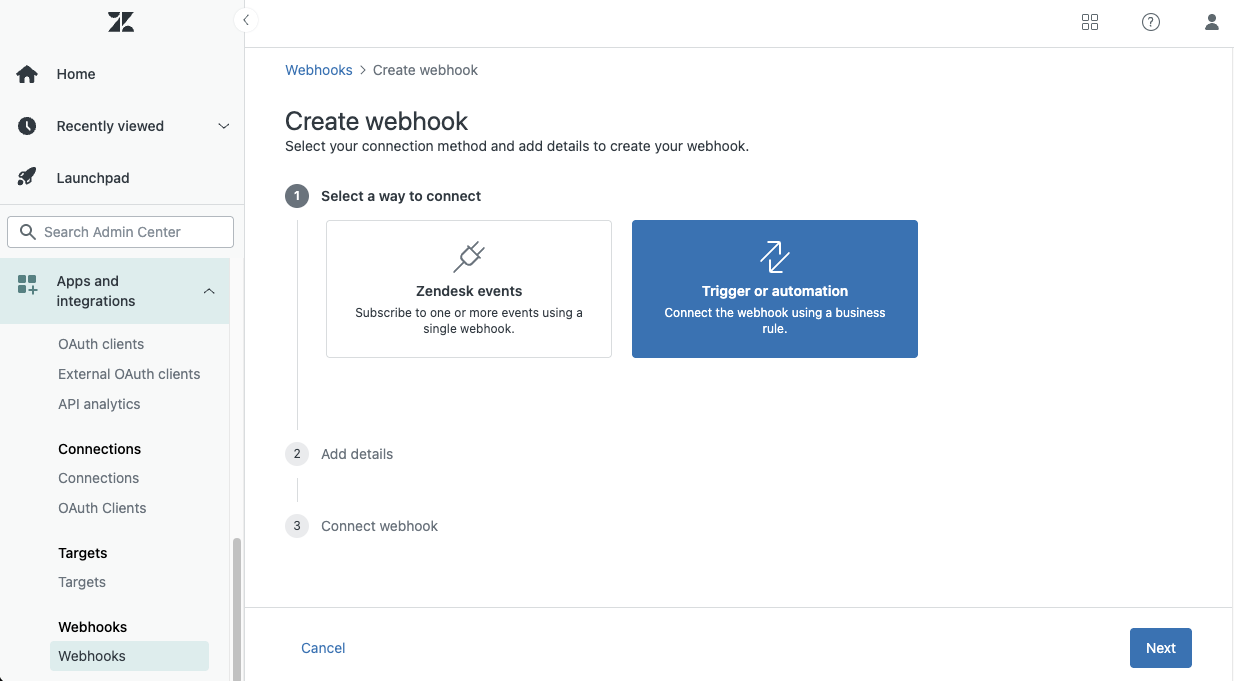
- Fill in the following fields to add details for your webhook:
- Name: Give the webhook a unique name. For example, you could title the webhooks "xMatters Notify Assignee", "xMatters Notify Group", and "xMattersTerminate Alerts".
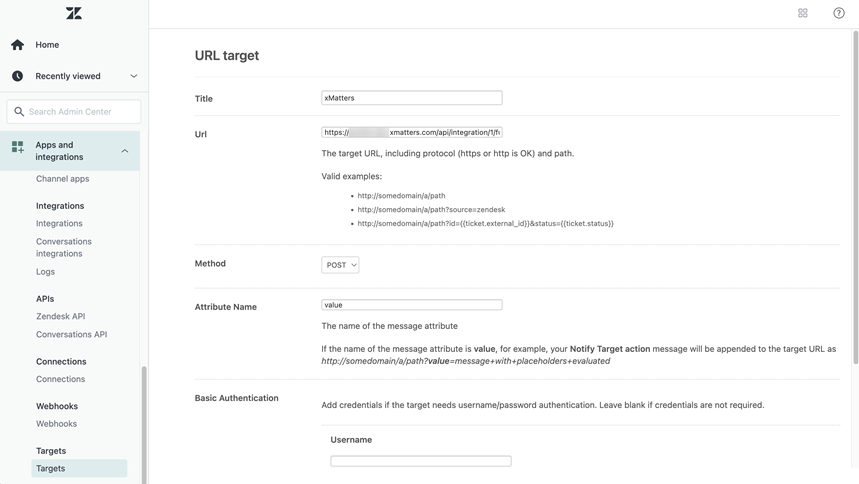
- Endpoint URL: The URL you copied from the workflow installer that matches the name of the webhook.
- Method: POST
- Request Format: JSON
- Authentication: None
- Click Create webhook, then click Finish setup.
- Repeat steps 1 - 5 so you have three Zendesk webhooks.
The next step is to create a Zendesk trigger that initiates the webhook. You will need to create a Zendesk trigger for each webhook.
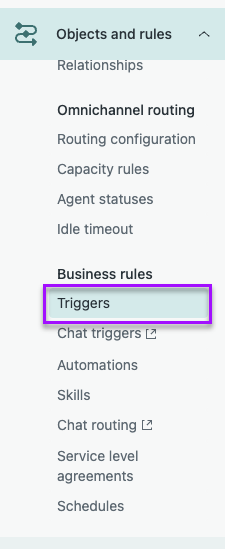
- In the left-hand menu expand the Objects and rules section, then go to Business rules > Triggers.
- Click Add trigger.
- Enter a trigger name and description. For example, you might want the trigger name to match the webhook name.
- Expand the Category drop-down list and select Notifications.
- In the Conditions section, click Add condition under the "Meet ALL of the following conditions" heading.
- Set the conditions in which you want Zendesk to send a request to xMatters and initiate the flow.
- For the Notify Group trigger, use the drop-down menus to set the following conditions:
- Ticket Is Created
- Group Is not -
- Assignee Is -
- For the Notify Assignee trigger, use the drop-down menus to set the following conditions:
- Ticket Is Created
- Assignee Is not -
- For the Terminate Alerts trigger, use the drop-down menus to set the following condition:
- Ticket status Changed to Solved
- For the Notify Group trigger, use the drop-down menus to set the following conditions:
- In the Actions section click Add Action.
- Select Notify target from the drop-down menu, then select the webhook from the drop-down menu that matches the trigger.
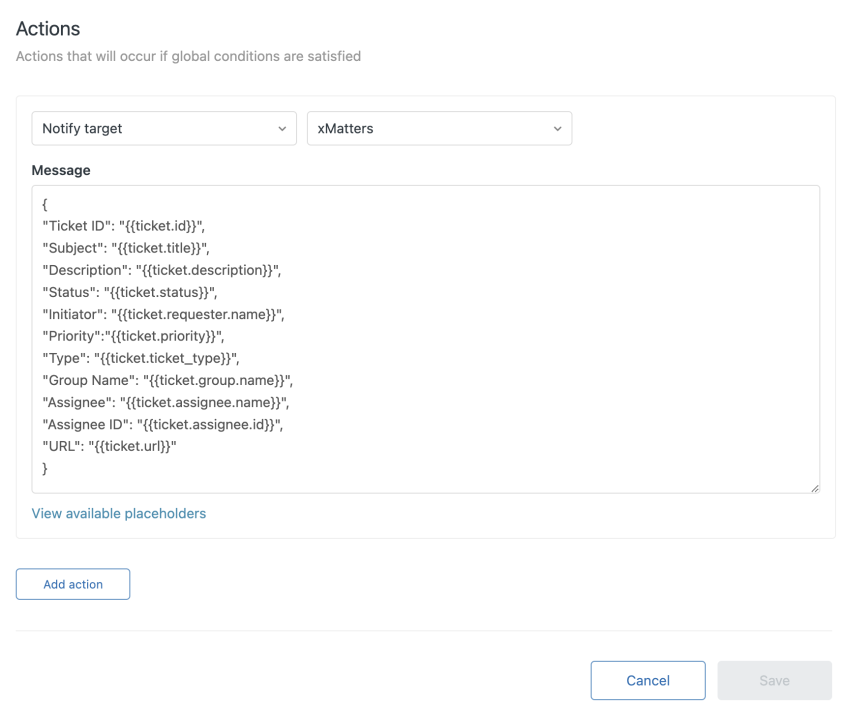
- Copy the following payload into the Message field.
Copy
{
  "Ticket ID": "{{ticket.id}}",
  "Subject": "{{ticket.title}}",
  "Description": "{{ticket.description}}",
  "Status": "{{ticket.status}}",
  "Initiator": "{{ticket.requester.name}}",
  "Priority": "{{ticket.priority}}",
  "Type": "{{ticket.ticket_type}}",
  "Group Name": "{{ticket.group.name}}",
  "Assignee": "{{ticket.assignee.name}}",
  "Assignee ID": "{{ticket.assignee.id}}",
  "URL": "{{ticket.url}}"
} - Click Save.
- Repeat steps 1 - 10 so you have three Zendesk triggers, each linked to its webhook.
As of January 13, 2026 Zendesk no longer supports password authentication, and recommends the use of API tokens through Basic Authentication.
- In the left-hand menu expand the Apps and integrations section. then go to APIs > API tokens.
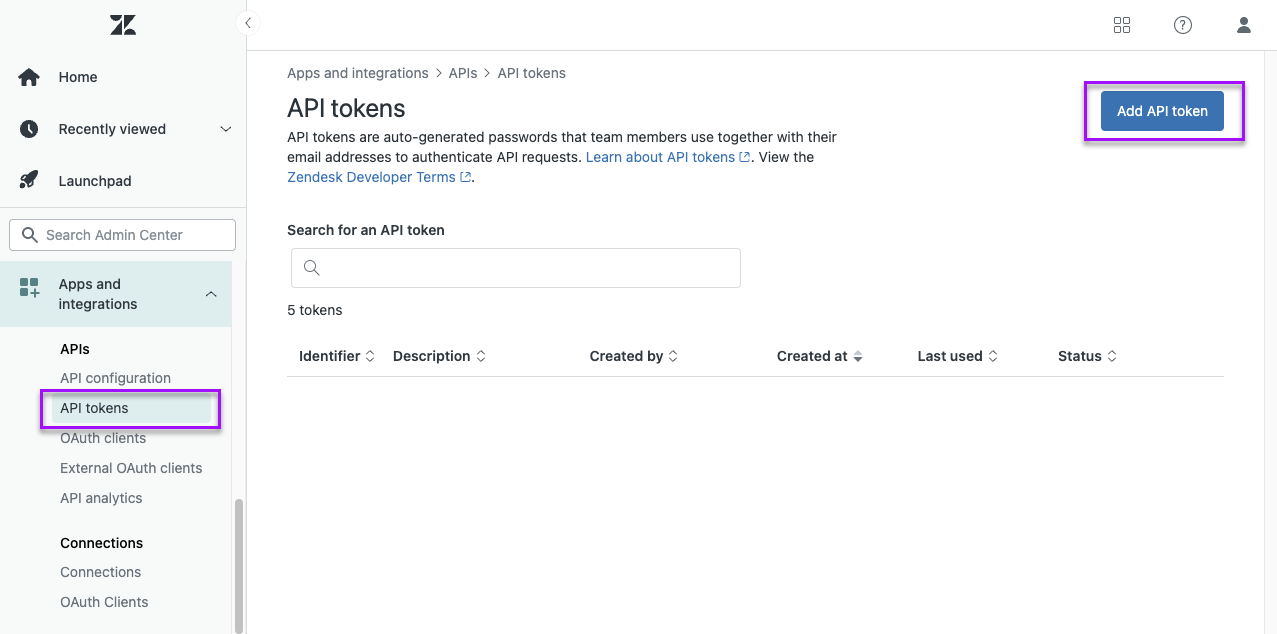
- Click Add API token.
- On the Add API token page, give the new token a unique description.
- Click Save (located on the bottom right corner of the page). After you click save, the token is generated and displayed in the Token field.
- Copy the token to an easy-to-find location, then click Save again.
xMatters needs to know a user's Zendesk ID so it can map the assignee coming from Zendesk to a user in xMatters and send notifications to the people who need to be notified.
- Create a custom user property with the name Zendesk User ID.
- In this instance, we didn't select Required because not all users in this xMatters deployment have a Zendesk ID.
- Click Save.
The next step is to update the Zendesk User ID field in the profiles of any new or existing users to hold their Zendesk ID.
- On the Users tab, select the user you want to update and click their Profile tab.
- Enter their Zendesk ID in the Zendesk User ID field and click Save Changes.
- To find a user's ID in Zendesk go to the Admin section, then to Manage > Agents. Open the record for the user then copy the user ID portion of the URL. For example, in the URL ...zendesk.com/agent/users/369711711693/assigned_tickets, the user ID is the number listed after "users/".

- To find a user's ID in Zendesk go to the Admin section, then to Manage > Agents. Open the record for the user then copy the user ID portion of the URL. For example, in the URL ...zendesk.com/agent/users/369711711693/assigned_tickets, the user ID is the number listed after "users/".
To update multiple users, you can also export a list of users to a .csv file (make sure you do this after you add the custom field), add the Zendesk user IDs to the custom field column in the .csv file, and then use the User Upload feature to load that information into xMatters.
Add your groups to xMatters, making sure to use the same name assigned to the group in Zendesk. This is the name xMatters looks up when notifying a group. When you add your group, you can create shifts, add members, and set up escalations and rotations.
If you change the name of a group in Zendesk, make sure you update it in xMatters.
Configure the Flow Designer endpoint
Once Zendesk is configured, you'll need to configure the Zendesk endpoint in Flow Designer.
- Go to Workflows > Workflows and select the Zendesk workflow you previously installed.
- Select the Flow Designer tab.
- Expand the Components drop-down and select Endpoints.
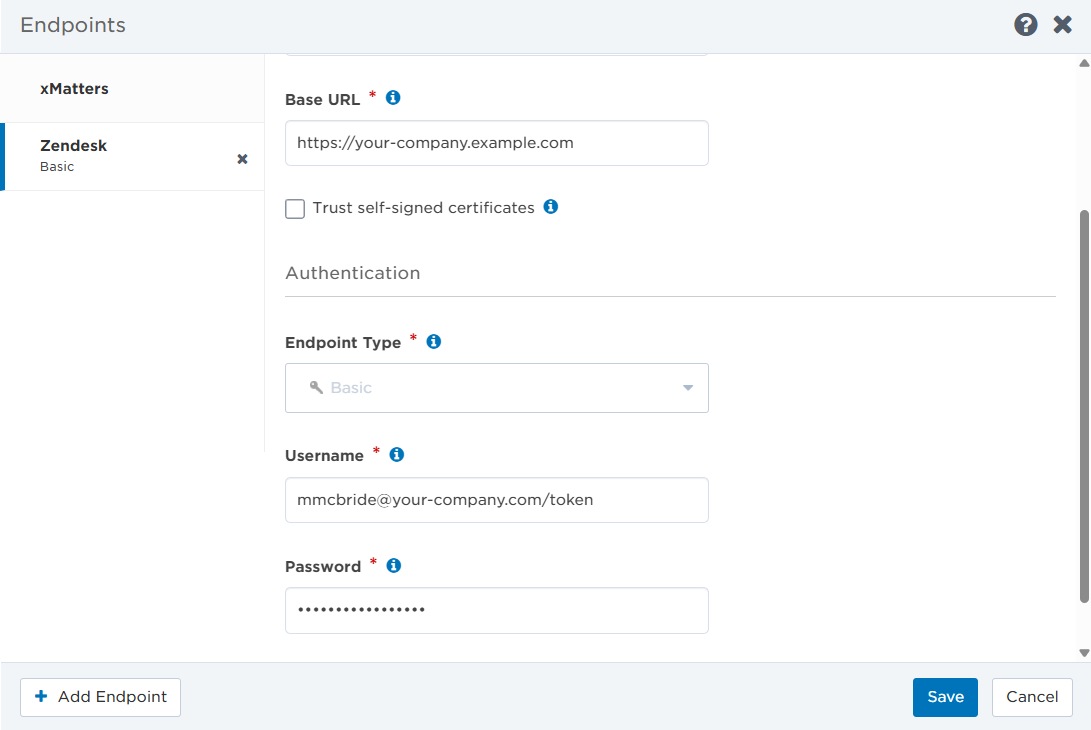
- On the Endpoints window, select the Zendesk tab.
- Add your Base URL.
- Enter your username using the following format: {email_address}/token
- Enter the API token you created in Zendesk into the Password field.
- If you do not see a password field, click Change Password to display it.
- Ensure that the 'Preemptive' check box is selected.
- Click Save.
Set recipients in the trigger URL
The trigger expects the recipients in the trigger URL. When you copy the URL from xMatters, it includes the recipients parameter: recipients=<yourname>. Of course, you don’t want to receive all the alerts.
To change the recipients for alerts from this webhook, swap out your name for the people or groups you want to target.
- For URL authentication, use an ampersand to attach recipients. For example, if you want to notify Emma Pearson and the on-call members in the group responsible for the Antares service, you'd add &recipients=epearson,antares to the URL.
- For other authentication types, use a question mark to attach recipients. For example, if you want to notify Barry Gull and the on-call members in the group responsible for the Cassiopeia service, you'd add ?recipients=bgull,cassiopeia to the URL.
Remember to URL-encode any special characters, including spaces, in your group names.
We recommend using groups so you can take advantage of the xMatters group features — rotations, escalations, and absences — to reach the right on-call people to jump on an issue.
How to use the workflow
When a new incident is created in Zendesk, it sends a signal to xMatters, which creates an alert and notifies the individual or the on-call members of groups you set as recipients in the webhook URL. When the trigger receives a signal saying the issue is resolved, it automatically terminates related alerts in xMatters.
An agent responding to the notification has the following response options:
- Acknowledge: Acknowledges the notifications and stops escalations.
- Add a Comment: Add a comment to the alert in Zendesk.
- Resolve: Resolves and closes the alert in Zendesk, terminates the xMatters alert, and stops notifying all targeted recipients.
A group responding to the notification has the following response options:
- Acknowledge: Acknowledges the notifications and stops escalations.
- Add a Comment: Add a comment to the alert in Zendesk.
- Escalate: Immediately escalate to the next on-call resource.
- Resolve: Resolves and closes the alert in Zendesk, terminates the xMatters alert, and stops notifying all targeted recipients.
Next Steps
Now that you've installed the workflow, you can use it as-is, or customize it to suit your needs better. Here are some examples of things you can add to the workflow to customize it:
- Use Slack, Zoom, and Microsoft Teams steps to add collaboration channels to the flow.
- Update the message sent to resolvers to include the information most relevant to your team.
- Use the Zendesk Alerts trigger to build your own custom flows.