
Splunk Infrastructure Monitoring
Splunk Infrastructure Monitoring (formerly SignalFx) is a real-time operational intelligence platform that discovers and collects metrics across every component in the cloud. The service provides real-time visibility into today’s dynamic environments for data-driven DevOps teams.
How it works
When a test meets a specified threshold in Splunk Infrastructure Monitoring, it sends a JSON-formatted webhook to xMatters. A Splunk Infrastructure Monitoring trigger in xMatters parses the webhook and initiates a flow. The webhook includes essential alert data you can use to enrich notifications to users or when building automated tasks.
Install the workflow
Here's how to install the Splunk Infrastructure Monitoring workflow through the xMatters one-click installation process. If you already installed the previous, built-in version of the integration, you can find instructions here.
- Go to the Workflow Templates page and click the Splunk Infrastructure Monitoring tile.
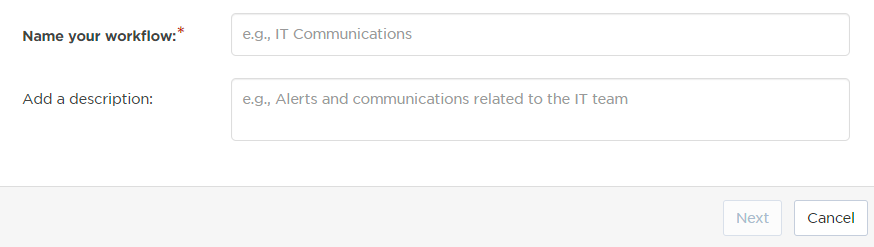
- On the Set up the Workflow tab, give the workflow a name that identifies its purpose (this must be unique in your instance), add an optional description, and set the default incident type (if applicable). Any built-in Initiate Incident steps in the workflow will automatically be set to the selected incident type.
- You can edit these later, if needed.
- You can edit these later, if needed.
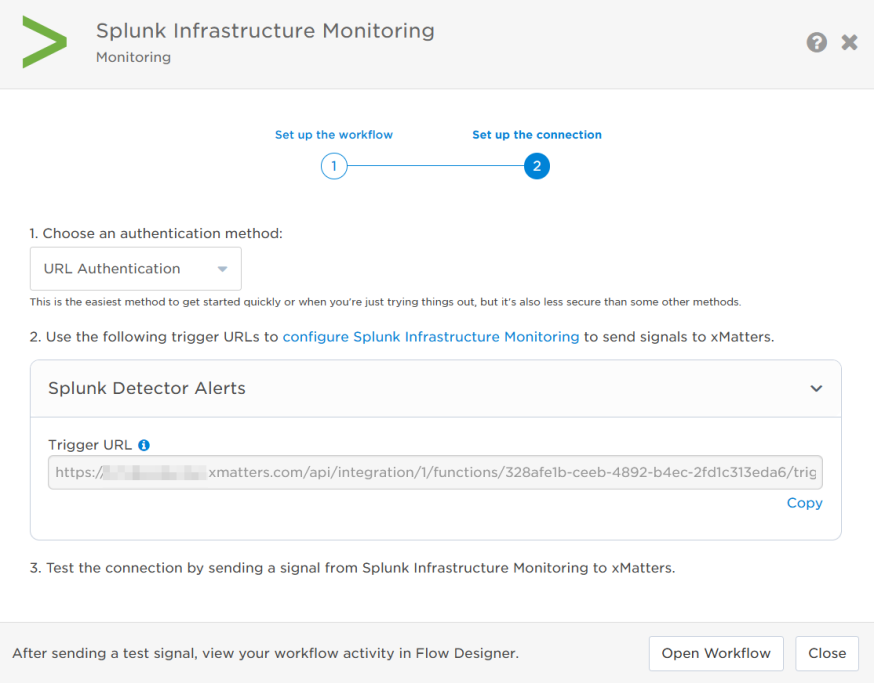
- Click Next to set up the connection.
- Copy the trigger URL — you’ll use this to configure the webhook in Splunk Infrastructure Monitoring.
- The trigger URL includes the recipients parameter, which specifies who should be notified. By default, this parameter is set to notify you (the logged in user), but you can set it to target any user or group you want.
- The trigger URL includes the recipients parameter, which specifies who should be notified. By default, this parameter is set to notify you (the logged in user), but you can set it to target any user or group you want.
- Send a test signal to the trigger URL to test the connection.
- Click Open Workflow to view and customize the workflow, or Close to return to the Workflows page.
Configure Splunk to send requests to the trigger URL
To have Splunk send alerts to the flow trigger, you need to configure a webhook and set it to use the trigger URL. You can either set up a new detector and alert rule using the Splunk Infrastructure Monitoring documentation, or modify one of your existing alert rules.
To modify an existing alert rule:
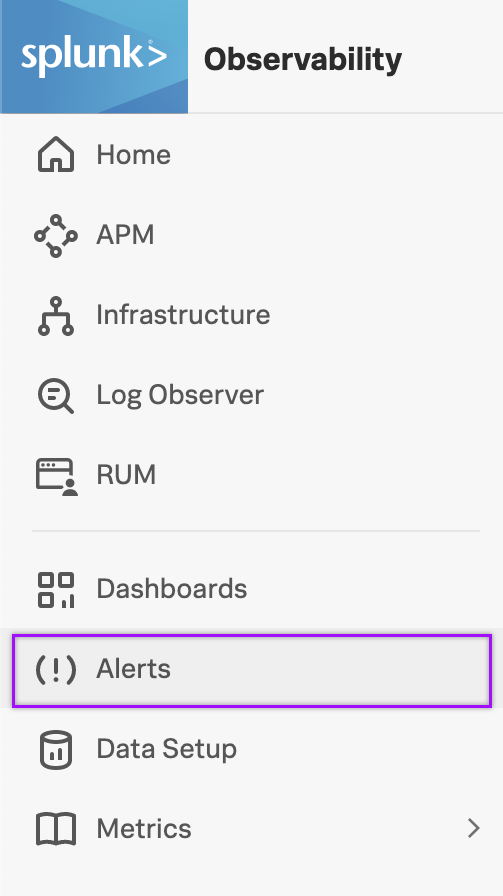
- In the Splunk Observability platform and select Alerts from the left-hand menu.
- Click the Detectors tab and select the detector you want to use to notify xMatters.
- Select an alert rule and click it's name or Edit to add xMatters as a recipient.

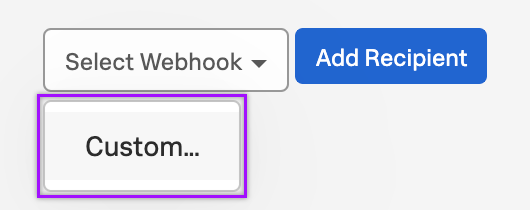
- In the Alert recipients section, click Add Recipient and select Webhook.
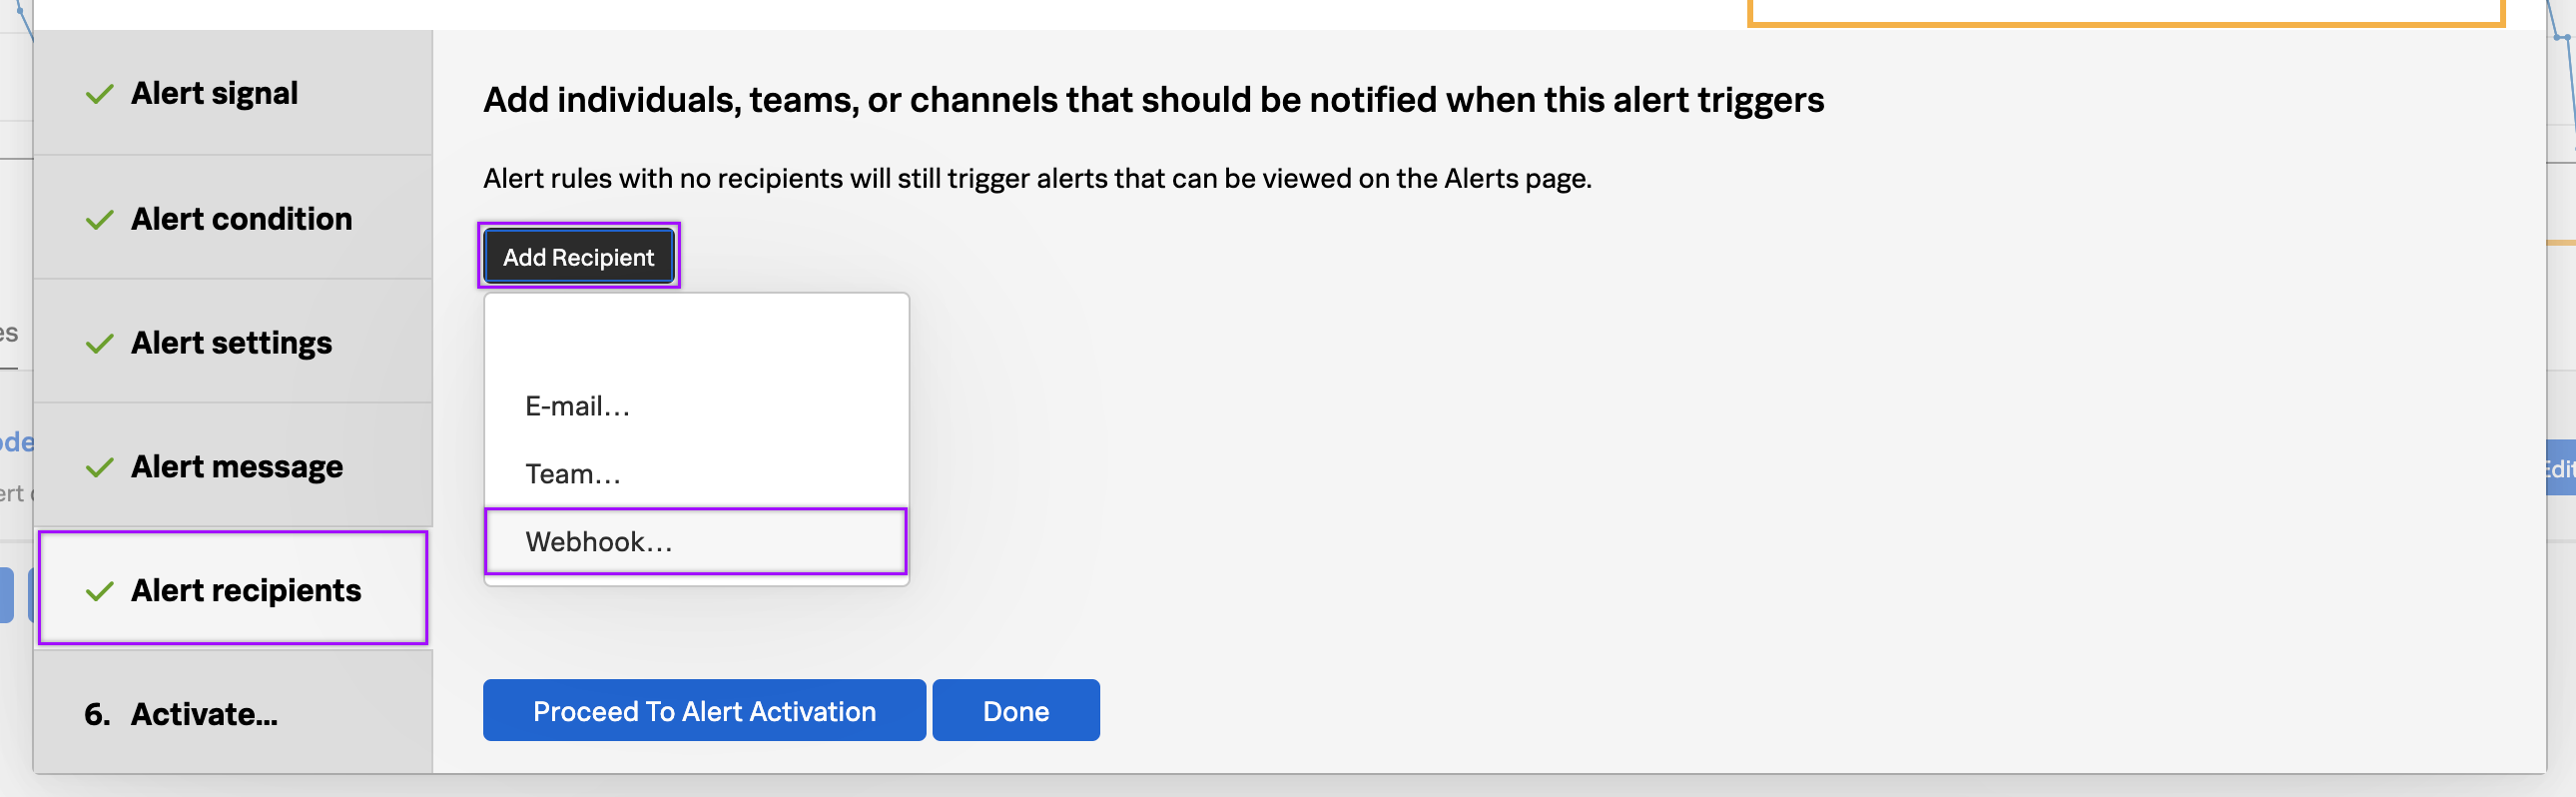
- Click Custom.
- In the URL field, paste the trigger URL you copied from the Splunk Detector Alerts trigger on the Flow Designer canvas.
- Add the target names of any recipients you want xMatters to notify when the alert fires to the end of the URL.
- For URL authentication, use an ampersand to attach recipients. For example, if you want to notify Emma Pearson and the on-call members in the group responsible for the Antares service, you'd add &recipients=epearson,antares to the URL.
- You must URL-encode any special characters or spaces in the target names.
- Click Update.
- In the Alert recipients section, click Done.
- To save your changes, click Update Alert Rule.
You're ready to use the webhook to trigger automated flows, including steps such as sending alerts and initiating incidents, though we always recommend testing before putting things into use.
Set recipients in the trigger URL
The trigger expects the recipients in the trigger URL. When you copy the URL from xMatters, it includes the recipients parameter: &recipients=<yourname>. Of course, you don’t want to receive all the alerts.
To change the recipients for alerts from this webhook, swap out your name for the people or groups you want to target. For example, to target the DatabaseTeam, Antares Service Team, and HR & Marketing groups, add &recipients=databaseteam,antares%20service%20team,HR%20%26%20Marketing to the trigger URL. Remember to URL-encode any special characters, including spaces, in your group names.
We recommend using groups so you can take advantage of the xMatters group features — rotations, escalations, and absences — to reach the right on-call people to jump on an issue.
How to use the workflow
When a condition you've set fires, it sends a signal to xMatters, which creates an alert and notifies the individual or the on-call members of the people or groups you set as recipients in the webhook URL. When the trigger receives a signal saying the issue is resolved, it automatically terminates related alerts in xMatters.
The person responding to the notification has the following response options:
- Acknowledge: Acknowledges the notifications and stops escalations.
- Escalate: Immediately escalates the alert to the next on-call resolver in a targeted group.
- Close: Ends the xMatters alert and stops notifying all targeted recipients.
- Initiate Incident: Initiates an incident in xMatters.
Next Steps
Now that you've installed the Splunk Infrastructure Monitoring workflow, you can use it as-is, or customize it to suit your needs better. Here are some examples of things you can add to the workflow to customize it:
- Use Slack, Zoom, and Microsoft Teams steps to add collaboration channels to the flow.
- Change the severity of incidents created when a recipient selects the Initiate Incident response.
- Update the message sent to resolvers to include the information most relevant to your team.
- Use the Splunk Detector Alerts trigger to build your own custom flows.
Previous versions
While the previous, built-in version of this integration (known as SignalFx) is no longer available, the instructions for it are included below for anyone who has it installed in their system already.
Do more with this integration
Incorporate this integration into your orchestrated incident resolution workflows with Flow Designer. After you create a configuration, the Flows tab appears. From there, you can build your flows — add new response options, connect to other apps, or even create new xMatters alerts based on activities in the flow — enriching the information injected by this integration along the way.
Get started with SignalFx
To install this integration in xMatters, simply go to Workflow Templates on the Workflows tab and start typing the name of the integration you're looking for to filter the list. Once you find it, click its tile then click Next to get to the configuration screen.
How to set up a SignalFx configuration
After you give your configuration a name and description, type a name to use when sending alerts (so you can easily tell which configuration or integration the alerts are from).
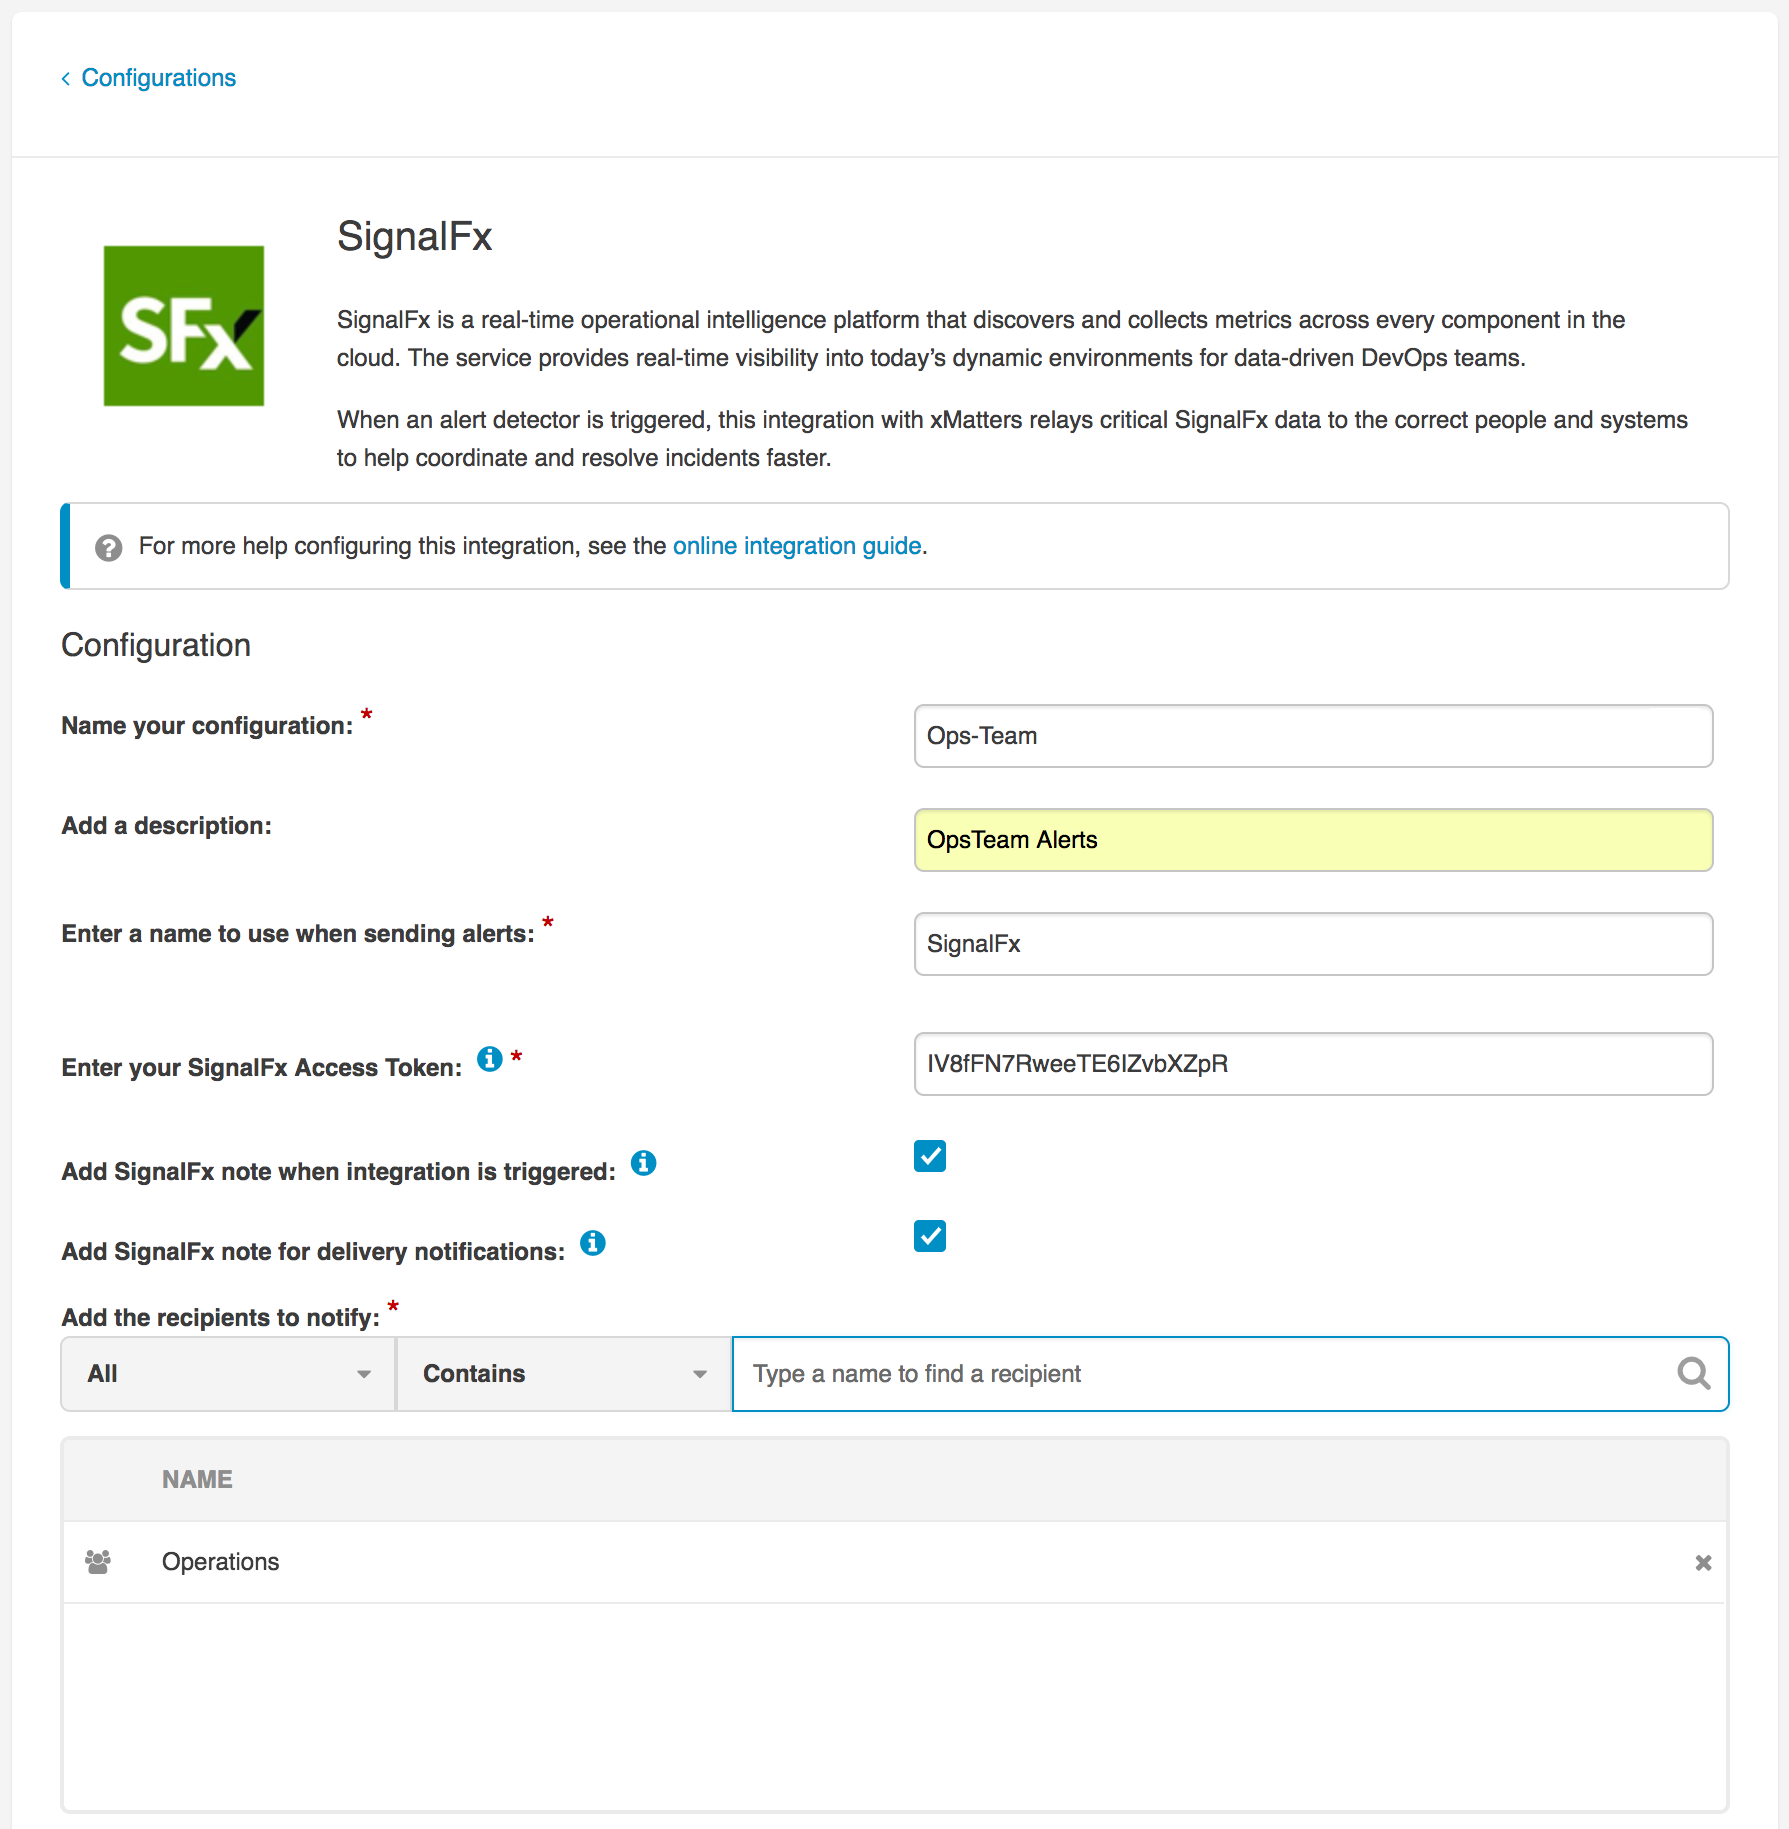
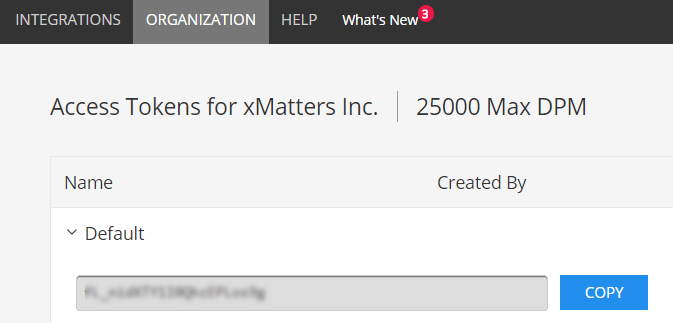
This integration also needs your SignalFx Access Token to authenticate xMatters requests.
- Log in to SignalFx and select Organization > Access Tokens.
- Expand the organization you're configuring and click Show Token, then click Copy.
Enter your SignalFx Access Token in the field on the configuration page, then select whether or not you want to add notes to SignalFx when the integration creates an alert in xMatters or receives a device delivery update. Add all the users and groups you want to be notified when the integration is triggered, then click Save.
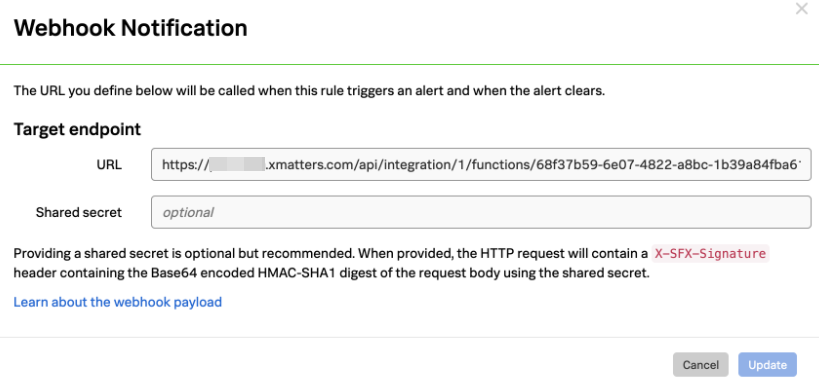
Once you save the configuration, xMatters displays the URL you need to configure SignalFx.
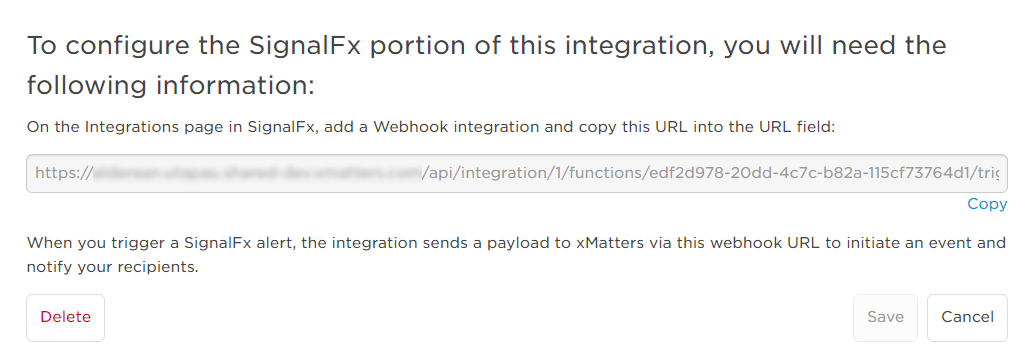
You can now create a webhook in SignalFx targeting this URL.
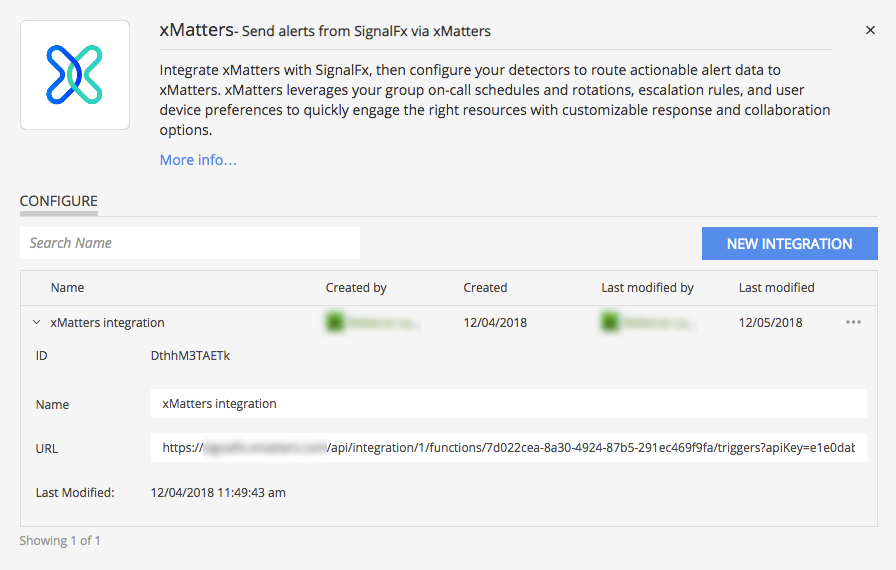
- Log into SignalFx as an administrator and go to the Integrations tab.
- Search for xMatters or go to the Notification Services section, and click the xMatters tile.
- Click New Integration, give it a name, and copy the URL from the integration configuration page in xMatters into the URL field in SignalFx.
Your integration is now complete! You can now add the xMatters integration as an alert recipient to an alert rule in SignalFx.
Troubleshooting
"Cannot find credential information" errors
You may encounter the following error message when configuring a connection from the xMatters app to Splunk:
ERROR: Delete user failed, cannot find the credential information with id : credential::xmatters_password:
This is due to a failed operation after the credential data is delivered. To resolve this issue, follow the direction in the support article here.
Use your integration
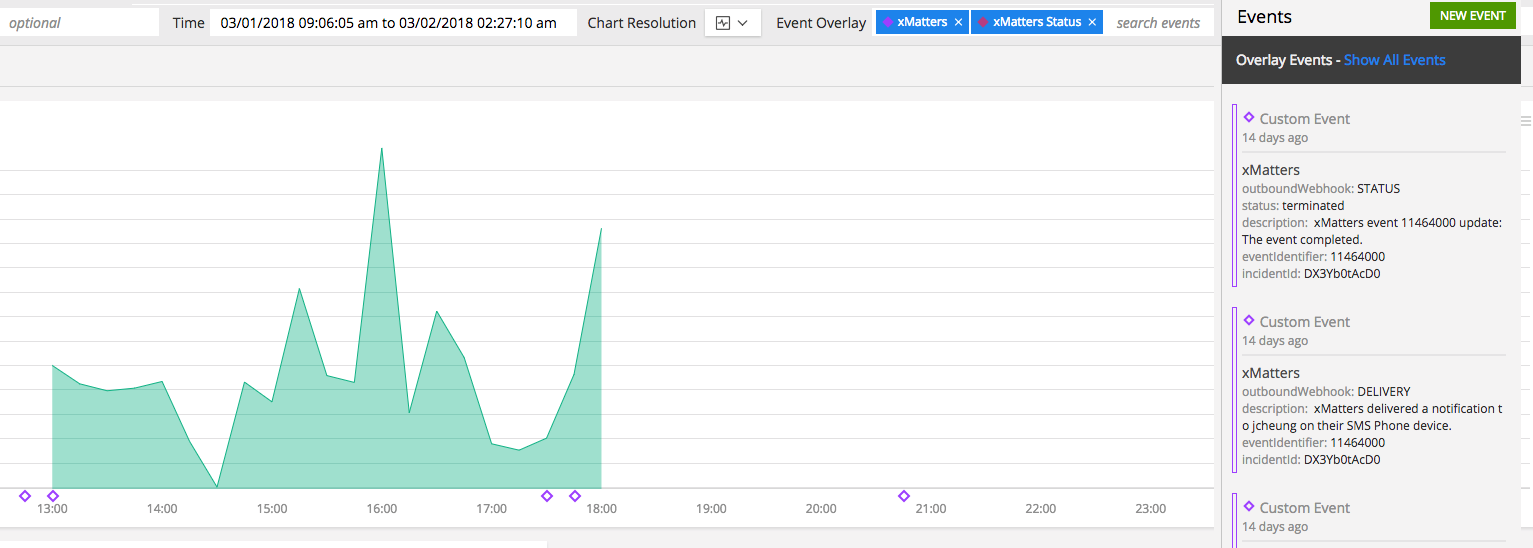
When an alert rule (with the xMatters webhook as the alert recipient) is triggered in SignalFx, the webhook integration sends details to xMatters, which creates an alert and notifies the recipients.
- Create a detector and add an alert rule (if you don't already have this set up).
- Add the SignalFx xMatters webhook integration as the alert recipient.
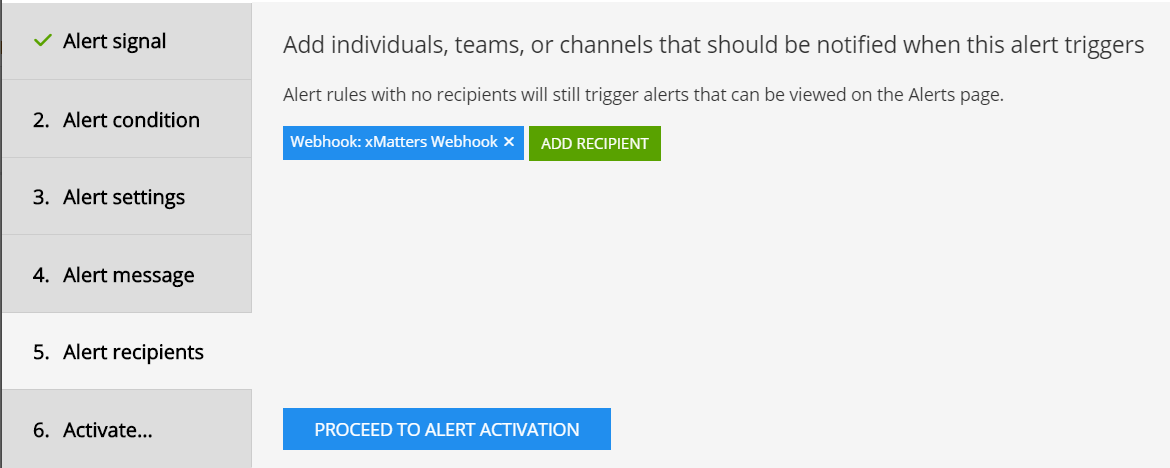
When the alert conditions are met, the integration creates an alert in xMatters, notifying the recipients you set up on the configuration page.
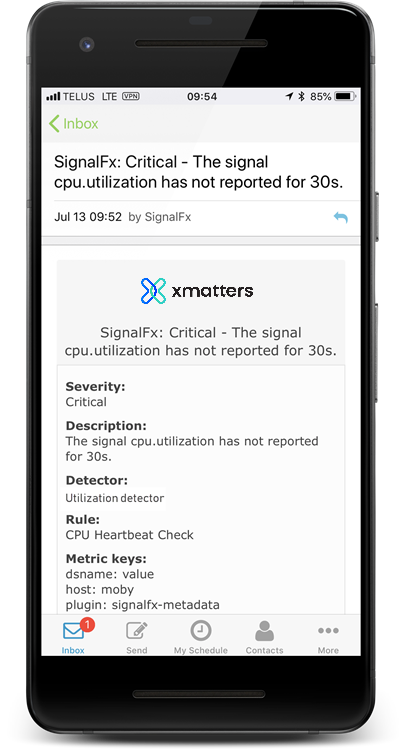
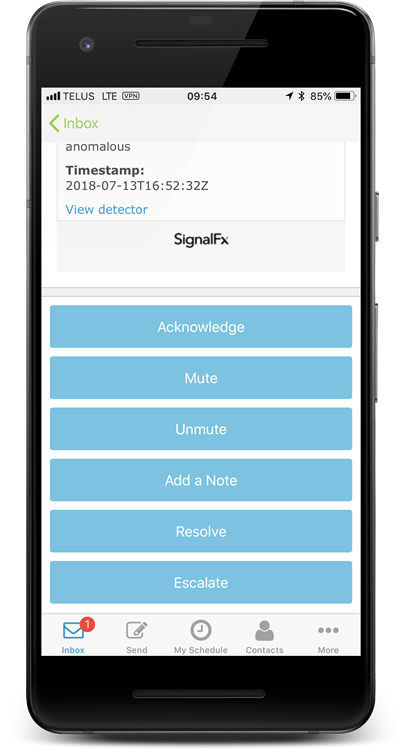
Check out the screenshots at the top of this page to see what the notifications would look like in the xMatters mobile app. When notified as a recipient, you can select one of the following responses:
- Acknowledge: assigns the alert to you, and stops notifying other recipients. A note is added to the alert in SignalFx.
- Mute: mutes notifications for 60 minutes. You can unmute notifications by going back into the original notification and selecting Unmute.
- Unmute: unmutes notifications before the mute duration has elapsed.
- Add a note: adds a note with your comment to the alert in SignalFx.
- Resolve: stops notifying all recipients and terminates the alert in xMatters and SignalFx.
- Escalate: stops notifying you about the alert, and immediately escalates the notification to the next available on-call member defined in xMatters.
Choose a response to see how your selection is reflected in SignalFx.
Extending your integration
Looking to do more with xMatters and SignalFx? If you want to tailor the settings and notifications for the integration, you can convert it to a custom workflow.