BigPanda
BigPanda is a data science platform that helps correlate IT alerts across multiple monitoring tools, leveraging AIOps to scan for service degradations across your systems. Combined with xMatters, you can notify on-call resolvers and give them the information they need to start working on the issue.
This workflow lets you send actionable alerts to on-call resources when xMatters gets a signal from BigPanda. Responders can initiate an incident with the press of a button, or you can build on the flow to perform automated resolution tasks.
How it works
When an alert is generated in BigPanda, it sends a JSON-formatted webhook to xMatters, based on the user-defined alert rules. A BigPanda trigger in xMatters parses the webhook and initiates a flow. The webhook includes essential alert data you can use to enrich notifications to users or when building automated tasks.
Install the workflow
The following instructions describe how to install the workflow through the xMatters one-click installation process. If you already installed the previous, built-in version of the integration, you can find instructions here.
- Go to the Workflow Templates page and click the BigPanda tile.
- On the Set up the Workflow tab, give the workflow a name that identifies its purpose (this must be unique in your instance), add an optional description, and set the default incident type (if applicable). Any built-in Initiate Incident steps in the workflow will automatically be set to the selected incident type.
- You can edit these later, if needed.Click Next to set up the connection.

- You can edit these later, if needed.Click Next to set up the connection.
- Click Next.
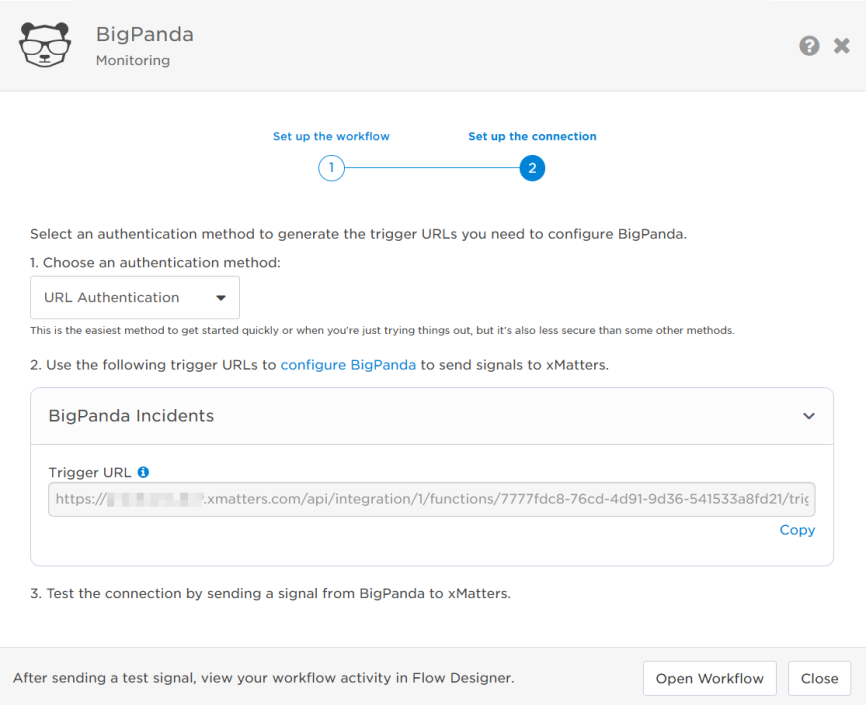
- Choose the authentication method. A trigger URL is generated based on the selected authentication method.
- Copy the trigger URL — you’ll use this to configure the webhook in BigPanda.
- The trigger URL includes the recipients parameter, which specifies who should be notified. By default, this parameter is set to notify you (the logged in user), but you can set it to target any user or group you want.
- The trigger URL includes the recipients parameter, which specifies who should be notified. By default, this parameter is set to notify you (the logged in user), but you can set it to target any user or group you want.
- Send a test signal to the trigger URL to test the connection.
- Click Open Workflow to view and customize the workflow, or Close to return to the Workflows page.
Configure BigPanda to send requests to the trigger URL
To have BigPanda send alerts to the flow trigger, you need to configure a webhook and set it to use the trigger URL.
Create an integration between BigPanda and xMatters.
- In BigPanda, navigate to the Integrations tab and click New Integration.
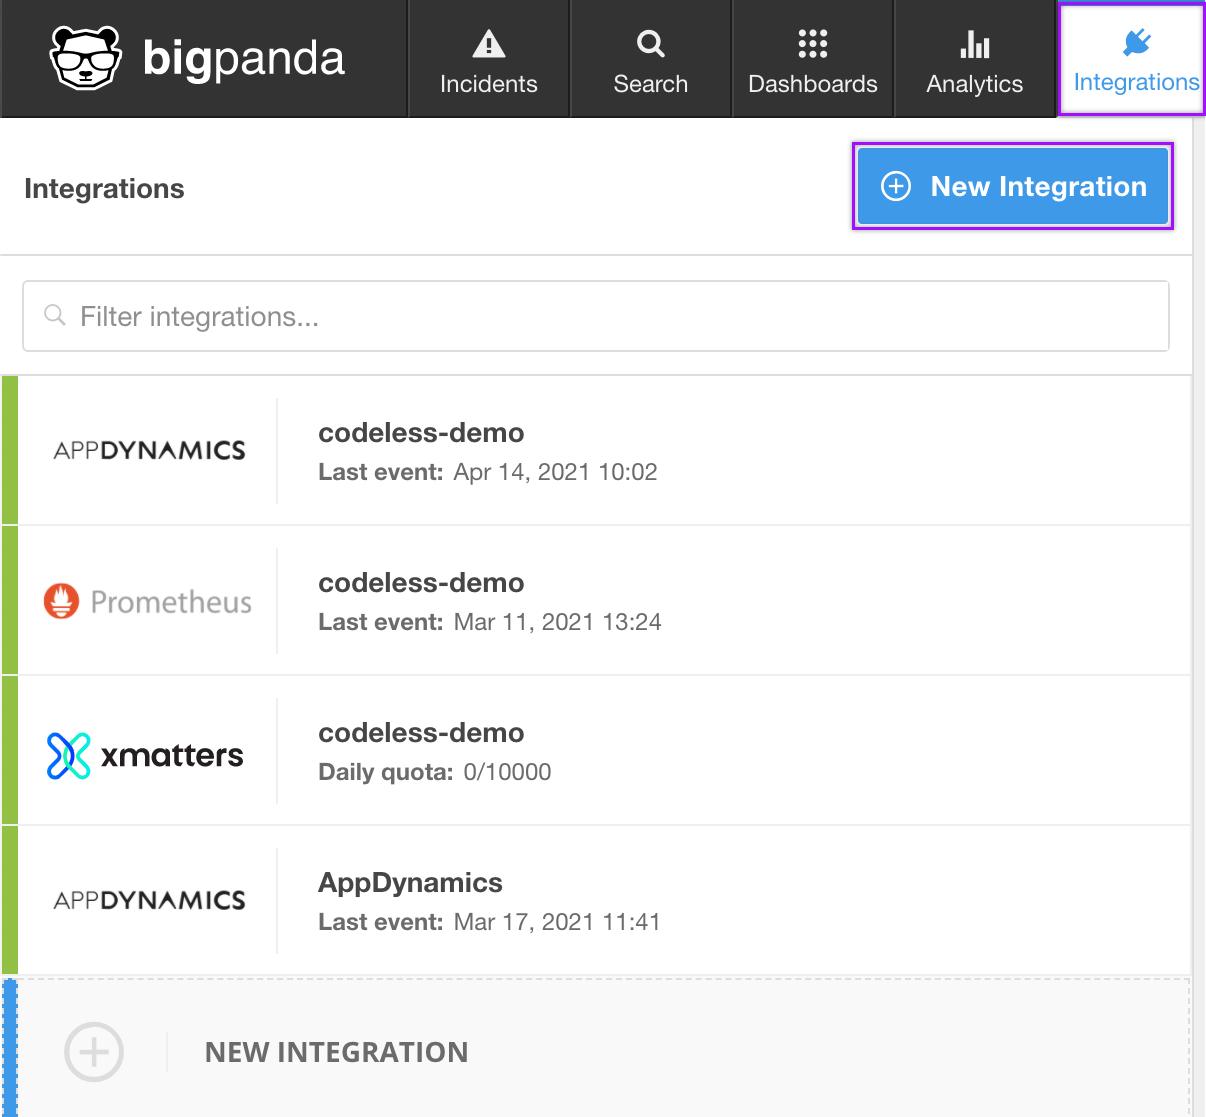
- Locate xMatters in the list of available integrations and click Integrate.
- Create an App Key. Give the integration a name, then click Generate App Key.
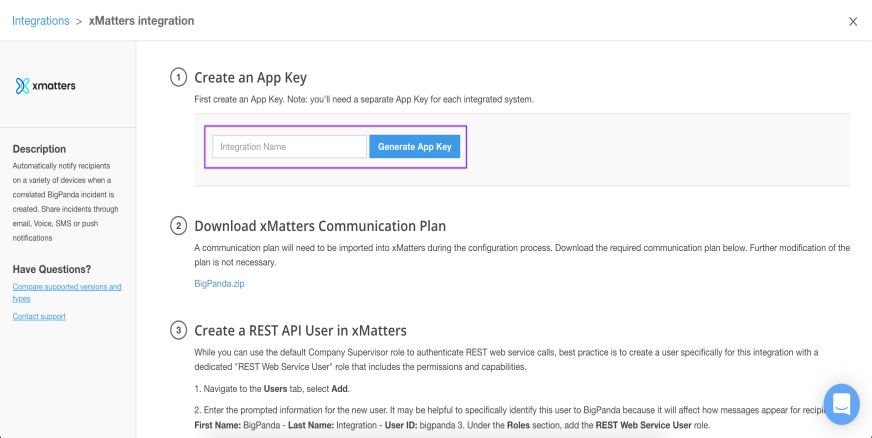
- Skip sections 2 - 7 on the BigPanda integration page as they are no longer required.
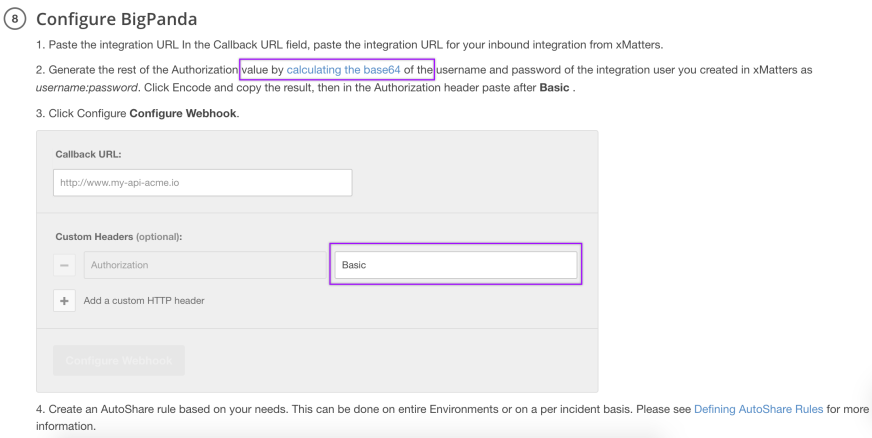
- In the Configure BigPanda section, paste the trigger URL from Flow Designer into the Callback URL field.
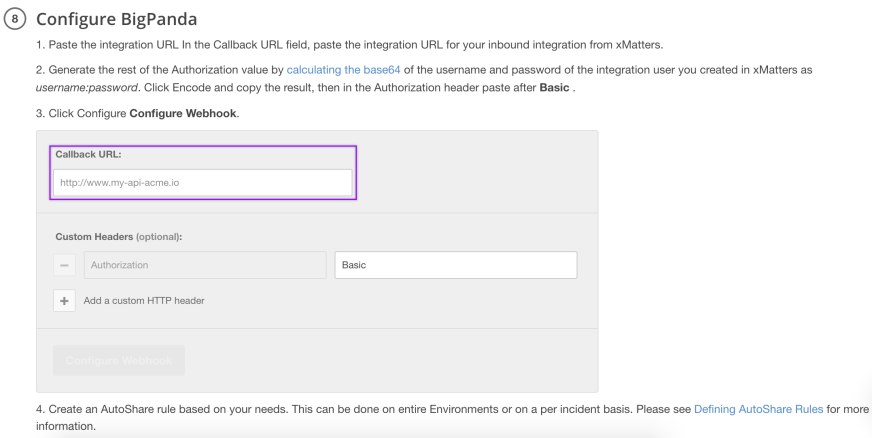
- If you use URL Authentication, continue on to the next step.
- If you use Basic Authentication, use the link on the BigPanda page to generate a Base64 encoded authorization for the authenticating user. Paste the generated value after the word Basic in the Custom Headers section.
- Add the target names of any recipients you want to notify when the alert fires.
- For URL authentication, use an ampersand to attach recipients. For example, if you want to notify Emma Pearson and the on-call members in the group responsible for the Antares service, you'd add &recipients=epearson,antares to the end of the URL.
- For other authentication types, use a question mark to attach recipients. For example, if you want to notify Barry Gull and the on-call members in the group responsible for the Cassiopeia service, you'd add ?recipients=bgull,cassiopeia to the end of the URL.
- You must URL-encode any special characters or spaces in the target names.
- Click Configure Webhook to save the integration.
Now that the integration is created, use BigPanda's Autoshare capabilites to share data from BigPanda.
- On the top right-hand side of the page, expand the Settings menu (represented by a gear icon) and click AutoShare.
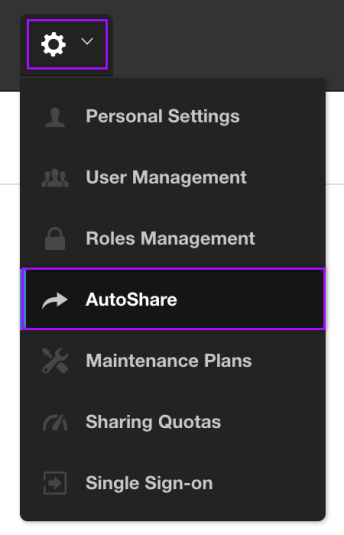
- Click Create AutoShare.
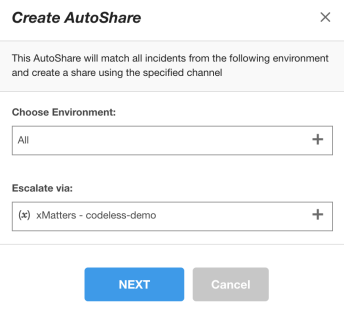
- In the Create AutoShare window, set the following fields:
- Choose Environment: Expand the drop-down menu and select All.
- Escalate via: Expand the drop-down menu and select the xMatters integration you just created.
- Click Next.
- Optional: Add a message the AutoShare. The message is displayed in the Recent Activity section whenever BigPanda sends a signal to xMatters.
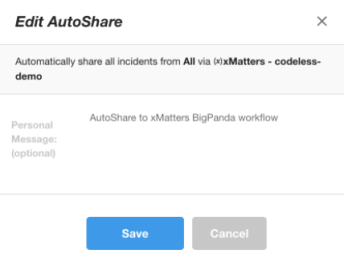
- Click Save.
You're ready to use the webhook to trigger automated flows, including steps such as sending alerts and initiating incidents, though we always recommend testing before putting things into use.
Set recipients in the trigger URL
The trigger expects the recipients in the trigger URL. When you copy the URL from xMatters, it includes the recipients parameter: recipients=<yourname>. Of course, you don’t want to receive all the alerts.
To change the recipients for alerts from this webhook, swap out your name for the people or groups you want to target.
- For URL authentication, use an ampersand to attach recipients. For example, if you want to notify Emma Pearson and the on-call members in the group responsible for the Antares service, you'd add &recipients=epearson,antares to the URL.
- For other authentication types, use a question mark to attach recipients. For example, if you want to notify Barry Gull and the on-call members in the group responsible for the Cassiopeia service, you'd add ?recipients=bgull,cassiopeia to the URL.
Remember to URL-encode any special characters in your group names.
We recommend using groups so you can take advantage of the xMatters group features — rotations, escalations, and absences — to reach the right on-call people to jump on an issue.
How to use the workflow
When an alert rule you’ve set to use the action group fires, it sends a signal to xMatters, which creates an alert and notifies the individual or the on-call members of the groups you set as recipients in the webhook URL.
When a condition you've set fires, it sends a signal to xMatters, which creates an alert and notifies the individual or the on-call members of the people or groups you set as recipients in the webhook URL. When the trigger receives a signal saying the issue is resolved, it automatically terminates related alerts in xMatters.
The person responding to the notification has the following response options:
- Acknowledge: Acknowledges the notifications and stops escalations.
- Escalate: Immediately escalates the alert to the next on-call resolver in a targeted group.
- Close: Ends the xMatters alert and stops notifying all targeted recipients.
- Initiate Incident: Initiates an incident in xMatters.
Next Steps
Now that you've installed the workflow, you can use it as-is, or customize it to suit your needs better. Here are some examples of things you can add to the workflow to customize it:
- Use Slack, Zoom, and Microsoft Teams steps to add collaboration channels to the flow.
- Change the severity of incidents created when a recipient selects the Initiate Incident response.
- Update the message sent to resolvers to include the information most relevant to your team.
Previous versions
While the previous, built-in version of this integration is no longer available, the instructions for it are included below for anyone who has it installed in their system already.
BigPanda is a data science platform that helps correlate IT alerts across multiple monitoring tools. When events meet predetermined criteria, this integration with xMatters relays critical BigPanda insights to the correct people and systems to help coordinate and resolve incidents faster.
The integration uses custom webhooks in BigPanda to automatically identify and notify the on-call resource on a variety of devices.
Do more with this integration
Incorporate this integration into your orchestrated incident resolution workflows with Flow Designer. After you create a configuration, the Flows tab appears. From there, you can build your flows — add new response options, connect to other apps, or even create new xMatters alerts based on activities in the flow — enriching the information injected by this integration along the way.
Get all your questions on integrating with BigPanda answered — take a live, online workshop led by one of our xPerts.
Get started with BigPanda
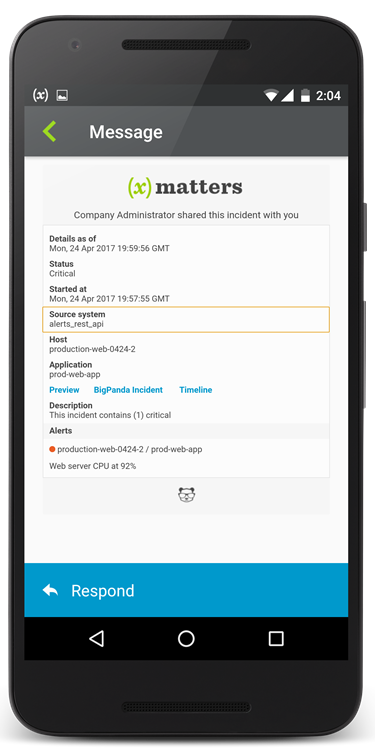
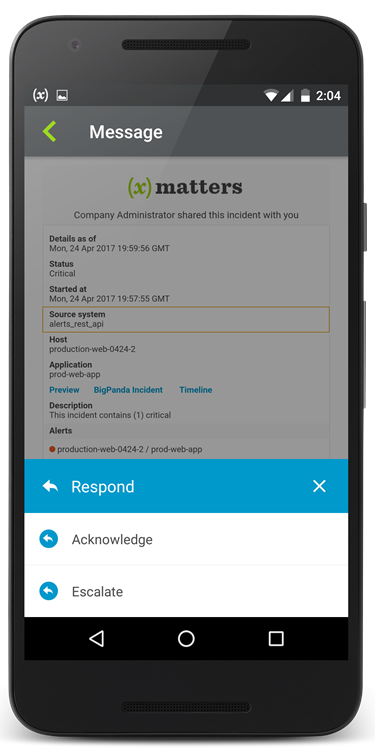
To install this integration in xMatters, simply go to Workflow Templates on the Workflows tab and start typing the name of the integration you're looking for to filter the list. Once you find it, click its tile then click Next to get to the configuration screen.
How to set up a BigPanda configuration
After you give your configuration a name and description, type a name to use when sending alerts (so you can easily tell which configuration or integration the alerts are from), and add all of the users and groups you want to be notified.
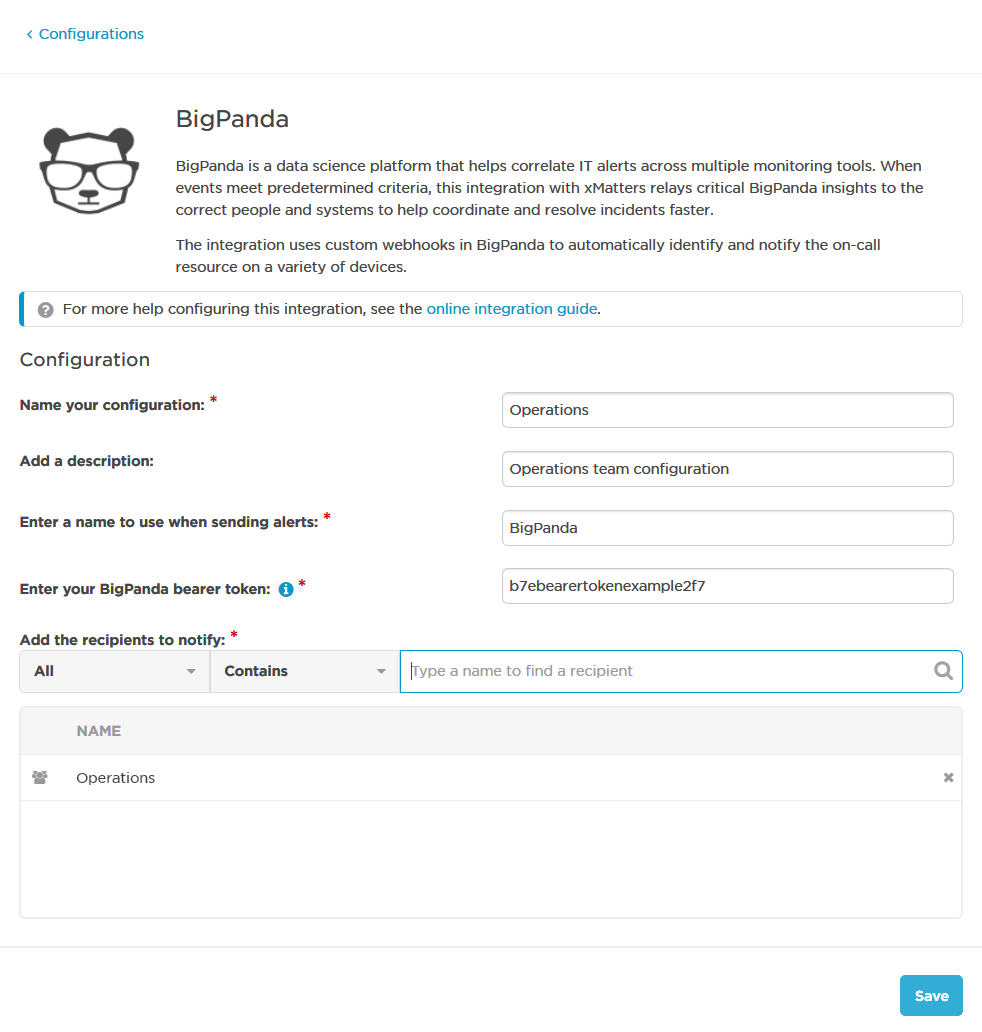
This integration also needs your BigPanda bearer token to authenticate the xMatters requests.
- Log into BigPanda, and then click the Integrations tab.
- Do one of the following:
- Select one of your existing Alerts REST API integrations, and then click Review Instructions.
- If you don't have an existing Alerts REST API integration, click New Integration, and then click Alerts REST API in the Create a New Integration window.
- In section 3 of the integration instructions, locate the HTTP headers information.
- Your bearer token is listed beside "Authorization: Bearer":

Enter your bearer token into the field on the configuration page, and then click Save.
Once you save the configuration, xMatters displays the URLs you need to configure BigPanda:

You can now create a webhook integration in BigPanda, and use this URL as the Callback URL. Then create an AutoShare in the environment where you want the integration to be active.
- In BigPanda, click the Integrations tab, and then click Create a New Integration.
- In the list of available integrations, click webhooks.
- In the Create an App Key section, type a name for your webhook in the field, and then click Generate App Key:

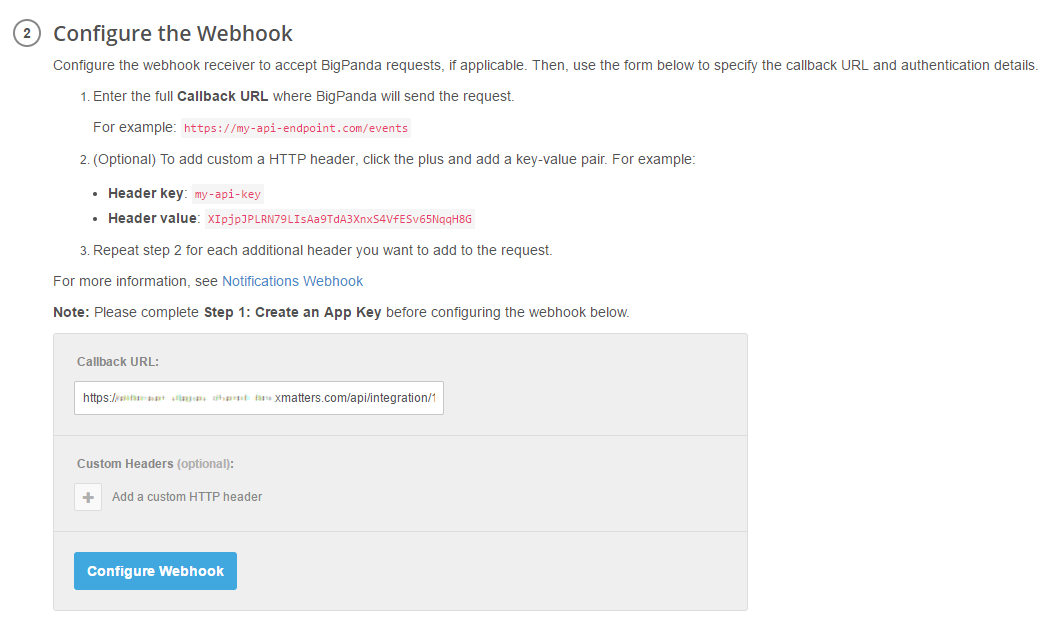
- In the Configure the Webhook section, paste the URL from the configuration page in xMatters into the Callback URL field, and then click Configure Webhook:
- Click the Settings drop-down list (the gear icon), and select AutoShare:
- On the AutoShare page, click Create AutoShare.
- In the Create AutoShare dialog box, select an environment in which you want the xMatters integration to be active from the Choose Environment drop-down list.
- In the Escalate via drop-down list, select the webhook integration you just created.
- Click Next, and then click Create.
Your integration is now complete!
Use your integration
Any change in the status of an incident triggers the AutoShare to send the details via the webhook integration to xMatters, which creates an alert and notifies the recipients.
To test the integration, create an alert that will satisfy the environment associated with the AutoShare.
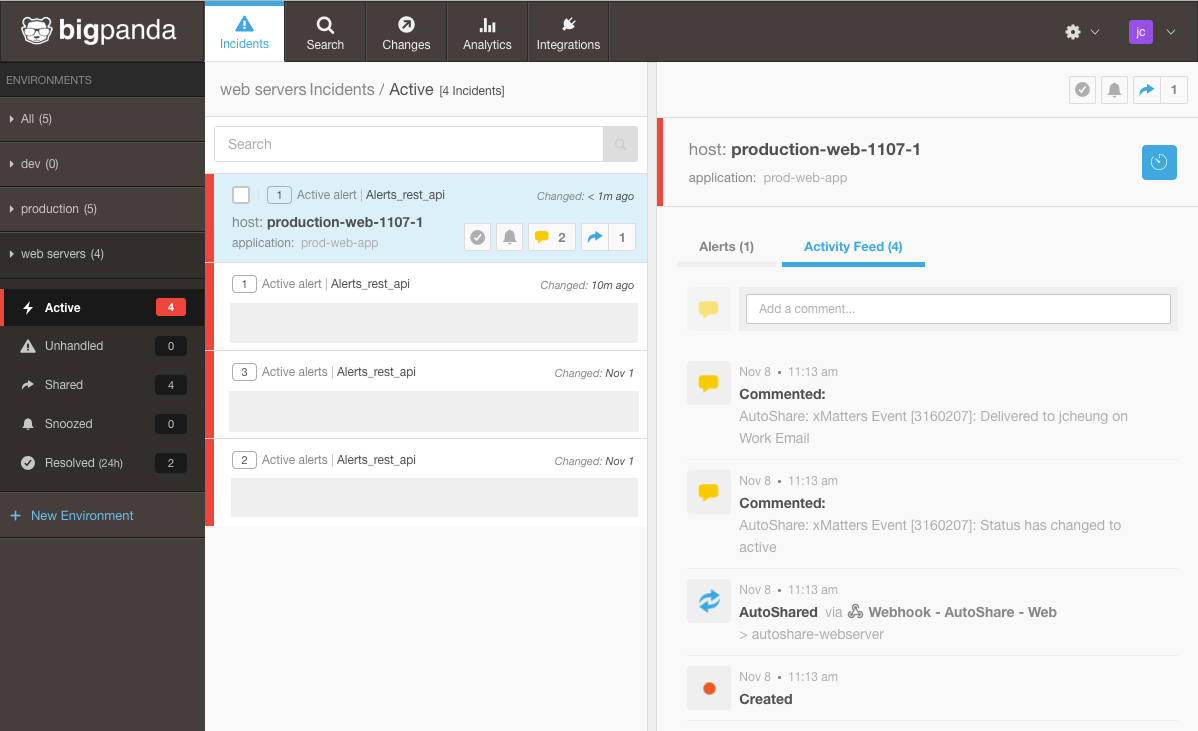
The AutoShare will be triggered via the newly created webhook integration, and post additional comments in the Activity Feed, indicating that an xMatters alert was created and set to active, and that a notification was sent to the recipients.
Extending your integration
Looking to do more with xMatters and BigPanda? If you want to tailor the settings and notifications for the integration, you can convert it to a custom workflow.
