
BlazeMeter
BlazeMeter (formerly Runscope) provides cloud-based and hybrid on-premises solutions that allow businesses to monitor, test, and debug web service APIs. BlazeMeter API tests can be used to test against services available in the public cloud, running on a private network behind a firewall, or running on a local development environment.
This workflow lets you send actionable alerts to on-call resources when xMatters gets a signal from BlazeMeter. Responders can initiate an incident with the press of a button, or you can build on the flow to perform automated resolution tasks.
How it works
When a test meets a specified threshold in BlazeMeter, it sends a JSON-formatted webhook to xMatters. A BlazeMeter API Monitoring trigger in xMatters parses the webhook and initiates a flow. The webhook includes essential alert data you can use to enrich notifications to users or when building automated tasks.
Install the workflow
The following instructions describe how to install the workflow through the xMatters one-click installation process. If you already installed the previous version of the integration, you can find instructions here.
- Go to the Workflow Templates page and click the BlazeMeter tile.
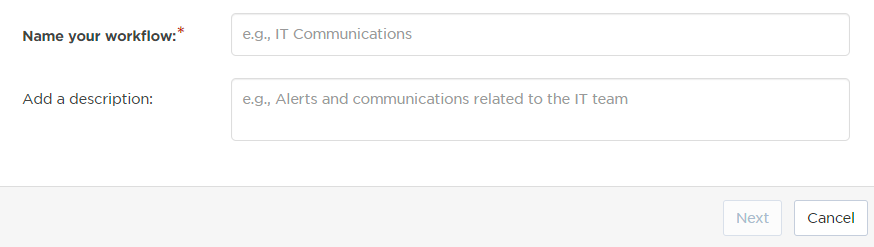
- On the Set up the Workflow tab, give the workflow a name that identifies its purpose (this must be unique in your instance), add an optional description, and set the default incident type (if applicable). Any built-in Initiate Incident steps in the workflow will automatically be set to the selected incident type.
- You can edit these later, if needed.
- You can edit these later, if needed.
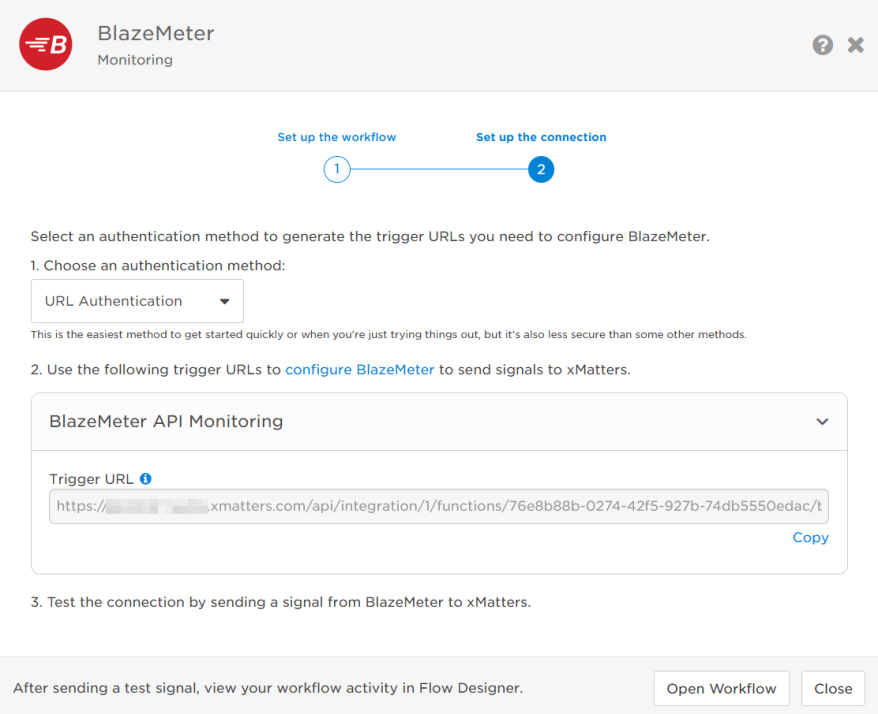
- Click Next to set up the connection.
- Choose the authentication method. A trigger URL is generated based on the selected authentication method.
- Copy the trigger URL — you’ll use this to configure the webhook in BlazeMeter.
- The trigger URL includes the recipients parameter, which specifies who should be notified. By default, this parameter is set to notify you (the logged in user), but you can set it to target any user or group you want.
- The trigger URL includes the recipients parameter, which specifies who should be notified. By default, this parameter is set to notify you (the logged in user), but you can set it to target any user or group you want.
- Send a test signal to the trigger URL to test the connection.
- Click Open Workflow to view and customize the workflow, or Close to return to the Workflows page.
Configure BlazeMeter to send requests to the trigger URL
To have BlazeMeter send alerts to the flow trigger, you need to configure a webhook and set it to use the trigger URL.
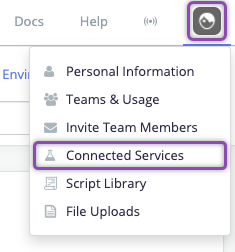
- In BlazeMeter, navigate to API Monitoring, then Connected Services:
- Go to Customized Webhook Notifications and click Connect.
- Add a Description.
- In the URL field, add the trigger URL you copied from Flow Designer.
- If you're using Basic Authentication, click Add Basic Authentication and add your authentication information.
- Add the target names of any recipients you want xMatters to notify when the monitor creates an alert.
- For URL authentication, use an ampersand to attach recipients. For example, if you want to notify Emma Pearson and the on-call members in the group responsible for the Antares service, you'd add &recipients=epearson,antares to the end of the URL.
- For other authentication types, use a question mark to attach recipients. For example, if you want to notify Barry Gull and the on-call members in the group responsible for the Cassiopeia service, you'd add ?recipients=bgull,cassiopeia to the end of the URL.
- You must URL-encode any special characters or spaces in the target names.
- Click Save Changes.
- Navigate to the new webhook and click Test Settings.
- Select Integrations.
You're ready to use the webhook to trigger automated flows, including steps such as sending alerts and initiating incidents, though we always recommend testing before putting things into use.
Set recipients in the trigger URL
The trigger expects the recipients in the trigger URL. When you copy the URL from xMatters, it includes the recipients parameter: recipients=<yourname>. Of course, you don’t want to receive all the alerts.
To change the recipients for alerts from this webhook, swap out your name for the people or groups you want to target.
- For URL authentication, use an ampersand to attach recipients. For example, if you want to notify Emma Pearson and the on-call members in the group responsible for the Antares service, you'd add &recipients=epearson,antares to the URL.
- For other authentication types, use a question mark to attach recipients. For example, if you want to notify Barry Gull and the on-call members in the group responsible for the Cassiopeia service, you'd add ?recipients=bgull,cassiopeia to the URL.
Remember to URL-encode any special characters, including spaces, in your group names.
We recommend using groups so you can take advantage of the xMatters group features — rotations, escalations, and absences — to reach the right on-call people to jump on an issue.
How to use the workflow
When a condition you've set fires, it sends a signal to xMatters, which creates an alert and notifies the individual or the on-call members of the people or groups you set as recipients in the webhook URL. When the trigger receives a signal saying the issue is resolved, it automatically terminates related alerts in xMatters.
The person responding to the notification has the following response options:
- Acknowledge: Acknowledges the notifications and stops escalations.
- Escalate: Immediately escalates the alert to the next on-call resolver in a targeted group.
- Close: Ends the xMatters alert and stops notifying all targeted recipients.
- Initiate Incident: Initiates an incident in xMatters.
Next Steps
Now that you've installed the workflow, you can use it as-is, or customize it to suit your needs better. Here are some examples of things you can add to the workflow to customize it:
- Use Slack, Zoom, and Microsoft Teams steps to add collaboration channels to the flow.
- Change the severity of incidents created when a recipient selects the Initiate Incident response.
- Update the message sent to resolvers to include the information most relevant to your team.
- Use the BlazeMeter API Monitoring trigger to build your own custom flows.
Previous versions
While the previous version of this integration is no longer available, the instructions for it are included below for anyone who has it installed in their system already.
Runscope
- Introduction
- Configure xMatters
- Configure Runscope
- Test the integration
- Troubleshooting
- Download resources
Introduction
This article provides installation, configuration, and implementation details when integrating xMatters with Runscope.
How it works
Runscope provides cloud-based and hybrid on-premises solutions that allow businesses to monitor, test, and debug web service APIs. Runscope API tests can be used to test against services available in the public cloud, running on a private network behind a firewall, or running on a local development environment.
Coupled with the power of xMatters alerts, the integration:
- Quickly identifies and notifies the on-call resource on a variety of devices.
- Allows for voice, SMS, and push messages to users.
- Allows users to reply with "Rerun" from their device to run the test again.
Signal injection is initiated when a Runscope runs a test. Runscope builds a payload and sends it to xMatters.
When the test passes, nothing else happens. When the test fails, the integration notifies a recipient (an individual or a group) defined in xMatters. Recipients can respond with "Acknowledge", which causes xMatters to stop notifying other users but keeps the alert alive, or "Rerun", which causes the integration to trigger another test run in Runscope, ending the current alert in xMatters.
If a Runscope test fails while there is a related active alert in xMatters, a new alert is not created. If a Runscope test has run and passed, the integration terminates all active alerts related to the test.
To begin, download the workflow; it contains everything you need for this integration. Don't unzip it – you'll import the zip file into xMatters.
Configure xMatters
The first step in setting up your integration is to configure xMatters.
This integration requires a user who can authenticate REST web service calls when working with alerts – these permissions are provided by the "REST Web Service User" role in xMatters. See Create an integration user for more information.
Make sure you keep the user ID and password of this user handy. You'll need them when configuring other parts of this integration.
The integration notifies the groups or users defined as recipients in the Test Results form. If the recipients are not defined, the xMatters alert is not created.
- To create a new group, see Create a new group.
- To create a new user, see Add a new user.
Import the workflow
The next step is to import the Runscope workflow.
- In the target xMatters system, go to the Workflows tab and click Import.
- Browse to the .zip file you downloaded, or drag it onto the Import Workflow dialog box.
- Click Import Workflow.
- Click the gear icon beside the workflow, and select Editor Permissions.
- Add the integration user, and then click Save.
- Click the workflow name to open the Forms tab.
- For the Test Result form, click Web Service and select Sender Permissions.
- Enter the integration user, and then click Save Changes.
- Click Edit beside the form and select Layout.
- In the Recipients area, specify a recipient (a user or a group) for alerts, and then click Save Changes.
Configure Runscope endpoint
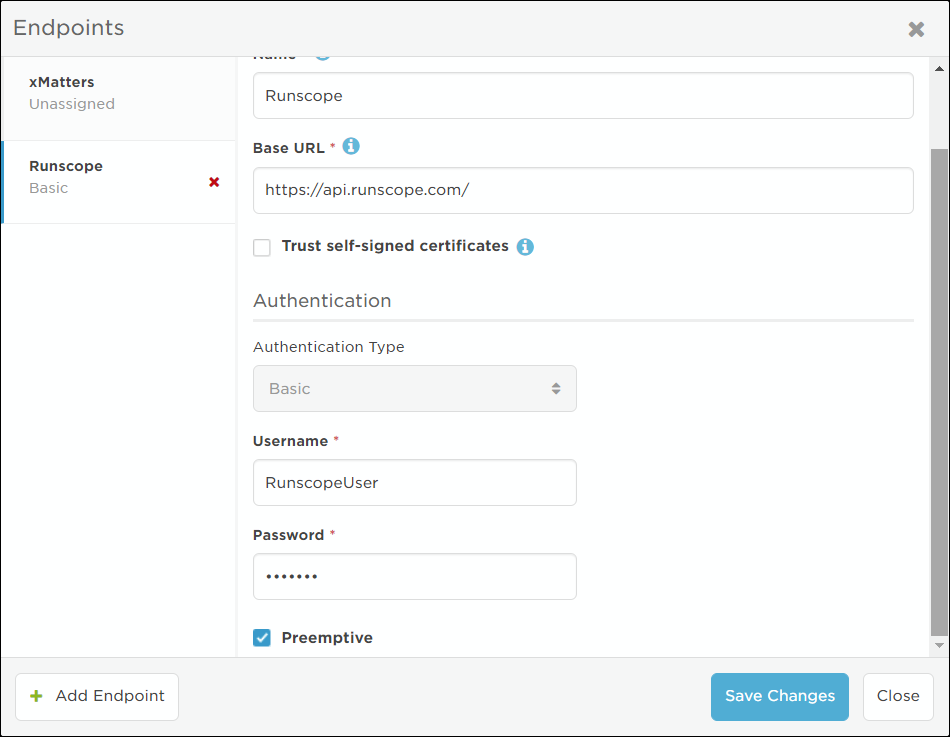
After you have imported the workflow, you need to set the authentication for the Runscope endpoint.
- Click the Integration Builder tab, and then click the Endpoints button to display the endpoints for the integration.
- Enter a valid username and password for Runscope.
- Select the Pre-emptive checkbox and then click Save Changes.
Configure inbound integrations
You need to retrieve the URLs of the inbound integrations to configure Runscope.
- Go to the Integration Builder tab and expand the list of inbound integrations.
- Click the name of the Test Results integration to view its details.
- Scroll down to How to trigger the integration at the bottom of the page, set the authentication method to URL Authentication, and then select the integration user as the authenticating user. The URL trigger is updated to reflect the new user.
- To be able to select the integration user, you need to be a supervisor of that user and the user needs to be assigned to the REST Web Services role.
- Click Copy beside the Trigger field – you'll need this to configure Runscope:

Configure Runscope
Now that you've configured xMatters, you can configure Runscope to integrate with xMatters. The following sections require you to log into Runscope and access the Tests settings page.
Runscope uses webhooks to initiate the web service calls when Runscope tests run.
Purpose: Injects a signal into xMatters when a test fails.
- To configure a Test Results webhook, click the Tests tab.
- Hover over the test and click the Edit button that appears.
- In the Editor, expand Test Settings, and then click Webhooks.
- Paste the URL from the "Test Results" inbound integration into the URL field, and then click Save:

Test the integration
After you set up the webhook, the best way to check that the integration is working is to configure the Runscope test so it will fail. Before you do, make sure you have access to the device configured for a targeted recipient then run the test.
You should receive a notification from xMatters that the test failed. You can select Acknowledge, which keeps the xMatters alert active but stops notifying other recipients, or Rerun, which terminates the alert and reruns the test in Runscope. If you select Rerun, you should see a new run of the test in Runscope. If that test also fails, another alert is initiated.
Troubleshooting
There are several places you can inspect when troubleshooting why a signal doesn't seem to make it over to xMatters.
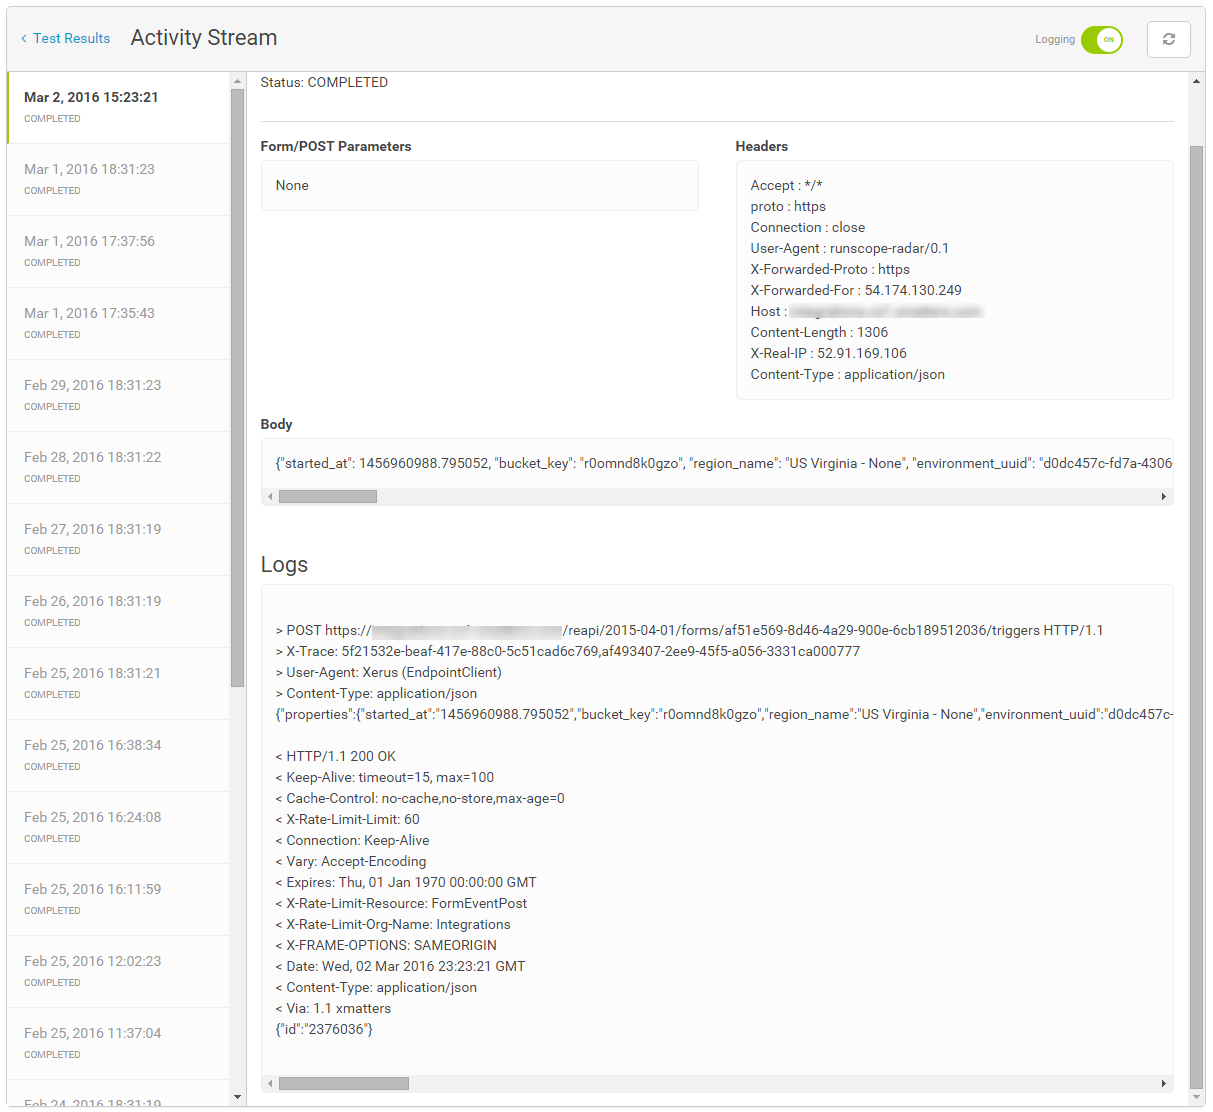
The first place to look is the Integration Builder Activity Stream. While on the Integration Builder tab, expand the Inbound integrations section, click the gear icon beside the inbound integration, and then click Activity Stream.
The Activity Stream contains the incoming (and for outbound integrations, the outgoing) request, any logging statements as well as the final alert creation messages.
For the two-way integration from xMatters to Runscope, the primary source of logging is the Integration Builder Activity Stream for that particular integration.
For example, if you are troubleshooting why a test was not run again after a user replied with "Rerun", check the Activity Steam for the Test Result Callbacks outbound integration.