
Graylog
Graylog is a log management solution that captures, stores, and analyzes your organization's data. With Graylog's analytics capabilities and xMatters's monitoring and alerting tools, you can give on-call resolvers the information they need to start working on any security, compliance, or operational issues.
This workflow lets you send actionable alerts to on-call resources when xMatters gets a signal from Graylog. Responders can initiate an incident with the press of a button, or you can build on the flow to perform automated resolution tasks.
How it works
When an alert is generated in Graylog, it sends a JSON-formatted webhook to xMatters, based on the user-defined alert rules. A Graylog trigger in xMatters parses the webhook and initiates a flow. The webhook includes essential alert data you can use to enrich notifications to users or when building automated tasks.
Install the workflow
The following instructions describe how to install the workflow through the xMatters one-click installation process.
- Go to the Workflow Templates page and click the Graylog tile.
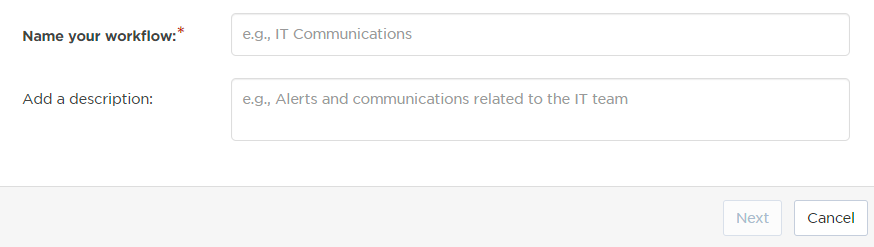
- On the Set up the Workflow tab, give the workflow a name that identifies its purpose (this must be unique in your instance), add an optional description, and set the default incident type (if applicable). Any built-in Initiate Incident steps in the workflow will automatically be set to the selected incident type.
- You can edit these later, if needed.
- You can edit these later, if needed.
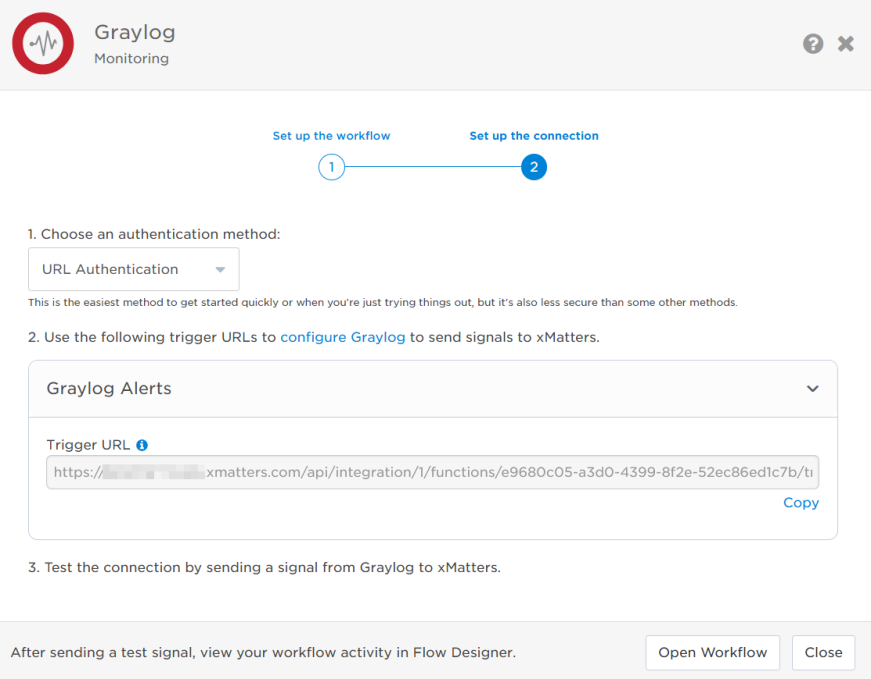
- Click Next to set up the connection.
- Copy the trigger URL — you’ll use this to configure the webhook in Graylog.
- The trigger URL includes the recipients parameter, which specifies who should be notified. By default, this parameter is set to notify you (the logged in user), but you can set it to target any user or group you want.
- The trigger URL includes the recipients parameter, which specifies who should be notified. By default, this parameter is set to notify you (the logged in user), but you can set it to target any user or group you want.
- Send a test signal to the trigger URL to test the connection.
- Click Open Workflow to view and customize the workflow, or Close to return to the Workflows page.
Configure Graylog to send requests to the trigger URL
To have Graylog send alerts to the flow trigger, you need to configure a webhook and set it to use the trigger URL.
You'll need to create a Notification in Graylog and then add it to a new or existing Event Definition.
- In Graylog, navigate to the Alerts tab and click Notifications.
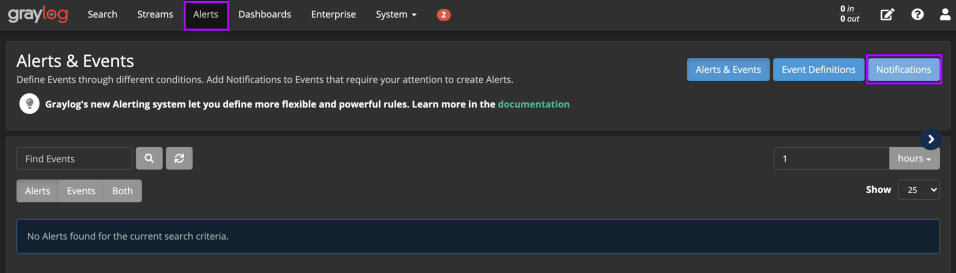
- On the Notifications screen, click Create Notification.
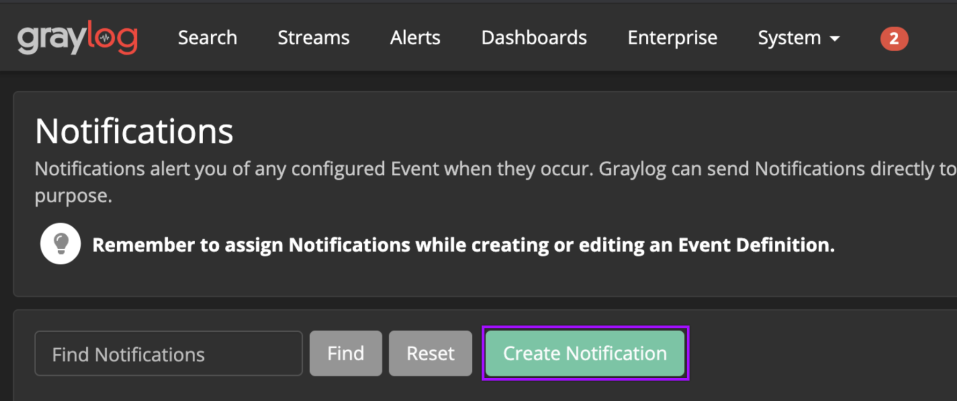
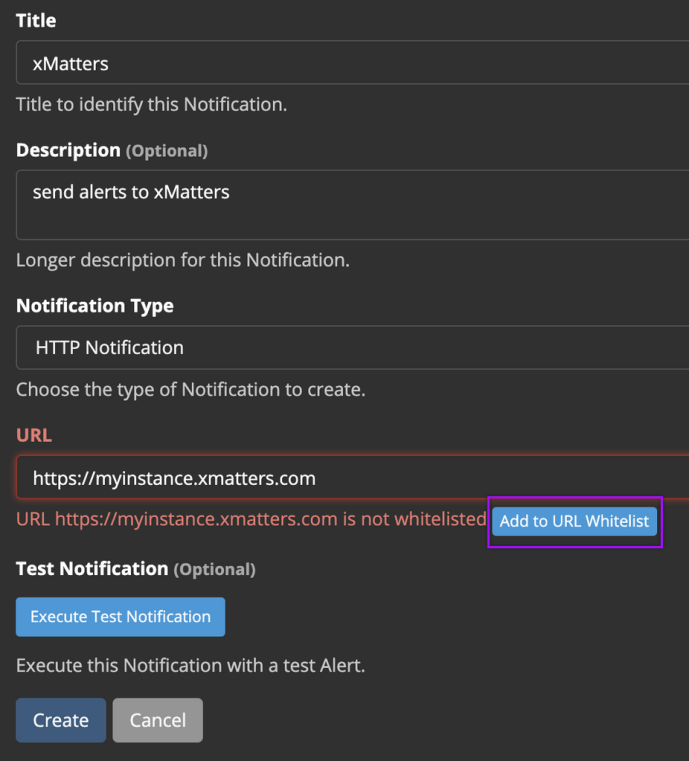
- Fill in the following fields for the notification:
- Title: xMatters
- Notification Type: HTTP Notification
- URL: Paste the URL you copied from the Flow Designer trigger. Add the target names of any recipients you want to notify when the alert fires.
- For URL authentication, use an ampersand to attach recipients. For example, if you want to notify Emma Pearson and the on-call members in the group responsible for the Antares service, you'd add &recipients=epearson,antares to the end of the URL.
- You must URL-encode any special characters or spaces in the target names.
- After you've filled in the URL field, click Add to URL Whitelist.
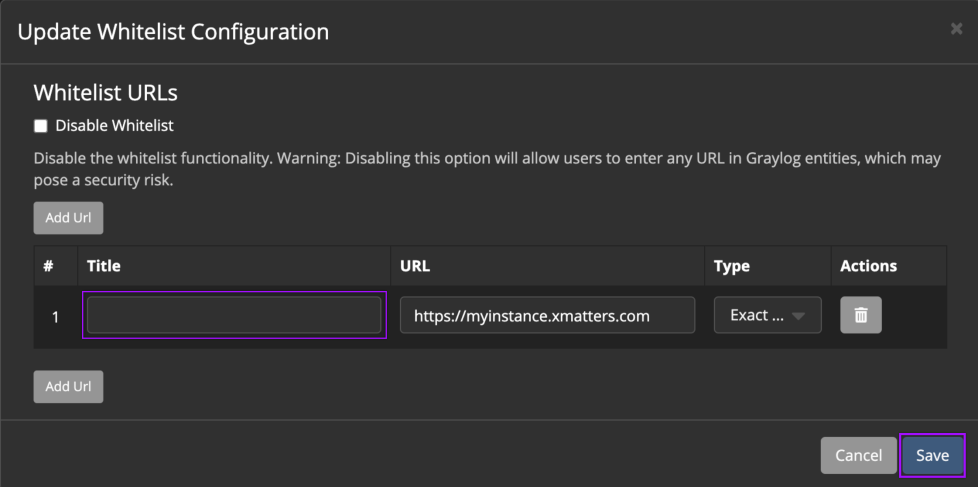
- In the Update Whitelist Configuration dialog box, give your URL a title and click Save.
- To test whether you've configured the webhook correctly, click Execute Test Notification.
- In xMatters, you can check for the incoming signal to your trigger from the Signals Report.
- Click Create.
Now that the notification is created, add it to a new or existing Event Definition.
- Click Event Definitions.
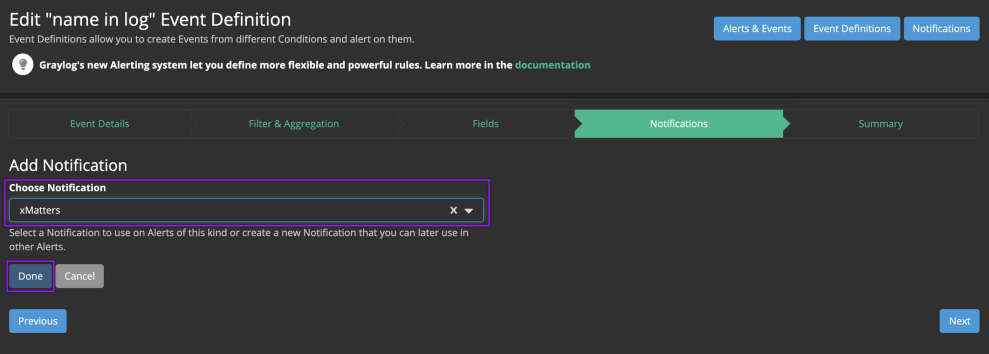
- Click the Notifications section of the Event Definition and then click Add Notification.
- Use the Choose Notifications drop-down to select the notification you created for xMatters, then click Done.
You're ready to use the webhook to trigger automated flows, including steps such as sending alerts and initiating incidents, though we always recommend testing before putting things into use.
Set recipients in the trigger URL
The trigger expects the recipients in the trigger URL. When you copy the URL from xMatters, it includes the recipients parameter: &recipients=<yourname>. Of course, you don’t want to receive all the alerts.
To change the recipients for alerts from this webhook, swap out your name for the people or groups you want to target. For example, to target the Antares service team and the Database Admins add &recipients=antaresteam,dbadmins to the trigger URL. Remember to URL-encode any special characters in your group names.
We recommend using groups so you can take advantage of the xMatters group features — rotations, escalations, and absences — to reach the right on-call people to jump on an issue.
How to use the workflow
When an alert rule you’ve set to use the action group fires, it sends a signal to xMatters, which creates an alert and notifies the individual or the on-call members of the groups you set as recipients in the webhook URL.
When a condition you've set fires, it sends a signal to xMatters, which creates an alert and notifies the individual or the on-call members of the people or groups you set as recipients in the webhook URL. When the trigger receives a signal saying the issue is resolved, it automatically terminates related alerts in xMatters.
The person responding to the notification has the following response options:
- Acknowledge: Acknowledges the notifications and stops escalations.
- Escalate: Immediately escalates the alert to the next on-call resolver in a targeted group.
- Close: Ends the xMatters alert and stops notifying all targeted recipients.
- Initiate Incident: Initiates an incident in xMatters.
Next Steps
Now that you've installed the workflow, you can use it as-is, or customize it to suit your needs better. Here are some examples of things you can add to the workflow to customize it:
- Use Slack, Zoom, and Microsoft Teams steps to add collaboration channels to the flow.
- Change the severity of incidents created when a recipient selects the Initiate Incident response.
- Update the message sent to resolvers to include the information most relevant to your team.
- Use the Graylog Alerts trigger to build your own custom flows.