Icinga Notifications
xMatters includes two built-in triggers to initiate flows when xMatters receives signals from Icinga: one for Icinga Host Notifications and one for Icinga Service Notifications. You can include both trigger types on the same canvas if required, but signals from Icinga host notifications will not trigger Icinga service notification flows, and vice versa.
Add the trigger to the canvas
- Go to the Triggers tab in the palette, expand the App Triggers section, and then drag either the Icinga Host Notifications or Icinga Service Notifications trigger onto the canvas.
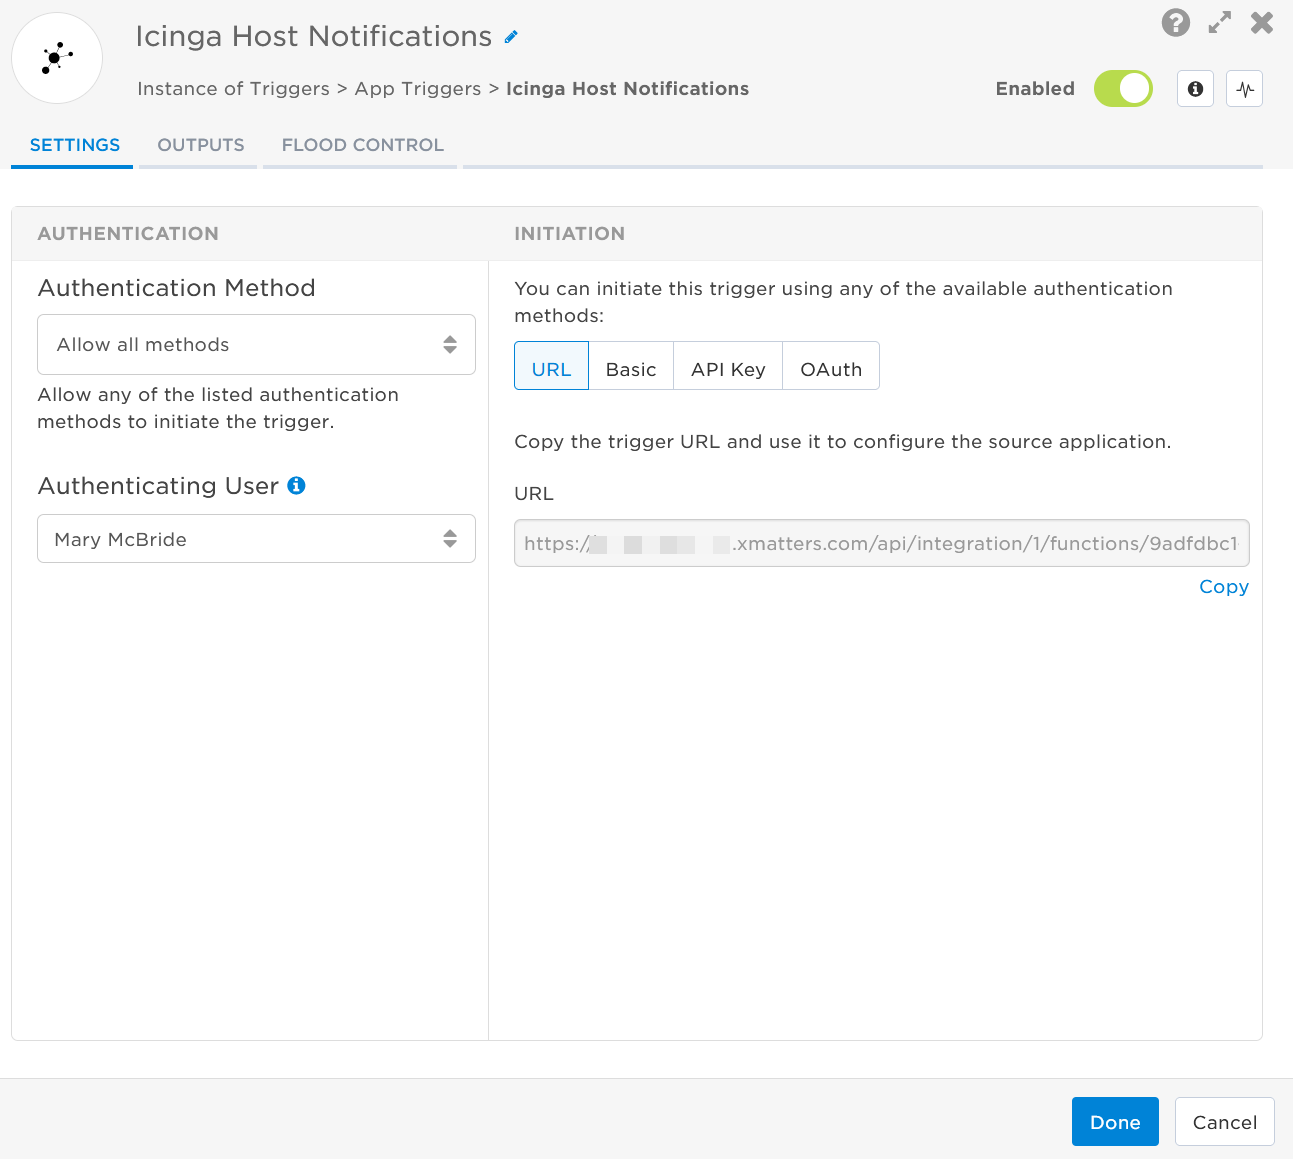
- Double-click the trigger (or click the pencil icon).
- Set the authenticating user, and then copy the URL — you'll use this to set up the webhook in Icinga. Alternatively, you can create an integration user to use as the authenticating user.
- Click the Flood Control tab to edit the trigger's default flood control settings. For more information about these settings, see Trigger Flood Control.
- Click Done.
- On the flow canvas, connect the steps you want to run when xMatters receives a request to that URL.
You're now ready to configure Icinga to target the trigger.
Configure Icinga to send requests to the trigger URL
The following instructions describe how to configure Icinga to send signals to your triggers.
- Download the xm-host-notification.sh, xm-service-notification.sh, and xmatters-plugin.conf files to your computer.
- Go to the location of your Icinga scripts folder. For example: /etc/icinga/scripts.
- Add both shell files to the scripts folder.
- If you're using Basic Authentication, open each shell file and add -u <username>:<password> to the cURL command and insert your username and password. For example:
#!/bin/shecho

"Sending xMatters host notification."
curl -i \
-u <mmcbride>:<SecurePwd!!>
-H "Content-Type: application/json" \
- If you're using Basic Authentication, open each shell file and add -u <username>:<password> to the cURL command and insert your username and password. For example:
- Save your changes to the shell files, if required.
- Open the xmatters-plugin.config file in a text editor.
- On the XM_INTEGRATION_URL line replace <YOUR_HOST_TRIGGER_URL> and <YOUR_SERVICE_TRIGGER_URL> with the URL you copied from the Icinga trigger in Flow Designer.
object NotificationCommand "xm-host-notification" {
command = [ SysconfDir + "/icinga2/scripts/xm-host-notification.sh" ]

env = {
ADDRESS = "$address$"
HOSTDISPLAYNAME = "$host.display_name$"
HOSTNAME = "$host.name$"
HOSTOUTPUT = "$host.output$"
HOSTSTATE = "$host.state$"
HOSTSTATETYPE = "$host.state_type$"
LASTHOSTSTATECHANGE = "$host.last_state_change$"
NOTIFICATIONAUTHOR = "$notification.author$"
NOTIFICATIONCOMMENT = "$notification.comment$"
NOTIFICATIONTYPE = "$notification.type$"
SHORTDATETIME = "$icinga.short_date_time$"
XM_INTEGRATION_URL = <YOUR_HOST_TRIGGER_URL>
}
}

object NotificationCommand "xm-service-notification" {
command = [ SysconfDir + "/icinga2/scripts/xm-service-notification.sh" ]

env = {
ADDRESS = "$address$"
HOSTNAME = "$host.name$"
LASTSERVICESTATECHANGE = "$service.last_state_change$"
NOTIFICATIONAUTHOR = "$notification.author$"
NOTIFICATIONCOMMENT = "$notification.comment$"
NOTIFICATIONTYPE = "$notification.type$"
SERVICEDISPLAYNAME = "$service.display_name$"
SERVICENAME = "$service.name$"
SERVICEOUTPUT = "$service.output$"
SERVICESTATE = "$service.state$"
SERVICESTATETYPE = "$service.state_type$"
SHORTDATETIME = "$icinga.short_date_time$"
XM_INTEGRATION_URL = <YOUR_SERVICE_TRIGGER_URL>
}
} - Add the target names of any recipients you want to notify when the notification fires.
- For URL authentication, use an ampersand to attach recipients. For example, if you want to notify Emma Pearson and the on-call members in the group responsible for the Antares service, you'd add &recipients=epearson,antares to the end of the URL.
- For other authentication types, use a question mark to attach recipients. For example, if you want to notify Barry Gull and the on-call members in the group responsible for the Cassiopeia service, you'd add ?recipients=bgull,cassiopeia to the end of the URL.
- You must URL-encode any special characters or spaces in the target names.
- Save the file.
- Move the xmatters-plugin.config file to your Icinga config file folder. For example: /etc/icinga/conf.d.
- Optional: If you have any other Icinga notification attributes, you can add them to the env part of the xmatters-plugin.conf file. You must then update the cURL commands in the shell scripts for each host/service to match.
Now add the notification to any Icinga host you want to monitor.
- Go to the location of your Icinga hosts. For example: /etc/icinga2/conf.d/hosts.conf.
- Add the following code to each host.
Copy
vars.notification["xm"] = {
groups = [ "icingaadmins" ]
} - Restart your Icinga service so all changes are captured and applied.
You're ready to use the webhook to trigger automated flows, including steps such as sending alerts and initiating incidents, though we always recommend testing before putting things into use.
Outputs
The Icinga Host Notifications trigger has the following outputs you can use as inputs to steps further along the flow.
|
Label |
Description |
|---|---|
|
Recipients |
List of targeted recipients. Recipients are set by adding a recipients query parameter to the trigger URL when you configure the webhook in Icinga. |
| Signal Mode | Determines the path the flow will take, based on the value of Host State parameter. |
| Signal ID | Key or identifier used to terminate or correlate signals. |
| Address | Network address of the Icinga host. |
| Host Display Name | Display name for the host. |
| Host Name | Short name for the host. |
| Host Output | First line of text output from the last host check. |
| Host State |
Current state of the host. |
| Host State Type | Current state type of the host. |
| Last Host State Change | Time the host last changed state. |
| Notification Author | Author of the notification comment, if there is one. |
| Notification Comment | Comment on the notification provided by the author. |
| Notification Type | Type of the notification in Icinga. |
| Short Date Time |
Time the notification was sent from Icinga. |
| Raw Request | JSON representation of the request. You can parse the raw request if you need additional details beyond the standard outputs. |
The Icinga Service Notifications trigger has the following outputs you can use as inputs to steps further along the flow.
|
Label |
Description |
|---|---|
|
Recipients |
List of targeted recipients. Recipients are set by adding a recipients query parameter to the trigger URL when you configure the webhook in Icinga. |
| Signal Mode | Determines the path the flow will take, based on the value of Service State parameter. |
| Signal ID | Key or identifier used to terminate or correlate signals. |
| Address | Network address of the host. |
| Host Name | Short name for the host. |
| Last Service State Change | Time the service last changed state. |
| Notification Author | Author of the notification comment, if there is one. |
| Notification Comment | Comment on the notification provided by the authors. |
| Notification Type | Type of the notification in Icinga. |
| Service Display Name |
Display name of the service. |
| Service Name | Name of the service in Icinga. |
| Service Output | First line of the text output from the last service check. |
| Service State | Current state of the service in Icinga. |
| Service State Type | Current state type of the service. |
| Short Date Time | Time the notification was sent from Icinga. |
| Raw Request | JSON representation of the request. You can parse the raw request if you need additional details beyond the standard outputs. |