Share steps and libraries
Some steps might be designed for a single, specific flow while others are useful in multiple flows across your organization. By sharing steps you can create a more streamlined process for building flows and provide consistency across flows.
You can only share items you own. When you share a step or library, the people you share it with can use it in their flows, or edit its settings or script, depending on the permissions you give them.
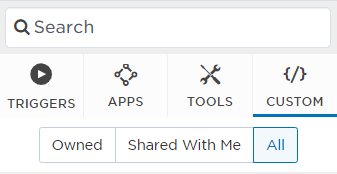
Sharing filters for HTTP triggers, custom steps, and callable flow steps
HTTP Triggers, custom steps, and callable flow steps have filters that you can use to quickly locate steps based on your usage permissions:
- Owned: The HTTP triggers, custom steps, or callable flow steps you own.
- Shared With Me: Any HTTP triggers, custom steps, or callable flow steps other users own and have allowed you to use or edit.
- All: All HTTP triggers, custom steps, or callable flow steps that are available to you.
Usage permissions
As a step or library owner you can specify who the item is shared with and what permission levels they have.
- Use: Users can add the step to their flows or use the library in their step scripts.
- Edit: Users can add the step to their flows, modify step settings in the palette, and edit library scripts.
When an item is shared, Flow Designer applies the greater access permission level.
For example, say you share the step with Joe Smith, and grant him Use permission. You also share the step with the IT Administrators group, and grant that group Edit permissions. Joe Smith is a member of the IT Administrators group and the group's higher permission setting overrides Joe's individual setting, so he can edit the step's properties in the palette. The same works in reverse: if Joe Smith has Edit permissions, but his group has Use permission, Joe can edit the step but others in his group can only use it.
- Click the gear icon beside the step or library you want to share and then select Usage Permissions.
- For libraries, you can only access usage permissions using the gear icon in the Libraries window: click Components > Libraries.
- In the Search bar, type the name of the role, group, or user, (or type two spaces to view a list of all available users and groups) then select the name from the list. In the search results and permission window, each user type is accompanied by an icon:
- Role:

- Group:

- User:

- All Users:

- Role:
- Use the drop-down menu to set the permission level for each person.
- Permission types are grouped together, so you'll see all roles, groups, and users with Edit permissions ahead of all roles, groups, and users with Use permissions.
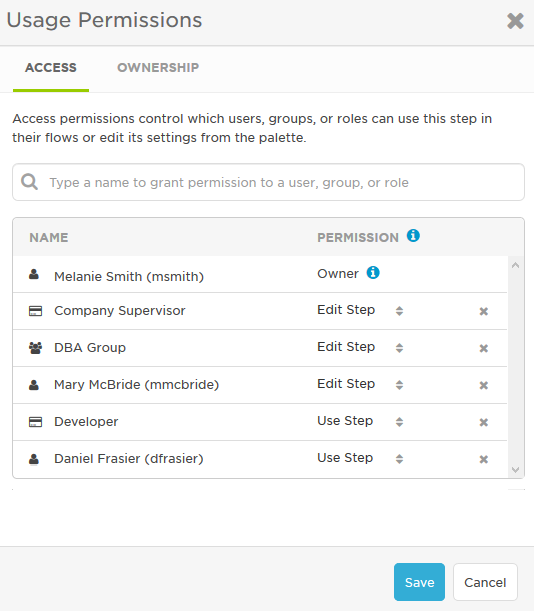
- You can add as many roles, groups, and users as you need. Once selected, names in the search list show a check mark beside them so you don't add the same name twice.
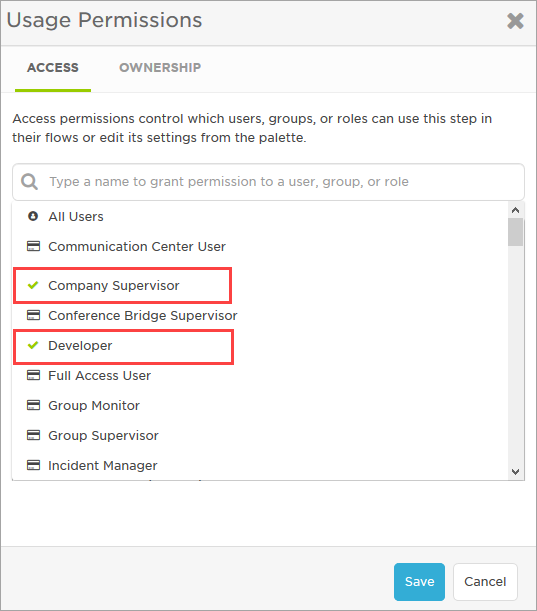
- Permission types are grouped together, so you'll see all roles, groups, and users with Edit permissions ahead of all roles, groups, and users with Use permissions.
- Click Save.
Revoking permissions prevents people from using an item in their flow or editing it further. It doesn't remove the item from places where it's already used — those flows or steps will continue work — but users who no longer have permission won't be able to change the settings in the step.
- Click the gear icon beside the step or library you want to share and then select Usage Permissions.
- For libraries, you can only access usage permissions using the gear icon in the Libraries window: click Components > Libraries.
- Click the x beside whoever you want to remove, and then click Save.
As an owner or the supervisor of an owner, you can change who owns a step or library. Once ownership changes, the former step owner no longer sees the step in the list of Owned steps, and individual access permissions are removed.
Change ownership
- Click the gear icon beside the step or library you want to reassign.
- For libraries, you can only change ownership using the gear icon in the Libraries window: click Components > Libraries.
- Select Usage Permissions and click the Ownership tab.
- In the search bar type, the name of the new owner, or enter two spaces to see a list of all users you have permission to assign the item to.
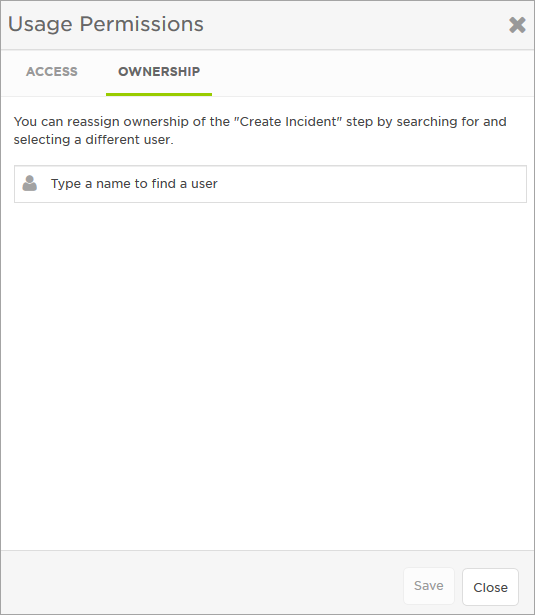
- Select the user from the list and click Save.
- On the confirmation window, click Continue to confirm the ownership change.