Splunk IT Service Intelligence
Splunk delivers operational intelligence software that monitors, reports, and analyzes real-time machine data. The integration allows users to interact with the built-in Splunk ITSI workflow or other systems in their toolchains.
When episodes meet criteria you define, this integration relays critical Splunk data to the correct people and systems to help coordinate and resolve incidents faster. When an episode triggers the integration, xMatters identifies the appropriate on-call personnel and delivers notifications about the issue. Users can choose response options that update the episode's status in Splunk.
Do more with this integration
Incorporate this integration into your orchestrated incident resolution workflows with Flow Designer. After you create a configuration, the Flows tab appears. From there, you can build your flows — add new response options, connect to other apps, or even create new xMatters alerts based on activities in the flow — enriching the information injected by this integration along the way.
Flow Designer also includes a built-in Splunk trigger so you can automatically initiate flows when Splunk sends an alert to xMatters.
This integration is suitable only for Splunk servers or instances that have the Splunk IT Service Intelligence module. If you do not have this module in your Splunk instance, this integration won't work properly and will generate potentially confusing error messages. To integrate xMatters and a Splunk instance without the ITSI module, use the Splunk integration instead.
Get started with Splunk ITSI
The xMatters Splunkbase app is currently undergoing a certification process with Splunk. Some features may not be available on all versions of Splunk or the xMatters app, and some aspects of the integration may change while certification is ongoing. Please bear with us while we get this very important step all sorted out.
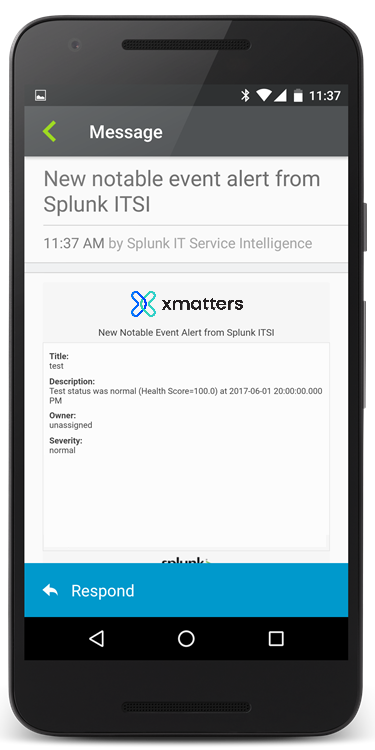
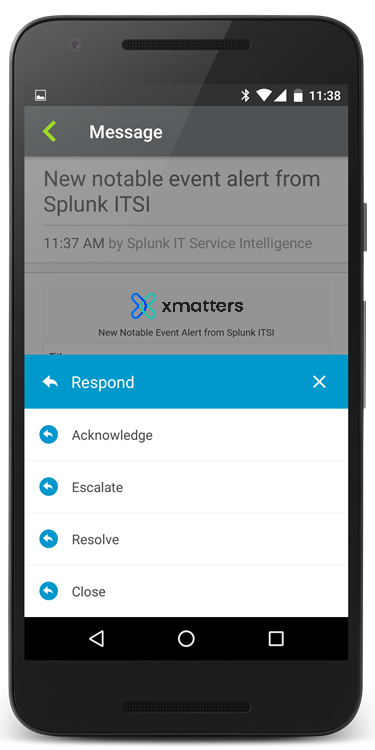
To install this integration in xMatters, simply go to Workflow Templates on the Workflows tab and start typing the name of the integration you're looking for to filter the list. Once you find it, click its tile then click Next to get to the configuration screen.
How to set up a Splunk ITSI configuration
After you give your configuration a name and description, type a name to use when sending alerts (so you can easily tell which configuration or integration the alerts are from).
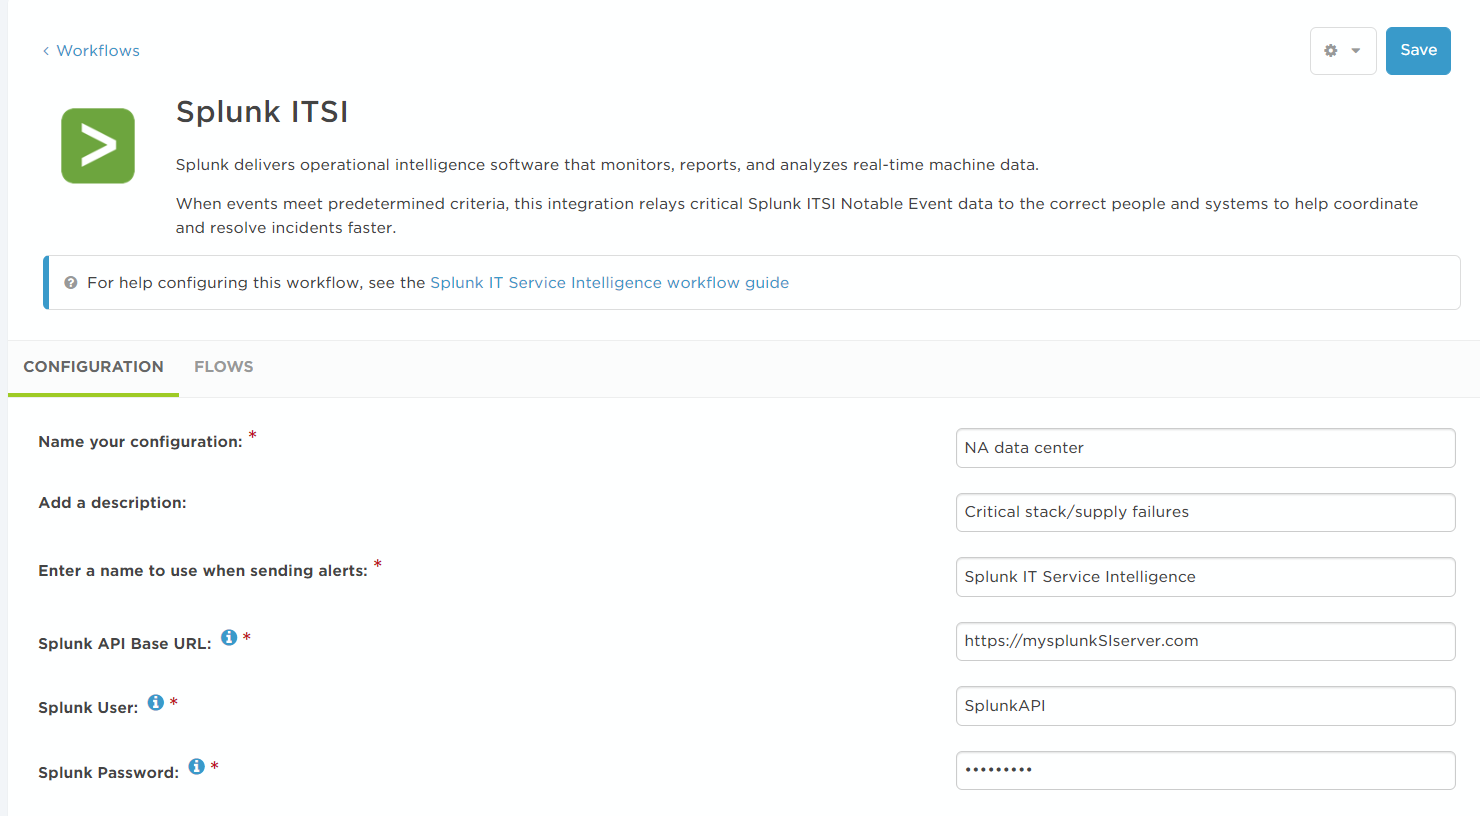
This integration also requires some extra configuration information:
- Splunk API Base URL: An externally-accessible URL that xMatters can use to post back to your Splunk system via the Splunk Enterprise API.
- Splunk User: The user name of a Splunk user that can grant xMatters access to the Splunk API.
- Splunk Password: The Splunk user's password.
Once you save the configuration, xMatters displays the settings you need to configure Splunk ITSI:

You can now install the "xMatters Actionable Alerts for Splunk ITSI" app from Splunkbase into your Splunk instance and, during installation, paste the provided URL into the Inbound Integration URL field. After you restart your Splunk instance, you can start sending episode information to xMatters.
Note: To properly install and configure Splunk for this integration, you must have the "admin" role (or have a role with "itoa_admin" permissions and "edit_user" capability).
You can download the xMatters app via the link on the configuration page and then install it into your configuration, or you can use the following instructions to install the app from within Splunk.
If your Splunk is configured in a clustered environment, make sure you deploy the xMatters app at the deployer level, and not in the Search Head Cluster. See the Splunk documentation for more information on using the deployer to distribute apps.
- Log in to your target Splunk instance and click Apps, and then click Browse more apps.
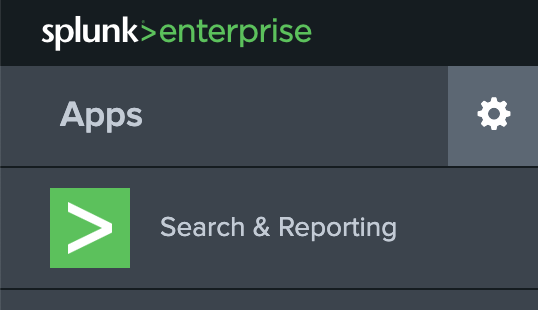
- Search for "xMatters", and then select and install the xMatters Actionable Alerts for Splunk ITSI app.
- The xMatters Actionable Alerts for Splunk app is used with the xMatters for Splunk integration.
- Once the app is installed, click the gear icon next to Apps to open the list of installed apps. Next to the xMatters Actionable Alerts for Splunk ITSI app, click Set Up.
- On the set up page, paste the URL from the configuration page in xMatters into the Inbound Integration URL field, and enter the user name and password of the integration user, if you created one for this integratoin.
- If you're installing this integration into an xMatters trial or free instance, you can just use your own xMatters login credentials; there's no need to create a new user.
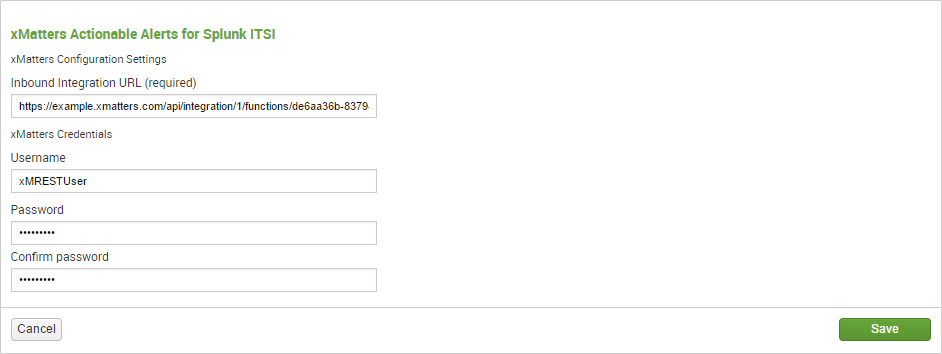
- Click Save.
Your integration is now complete!
Now you can either trigger a notification manually, or configure your episode aggregation policies to send notifications automatically whenever certain criteria are met. Recipients can then choose to accept, close, escalate, or resolve alerts using the response choices in their notifications.
To trigger a notification manually:
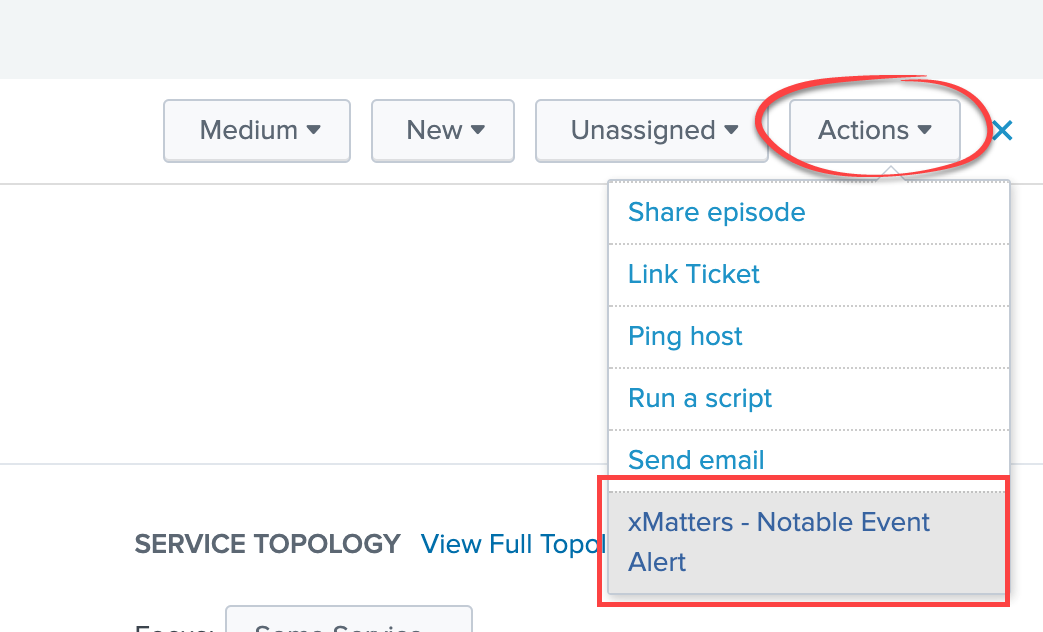
- In Splunk ITSI, navigate to the Episode Review screen, click Actions > xMatters - Notable Event Alert.
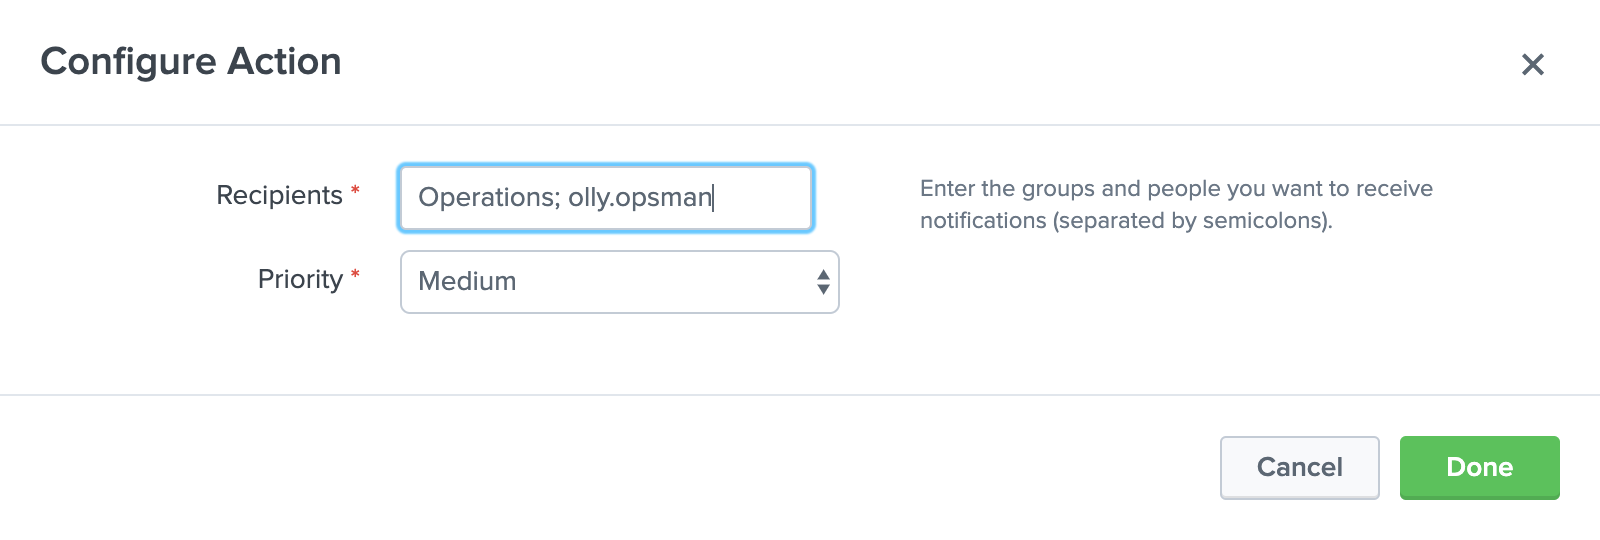
- In the Configure Action dialog box, enter the people or groups you want to notify in xMatters, select a priority for the xMatters alert., and then click Done.
To configure automatic notifications:
- In the Configure menu, select Notable Event Aggregation Policies, and configure the filtering criteria for the policy.
- Configure any action rules that you want to apply, making sure to have at least one xmatters - notable event alert action specified.
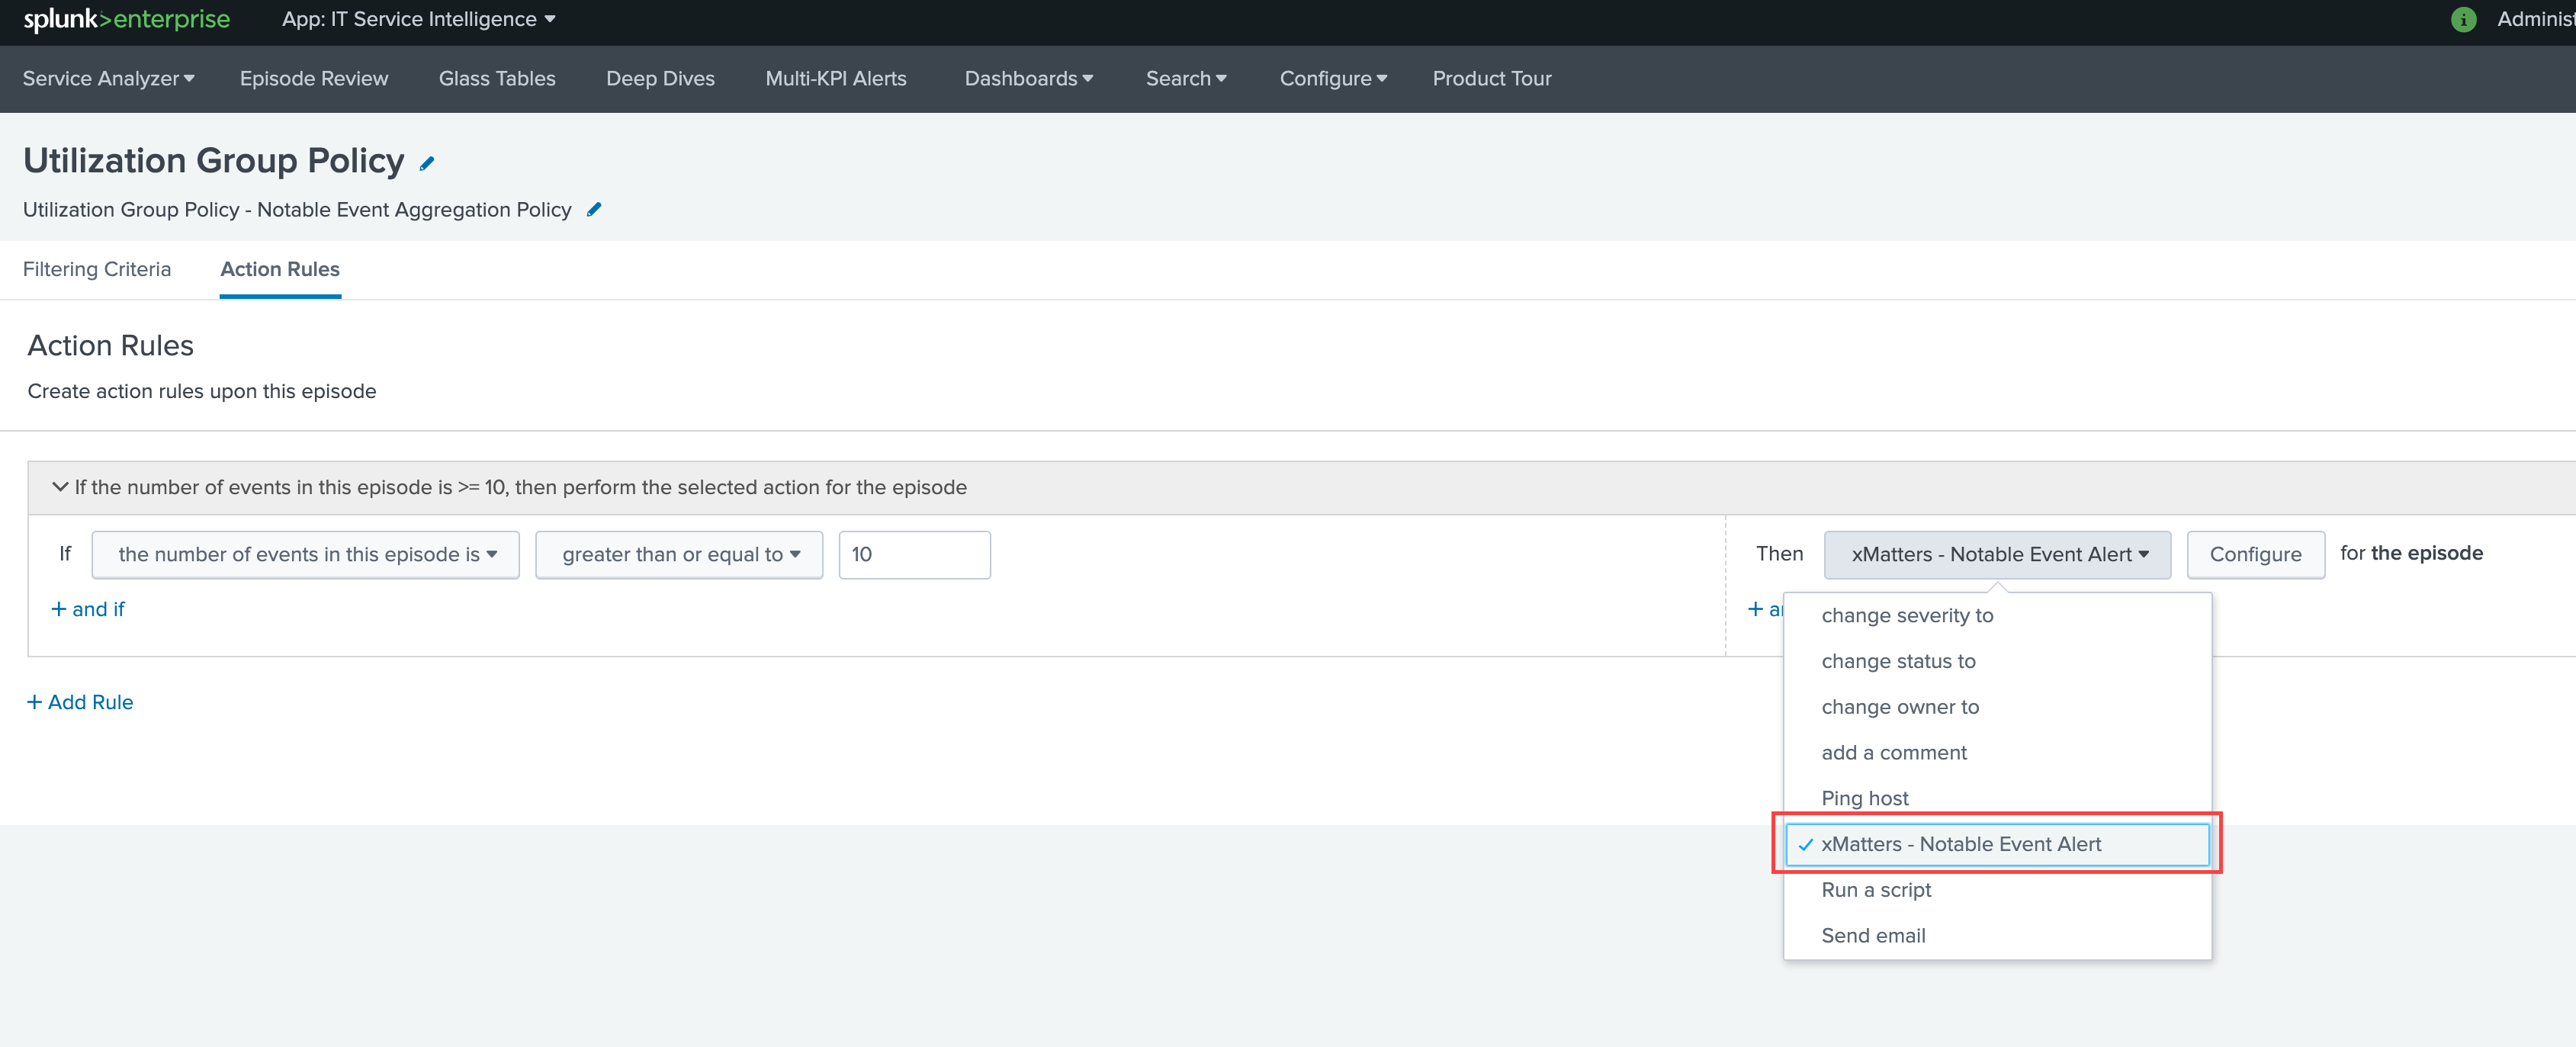
- Configure the alert to target the people and groups you want to notify, and then click Done.
When you trigger a manual event or an automatic event is triggered by the configured criteria, Splunk sends the details to xMatters, which notifies the specified recipients. Check out the samples at the top of this page to see what the notifications would look like in the xMatters mobile app.
Recipients can select from the following response choices:
- Acknowledge: assigns the episode to the responder, updates its status to "In Progress" in Splunk, and stops notifying other recipients about the alert.
- Escalate: stops notifying the responder about the alert, and immediately escalates the notification to the next available group member defined in xMatters.
- Resolve: stops notifying all recipients about the alert, assigns the episode in Splunk to the responder, and marks it as "Resolved".
- Close: stops notifying all recipients and terminates the alert. Also assigns the episode in Splunk to the responder, and updates its status to "Closed".
Note: For issues to be assigned correctly, the responder's user ID in Splunk must match their user ID in xMatters.
You can see full details of all notifications and responses on the Reports tab in the xMatters web user interface.
Troubleshooting
General tips:
- If the integration doesn't generate any notifications, ensure that your Splunk installation has the Splunk IT Service Intelligence module installed. If the module is not installed, the integration will not work.
- Check the Splunk log files for messages similar to "STDERR - ImportError: No module named itsi_path". This message indicates that the xMatters integration is unable to connect to the Splunk ITSI module.
- If your Splunk instance does not have the Splunk ITSI module installed, use the xMatters for Splunk integration instead.
"Cannot find credential information" errors
You may encounter the following error message when configuring a connection from the xMatters app to Splunk:
ERROR: Delete user failed, cannot find the credential information with id : credential::xmatters_password:
This is due to a failed operation after the credential data is delivered. To resolve this issue, follow the direction in the support article here.
Extending your integration
Looking to do more with xMatters and Splunk ITSI? If you want to tailor the settings and notifications for the integration, you can convert it to a custom workflow.
