BMC Remedy ITSM
Flow Designer has BMC Helix ITSM Incidents trigger and built-in steps for both Remedy ITSM and Helix ITSM to help you integrate BMC into your event management and incident response flows.
BMC ITSM Steps
The following steps are available:
- Create Incident: automatically create a new incident in Remedy, populating it with information from the event or any previous steps in the flow.
- Get Incident: get a BMC Helix ITSM incident by its incident number.
- Update Incident: automatically update an incident record in Remedy as information changes.
- Add Note: automatically add a note to an incident, either as an internal comment or as a public comment visible to the customer, adding information from the trigger and previous steps in the flow.
- To add a BMC Remedy step to your flow, go to the Apps panel in the palette, expand the Remedy ITSM steps and drag the step onto the canvas.
- Connect the step to the previous step in the flow. This lets you access the alert properties and outputs of previous steps when configuring the inputs.
- Double-click the step to edit it, and use the Setup tab to configure the inputs. You can use plain text, input variables, or a combination of both. See the sections below for detailed information on the inputs for each step, including which ones are required. Some things to keep in mind:
- Certain values must exactly match an option configured in Remedy, and the Remedy API is case-sensitve: "Phone" and "phone" are different values. Your Remedy configuration might also be customized to allow different options besides those listed below.
- It's recommended that you set up your assignment routing rules in Remedy before using these steps in your flow. This makes sure incidents can be assigned even if you don't specify the assignment information in the step.
- On the Run Location tab, set where you want the step to run: on the cloud or on an agent installed behind your firewall.
- On the Endpoint tab, configure the step to point to a Remedy instance.
- You can select a pre-existing endpoint that uses the Remedy Token authentication type or create a new endpoint. If you create a new endpoint, set the authentication type to Remedy Token, the Base URL to your Remedy instance, and enter the credentials of a user you normally do not assign incidents to.
- To create incidents, the authenticating user configured in the endpoint must be a Support Staff member with 'Incident Master', 'Incident User' or 'Incident Submitter' permissions.
Create Incident
Use the Create Incident step to automatically create a new incident in Remedy. Map outputs from previous steps to the inputs; at runtime, the values in the inputs are used to fill in the incident record.
Inputs
Inputs with an asterisk* are required. The values of certain fields must match the values configured in Remedy, including letter case (for example, Phone versus phone); if the value passed through at runtime does not match, Remedy will return an error.
|
Name API mapping |
Description |
|---|---|
|
Customer Login ID* Login_ID |
The ID of the person or organization reporting the issue (for example, bsmith). |
|
Summary* Description |
A brief description of the incident. This becomes the title of the incident. |
|
Impact* Impact |
Level of impact on the customer. Remedy uses the values of "Impact" and "Urgency" to automatically set the priority of the incident. Valid values are:
Your Remedy instance might be configured to use different values. |
|
Urgency* Urgency |
Urgency to address the issue. Remedy uses the values of "Impact" and "Urgency" to automatically set the priority of the incident. Valid values are:
Your Remedy instance might be configured to use different values. |
|
Incident Type* Incident_Type |
Type of incident to report. Valid values are:
Your Remedy instance might be configured to use different values. |
|
Reported Source* Reported Source |
Source of the incident report. Valid values are:
Your Remedy instance might be configured to use different values. |
|
Status* Status |
Status to assign to the incident. Valid values are:
To set the status to "Pending" or "Resolved", you need to provide a value for "Status Reason" and "Resolution Note". To set the status to "Closed" or "Cancelled", you need to provide a value for "Status Reason". |
|
Status Reason Status_Reason |
The reason for the status. You must provide a reason if setting "Status" to Pending, Resolved, Closed, or Cancelled. Valid values vary depending on the "Status" value; see the BMC Remedy documentation for more information. |
|
Resolution Note Resolution_Note |
Information regarding the incident resolution. This field is required if setting "Status" to Resolved or Closed. |
|
Description Description |
Detailed description of the incident, added to the Notes or Description field of the incident, depending on your system. |
|
Assigned Support Company Assigned Company |
Full name of the company to assign to the incident. See Assigning incidents using step inputs for details on how the assignment parameters work together. |
|
Assigned Support Organization Assigned Support Organization |
Full name of the support organization to assign to the incident. See Assigning incidents using step inputs for details on how the assignment parameters work together. |
|
Assigned Group Assigned Group |
Full name of the group to assign to the incident. See Assigning incidents using step inputs for details on how the assignment parameters work together. |
|
Assignee Assignee |
Full name of the user to assign to the incident (for example, Betty Smith). See Assigning incidents using step inputs for details on how the assignment parameters work together. If you are trying to assign the incident to the user, "Status" must be set to Pending or Resolved. |
Outputs
These outputs are available as inputs to steps further along the flow.
|
Name API mapping |
Description |
|---|---|
|
Incident Number Incident_Number |
Unique ID of the incident in BMC Remedy. |
Update Incident
Use the Update Incident step to automatically update an existing Remedy incident. Map outputs from previous steps to the inputs; at runtime, the values in the inputs are used to fill in the incident record.
Inputs
Inputs with an asterisk* are required. The values of certain fields must match the values configured in Remedy, including letter case (for example, Phone versus phone); if the value passed through at runtime does not match, Remedy will return an error.
|
Name API mapping |
Description |
|---|---|
|
Incident Number* Incident Number |
The number of the incident you want to update with this step. You can use the "Incident Number" output from the Create Incident step. |
|
First Name First Name |
The first name of the customer impacted by the issue. |
|
Last Name Last Name |
Last name of the customer impacted by the issue. |
|
Summary Description |
A brief description of the incident. This updates the title of the incident. |
|
Impact Impact |
Level of impact on the customer. Remedy uses the values of "Impact" and "Urgency" to automatically set the priority of the incident. Valid values are:
Your Remedy instance might be configured to use different values. |
|
Urgency Urgency |
Urgency to address the issue. Remedy uses the values of "Impact" and "Urgency" to automatically set the priority of the incident. Valid values are:
Your Remedy instance might be configured to use different values. |
|
Incident Type Incident_Type |
Type of incident to report. Valid values are:
Your Remedy instance might be configured to use different values. |
|
Reported Source Reported Source |
Source of the incident report. Valid values are:
Your Remedy instance might be configured to use different values. |
|
Status Status |
Status to assign to the incident. Valid values are:
To set the status to "Pending" or "Resolved", you need to provide a value for "Status Reason" and "Resolution Note". To set the status to "Closed" or "Cancelled", you need to provide a value for "Status Reason". |
|
Status Reason Status_Reason |
The reason for the status. You must provide a reason if setting "Status" to Pending, Resolved, Closed, or Cancelled. Valid values vary depending on the "Status" value; see the BMC Remedy documentation for more information. |
|
Resolution Note Resolution_Note |
Information regarding the incident resolution. This field is required if setting "Status" to Resolved or Closed. |
|
Notes/Description Description |
Detailed description of the incident, added to the Notes or Description field of the incident, depending on your system. |
|
Assigned Support Company Assigned Company |
Full name of the company to assign to the incident. See Assigning incidents using step inputs for details on how the assignment parameters work together. |
|
Assigned Support Organization Assigned Support Organization |
Full name of the support organization to assign to the incident. See Assigning incidents using step inputs for details on how the assignment parameters work together. |
|
Assigned Group Assigned Group |
Full name of the group to assign to the incident. See Assigning incidents using step inputs for details on how the assignment parameters work together. |
|
Assigned Group ID Assigned Group ID |
ID of the group to assign to the incident. See Assigning incidents using step inputs for details on how the assignment parameters work together. |
|
Assignee Assignee |
Full name of the user to assign to the incident (for example, Betty Smith). See Assigning incidents using step inputs for details on how the assignment parameters work together. If you are trying to assign the incident to the user, "Status" must be set to Pending or Resolved. |
|
Assignee Login ID Assignee Login ID |
Login ID of the assignee. See Assigning incidents using step inputs for details on how the assignment parameters work together. |
Outputs
This step has no outputs.
Get Incident
Use the Get Incident step to get information on an existing incident in BMC Helix ITSM. The outputs of this step can be used as inputs in steps further down the flow.
Inputs
Inputs with an asterisk* are required. The values of certain fields must match the values configured in Remedy, including letter case (for example, Phone versus phone); if the value passed through at runtime does not match, Remedy will return an error.
|
Name |
Description |
|---|---|
|
Incident Number* |
Unique number of the incident in BMC Helix ITSM. |
Outputs
These outputs are available as inputs to steps further along the flow.
|
Name |
Description |
|---|---|
|
Assigned Group |
Name of the BMC Helix group assigned to the incident. |
| Assigned Group ID | Unique ID of the BMC Helix group assigned to the incident. |
| Assigned Support Company | Support company assigned to the incident. |
| Assigned Support Organization | Support organization assigned to the incident. |
| Assignee | Name of the BMC Helix user assigned to the incident. |
| Assignee Login ID | BMC Helix login ID of the user assigned to the incident. |
| First Name | First name of the customer impacted by the issue. |
| Last Name | Last name of the customer impacted by the issue. |
| Impact | Impact level of the incident. |
| Incident Type | Type of incident in BMC Helix. |
| Last Modified Date | Date and time the incident was last modified. |
| Modified By | Login ID of user that last modified the incident. |
| Notes | Detailed description of the incident. |
| Number | Unique number of the incident in BMC Helix. |
| Priority | Priority level of the BMC Helix incident. |
| Reported Source | Source of the incident in BMC Helix. |
| Resolution Note | Note about the incident resolution. |
| Status | Status of the incident in BMC Helix. |
| Status Reason | Detailed description of the status. |
| Submit Date | Date and time when the incident was submitted. |
| Submitted By | Login ID of user that submitted the incident. |
| Summary | Summary of the incident. |
| Urgency | Urgency level of the incident |
Add Note
Use the Add Note step to automatically add a comment to an existing Remedy incident. Map outputs from previous steps to the inputs; at runtime, the values in the inputs are used to determine the incident to add the note to, and the content of the note.
Inputs
Inputs with an asterisk* are required. The values of certain fields must match the values configured in Remedy, including letter case (for example, Phone versus phone); if the value passed through at runtime does not match, Remedy will return an error.
|
Name API mapping |
Description |
|---|---|
|
Incident Number* Incident Number |
The ID of the incident you want to update with this step. You can use the "Incident Number" output from the Create Incident step. |
|
Note* z1D_WorklogDetails |
The content of the note to add. |
|
Work Info Type z1D_Activity_Type |
The type of note to add (for example, general information). This value is case-sensitive, and the types of notes available will vary depending on your Remedy configuration. If Remedy does not recognized the value submitted, it will default to the first value in the list of activity types configured for your Remedy instance. |
|
View Access z1D_View_Access |
Sets whether the note is internal ("internal") or can be viewed by the customer ("public"). The step configuration defaults to "internal"; however, if you leave the field blank, your Remedy instance uses its default value. |
|
Locked z1D_Secure_Log |
Sets whether the note can be modified after it is added ("yes") or not ("no"). The step configuration defaults to "no"; however, if you leave the field blank, your Remedy instance uses its default value . |
Outputs
This step has no outputs.
Setting status and assigning incidents using step inputs
The Remedy API has specific requirements when setting the status and assigning an incident.
The assignment fields — "Assigned Support Organization", "Assigned Company", "Assigned Group", "Assigned Group", "Assignee", and "Assignee Login ID" — must be set according to these requirements from Remedy:
- If you leave these fields blank, the incident is automatically assigned based on the routing rules you have defined in Remedy. This is why we recommend you set up assignment routing rules when using these steps.
- To assign the incident to a group, you must set values for Assigned Support Company, Assigned Support Organization, and Assigned Group (you can set one or more of these inputs to "null"). Leave "Assignee" blank. For the Update Incident step, you also need to set "Assigned Group ID" to assign the incident to a different group.
- To assign the incident to a specific person, you must set "Assignee" in addition to the fields mentioned above (though you can set those inputs to "null"). For the Update Incident step, you also need to set "Assignee Login ID" to assign the incident to a different user.
BMC Helix ITSM Incident trigger
The BMC Helix ITSM Incidents trigger initiates a flow when it receives a request from a webhook in BMC Helix ITSM.
Add the BMC Helix ITSM Incidents trigger to the canvas
- Go to the Triggers tab in the palette, expand the App Triggers section and drag the trigger onto the canvas.
- Double-click the trigger (or click the pencil icon).
- Set the authenticating user.
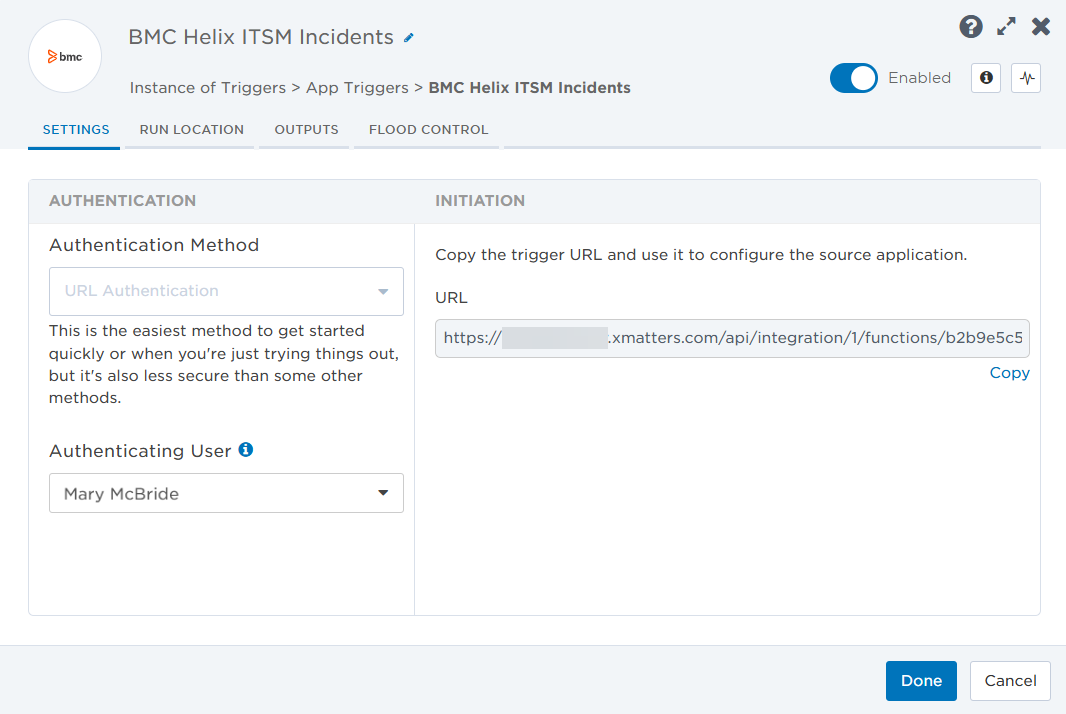
- Copy the trigger URL — you'll use this to set up the webhook in BMC Helix ITSM.
- Click the Flood Control tab to edit the trigger's default flood control settings. For more information about these settings, see Trigger Flood Control.
- Click Done.
- On the flow canvas, connect the steps you want to run when xMatters receives a request to that URL.
You're now ready to configure BMC Helix ITSM to target the trigger.
Configure BMC Helix ITSM to send requests to the trigger URL
To have BMC Helix ITSM send alerts to the flow trigger, you need to configure two webhooks and set them to use the trigger URL. The first webhook creates incidents, the second one updates them with information from BMC Helix ITSM. You can either configure the webhooks using the BMC Helix ITSM user interface, or the BMC Helix ITSM API.
To configure the webhooks using the BMC Helix ITSM user interface:
- Go to the AR System Webhook Registration page in Administrator View. You can use this link to get there: https://<BMC helix base URL>/arsys/forms/onbmc-s/AR+System+Webhook/Default+Administrator+View.
- Click New request to create a new webhook.

- In the Event Information section, fill in the following fields:
- Form Name: Enter HPD:Help Desk.
- Events: Select the Create check box.
- Field ID List:Copy
301398700;301398800;2;3;4;5;6;7;1000000218;1000000151;1000000162;1000000163;1000000161;1000000164;1000000217;1000002700;1000000000;1000002701;1000000981;1000000975;1000000774;1000000881;1000000156;1000000014;1000000251;1000000019;1000000018;1000000215;1000000150;1000000079;1000000099 - Qualification: Enter "Incident Number" != null.
- Custom Json: Leave this field blank.
- Status: Select the Enabled radio button.
- Send Attachment as Reference: Leave this check box disabled.
- Send Unchanged Fields: Click the check box to enable it.

- In the Callback Information section, fill in the following fields:
- Callback URL: Enter the trigger URL you copied earlier from Flow Designer.
- Authentication Type:
- No Authentication: Select if using URL authentication on the Flow Designer trigger.
- Basic Authentication: Select if using Basic Authentication on the Flow Designer trigger and supply the xMatters username and password, or API Key and Secret.

- In the Basic Information section, fill in the following field:
- Description: Enter Send new incidents to xMatters.

- Description: Enter Send new incidents to xMatters.
- Click Save.

Now create a second webhook that sends incident update information to xMatters.
- Click New request to create a new webhook.
- In the Event Information section, fill in the following fields:
- Form Name: Enter HPD:Help Desk.
- Events: Select the Update and Delete check boxes.
- Field ID List:Copy
301398700;301398800;2;3;4;5;6;7;1000000218;1000000151;1000000162;1000000163;1000000161;1000000164;1000000217;1000002700;1000000000;1000002701;1000000981;1000000975;1000000774;1000000881;1000000156;1000000014;1000000251;1000000019;1000000018;1000000215;1000000150;1000000079;1000000099 - Qualification:Copy
'z1D_Summary' != null AND 'z1D_Summary' != "" AND NOT 'z1D_Summary' LIKE "xMatters:%" - Custom Json: Leave this field blank.
- Status: Select the Enabled radio button.
- Send Attachment as Reference: Leave this check box disabled.
- Send Unchanged Fields: Click the check box to enable it.

- In the Callback Information section, fill in the following fields:
- Callback URL: Enter the trigger URL you copied earlier from Flow Designer.
- Authentication Type:
- No Authentication: Select if using URL authentication on the Flow Designer trigger.
- Basic Authentication: Select if using Basic Authentication on the Flow Designer trigger and supply the xMatters username and password, or API Key and Secret.
- In the Basic Information section, fill in the following fields:
- Description: Enter Send incident updates to xMatters.

- Description: Enter Send incident updates to xMatters.
- Click Save.
To create the webhooks that send create and update information from BMC Helix ITSM to xMatters:
- Obtain an access token with the API:
Copy
curl -X POST -H "Content-Type: application/x-www-form-urlencoded" -d
"username=<BMC Helix username>&password=<BMC Helix password>"
"https://<BMC Helix base URL>/api/jwt/login" - Create the Create Incident webhook.
Ensure you replace placeholder values with valid values for your system: Copy
curl -X POST -H "Authorization: AR-JWT <access_token>" -H "Content-Type: application/json" -d
"data {
  "description": "Send new incidents to Flow Designer",
  "form_name": "HPD:Help Desk",
  "condition": "‘Incident Number’ != null"
  "entry_events": [
    "Create"
  ],
  "payload_fields": [
    "Assigned Group",
    "Assigned Group ID",
    "Assigned Support Company",
    "Assigned Support Organization",
    "Assignee",
    "Assignee Login ID",
    "Event Details",
    "Event Summary",
    "Event Type",
    "First Name",
    "Form Name",
    "Impact",
    "Last Name",
    "Modified",
    "Modified By",
    "Notes",
    "Number",
    "Priority",
    "Recipients",
    "Reported Source",
    "Resolution Note",
    "Service Type",
    "Status",
    "Status Reason",
    "Submitted",
    "Submitted By",
    "Summary",
    "Urgency",
    "Webhook ID"
  ],
  "enabled": true,
  "callback": {
    "url": "https://example.xmatters.com/api/integration/1/functions/94118330-0853-467e-b325-81628726ed77/triggers?apiKey=52962b2c-7e6f-4df3-9e7d-fee480f8af5d",
    "authentication": {
      "type": "NO_AUTH",
      "username": null,
      "password": null,
      "accessKey": null,
      "accessSecretKey": null,
      "tenantId": null,
      "authBaseUrl": null,
      "authAccessTokenPath": null,
      "authRefreshTokenPath": null,
      "authHeaderTokenName": null
    }
  },
  "send_attachment_as_reference": false,
  "send_unchanged_fields": true
}"
"https://<BMC Helix base URL>/api/arsys/v1.0/webhook" - Create the Update/Delete incident webhook. The following placeholder values must be replaced with valid values for your system:
- access_token
- url
- BMC_Helix_Base_URL
Copycurl -X POST -H "Authorization: AR-JWT <access_token>" -H "Content-Type: application/json" -d
"data {
"description": "Send incident updates to Flow Designer",
"form_name": "HPD:Help Desk",
"condition": "'z1D_Summary' != null AND 'z1D_Summary' != \"\" AND NOT 'z1D_Summary' LIKE \"xMatters:%\""
"entry_events": [
"Update",
"Delete"
],
"payload_fields": [
"Assigned Group",
"Assigned Group ID",
"Assigned Support Company",
"Assigned Support Organization",
"Assignee",
"Assignee Login ID",
"Event Details",
"Event Summary",
"Event Type",
"First Name",
"Form Name",
"Impact",
"Last Name",
"Modified",
"Modified By",
"Notes",
"Number",
"Priority",
"Recipients",
"Reported Source",
"Resolution Note",
"Service Type",
"Status",
"Status Reason",
"Submitted",
"Submitted By",
"Summary",
"Urgency",
"Webhook ID"
],
"enabled": true,
"callback": {
"url": "https://example.xmatters.com/api/integration/1/functions/94118330-0853-467e-b325-81628726ed77/triggers?apiKey=52962b2c-7e6f-4df3-9e7d-fee480f8af5d",
"authentication": {
"type": "NO_AUTH",
"username": null,
"password": null,
"accessKey": null,
"accessSecretKey": null,
"tenantId": null,
"authBaseUrl": null,
"authAccessTokenPath": null,
"authRefreshTokenPath": null,
"authHeaderTokenName": null
}
},
"send_attachment_as_reference": false,
"send_unchanged_fields": true
}"
"https://<BMC Helix base URL>/api/arsys/v1.0/webhook"
You're ready to use the webhook to trigger automated flows, including steps such as sending alerts and initiating incidents, though we always recommend testing before putting things into use.
Outputs
The BMC Helix ITSM Incidents trigger has the following outputs you can use as inputs to steps further along the flow.
|
Label |
Description |
|---|---|
| Assigned Group |
Name of the group assigned to the incident. |
| Assigned Group ID | Unique ID of the BMC Helix group assigned to incident. |
| Assigned Support Company | Name of the support company assigned to the incident. |
| Assigned Support Organization | Name of the support organization assigned to the incident. |
| Assignee | Name of the BMC Helix user assigned to the incident. |
| Assignee Login ID | Login ID of the assigned user. |
| Event Details | Details about the event that occurred. |
| Event Summary | Short summary of the event that occurred. |
| Event Type | Type of event triggered by the incident. |
| First Name | First name of the user that initiated the incident. |
| Form Name |
Name of the BMC Helix form associated with the webhook. |
| Impact | Impact level of the incident. |
| Incident Type | Type of incident in BMC Helix. |
| Last Name | Last name of the user that initiated the incident. |
| Last Modified Date | Date and time the incident was last modified in BMC Helix. |
| Modified By | Login ID of user that last modified the incident. |
| Notes | Notes of the BMC Helix incident. |
| Number | Unique number of the incident in BMC Helix. |
| Priority | Priority level of the BMC Helix incident |
| Recipients | List of targeted recipients. |
| Reported Source | Source of the incident in BMC Helix. |
| Resolution Note | Note about the incident resolution. |
| Status | Status of the incident in BMC Helix. |
| Status Reason | Detailed description of the status. |
| Submit Date | Date and time when the incident was submitted to BMC Helix. |
| Submitted By | Login ID of user that submitted the incident. |
| Summary | Summary of the incident. |
| Urgency | Urgency level of the incident. |
| Webhook ID | Unique ID of the webhook that sent the signal. |