Zendesk
Flow Designer has built-in steps to help you integrate Zendesk into your critical event management and incident response flows.
Zendesk Steps
The following steps are available:
- Create Ticket: automatically create a new ticket in Zendesk, populating it with information from the original event or previous steps in the flow.
- Update Ticket: automatically update an existing ticket as information about the event or alert changes.
- Add Comment: automatically add a comment to an existing ticket, with new information from other steps in the flow.
There's also a built-in Zendesk trigger you can use to initiate flows with requests from Zendesk. This trigger is also used in our packaged Zendesk workflow.

In the example above, the flow creates a Zendesk ticket when a certain response is selected, including alert information in the ticket. The flow creates a channel in Slack using the ticket ID in the name and posts a message with details about the alert so the team can start collaborating on a resolution. The Slack channel name is added to an internal comment in Zendesk. Finally, the Slack channel URL is added as an External ID in the Zendesk ticket for traceability.
- To add a Zendesk step to your flow, go to the Apps panel in the palette, expand the Zendesk steps and drag the step you want to add onto the canvas.
- For instructions on using the Zendesk trigger, see Initiate a flow using the built-in Zendesk trigger.
- Connect the step to the previous step in the flow. This gives you access to the step properties and outputs of previous steps when you configure this step's inputs.
- Double-click the step to edit it, and use the Setup tab to configure the inputs. You can use plain text and input variables (or both). See the following sections for detailed information on the inputs for each step, including which are required.
- On the Endpoint tab, configure the step to point to your Zendesk instance.
- You can select a pre-existing endpoint or create a new endpoint.
- Click the Flood Control tab to edit the trigger's default flood control settings. For more information about these settings, see Trigger Flood Control.
Create Ticket
Use the Create Ticket step to automatically create a new ticket in Zendesk. Map outputs from previous steps to the inputs to complete the incident details.
Inputs
Inputs with an asterisk* are required.
|
Label API mapping |
Description |
|---|---|
|
Comment* ticket.comment.body |
Include a comment as either a public reply or an internal note, depending on the setting of the "Make Comment Public" input. The comment becomes the ticket description. You can use a combination of plain text and outputs from the alert or previous steps to create the comment. |
|
Make Comment Public* ticket.comment.public |
The value of this input determines if the "Comment" is added as a public reply (true) or an internal note (false). A public reply is viewable by anyone with access to the ticket; an internal note is viewable only by agents. |
|
Subject ticket.subject |
The title or summary of the ticket. If this is left blank, the value of the "Comment" input is duplicated into this field. |
|
Requester ticket.requester_id |
ID of the Zendesk user who is requesting support. |
|
Type ticket.type |
The type of ticket to create. Available options are:
|
|
Priority ticket.priority |
The urgency to assign to the ticket (for example, normal). The acceptable values are defined by your Zendesk administrator. |
|
Status ticket.status |
The status to set the ticket at. The acceptable values are defined by your Zendesk administrator. |
|
Recipient ticket.recipient |
The email address to set as the original recipient of the request for support (for example, support@yourcompany.com). |
|
Submitter ticket.submitter_id |
ID of the Zendesk user to record as the person who submitted the ticket. This user also becomes the author of the first comment (Public Reply). If not set, the Requester is used. |
|
Assignee ticket.assignee_id |
ID of the agent or group to assign the ticket to. If you set the assignee but don't set the group, Zendesk will set Group to the default group configured for the assignee. If you set both Assignee and Group, but set the assignee to a user who is not a member of the group or is an invalid assignee, the assignee field is set to the group only. |
|
Group ticket.group_id |
ID of the group to assign the ticket to. If you set the assignee but don't set the group, Zendesk will set Group to the default group configured for the assignee. |
|
Problem ticket.problem_id |
If the Type field is set to "incident", use this field to link the ticket to a ticket with a "problem" ticket type. |
|
Tags ticket.tags |
Tags to add to the ticket, separated by a delimiter. The delimiter can be any character or space accepted by Zendesk (for example, commas, pipes or spaces). |
|
External ID ticket.external_id |
Include the ID of an external record to link the ticket to it. |
Outputs
These outputs are available as inputs to steps further along the flow.
|
Label API mapping |
Description |
|---|---|
|
Ticket ID ticket.id |
The unique ID assigned to the ticket by Zendesk. |
|
URL ticket.url |
URL of the Zendesk instance the ticket was created in. |
|
Audit ID audit.id |
ID of the audit created by the ticket creation. |
Update Ticket
Use the Update Ticket step to automatically update the information on an existing ticket. Map outputs of previous steps to the inputs to determine which ticket to update and what details to change.
Inputs
Inputs with an asterisk* are required.
|
Label API mapping |
Description |
|---|---|
|
Ticket ID* ticket.id |
ID of the ticket to update. You could map the Ticket ID output of a Create Ticket step to this input. |
|
Subject ticket.subject |
The title or summary of the ticket. |
|
Requester ticket.requester_id |
ID of the Zendesk user who is requesting support. |
|
Type ticket.type |
The type of ticket to create. Available options are:
|
|
Priority ticket.priority |
The urgency to assign to the ticket (for example, normal). The acceptable values are defined by your Zendesk administrator. |
|
Status ticket.status |
The status to set the ticket at. The acceptable values are defined by your Zendesk administrator. |
|
Assignee ticket.assignee_id |
ID of the agent or group to assign the ticket to. If you set the assignee but don't set the group, Zendesk will set Group to the default group configured for the assignee. If you set both Assignee and Group, but set the assignee to a user who is not a member of the group or is an invalid assignee, the assignee field is set to the group only. |
|
Group ticket.group_id |
ID of the group to assign the ticket to. If you set the assignee but don't set the group, Zendesk will set Group to the default group configured for the assignee. |
|
Problem ticket.problem_id |
If the Type field is set to "incident", use this field to link the ticket to a ticket with a "problem" ticket type. |
|
Tags ticket.tags |
Tags to add to the ticket, separated by a delimiter. The delimiter can be any character or space accepted by Zendesk (for example, commas, pipes or spaces). |
|
External ID ticket.external_id |
Include the ID of an external record to link the ticket to it. |
Outputs
These outputs are available as inputs to steps further along the flow.
|
Label API mapping |
Description |
|---|---|
|
Audit ID |
ID of the audit record of this ticket update. |
Add Comment
Use the Add Comment step to automatically add an internal note or public reply to an existing ticket. Map outputs of previous steps to the inputs to create the comment and determine which ticket to comment on.
Inputs
Inputs with an asterisk* are required.
|
Label API mapping |
Description |
|---|---|
|
Ticket ID* ticket.id |
ID of the ticket to update. You could map this input to the output of a Create Ticket step. |
|
Comment* ticket.comment.body |
The comment to add to the ticket as either a public reply or an internal note, depending on the setting of the "Make Comment Public" input. You can use a combination of plain text and outputs from the alert and previous steps to create the comment. |
|
Make Comment Public* |
The value of this input determines if the "Comment" is added as a public reply (true) or an internal note (false). A public reply is viewable by anyone with access to the ticket; an internal note is viewable only by agents. |
Outputs
These outputs are available as inputs to steps further along the flow.
|
Label API mapping |
Description |
|---|---|
|
Audit ID audit.id |
ID of the audit created by the ticket change. |
Zendesk Alerts trigger
Flow Designer includes a built-in Zendesk Alerts trigger that initiates a flow when it receives a request from Zendesk. You can configure a Zendesk target to send the request when your configured conditions are met.
This trigger is used in our packaged Zendesk workflow. If you're using Zendesk in your incident management processes, you might want to check it out. The workflow instructions have additional information on automatically determining recipients of notifications based on user or group assignment in Zendesk. The workflow already has steps in its flows to update and add comments to Zendesk tickets with information from the xMatters alert.
- Go to the Triggers panel in the palette, expand the App Triggers section and drag the Zendesk trigger onto the canvas.
- Double-click the trigger (or click the pencil icon).
- Set the authenticating user, and then copy URL — you'll use this to set up the webhook in Zendesk. Alternatively, you can create an integration user to use as the authenticating user.
- The trigger URL includes the recipients parameter, which specifies who should be notified. By default, this parameter is set to notify you (the logged in user), but you can set it to target any user or group you want.
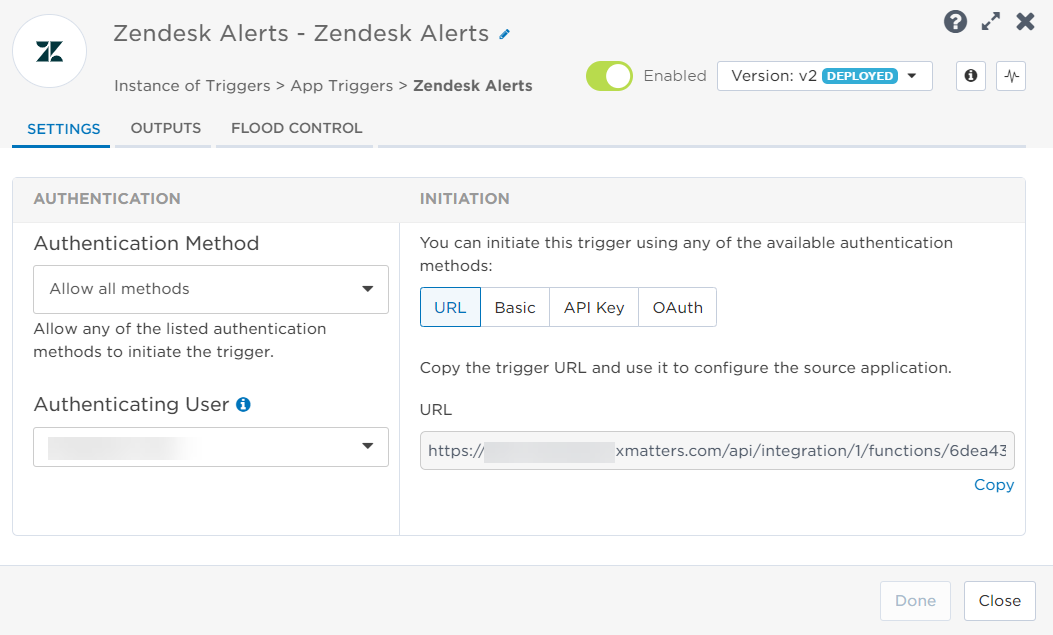
- Click the Flood Control tab to edit the trigger's default flood control settings. For more information about these settings, see Trigger Flood Control.
- Click Done.
- On the flow canvas, connect the steps you want to run when xMatters receives a request to that URL.
You're now ready to configure Zendesk to target the trigger.
Configure Zendesk to send requests to the trigger URL
The following sections provide detailed instructions on how to configure Zendesk to send alerts to xMatters.
To configure Zendesk to send alerts to xMatters, you need to create a webhook for each Zendesk trigger on your canvas.
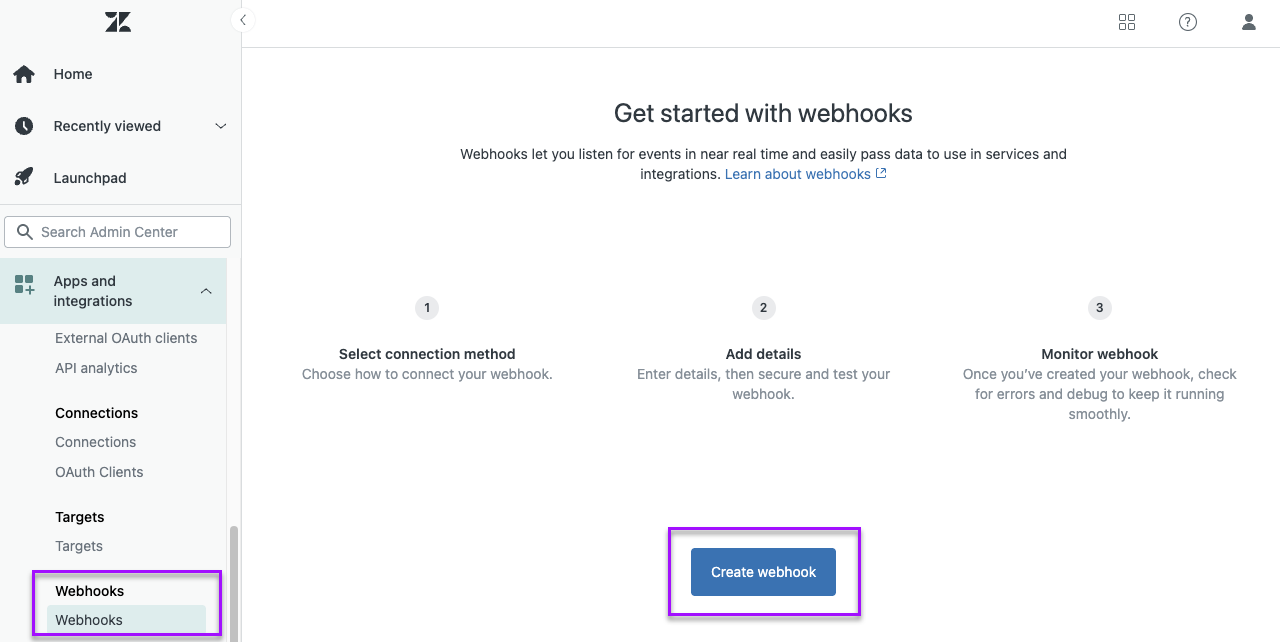
- Open the Zendesk Admin Center, expand Apps and Integrations, then select Webhooks.
- Click Create webhook.
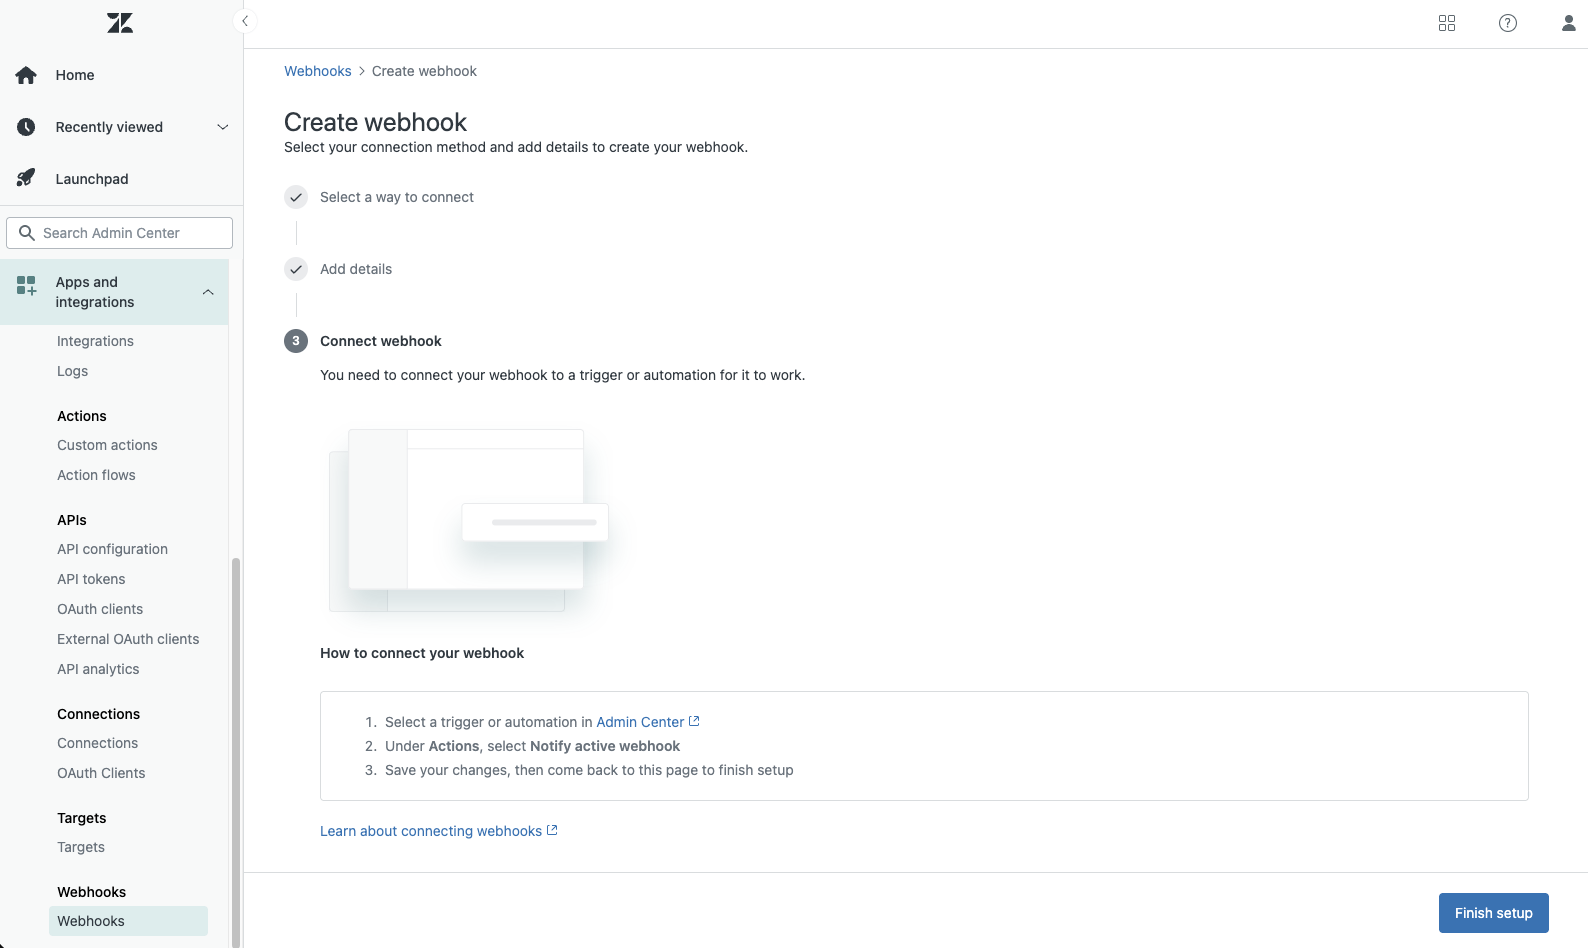
- On the Create webhook page, select Trigger or automation as the way to connect.

- Fill in the following fields to add details for your webhook:
- Name: Give the webhook a unique name.
- Endpoint URL: The URL you copied from Flow Designer.
- Method: POST
- Request Format: JSON
- Authentication: None
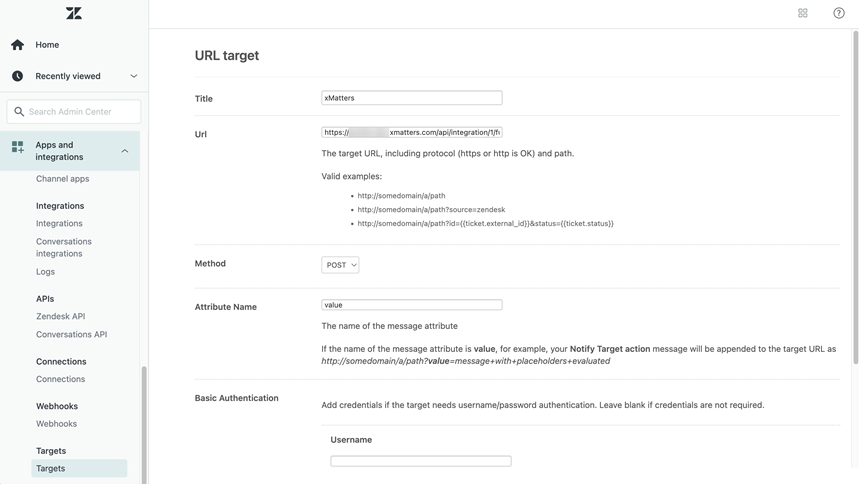
- Click Create webhook.
- Click Finish setup.
The next step is to create a Zendesk trigger that initiates the webhook. You will need to create a Zendesk trigger for each webhook you have.
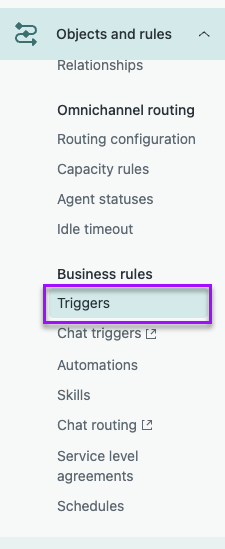
- In the left-hand menu expand the Objects and rules section, then go to Business rules > Triggers.
- Click Add trigger.
- Enter a trigger name and description. For example, you might want the trigger name to match the URL target name.
- Expand the Category drop-down list and select Notifications.
- In the Conditions section set the conditions in which you want Zendesk to send a request to xMatters.
- In the Actions section click Add Action.
- Select Notify target from the drop-down menu, then select the webhook you created from the drop-down menu.
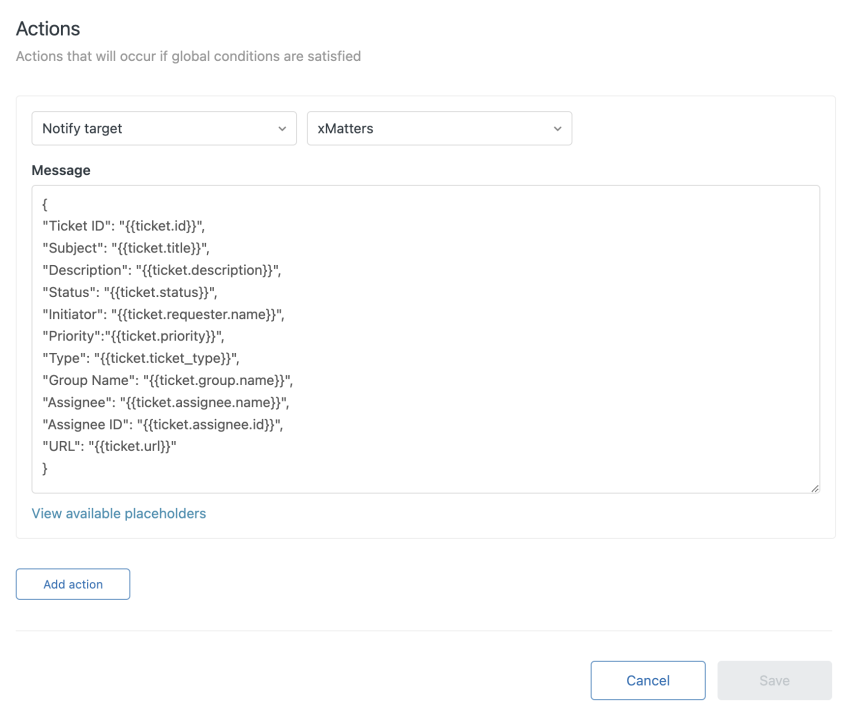
- Copy the following payload into the Message field.
{`Ticket ID`: `{{ticket.id}}`,`Subject`: `{{ticket.title}}`,`Description`: `{{ticket.description}}`,`Status`: `{{ticket.status}}`,`Initiator`: `{{ticket.requester.name}}`,`Priority`:`{{ticket.priority}}`,`Type`: `{{ticket.ticket_type}}`,`Group Name`: `{{ticket.group.name}}`,`Assignee`: `{{ticket.assignee.name}}`,`Assignee ID`: `{{ticket.assignee.id}}`,`URL`: `{{ticket.url}}`}
- Click Save.
If you use Basic Authentication you'll need to enable Basic Authentication password access in Zendesk.
- In the left-hand menu expand the Apps and integrations section. then go to APIs > Zendesk API.
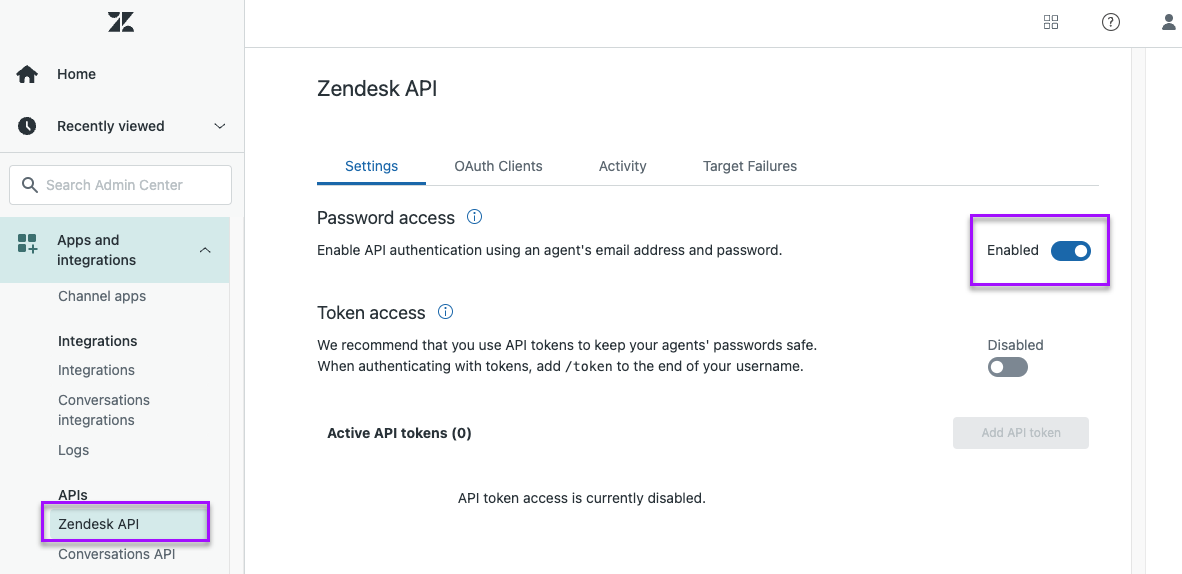
- In the Settings tab, go to the Password access toggle and enable it..
Set recipients in the trigger URL
The trigger expects the recipients in the trigger URL. When you copy the URL from xMatters, it includes the recipients parameter: recipients=<yourname>. Of course, you don’t want to receive all the alerts.
To change the recipients, swap out your name for the people or groups you want to target.
- For URL authentication, use an ampersand to attach recipients. For example, if you want to notify Emma Pearson and the on-call members in the group responsible for the Antares service, you'd add &recipients=epearson,antares to the URL.
- For other authentication types, use a question mark to attach recipients. For example, if you want to notify Barry Gull and the on-call members in the group responsible for the Cassiopeia service, you'd add ?recipients=bgull,cassiopeia to the URL.
Remember to URL-encode any special characters, including spaces, in your group names.
We recommend using groups so you can take advantage of the xMatters group features — rotations, escalations, and absences — to reach the right on-call people to jump on an issue.
Outputs
The trigger has the following outputs you can use as inputs to steps further along the flow. If you want to include additional items in the payload from Zendesk and make that information available in the outputs, you can convert the trigger to a custom HTTP trigger and edit the script.
|
Label |
Description |
|---|---|
| Assignee |
Name of the agent assigned to the ticket |
| Assignee ID | ID of the agent assigned to the ticket. |
| Description | Additional details entered in the ticket. |
| Group Name | Name of the group assigned to ticket. |
| Initiator | Name of the Zendesk user requesting support. |
| Priority | Level of urgency to resolve the issue in relation to other tickets. |
| Status | State of the ticket (for example, New or Solved). |
| Subject | The subject of the Zendesk ticket. |
|
Ticket ID |
ID assigned to the ticket in Zendesk. You could use this to identify the ticket to update or add comments to further along the flow. |
| Type | Type of request (for example, question). |
| URL | URL of the ticket in Zendesk. |