ServiceNow Data Sync - Groups
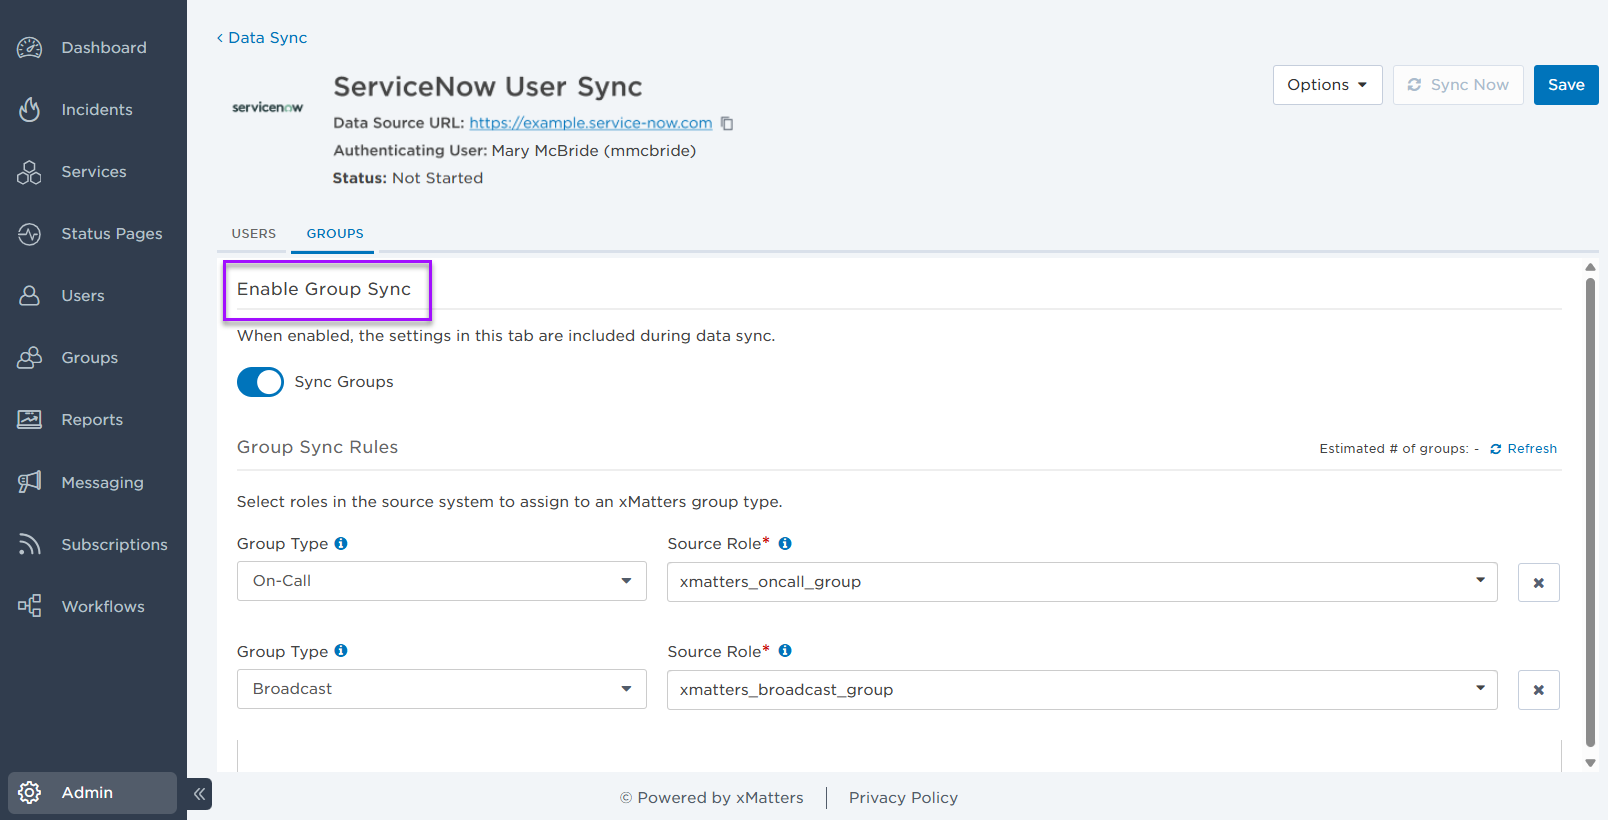
Once you have created a sync configuration, you can set how you'd like groups to be synchronized between ServiceNow and xMatters.
For each configuration you can specify whether to sync users, groups, or both, however you must have at least one part of the sync (users or groups) enabled in order to run a sync.
Once you have created a new sync configuration, you can set which ServiceNow roles you want to map to each group type in xMatters. As you map values, you can see the estimated number of groups that will be synchronized between ServiceNow and xMatters. If you make changes to the sync rules, you can 'Refresh' to see the new the number of groups.
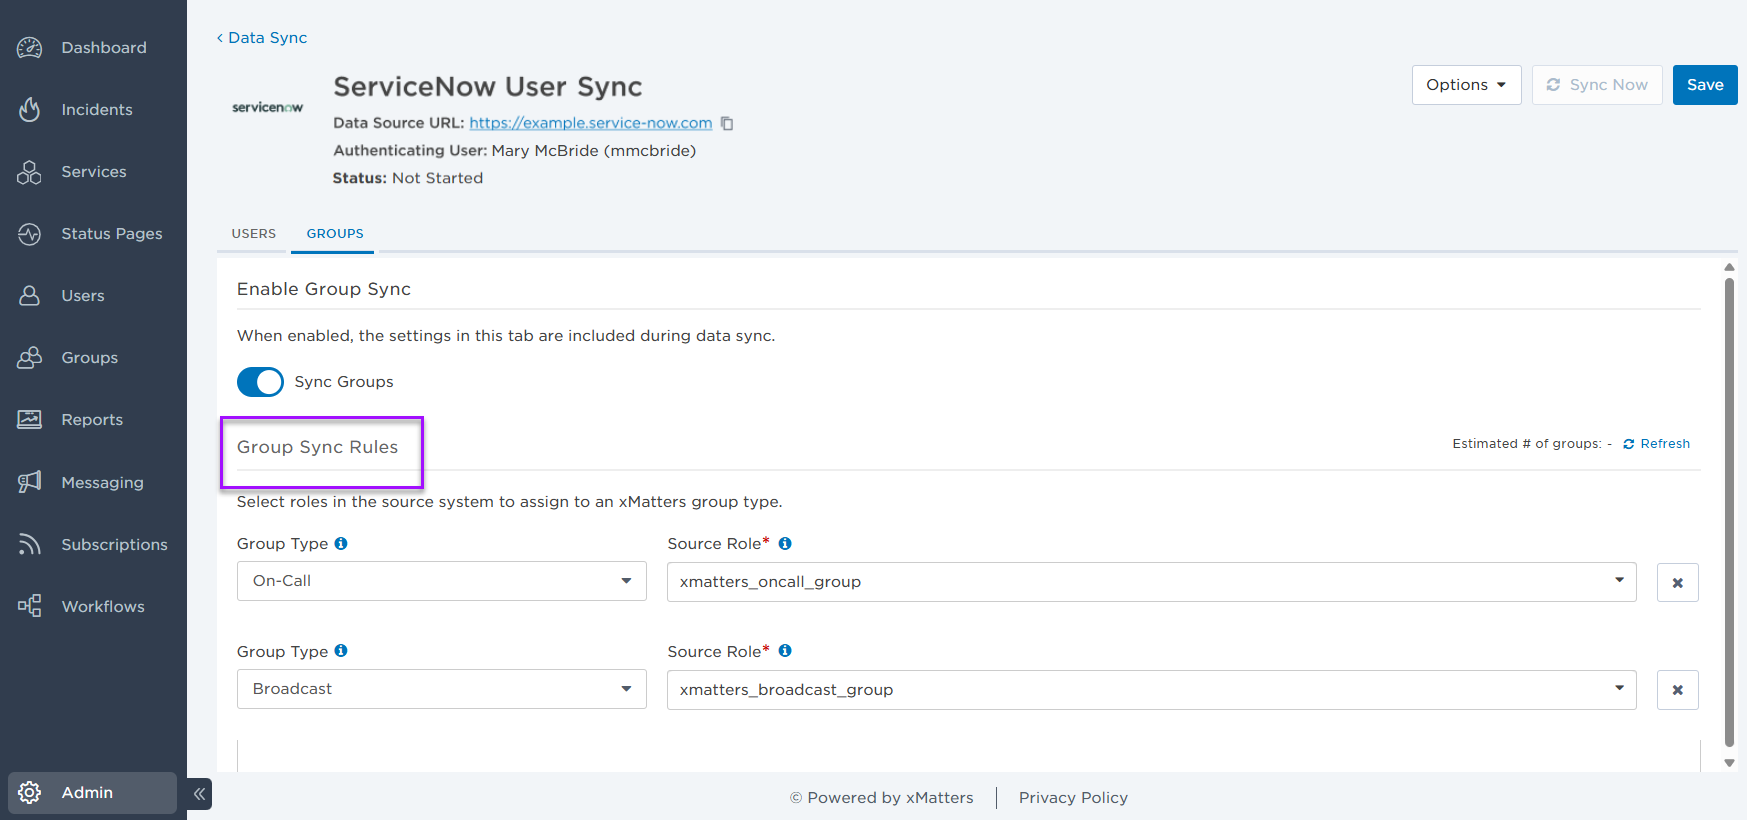
To add roles to a group type;
- In the Group Sync Rules section, expand the Group Type drop-down menu and select the group type. Available options are:
- On-Call
- Broadcast
- Expand the Source Role drop-down menu and select the ServiceNow roles to map to the group type.
- An xMatters group type can contain multiple ServiceNow roles, but a role can only be mapped to one group type. If a group matches criteria for both group types, the Broadcast group type takes precedence.
Now that the group types are mapped, you can map the group properties.
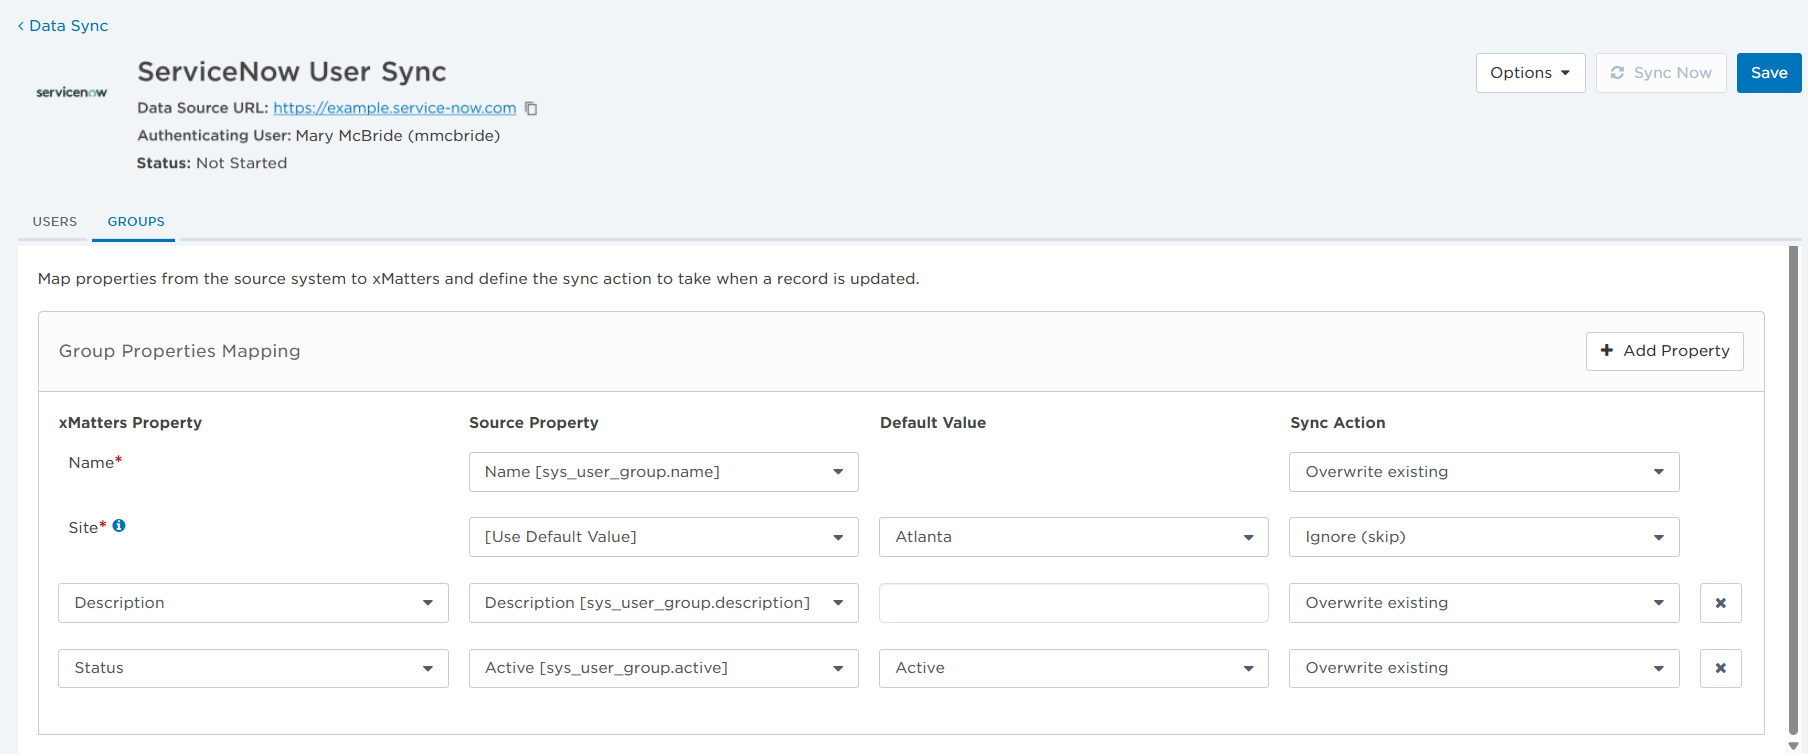
- In the Group Properties Mapping table, map source properties from ServiceNow to their corresponding xMatters properties.
- xMatters Property: Name of the property in xMatters.
- Source Property: Name of the property in ServiceNow. If the property has a default value, you can use that by selecting 'Use Default Value' from the drop-down menu.
- Default Value: The default value for the property, if there is one.
- Sync Action: What action to take for each property when a subsequent sync is run. During the initial sync the Sync Action setting is ignored. Available values are:
- Overwrite existing: Overwrite the existing property in xMatters with the property value from ServiceNow.
- Update if empty: Only update the field in xMatters if it was previously empty.
- Ignore (skip): Make no changes in xMatters.
- To map properties other than the listed default properties, click Add Property.
- Continue to the next configuration section or Save and run the sync.
Group administrators are set when a group is created during the initial sync with xMatters. Each group must have at least one admin specified on creation, but you can add or remove additional admins during subsequent syncs.
- Go to the Group Admin Sync Rules section.

- In the Default Group Admins field, search for or enter the name of the xMatters user to set as the group administrator. The drop-down menu displays a list of users that are authorized to be group admins.
- Save the sync.
After a configuration is saved, click Sync Now to run the data sync.
Only one sync can be run at a time for each configuration and it can take several minutes for a sync to connect, then to complete. Once you click 'Sync Now', do not navigate away from the page, or click the 'Sync Now' button again.
When the sync is finished, you can click the Status link to view a summary report.
You can make changes to an existing configuration if required. It is important to note that when configuration settings change, there may be mapping errors that require correction.
To edit the sync configuration:
- Go to the Options menu and select Edit Configuration.

- On the Edit Sync Configurations window, make the required changes.
- Click Save.
Once applied, any properties not compatible with the new configuration settings will be highlighted. To run a sync using the new configuration you must clear all mapping errors and save the configuration.
If a sync configuration is no longer required, you can delete it to ensure it's not accidentally run. Deleting a sync removes the connection between xMatters and ServiceNow, but it does not delete any data brought into xMatters from previously run syncs.
To delete the sync configuration:
- Go to the Options menu and select Delete.

- Confirm the deletion.
The sync is deleted from the Sync Configurations page.