AppDynamics Events
The built-in AppDynamics Events trigger initiates a flow when it receives a signal from AppDynamics.
Add the AppDynamics Events trigger to the canvas
- Go to the Triggers tab in the palette, expand the App Triggers section and drag the trigger onto the canvas.
- Double-click the trigger (or click the pencil icon).
- Set the authenticating user, and then copy the URL and Configuration Payload — you'll use these to set up a webhook in AppDynamics. Alternatively, you can create an integration user to use as the authenticating user.
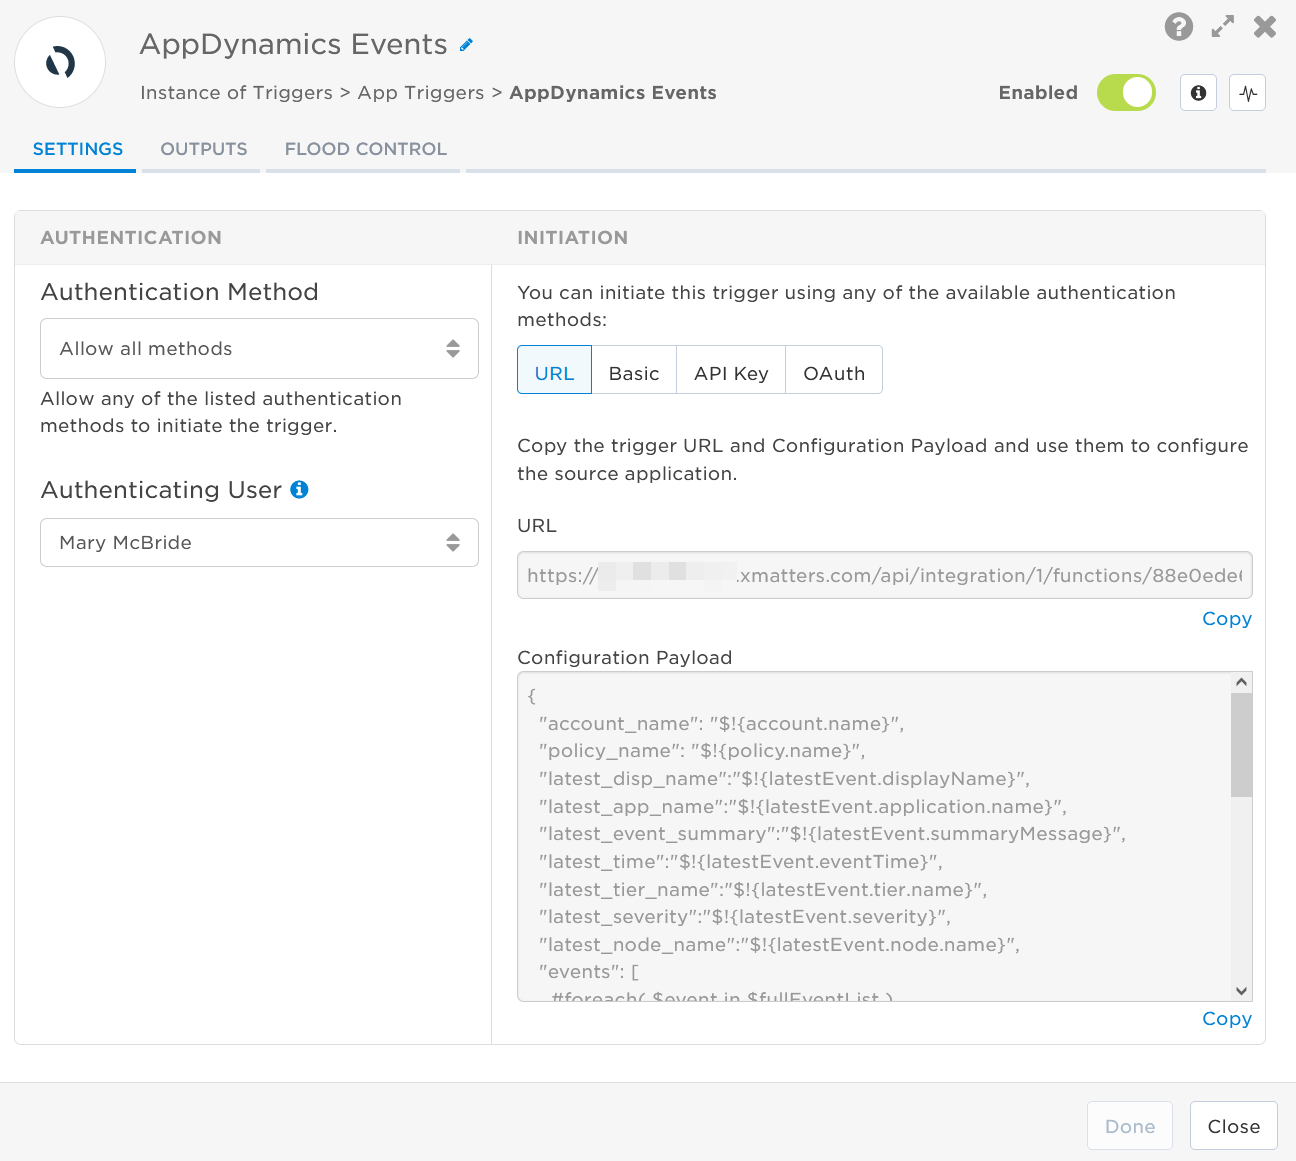
- Click the Flood Control tab to edit the trigger's default flood control settings. For more information about these settings, see Trigger Flood Control.
- Click Done.
- On the flow canvas, connect the steps you want to run when xMatters receives a request to that URL.
You're now ready to configure AppDynamics to target the trigger.
Configure AppDynamics to send requests to the trigger URL
To have AppDynamics send alerts to the flow trigger, you need to configure a webhook and set it to use the trigger URL.
- Log in to your AppDynamics controller and navigate to Alert & Respond > HTTP Request Templates.
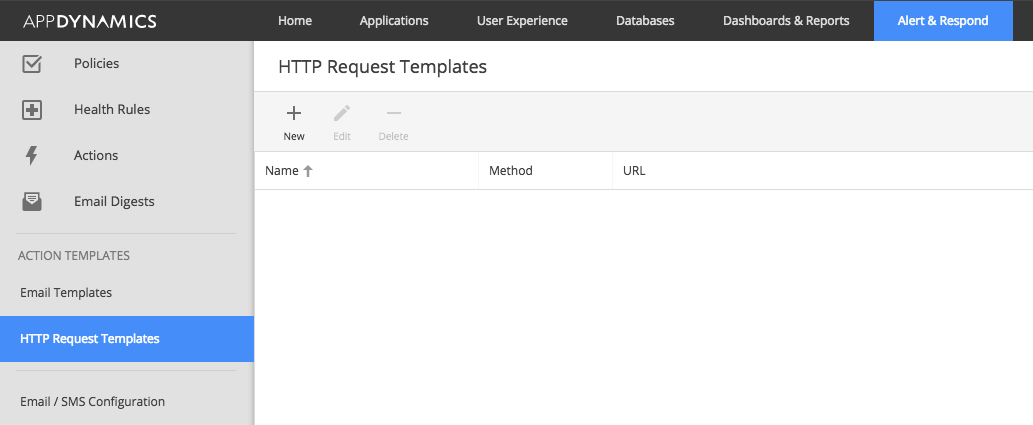
- Click New to create a new template, then name the new template xMatters.
- In the Request URL section, set the Method to POST.
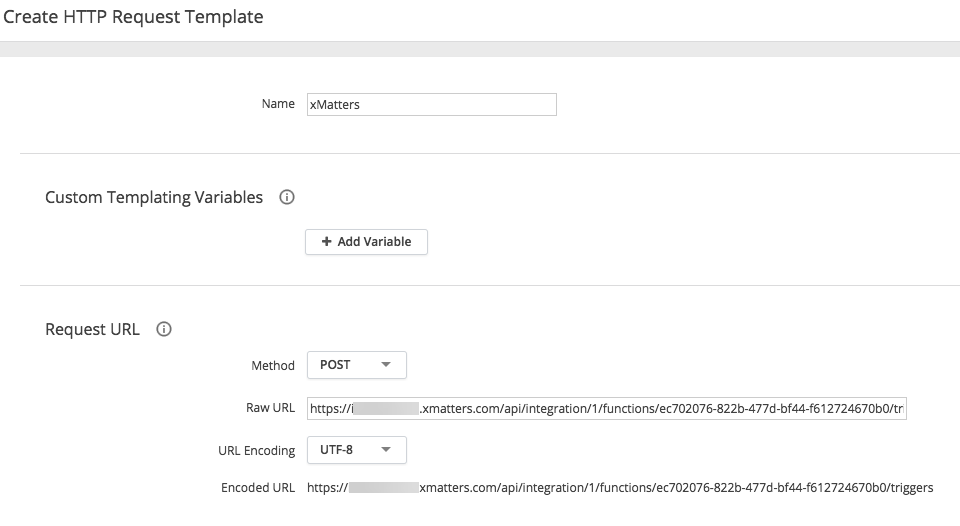
- Paste the trigger URL you copied from Flow Designer into the Raw URL field.
- Add the target names of any recipients you want to notify when the alert fires.
- For URL authentication, use an ampersand to attach recipients. For example, if you want to notify Emma Pearson and the on-call members in the group responsible for the Antares service, you'd add &recipients=epearson,antares to the end of the URL.
- For other authentication types, use a question mark to attach recipients. For example, if you want to notify Barry Gull and the on-call members in the group responsible for the Cassiopeia service, you'd add ?recipients=bgull,cassiopeia to the end of the URL.
- You must URL-encode any special characters or spaces in the target names.
- In the Payload section, set the MIME Type to application/json.
- Paste the following Configuration Payload into the Payload field. Copy
{
"account_name": "${account.name}",
"policy_name": "${policy.name}",
"latest_disp_name":"${latestEvent.displayName}",
"latest_app_name":"${latestEvent.application.name}",
"latest_time":"${latestEvent.eventTime}",
"latest_tier_name":"${latestEvent.tier.name}",
"latest_severity":"${latestEvent.severity}",
"latest_node_name":"${latestEvent.node.name}",
"events": [
#foreach( $event in $fullEventList )
{
"event_name": "$event.displayName",
"event_message": "$event.eventMessage",
"event_node_name": "$event.node.name",
"event_tier_name": "$event.tier.name",
"event_time": "$event.eventTime",
"event_link": "$event.deepLink",
"event_severity_image": "$event.severityImage.deepLink"
 }#if( $foreach.hasNext ),#end
 #end
 ],
"top_severity": "${topSeverity}",
"controller_url": "${controllerUrl}",
"action_name": "${action.name}",
"action_trigger_time": "${action.triggerTime}"
} - If you want to receive an alert for each new event detected, enable the One Request Per Event check box.
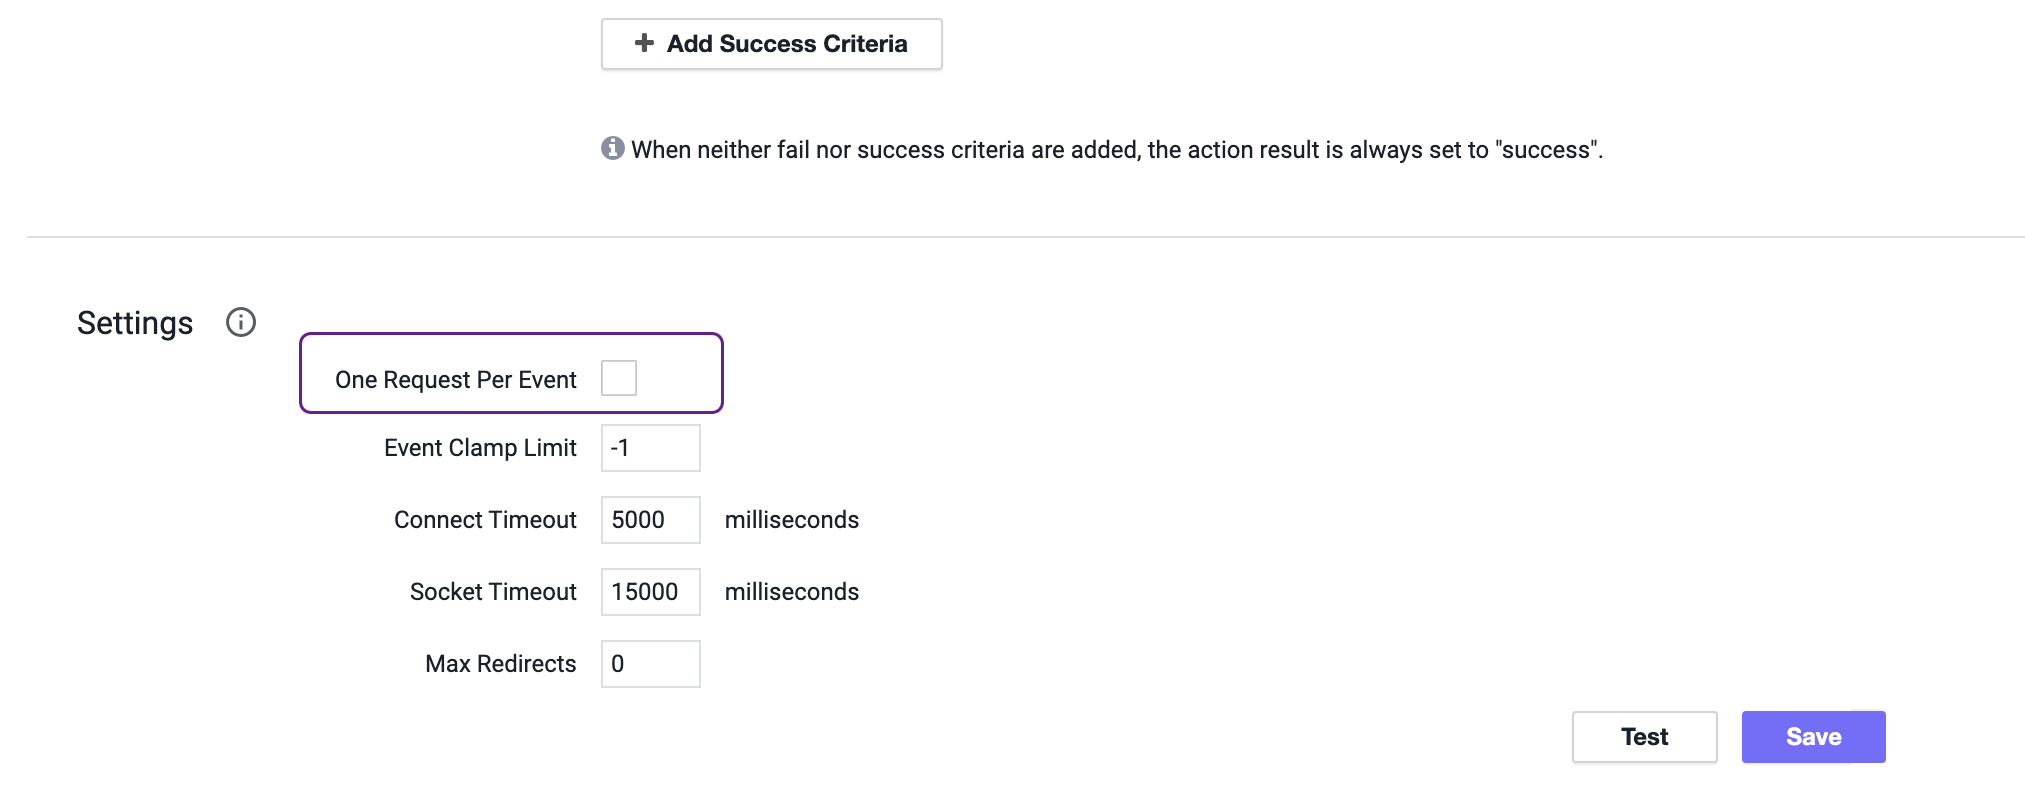
- Save the template.
Next you'll need to create an action and append it to a policy.
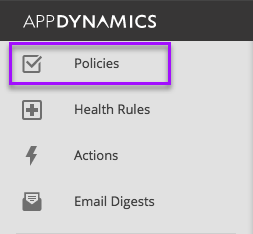
- From the left-hand menu, select Policies.
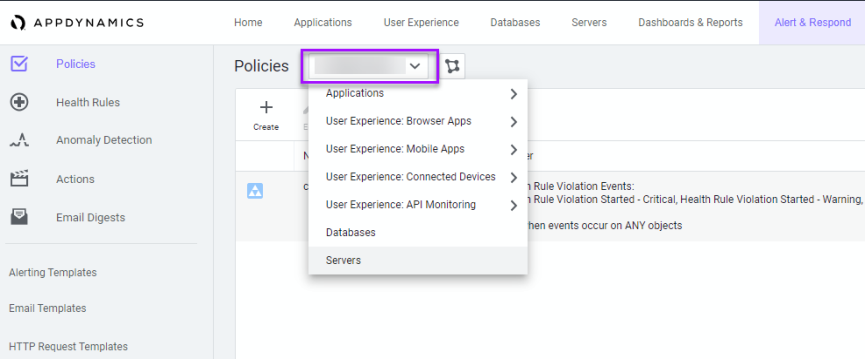
- Select an existing policy from the drop-down menu or create a new policy by clicking Create.
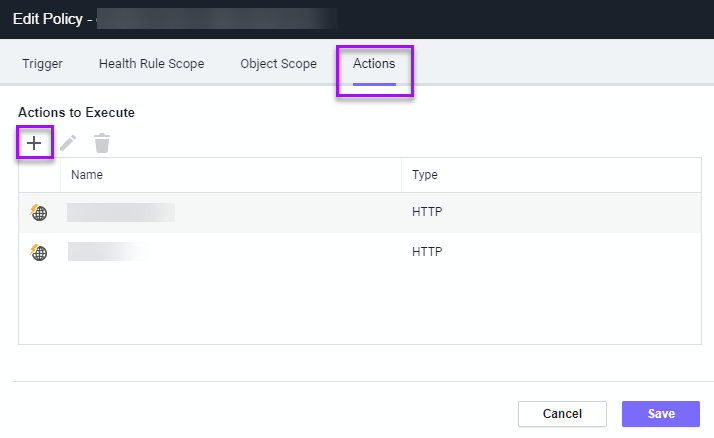
- In an existing policy, go to the Actions tab.
- Click the plus sign to add a new action.
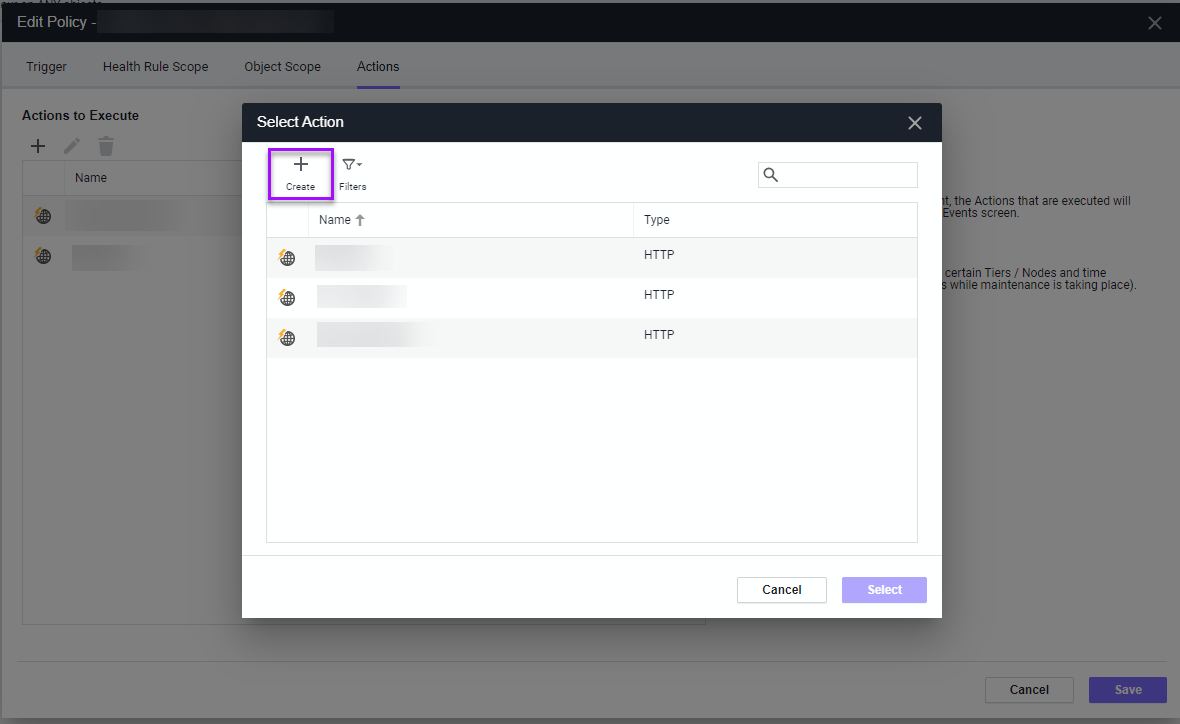
- In the Select Action window, click Create.
- In the Create Action window, select the Make an HTTP Request radio button and click OK.
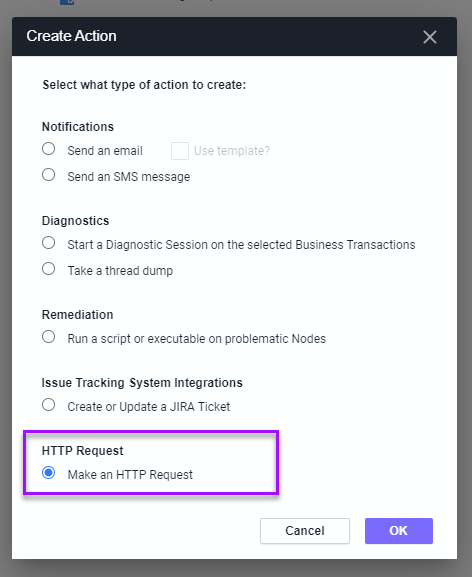
- Give the HTTP Action a unique name and then select the HTTP request template you created from the list. The Edit HTTP Action window gives you a preview of the action you just created.
- Click Save.
If your implementation requires Tier / Node information, set it in AppDynamics:
- Go to the Alert & Respond menu and select Health Rules.

- Click Affected Entities and select one of the three available Tier / Node options.
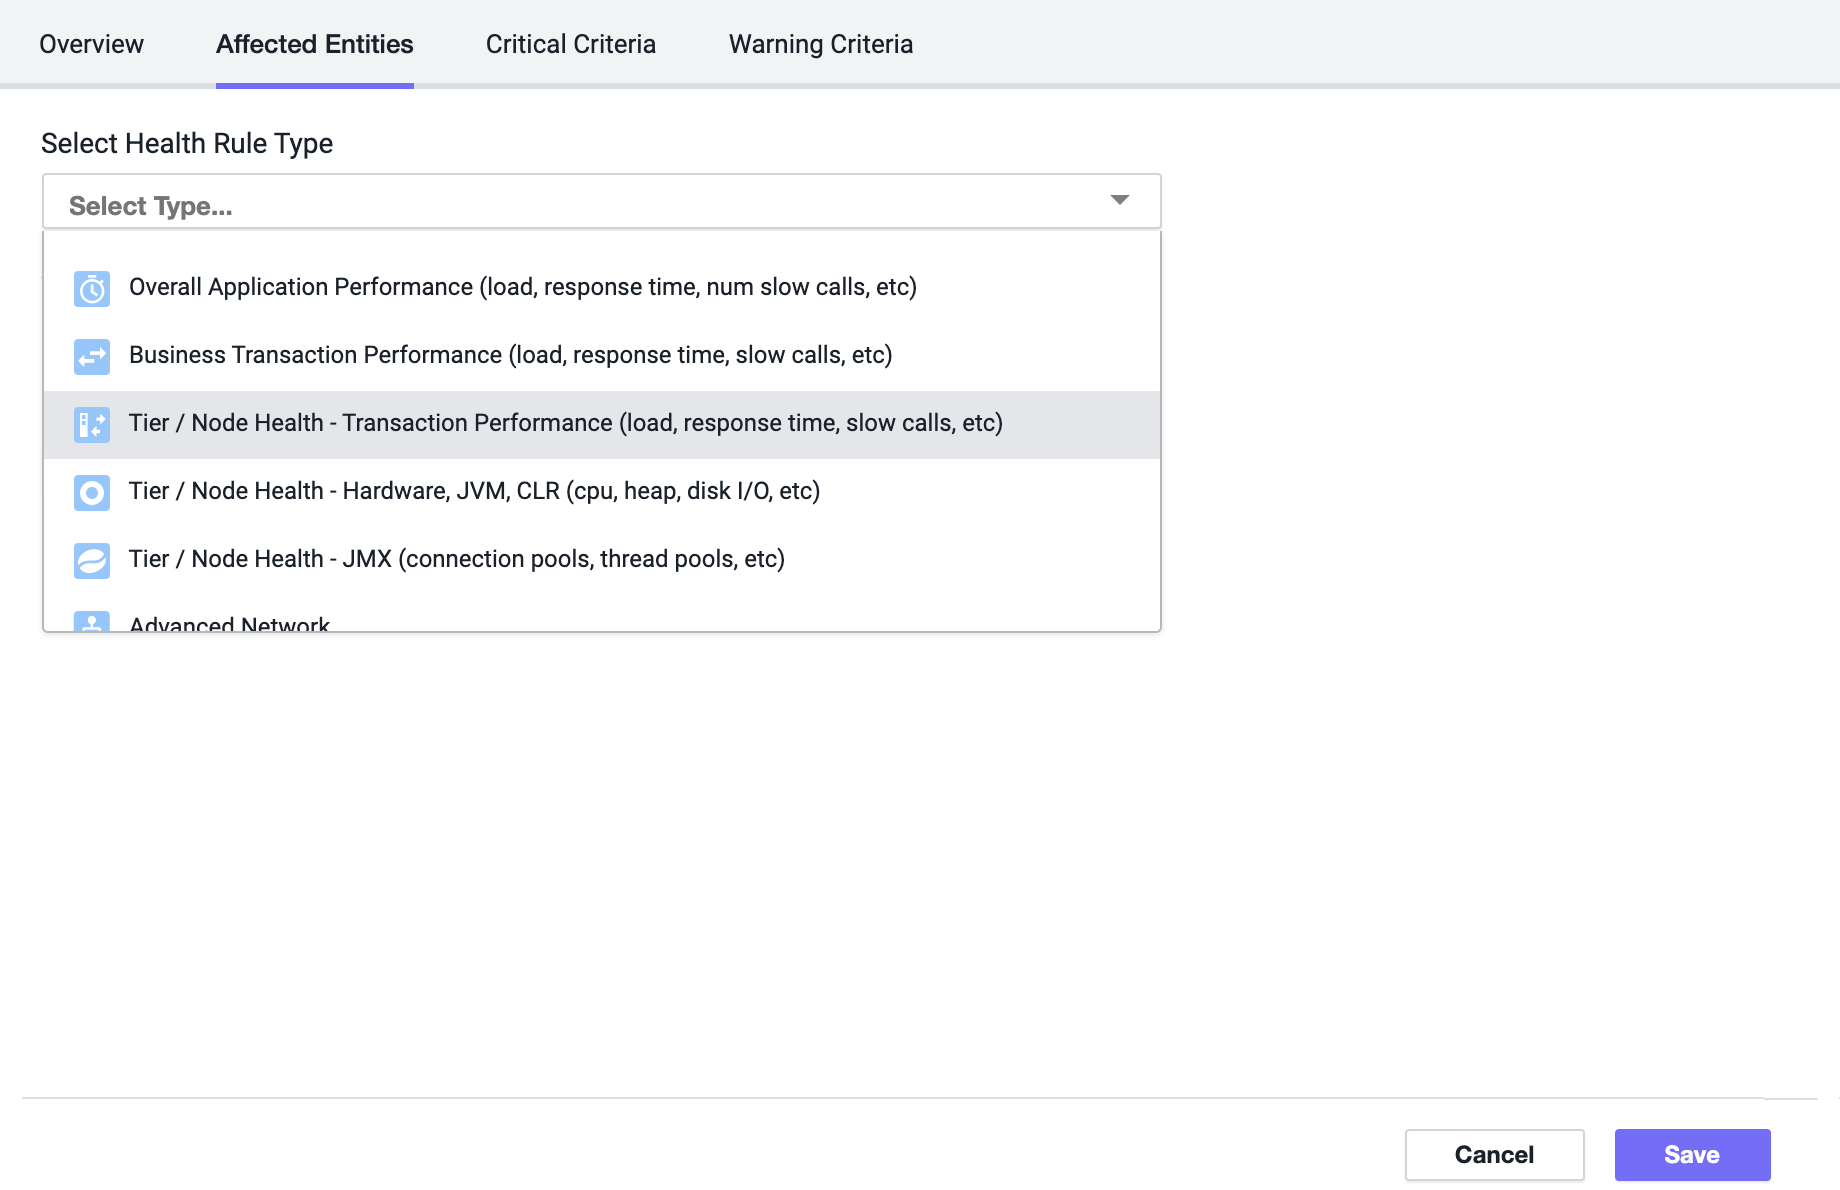
- Click Save to apply the Tier / Node changes.
You're ready to use the webhook to trigger automated flows, including steps such as sending alerts and initiating incidents, though we always recommend testing before putting things into use.
Outputs
The trigger has the following outputs you can use as inputs to steps further along the flow.
|
Label |
Description |
|---|---|
|
Recipients |
List of targeted recipients. Recipients are set by adding a recipients query parameter to the trigger URL. |
| Signal Mode | Determines the path the flow will take, based on the value of the Policy Name and Latest App parameters. |
| Account Name | Name of the AppDynamics account. |
| Action Name | Name of the action sending the alert from AppDynamics. |
| Controller URL | Direct link to the AppDynamics controller. |
| Latest App | Name of the app which sent the most recent event. |
| Latest Display Name | Display name associated with the most recent event. |
| Latest Node | Name of the node associated with the most recent event. |
| Latest Severity | Severity of the most recent event in AppDynamics. |
| Latest Summary | Latest summary associated with the most recent event. |
| Latest Tier | Name of the tier for the most recent event in AppDynamics. |
| Number of Events | Number of events sent by the policy |
| Policy Name | Name of the alert policy that triggered the event. |
| Timestamp | Timestamp for the most recent event in AppDynamics. |
| Top Severity | Maximum severity within the list of events sent by AppDynamics. |
| Trigger Time | Time the alert was triggered in AppDynamics. |
| Raw Request | JSON representation of the request. You can parse the raw request if you need additional details beyond the standard outputs. |