Use the incident timeline
You can use the timeline during and after an incident to keep track of everything that happened during the incident. The timeline automatically records incident activities in real-time, while also allowing users to manually add notes to provide additional context.
The timeline is a powerful information source both while the incident is active and after it's been resolved because it can include rationale and details for any changes made during the resolution process.
![]()
You can sort and filter the timeline to find information quickly. Some incidents can span hours or days, leading the timeline to amass an immense amount of information. The most recently added information is at the top of the list by default, but you can use the drop-down at the top of the timeline to sort by Newest First or Oldest First.

During its lifetime, an incident can have many pieces of information logged in the timeline, so you may need to filter the timeline quickly to find the information you need. For example, you might want to see how many times an incident's severity was changed. Using the filters drop-down menu, you can select Updates and the timeline will show only changes to the incident's summary, description, incident commander, status, and severity.

To filter the timeline, click the filter drop-down menu and select one of the available options:
- All: Display all available timeline entries.
- Attachments: Display attachments as they were added to or removed from the incident, including any changes to attachments names and descriptions. Depending on the file type, when you click the name of an attachment in the timeline it is either opened as a preview in a new browser window, or downloaded to your machine.
- Automations: Display automations as they were initiated from the incident. Each automation timeline entry contains its status (success or failure), the user who executed it, and a link to the Activity panel in Flow Designer which shows you the details of the automation system request.
- Collaborations: Display collaboration channels as they were added to the incident, as well as any descriptions or links.
- Linked Incidents: Display incident links as they were added to or removed from the incident. Each incident link timeline entry contains the link relationship type, as well as the user who added or removed the link.
- Notes: Display comments added by users when they respond to a notification, as well as any notes added directly to the incident.
- Resolvers: Display resolvers as they were added to the incident and their responses when they received notification of the incident.
- Stakeholders: Display stakeholders as they were added to the incident, as well as any updates sent.
- Tasks: Display tasks as they were added, updated, or removed from the incident, or if they become overdue.
- Updates: Display all changes to the summary, description, custom incident properties, incident commander, status, and severity of the incident.
You can narrow timeline information even further using the search bar. Type the name of a user or group, or the keyword of a note to filter the timeline down more precisely. (Clear the search bar to reset the timeline contents.)
.png)
Notes are any comments relevant to an incident that were added by users. They include response comments submitted by resolvers when they acknowledge a notification, rationale behind a change to the incident's status, severity, or incident commander, and any additional information you want to add to describe the progression of an incident.
Any user involved in an incident, including the incident commander, initiator, and resolvers, can add notes to the timeline. For example, while your team is working on an issue, you can add notes about what steps they are taking to detect its cause and resolve it. These notes are then included in the incident export, and can be easily accessed when building out a Post-Incident Report.
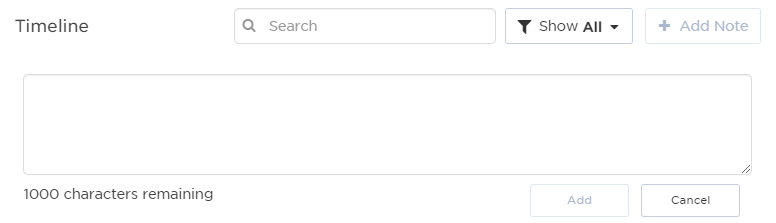
You can add notes directly to an incident with the Add Note button. A text box opens where you can write a note up to 1000 characters. When you're finished the note, click Add to add it to the timeline.
To help incident commanders and scribes keep accurate records during the incident response process, incident timeline notes can be updated from within the xMatters Incident Console.
To edit a note in the timeline
- Click the pencil icon (
 ) next to the note you want to edit.
 - Update the note by typing in the box. You can see a preview of how the note will display in the timeline as you type.
- To save the note, click Save. Edited notes are marked with '(edited)' in the timeline.