Create a Post-Incident Report
The Post-Incident Report builder is available to Advanced plan customers and lets you create a Post-Incident Report to document the incident postmortem process. This allows users to share key information and understanding about why an incident occurred, how resolvers responded, and what preventive actions can be taken to ensure it doesn't happen again. Once a Post-Incident Report is created, you can update its status or export it to be shared with other colleagues or stakeholders.
Create a Post-Incident Report
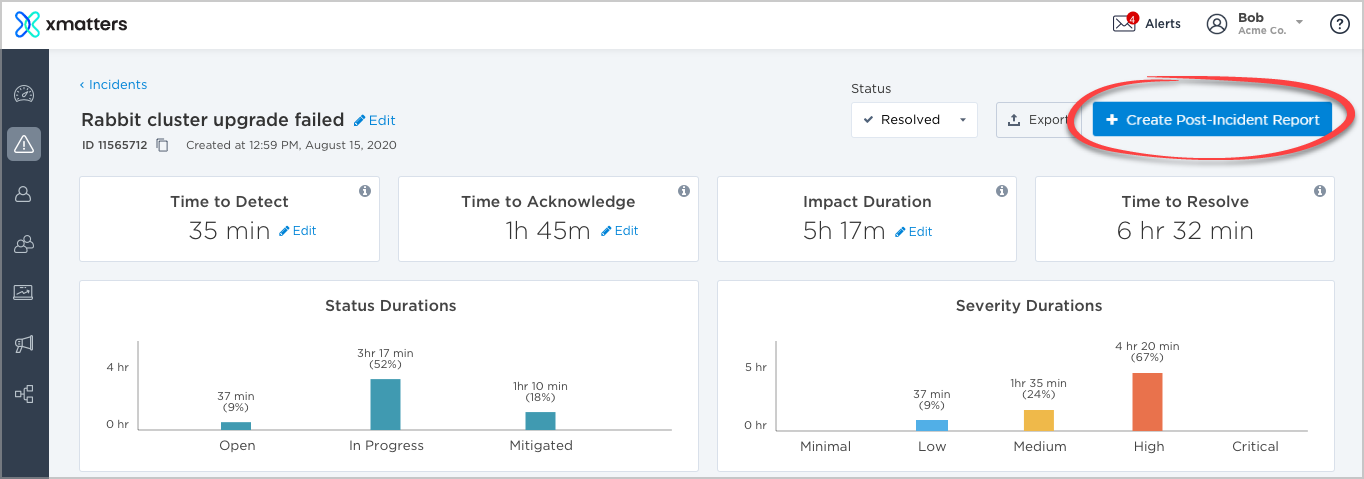
Reports can be created once an incident is in the Resolved status. The incident commander or company supervisor can generate the report in the Incident Console.
- On the Incidents screen, click the Summary of the incident.
- In the top right corner of the Incident Console, click Create Post-Incident Report.
- Once a Post-Incident report is created, the button changes to View Post-Incident Report.
- At the top of the report, you can edit the title, see when it was created, and when and who last updated it:

- Complete the report sections:
Update the report status
The Post-Incident Report owner can change the report status to let resolvers and contributors know how it's progressing (for example, if further edits are required or if it can be distributed to stakeholders).
To update the report status, click the Status drop-down at the top of the report and select one of the following from the menu:
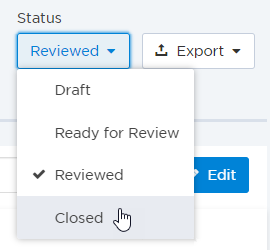
- Draft: The report is currently being worked on.
- Ready for Review: The draft is complete and ready to be reviewed.
- Reviewed: The report has been reviewed. If a report has this status, only users with appropriate permissions can make changes to the Review section; the Actions tab can still be updated by users with access to the report.
- Closed: The report is complete and ready to be distributed. Once a report has been closed, no users can make changes to the Review section; the Actions tab can still be updated by users with access to the report.
Post-Incident Report sections
The Post-Incident report is split into the following sections:
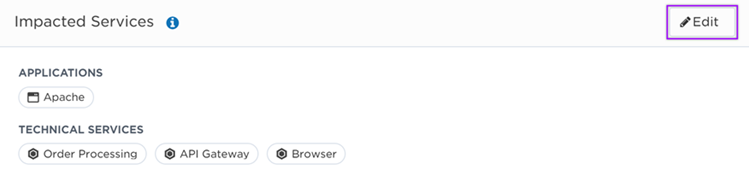
This section is used to identify any services that were impacted by the incident. Impacted services are categorized by their service type. Within each type, services are sorted by their tier from highest to lowest. If these are not accurate, or you need to add or remove services from the Post-Incident Report, click Edit to manage the services listed in the report.
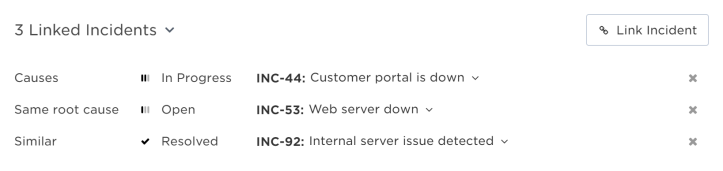
This section is used to list the active and historical incidents that were linked to this incident, along with their corresponding relationship types. Click Link Incident to link additional related incidents that helped with this incident's resolution process, or click X beside an incident link to remove it.
Use this section to list the names of the report owner and contributors. Adding a Post-Incident Report owner and contributors helps readers understand who is involved in the postmortem process.
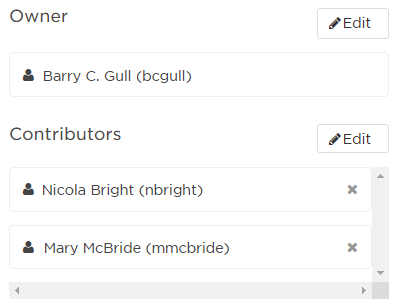
Owner
The report owner is the person responsible for the postmortem process and updating the status of the report. The person who creates the Post-Incident Report is automatically set as its owner, but ownership is transferable. Simply click Edit and select a new owner from the list.
Contributors
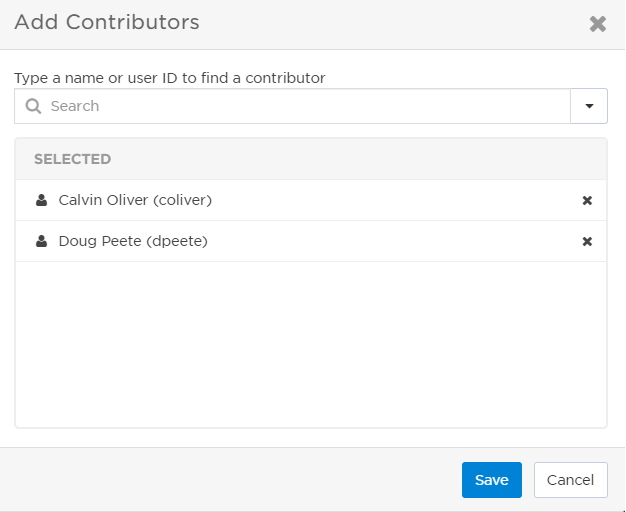
Contributors are people involved in the postmortem process. (This may include filling out sections of the report or completing follow-up tasks.) Any users that were engaged resolvers when the incident status was changed to Resolved are automatically added as contributors to the Post-Incident Report. You can add additional xMatters users as contributors by clicking Edit and then searching and selecting users from the list:
To remove contributors from the list, click the x next to the name of the contributor you want to remove.
The Analysis section is broken down into four text boxes to document key incident information:
|
Detail |
Description |
|
Impact |
Add details about who was impacted by the incident, what their experience was, and how long the impact lasted. |
|
Root Causes and Contributing Factors |
Include information about the cause of the incident, as well as any contributing factors. |
| Response and Resolution | Add details about what was done to diagnose, mitigate, and resolve the incident. |
| Lessons Learned | Include what went well, what could have gone better, and information on what can be done to prevent the same incident from reoccurring. |
To edit these sections, click Edit and start typing. Once you've finished, click anywhere outside of the editing panel to automatically save your changes.

Depending on the type of incident, the Details section of the Post-Incident Report may include specific incident properties and their values.
To update the values of incident properties:
- Click Edit in the Details section.
- Modify the values of incident properties that you want to update.
- Click Save.
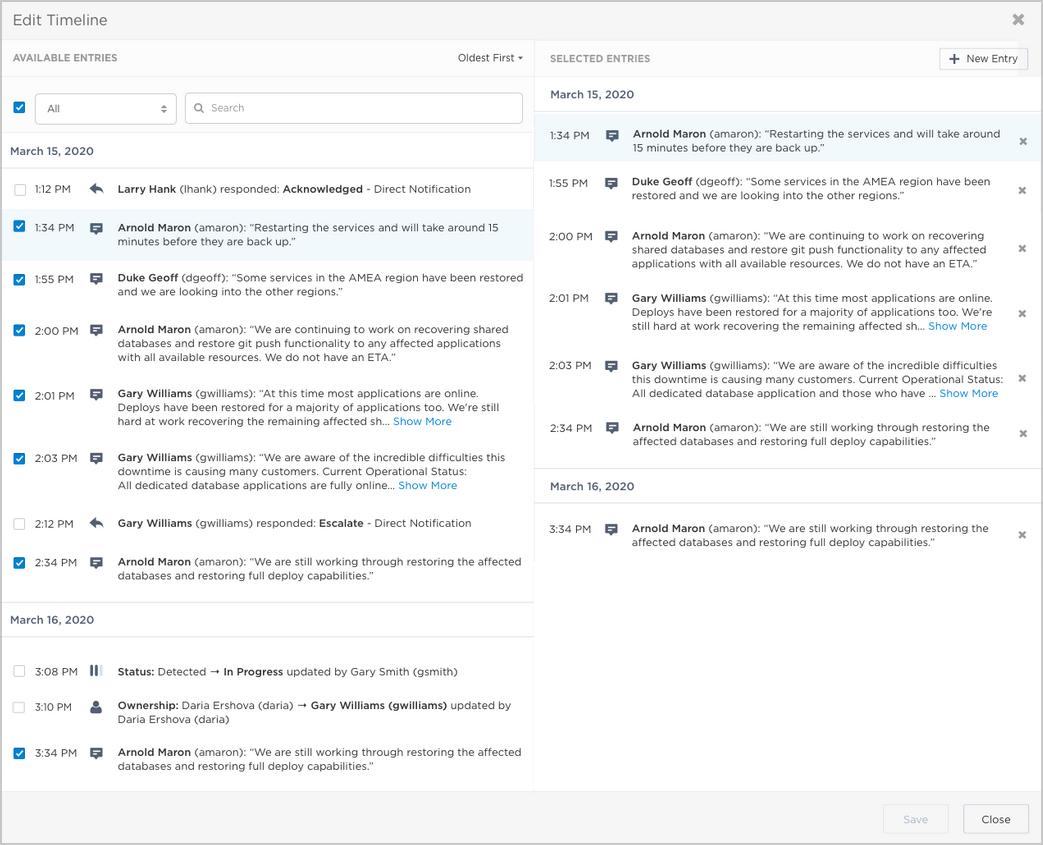
The timeline allows you to create a curated timeline for stakeholders. By default, it includes all the entries from the original timeline, but you can edit it to ensure only the most relevant moments of an incident's lifecycle and resolution process are captured. You can add, edit, or remove entries from the report timeline if extra information needs to be included that wasn't captured while the incident was occurring, or if details need to be modified to suit the audience.
To modify the timeline entries included in the report:
- Click Edit at the top of the timeline area.
- In the Edit Timeline screen, do any of the following:
- To exclude an entry from the report, click the 'x' beside it in the Selected Entries area to move it to Available Entries.
- To include an entry in the report, select the check box beside the entry in the Available Entries area to move it to Selected Entries.
- To filter the entries in the Available Entries list, use the drop-down list to specify which type of entries you want to see, or type one or more search terms in the Search field to display only the entries that include those terms.
- To sort the entries, click the drop-down menu and select Oldest First or Newest First.
- To add a Note to the timeline, click New Entry above the Selected Entries list. It will appear chronologically based on the timestamp.
The Actions panel lets you assign follow-up tasks to other xMatters users and track the progress by adding a description, external ticket link, and target date.
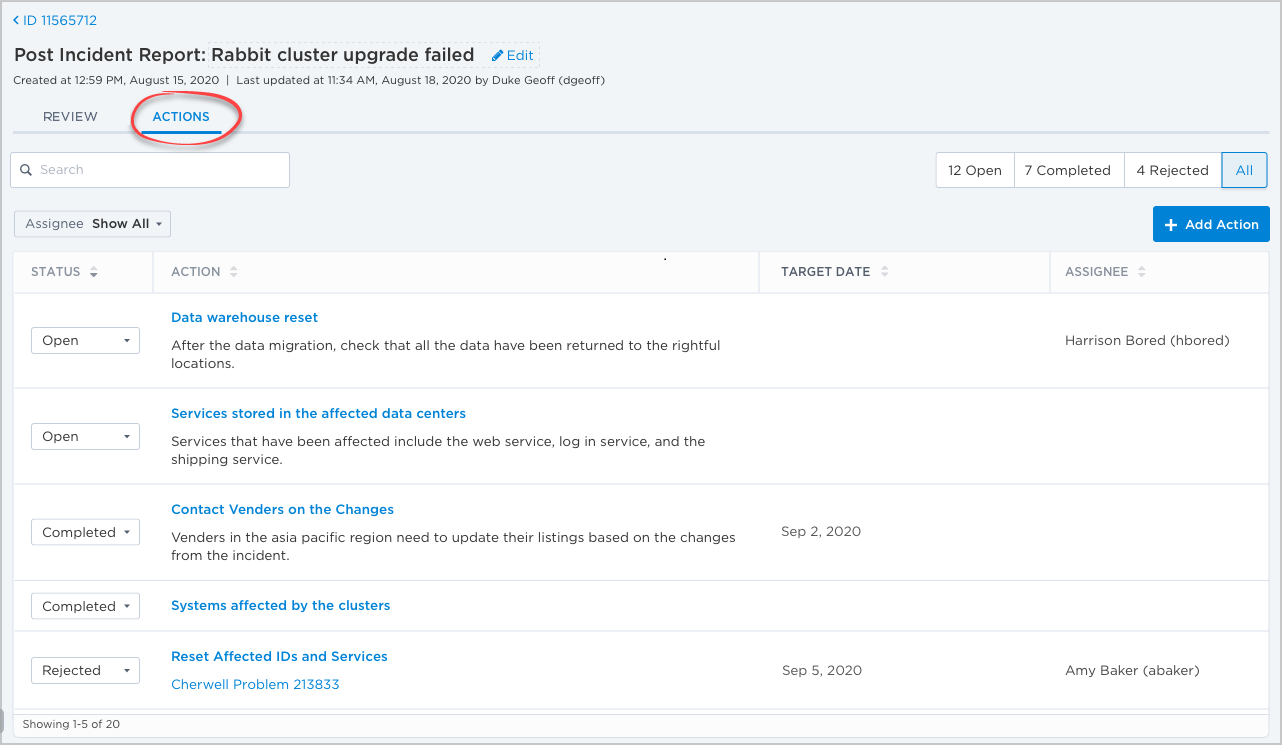
To create an action:
- At the top of the Post-Incident Report, click + Add Action. You can add an action from both the Review or Actions tab.
- Add a title, description, and an optional external ticket link/label. (If you need to reference or copy information from the Post-Incident Report, the pop out window is fixed so you can easily scroll through the different sections of the report while creating the action.)
- Choose an xMatters user or group to assign the action to by typing their name in the search bar and selecting them from the list.
- Select an optional target date using the calender.
- Click Save:

Currently actions can only be assigned to xMatters users. When a user is assigned an action, their name is displayed under the Assignee column of that action, but they aren't notified.
To manage post-incident actions:
- Click the Actions tab on the Post-Incident report.
- In the Actions list, do any of the following:
- To update the status of an action, select a new status from the corresponding drop-down menu.
- To update the Name, Description, Target Date, Links, or Assignees of an action, click the name of the action you want to edit.
- To delete an action, click the name of the action you want to remove, and click Delete.
- To sort the actions list, click any of the column headings to arrange them by status, name, target date, or assignees.
- To search and filter for specific actions, click the search bar and type the name, description, or link of the actions you want to see.
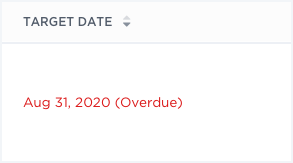
Overdue post-incident actions
To help you keep track of their progress, any overdue actions are automatically flagged with a red target date and moved to the top of the list:
Report permissions
Only incident commanders or company supervisors can create a Post-Incident Report or edit report owners. However, once a report is created, the report owner can be changed to any xMatters user by the current report owner, their supervisor, or a company supervisor. Any authenticated xMatters user can edit or view the report.
- Under the Roles section, click Edit.
- Type the name of the xMatters user to find and select them from the list.
- Click Update.
Export
You can export a Post-Incident Report as a DOCX or PDF file to share with others outside of xMatters or convert it to an editable document.