Manage task lists
The best time to create task lists is before an incident even happens. Preparing a list of tasks ahead of time ensures that you capture all the steps in your response process, allowing incident commanders to focus their efforts on resolving the issue quickly. The Incidents menu in Base and Advanced xMatters plans includes a Task Lists section where teams can build lists of tasks for different incident types or use cases. For example, SREs may define a list of failover tasks, service teams may document how to perform a deployment rollback, or support managers may specify the customer communication process. During an incident, incident commanders can select the relevant task lists that apply to the incident, and the tasks within the list will be added into the Tasks section of the console.
You can use the Task Lists page to review the current task lists (including how many tasks are in each list), remove existing lists that are no longer relevant, and create new ones to use in future incidents. Task lists are useful if your teams follow specific playbooks during the incident management process, and help resolvers adhere to best practices to reduce response time.
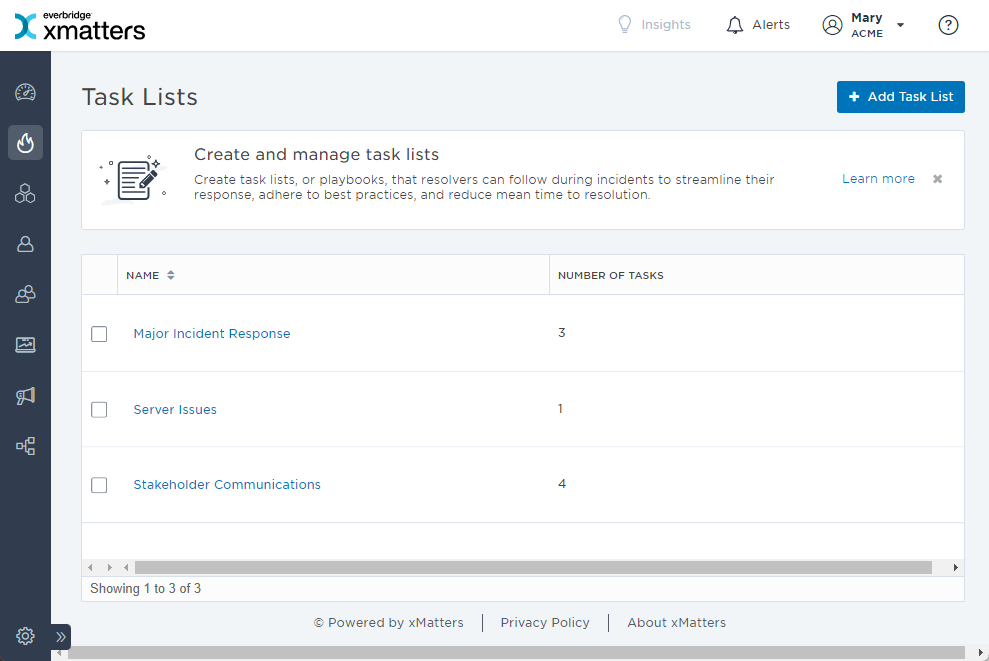
In the Incidents menu, under Configuration, click Task Lists.
The Task Lists page includes the following columns:
| Column | Description |
|---|---|
| Name | The name of the task list. |
|
Number of tasks |
The number of tasks in the task list. |
To more easily view data in the list, do one or more of the following:
- To sort the content of a column in alphabetical or chronological order, click the column header. (Click the header again to reverse the sort order.)
- To change the width of a column, move the pointer over the edge of the column and when the re-size icon appears, click and drag the column to the desired size.
- To rearrange the columns, click and drag a column header to a new location on the table.
- If the list contains more entries or columns than can be displayed on your screen, scroll horizontally or vertically. The system automatically loads more data as you scroll down the page.
You can add a new task list to use in future incidents.
To add a task list from the Task Lists page:
- On the Task Lists page, click + Add Task List.

- Type the name of the task list.
- Add an optional description.

- Click Add.
You can delete existing task lists that are no longer relevant.
To delete a task list from the Task Lists page:
- Select the check box next to the name of the task lists you want to delete. (Only one task list can be deleted at a time.)
- Select the check box next to the task or tasks you want to delete
- Click Delete.

Once you've created a task list, you can add new tasks from the task list's page.
To add a task to a task list:
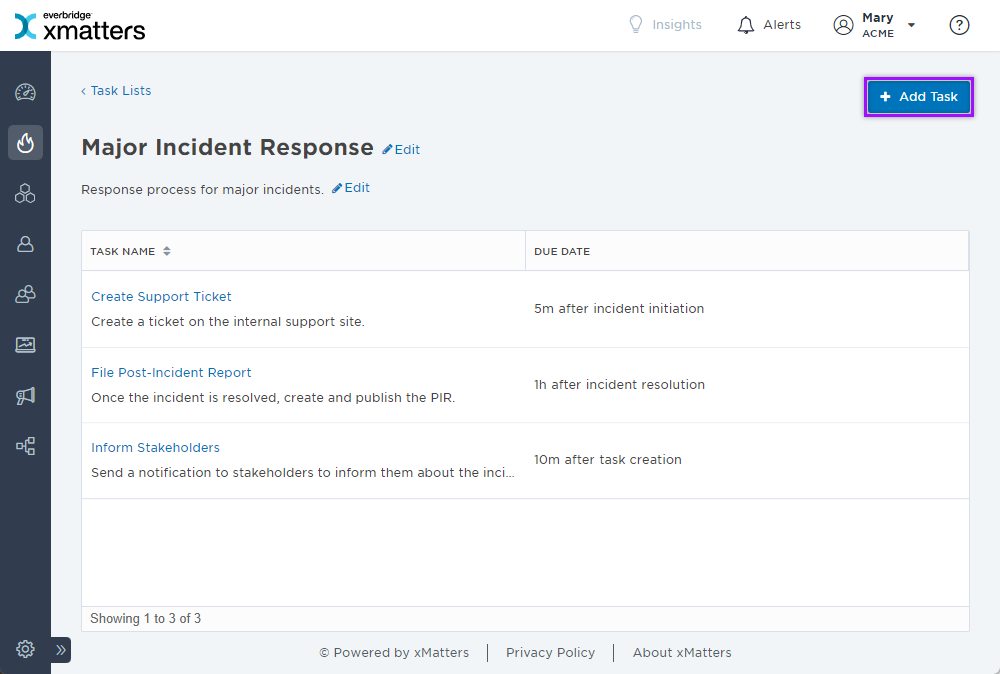
- On the Task Lists page, click the name of the list you want to add a task to.
- Click + Add Task.
- Type the name of the task.
- Add an optional description.
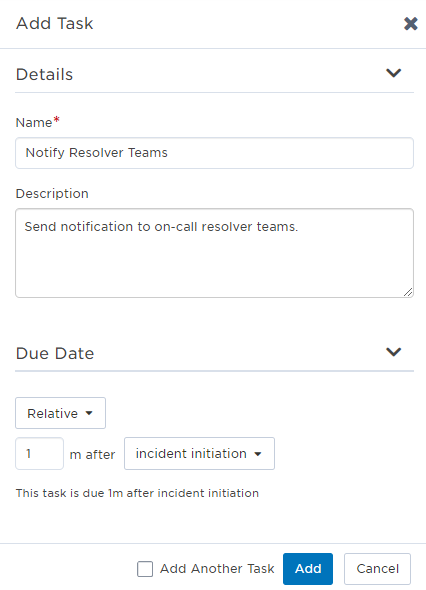
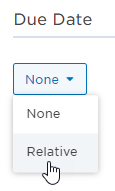
- For the Due Date, select None or Relative.
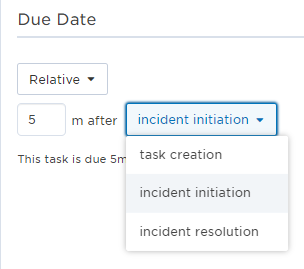
- If selecting a Relative due date, specify the number of minutes the task is due after either task creation, incident initiation, or incident resolution. (For example, if a task is due 10 minutes after an incident is initiated, type '10' and then select incident initiation from the drop-down menu.)
- If you want to add an additional task, check Add Another Task.

- Click Add.
You can delete individual tasks from a list if they are no longer required.
To remove a task from a task list:
- From the Task Lists page, click the name of the task list you want to remove a task from.
- Click the name of the task you want to delete.
- In the side panel, Click Delete.
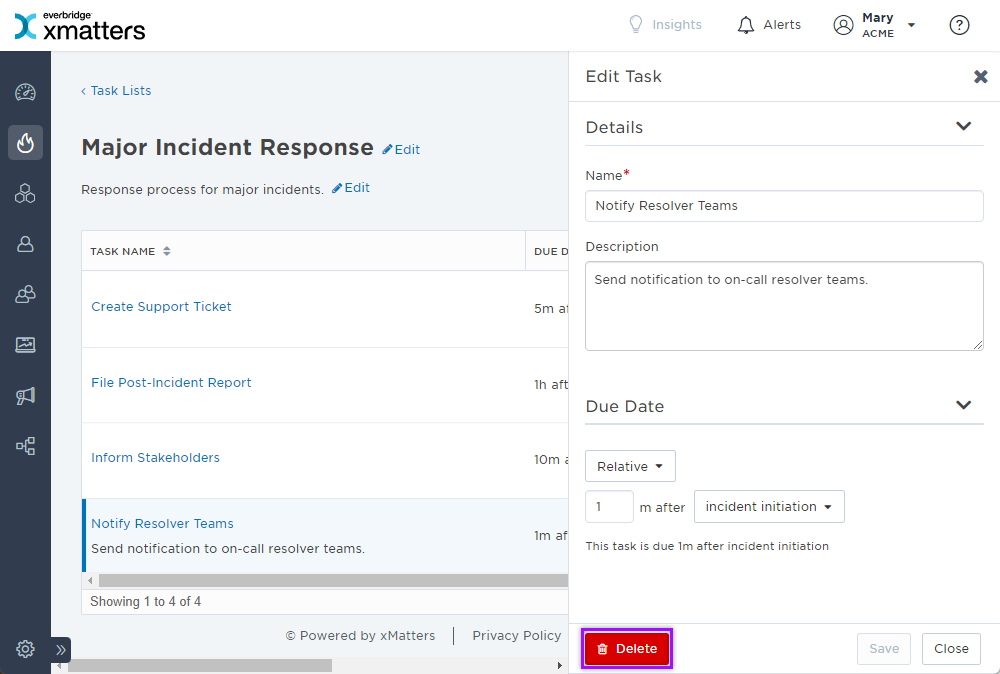
- From the Delete Task window, click Delete to permanently remove the selected task from the system.
If you remove a task from a task list, the task will still appear in the Incident Console of any existing incidents currently using that task list.
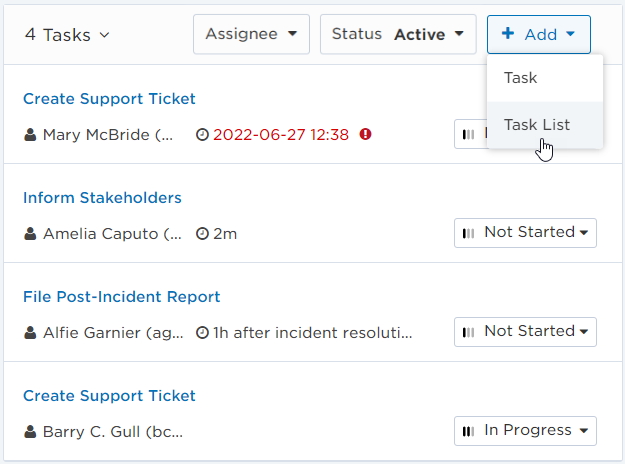
Tasks lists can be added to the Incident Console at any point during the response process. When added, the individual tasks within the list are displayed in the Tasks section of the console and can be managed and updated separately.
