Manage incident tasks
When teams are in the heat of an incident, it's crucial that everyone knows what needs to be done and who is working on what. The Tasks section of the Incident Console enables teams to run their incident response playbooks from within xMatters. From here, you can add tasks or task lists, assign them to users, set a due time and date, review the length of time remaining for each task and if any are overdue, and update each task's status.
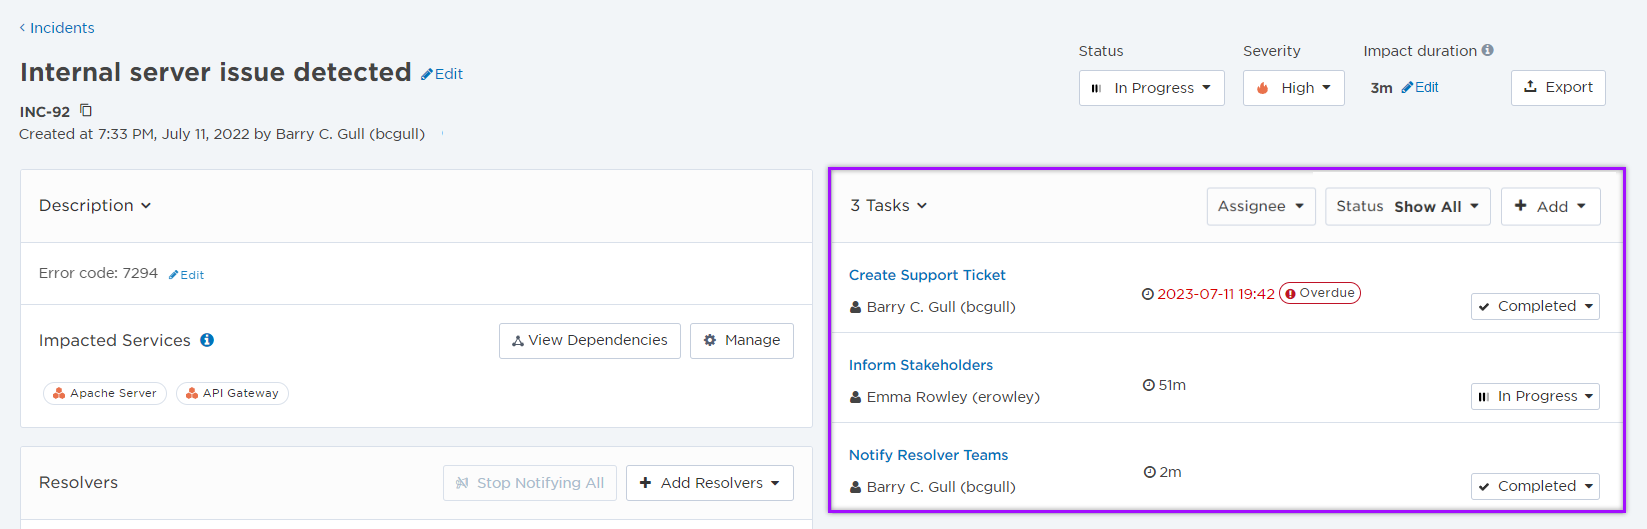
The Tasks section is available in the Incident Console during an incident, as well as after the incident is mitigated or resolved. The title, assigned user, due date, and status are clearly displayed in a list format, and you can update them at any time.
You can add tasks from within the Incident Console at any point and include important details to help teams at every stage of the incident response process. Status, due date, and assignee information allows resolvers to keep track of what needs to be done during the incident.
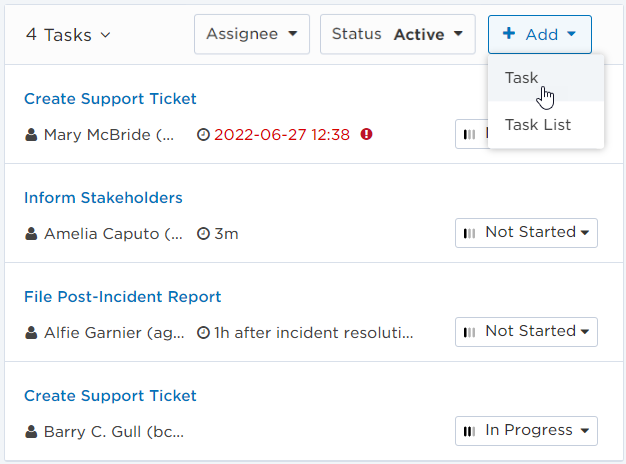
To add a task to an incident:
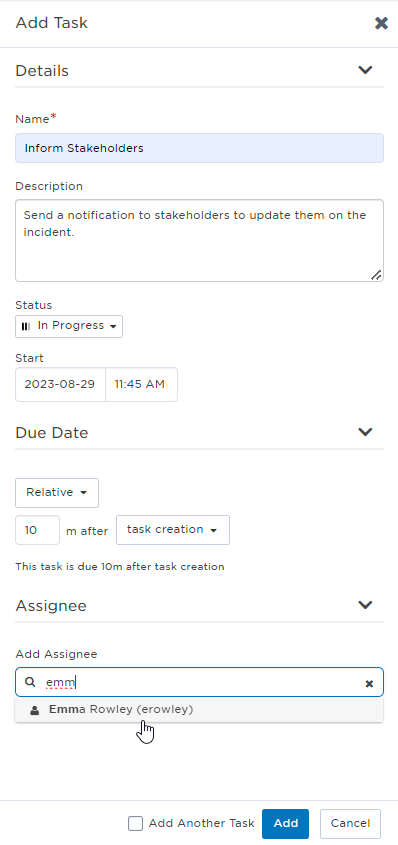
- In the Tasks section of the Incident Console, click + Add and select Task to open the Add Task side panel.
- Type the task Name and an optional Description.
- Click the Status drop-down and select the task's current status:
- Not Started
- In Progress
- Completed
- Rejected
- If the status is In Progress or Completed, select a Start time for the task.
- For the Due Date, select None, Relative, Repeating, or Specific.
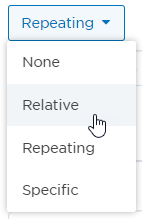
- If selecting a due date, do one of the following:
- For Specific due dates, select the date and time the task is due.
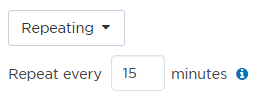
- For Repeating due dates, specify the interval (in minutes) between each time the task repeats. (Each repeating task is created with the same name and details as the original task, and repetitions continue until the incident is resolved.)
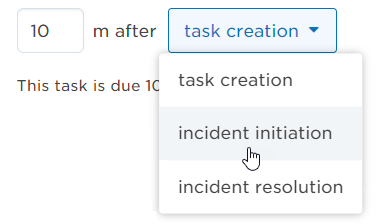
- For Relative due dates, specify the number of minutes the task is due after either task creation, incident initiation, or incident resolution. (For example, if a task is due 10 minutes after an incident is initiated, type '10' and then select incident initiation from the drop-down menu.)
- In the Assignee section, start typing the name of a user to search for and select them.
- To send a notification to the assignee letting them know that they've been assigned a task, select the Notify Assignee check box.
- Task assignment notifications are sent only to users' email, chat app, or mobile app devices, and not to SMS or voice devices.
- To create another task immediately after you've finished adding the current task, select the Add Another Task check box.
- Click Add.
You can add task lists from within the Incident Console at any point. Tasks lists can be set up to help incident commanders capture all the steps in a response process, without having to add individual tasks manually.
To add a task list to an incident:
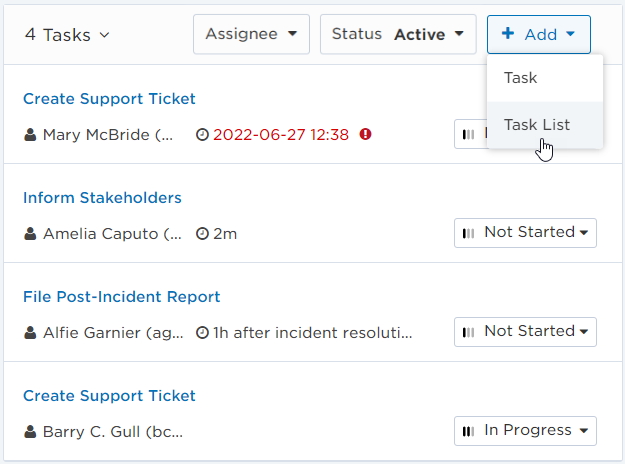
- In the Tasks section of the Incident Console, click + Add and select Task List.
- From the Add Task List window, search for and select the task list you want to add. (You can only select one task list at a time.)
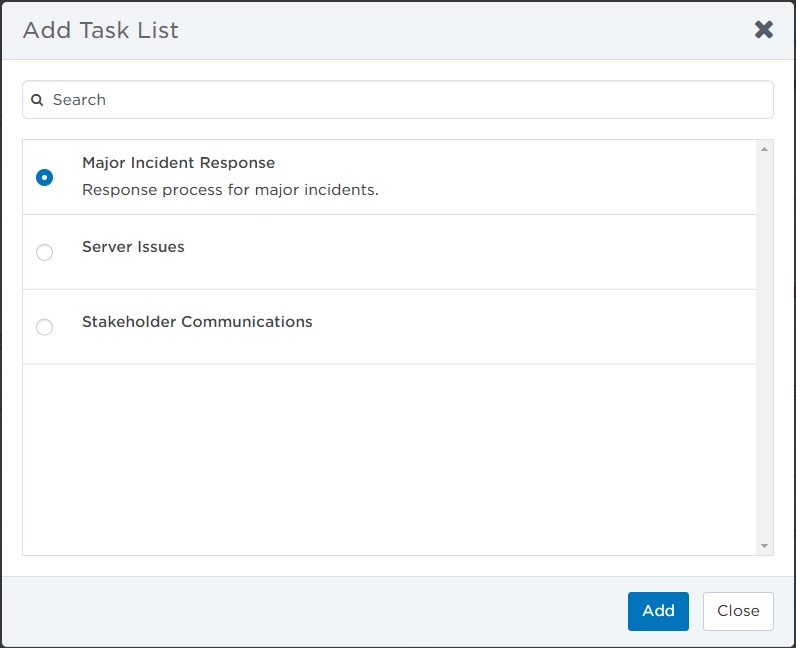
- Click Add.
When task lists are added to an incident, the individual tasks within the list are displayed in the Tasks section of the Incident Console.
You can update tasks at any time during the incident response process to reflect any required changes to the task, assignee, or status.
To update a task:
- In the Tasks section of the Incident Console, click the name of the task you want to update.
- You can also update tasks from the Tasks page.
- You can also update tasks from the Tasks page.
- Update the name, description, start or end time, due date, assignee, or status of the task.
- If you're changing the assignee, select Notify Assignee to send them a notification that they have been assigned a task.
- Click Save.
To update a repeating task:
- In the Tasks section of the Incident Console, click the name of the task you want to update.
- Do one of the following:
- To update the selected occurrence of a repeating task, update the name, description, start or end time, due date, assignee, or status of the occurrence.
- To update all the occurrences of a repeating task, click Edit Series, and update the name, description, due date, or assignee of the repeating task.
- Click Save.
The due date of a repeating task cannot be updated.
You can delete tasks at any time during the incident response process if they are inaccurate or no longer relevant.
To delete a task:
- In the Tasks section of the Incident Console, click the name of the task you want to delete.
- You can also delete tasks from the Tasks page.
- You can also delete tasks from the Tasks page.
- At the bottom of the Edit Task panel, click Delete.
- In the Delete Task dialog box, click Delete.
To delete a repeating task:
- In the Tasks section of the Incident Console, click the name of the task you want to delete.
- Do one of the following:
- To delete the selected occurrence of a repeating task, at the bottom of the Edit Task panel, click Delete. (Deleting the last occurrence of a repeating task will also discontinue all future occurrences.)
- To discontinue all future occurrences of the task, click Edit Series, and at the bottom of the Edit Task panel, click Delete. (Any existing tasks will be detached from the original repeating task.)
- In the Delete Task or Delete Task Series dialog box, click Delete.
The available filters allow you to narrow the tasks list based on matching specific criteria. For example, you can use filters to find tasks assigned to a specific user, or only tasks that have not been started.
You can apply one or more filters to narrow down the list of tasks. If you apply multiple filters, xMatters only returns tasks that match all of the specified filter criteria. For detailed instructions on how to use filters, see Filtering data tables.
The following table describes the available filters in the Tasks section of the Incident Console and their values:
| Filter | Values |
|---|---|
|
Assignee
|
|
| Status |
|