Save and manage Alerts report views
You can extract a lot of information from the Alerts report using a well-crafted combination of filters and search criteria. With custom alert views, you can save that precise combination and easily load it again or even share it with other users. Whether you're managing multiple active alerts or generating reports on historical alerts, this lets you easily switch between different setups without having to rebuild your filters from scratch every time.
 Create a custom alert view
To create a custom alert view, follow these steps:
- In the Alerts report, use the available filters and search options to fine-tune the data displayed in the report and to arrange the columns in your desired order.
- Once you've finalized the criteria and layout of the Alerts report you want to save, click the Save Alert View link in the report header, then select Save As....
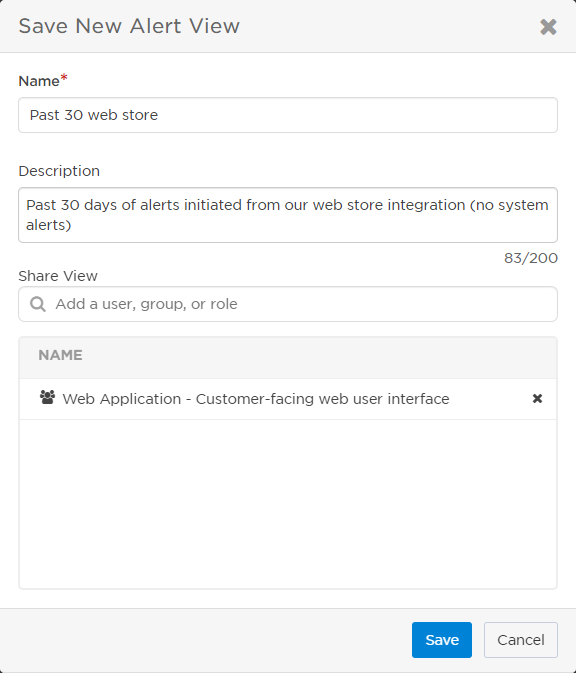
- In the Save New Alert View dialog box, enter a Name and Description.
- Use the Share View search field to locate the users, groups, or roles with whom you want to share the view.
- Click Save to create the new view.

You can create a view for a maximum of 50 recipients selected in the Targeted Recipients or Notified Recipients filters.
Manage your custom alert views
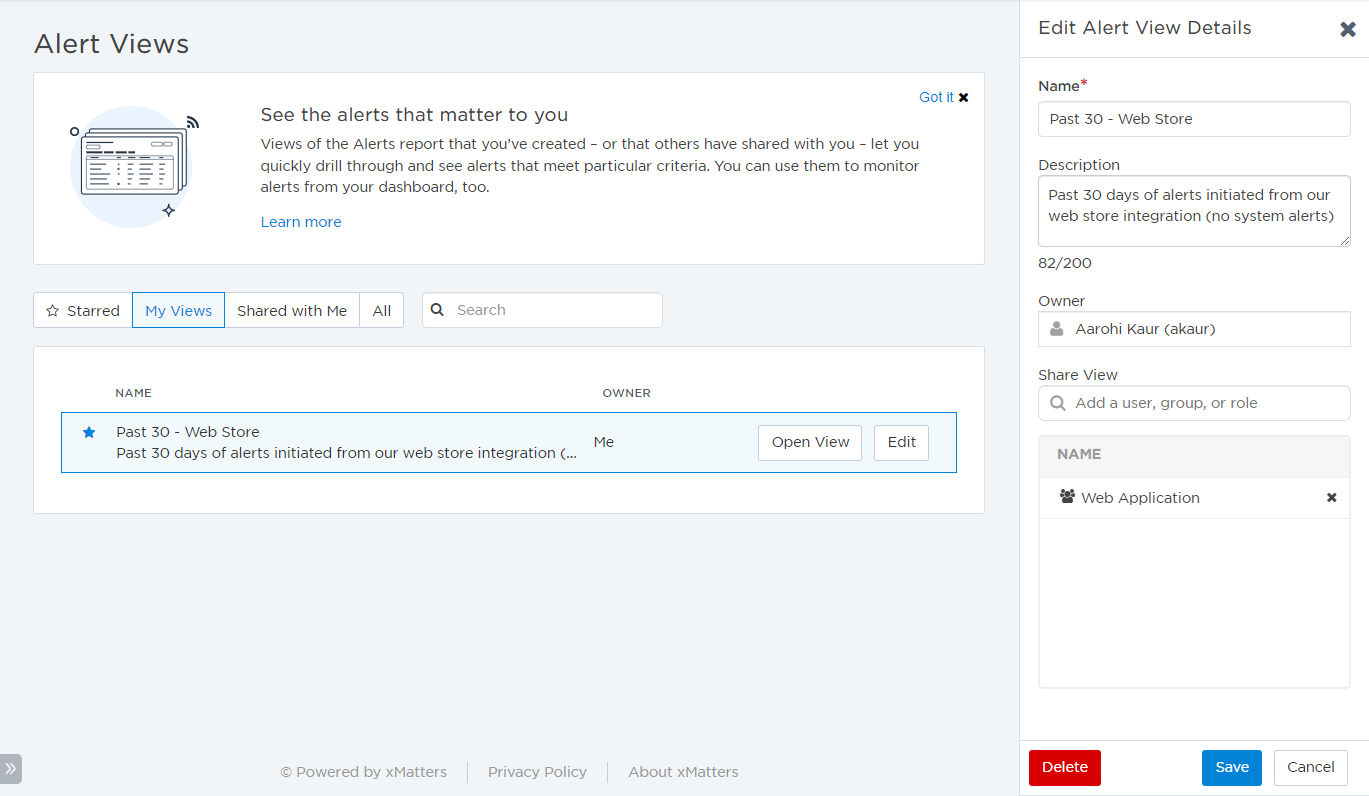
You can view and filter your custom views on the Alert Views page. To access the page, click the Alert Views option in the Reports menu on the left side of the screen.
On the Alert Views page, do any of the following:
- Select a filter at the top of the list to limit the displayed views to the ones you created, to views other users have shared with you, or only to the views you have starred.
- Click the star to the left of a view to mark it as important; starred views appear at the top of the list on both the Alerts View page and the Alerts report custom view drop-down list.
Open a custom alert view in the Alerts report
To load a previously saved custom alert view, select the view from the drop-down list at the top of the Alerts report. You can also navigate to the Alert Views page, locate the view you want to open, and click Open View. xMatters will open the Alerts report and load the selected view.
Modify a custom alert view's criteria and layout
To modify the filters and layout of an existing custom alert view:
- Select the view from the drop-down list at the top of the Alerts report to load it.
- Modify the filters and search criteria and rearrange the column layout as needed.
- Click the Save Alert View link in the report header, and then select Save Changes.
- If you want to save a new custom alert view with your modified criteria, select Save As... instead of Save Changes. The existing custom alert view will retain its original filters and layout.
Edit a custom alert view's details
You can modify the details of your custom alert views and the alert views that have been shared with you on the Alert Views page. You can change the name and description, reassign ownership, and change whom it's shared with.
- On the Alert Views page, locate the view you want to modify and click Edit.
- In the Edit Alert View Details panel, do any of the following:
- Update the Name and Description to help other users identify the purpose of the view.
- Reassign ownership by selecting a new user in the Owner field. If you are reassigning a view you created, you may not be able to load or edit the view unless you belong to a group or role the view is shared with.
- Change the users, groups, or roles that the view is shared with by modifying the list in the Share View section.
- Click Save to apply your changes.
Delete a custom alert view
To delete a custom alert view:
- On the Alert Views page, locate the view you want to delete and click Edit.
- At the bottom of the Edit Alert View Details panel, click Delete.