Example: Configure an outbound integration
In our inbound integration example, we built an integration that created a notification alert in xMatters when a web request was received from New Relic. In this example, we'll build an outbound integration that starts a new conference bridge in xMatters.
1. Add a new outbound integration
To begin, click the Workflows tab, then click the name of the workflow. Select the Integration Builder tab and add a new outbound integration.
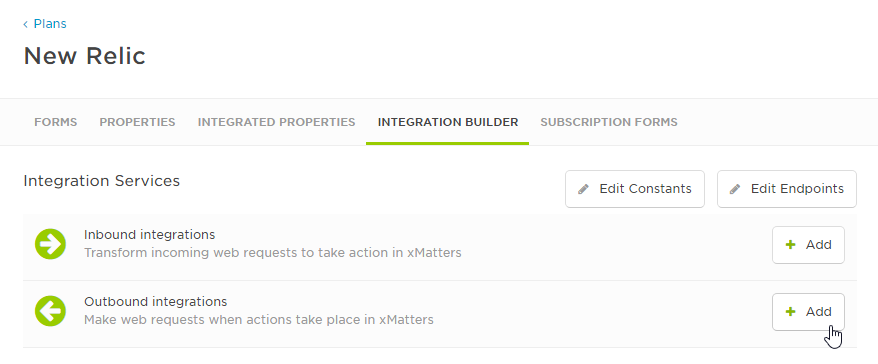
Step 1 - Select the trigger
The first thing we do is set the trigger for our outbound integration. This means selecting the type of activity that occurs for a form that will trigger our integration.
We want our integration to run when responses are submitted, so we select the Notification Responses activity type. And since we want xMatters to start a new conference bridge based on responses to our New Relic integration, we'll select the New Incident form.

Step 2 - Choose an action
Next we'll choose the action for our outbound integration. We'll select that we want our integration to Run a Script.

Step 3 - Name the integration
We'll make sure to give our integration a meaningful name so we can find it again later.

Step 4 - Transform the content (skip this step for now, we'll come back to it later)
The Integration Builder creates a default transformation script and provides a full-screen editing window to modify it. We'll skip this step for the moment, because we first want to see exactly what the webhook from our form look like.

Click Create Outbound Integration. Our new integration is now listed as an integration service. Let's check the alert properties that we want to send to the outbound integration.
2. Include properties in outbound integrations
In this next step, we'll select the alert properties that we want to send to the outbound integration.
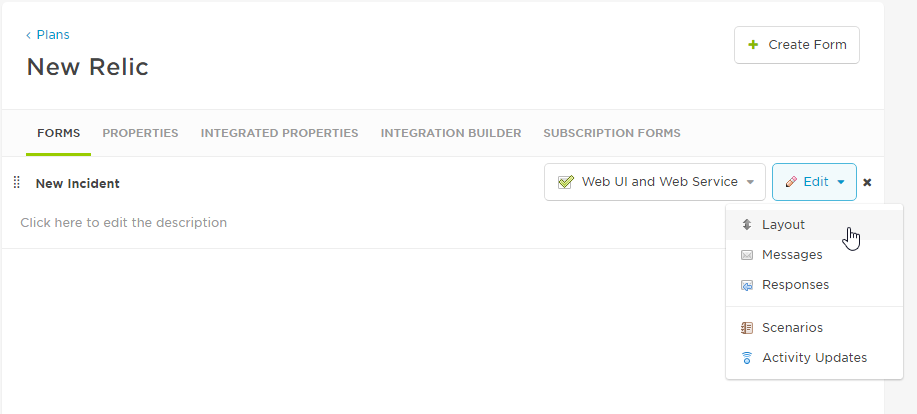
To configure the alert properties that will be included in our outbound integration, we go to the Forms tab, and from the Edit menu select Layout.
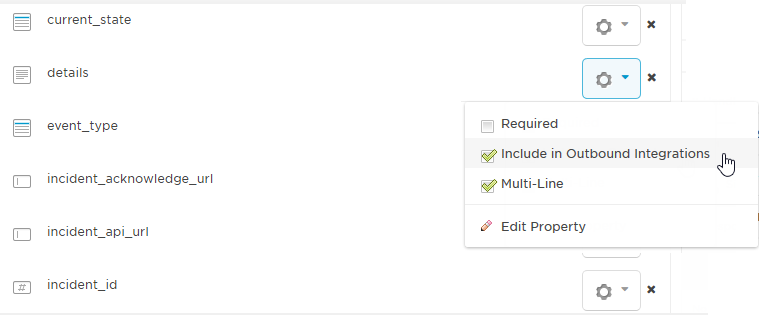
We'll click the Options icon and select Include in Outbound Integrations for each property we want to include.
If your outbound integration needs to update another product, make sure you include the property that represents the alert or incident in that product. For example, a help desk system such as ZenDesk would require the property containing the ZenDesk incident ID.
That should take care of all the plumbing needed to actually execute the integration service. Now we need to test what we've done so far and get a look at that webhook.
3. Check the request details in the Activity panel
We can use the Activity panel in xMatters to see the input for our integration service. Once we see the content of the webhook, we can transform the content to make sure it does what we want.
First, we create an alert using the New Incident form and respond to one of the resulting notifications. In the Integration Builder, we click the Settings drop-down list (the gear icon) for our outbound integration, and click View Activity.
The Activity panel shows us not only that the sample transformation script has written the xMatters alert ID to the logs, but that the input to our outbound integration service is a response from our form, the content of which is a JSON object:
{
	"recipient":"irose",
	"device":"iPhone",
	"response":"Acknowledge",
	"annotation":"null",
	"eventIdentifier":395002,
	"date":"15-11-04 21:07:45.910",
	"eventProperties":[
	{
		"details":"New Relic Alert - Channel Test"
	}
	]
}
The next task is to modify our transformation script to make an outbound web request.
4. Transform the content of the webhook
In this step, we'll create a script that will transform the webhook content into an outbound web request that will trigger a form to start a conference bridge.
Our conference bridge form needs to be in the same workflow, and we can add two properties to it that we will populate using the transformation script:
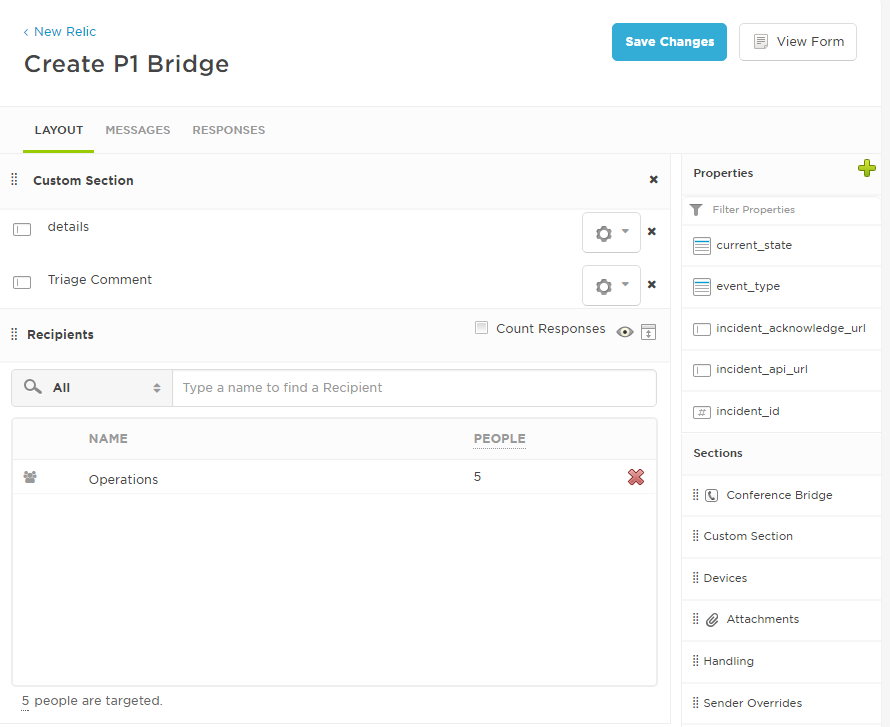
When deployed as a web service, this form can be initiated using a cURL command similar to the following:
curl -1 -H "Content-Type: application/json" --user USERNAME -X POST -d '
{ "properties": {"details": "",
"Triage Comment": ""
},
"recipients": [
{"targetName": "Operations"
}
]
}
' "https://company.na11.xmatters.com/reapi/2015-04-01/forms/370cfaf4-c2d0-4a72-8472-1a10b6e7f2ec/triggers"
We need to replicate this cURL command in the transformation script using the built-in HTTP client and endpoints.
In the Integration Builder, we click the name of our outbound integration to edit it, and then click Edit Script. The Transformation Script Editor contains the default transformation script that was generated when we created our integration. The sample code provides examples of how to perform common tasks required by outbound integrations: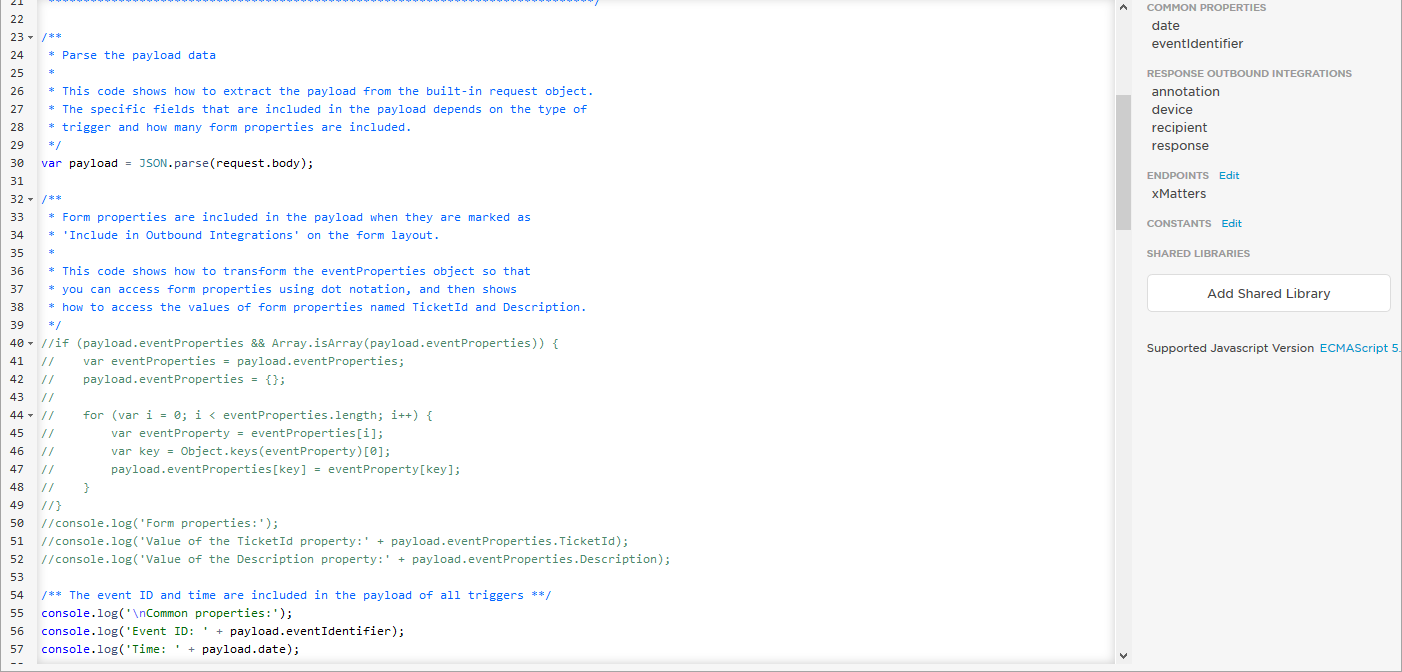
The sample script contains the following code snippet:
var auditLogRequest = http.request({'endpoint': 'AuditLoggerSystem',
'method': 'POST',
'path': '/api/logEntry',
'headers': {'Content-Type': 'application/json'
}
});
We want to modify this to use our "xMatters" endpoint that we created in the inbound integration to represent the base URL of the web service we want to call, and the authentication credentials to send with the request. We also need to define the path of our web service, relative to the base URL of the endpoint:
var createBridge = http.request({'endpoint': 'xMatters',
'method': 'POST',
'path': '/reapi/2015-04-01/forms/370cfaf4-c2d0-4a72-8472-1a10b6e7f2ec/triggers',
'headers': {'Content-Type': 'application/json'
}
});
If we wanted to use different authentication credentials, or target a different URL , we could simply create a different endpoint.
With that done, we can create a trigger object to send in the request body.
The Script Editor lists all of the properties available to use in the incoming webhook objects. We'll grab the "details" alert property, and the value of any annotations (comments) that may have been submitted with the response:
var requestBody = {};requestBody.properties = {};requestBody.properties.details = payload.eventProperties.details;
requestBody.properties['Triage Comment'] = payload.annotation
The last thing we need the script to do is to send the request. In this example, we'll check the response option that was submitted, and only send the web request if a particular response was used:
if(callback.response === 'P1Bridge'){var response = auditLogRequest.write(requestBody);
if(response.statusCode!= 200){ console.log('\nThere was an error updating the external system.\n');return;
}
}
That should do it! We save the changes to the script, save the integration, and it's time to test our work.
5. Check that it works
The final thing to do is to respond to a notification with "P1 Bridge" and make sure everything is working.
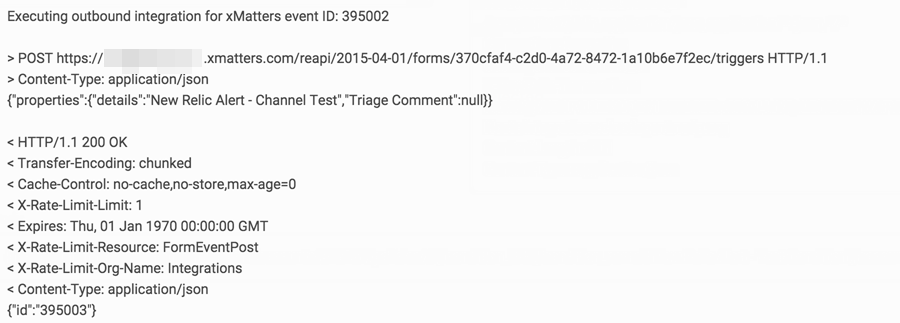
Once we've sent another webhook from New Relic to our inbound integration, and responded to the resulting notification with "P1 Bridge", we can go back to the Activity panel and check the output of the transformation script. Click View Activity from the script editor to view the Activity panel.
The logs show us the HTTP request and response:
Success!
This example described how to use an outbound integration to make a request to the xMatters REST API, but the workflow is similar no matters what you want to do. The key steps are:
- Direct web requests from a form to an outbound integration.
- Use the transformation script to get the values of alert properties from the webhook.
- Define an endpoint with the base URL and authentication credentials to use with your HTTP request.
- Use the HTTP client to define the path of the web service you want to call, relative to the base URL of the endpoint you are using.
- Construct the body of the HTTP request according to the requirements of the API you are using.
- Submit the HTTP request.
That's it, we're done!
Over to you now: we can't wait to see what you build.