Example: Configure an inbound integration
Inbound integrations take action in xMatters. For example, xMatters might create or terminate a notification alert based on an incoming web request.

In this example, we'll build an inbound integration that sends notifications when New Relic detects a new incident.
1. Add a new Inbound Integration
The first step in getting an integration up and running in xMatters is to create and save the integration in our workflow.
First let's get to the right place in the interface: Click the Workflows tab to see a list of your workflows. Click the name to open the workflow the click the Integration Builder tab. Expand the Inbound Integrations section and click Add.
Now let's add a new integration.
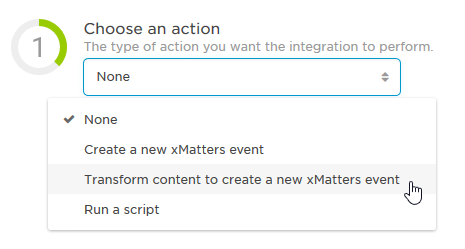
- Choose an action:
The first thing we do is choose an action for our integration. Since we want xMatters to send notifications when New Relic detects a new incident, we use the drop-down to select Transform content to create a new xMatters alert.
- Select a form
Next, we choose the form that will be used to send the notifications. In this example, our form is called "New Incident".
The form defines all the properties that we expect New Relic to send us, the content of the notification to be sent out, any response options to present to recipients, and also any rules for creating subscriptions.

- Name the integration
We make sure to give our integration a meaningful name so we can find it again later.

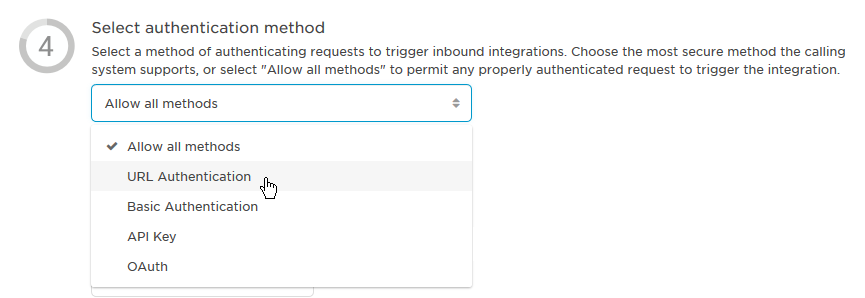
- Select authentication method
Set the authentication method to 'URL Authentication'. Later when you're setting up your own integrations, you may want to consider one of the more secure user-based authentication methods that are available.
- Transform the content (skip this step for now, we'll come back to it later)
The Integration Builder then gives us the option to create a transformation script. We'll skip this step for the moment, because we first want to see exactly what New Relic is sending us so we know how to transform it.

- Click Save. Our new integration is now listed as an integration service.
xMatters displays the web service URL that we can use to target this integration from an external application. Click Copy URL, and let's get New Relic to send us a webhook so that we can inspect the payload and figure out what our transformation script will need to do.

2. Send a test webhook to xMatters
In this next step, we'll get New Relic to send a web request to our integration URL so that we can figure out what our transformation script needs to do.
- In New Relic, paste your xMatters integration URL into the Base URL field, and then send a test notification.
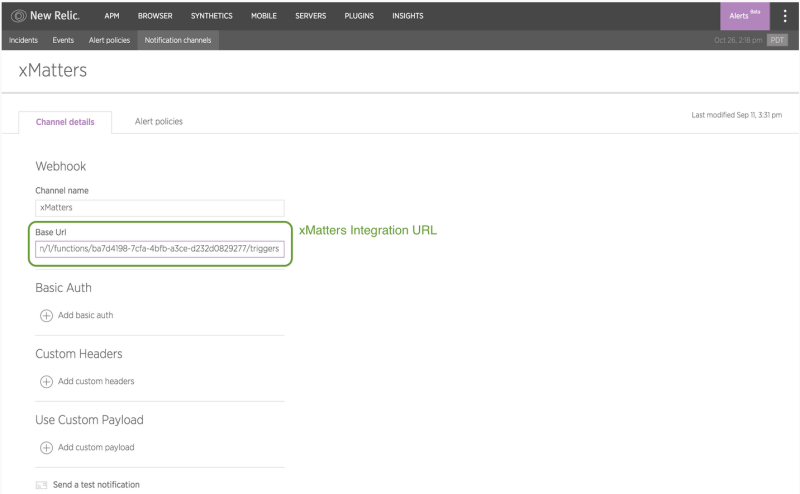
Now that the webhook is sent, let's inspect the webhook content to see what information is included in the request from New Relic.
3. Check the request details in the Activity panel
We can use the Activity panel in xMatters to see the history of incoming web requests sent to us by an integration service. Once we see what New Relic is sending us, we can transform the content so that our form understands it.
- In xMatters, go to the Workflows tab again, and click name of the workflow.
- Click the Integration Builder tab and expand the Inbound integrations section.
- Click the Settings drop-down list (the gear icon) for our integration, and click View Activity.
The status of an inbound integration may be:
- Completed: The integration script ran to conclusion without throwing any errors. (This doesn't necessarily mean that an xMatters alert was created.)
- Error: The integration script encountered an error, such as a syntax error. This logs will display the output of the script to help you locate and debug the problem.
- Canceled: The integration script failed to complete. This might be because code in the script caused an infinite loop, or the script used excess resources and hung.
The Activity panel contains three tabs with details for each request: Steps, Log, and Alert. We're interested in the Steps and Log tabs, as these will show us any request parameters or headers for the incoming request, as well as the request body.
We can see that New Relic has sent us some JSON:
{
   "policy_url":"https://alerts.newrelic.com/accounts/395751/policies/0",
   "condition_id":0,
   "condition_name":"New Relic Alert - Test Condition",
   "account_id":395751,
   "event_type":"NOTIFICATION",
   "runbook_url":"http://localhost/runbook/url",
   "severity":"INFO",
   "incident_id":0,
   "version":"1.0",
   "account_name":"xMatters_1",
   "timestamp":1445894710005,
   "details":"New Relic Alert - Channel Test",
   "incident_acknowledge_url":"https://alerts.newrelic.com/accounts/395751/incidents/0/acknowledge",
   "owner":"John Smith",
   "policy_name":"New Relic Alert - Test Policy",
   "incident_url":"https://alerts.newrelic.com/accounts/395751/incidents/0",
   "current_state":"test",
   "targets":[
      {
         "id":"12345",
         "name":"Test Target",
         "link":"http://localhost/sample/callback/link/12345",
         "labels":{
            "label":"value"
         },
         "product":"TESTING",
         "type":"test"
      }
   ]
}
Luckily for us, this JSON request sent by New Relic isn't too far off of the payload required to trigger an alert using the xMatters REST API. In the next step, we'll use the Transformation Script Editor to create a script that will transform the incoming web request from New Relic into the format we need.
4. Transform the content of the incoming request
In this step, we'll create a script that will transform the incoming web request from New Relic into a format that is compatible with our form.
The input to every inbound integration script is an object that represents the incoming web request that triggered the integration. Using the object, we have access to the request body, parameters, and headers.
- In the Integration Builder, open the inbound integration and click Save and Open Script Editor.
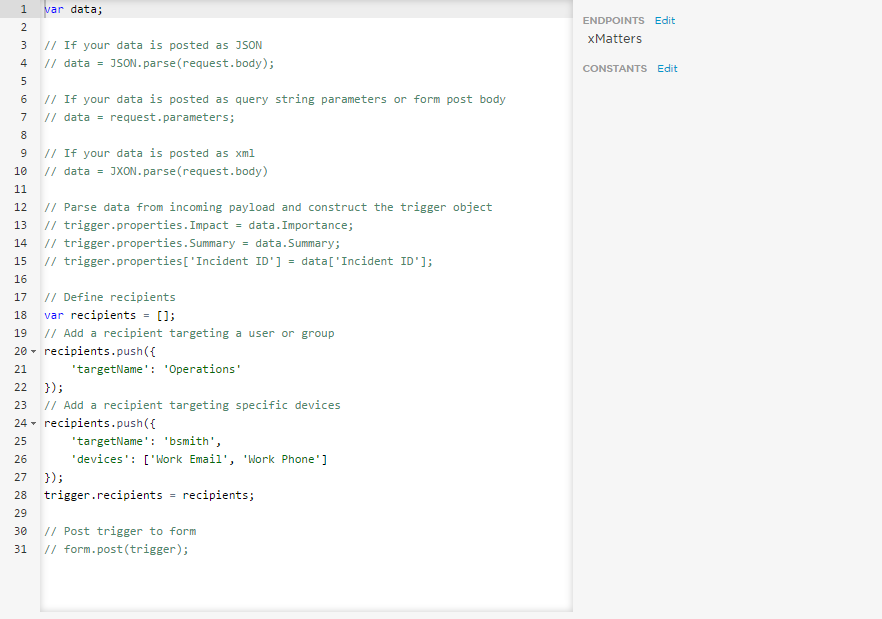
We want to parse the request body as JSON, so we can replace this first section of the script:
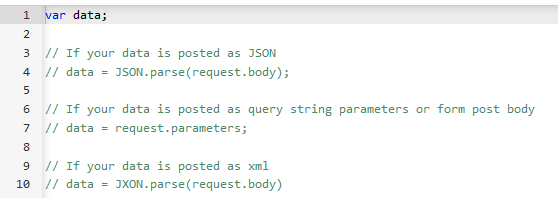
With the following code:
var data = JSON.parse(request.body);
Inbound integrations that will create an xMatters alert need to construct a trigger object that will be sent to the POST trigger web service. The sample script shows us a few examples of how to parse the incoming JSON and populate properties of the trigger object:

Because the payload of the New Relic webhook is so similar to what we need, we can create a valid trigger object by replacing this section with the following code:
trigger.properties = data;
The next section of the sample script is used to define the recipients of the messages, but there is nothing in the payload from New Relic that represents the owner. We can more easily define this in the form instead, so we'll remove this section of code.
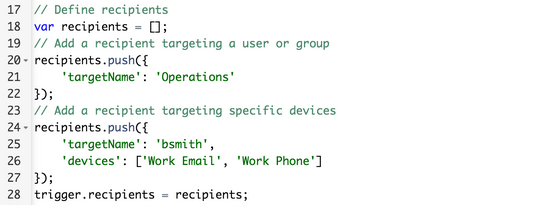
The final section uses the form.post(trigger) sample function which is used to create the alert:

We'll use this function to take our trigger object as an argument and post it to the form we selected earlier in our configuration of the service.
Our final transformation script looks like this:

5. Check that it works
The final thing to do is to send another webhook from New Relic and make sure everything is working.
Once we've sent another webhook from New Relic to our xMatters integration URL, we can go back to the Activity panel and check the output of the transformation script.
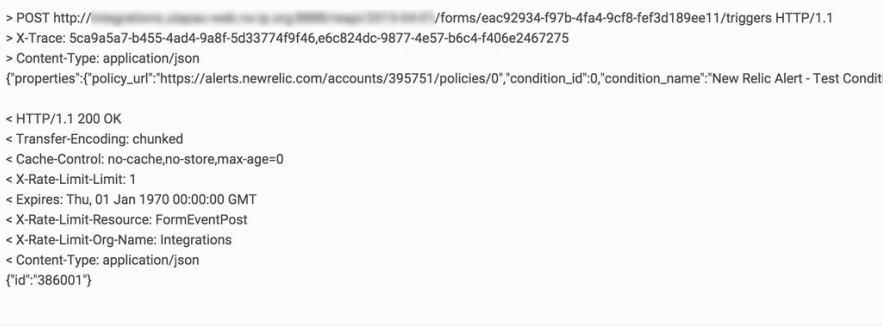
The logs show us the HTTP request that was made to the POST trigger web service, as well as the 200 OK response which contains the alert ID of the created alert:
