Microsoft SCOM
Flow Designer has a Microsoft SCOM alerts trigger and built-in Microsoft SCOM step to help you integrate Microsoft SCOM into your alert management and incident response flows.
Microsoft SCOM Step
The following steps is available:
- Set Alert Resolution State: automatically add a comment to an existing Microsoft SCOM Incident.
Prerequisites
All requests between xMatters and Microsoft SCOM must be made through an agent. If you do not already have an agent installed and running, see Download and install the agent.
To add a Microsoft SCOM step to your flow:
- Go to the Apps tab of the palette, expand the Microsoft SCOM section, and drag the Set Alert Resolution State step onto the canvas.
- For instructions on using the Microsoft SCOM trigger, see Microsoft SCOM Incidents trigger.
- Connect the step to the previous step in the flow. This gives you access to the alert properties and outputs of previous steps when you configure this step's inputs.
- Double-click the step to edit it, and use the Setup tab to configure the inputs. You can use plain text and input variables (or both). See the following section for detailed information on the inputs, including which are required.
- On the Run Location tab, select the agent to use.
Set Alert Resolution State
Use the Set Alert Resolution State step to update the resolution state of an existing Microsoft SCOM incident.
Inputs
Inputs with an asterisk* are required.
|
Label |
Description |
|---|---|
|
Alert ID* |
Comma-separated list of Microsoft SCOM alert IDs. |
| Resolution State* | Numerical code of the resolution state to set the alerts to. For example, 254 to resolve an alert. |
| Comment | Comment to add for the resolution state change. Maximum length is 85 characters and longer values will be truncated. |
Outputs
|
Label |
Description |
|---|---|
|
Success |
When all alerts were updated, the value is true. If any alert could not be updated, the value is false. |
Microsoft SCOM Alerts trigger
The built-in Microsoft SCOM Alerts trigger initiates a flow when it receives a request from a webhook in Microsoft SCOM.
Prerequisites
All requests between xMatters and Microsoft SCOM must be made through an agent. If you do not already have an agent installed and running, see Download and install the agent.
Add the Microsoft SCOM Alerts trigger to the canvas
- Go to the Triggers tab in the palette, expand the App Triggers section and drag the trigger onto the canvas.
- Double-click the trigger (or click the pencil icon).
- Set the authenticating user. Alternatively, you can create an integration user to use as the authenticating user.
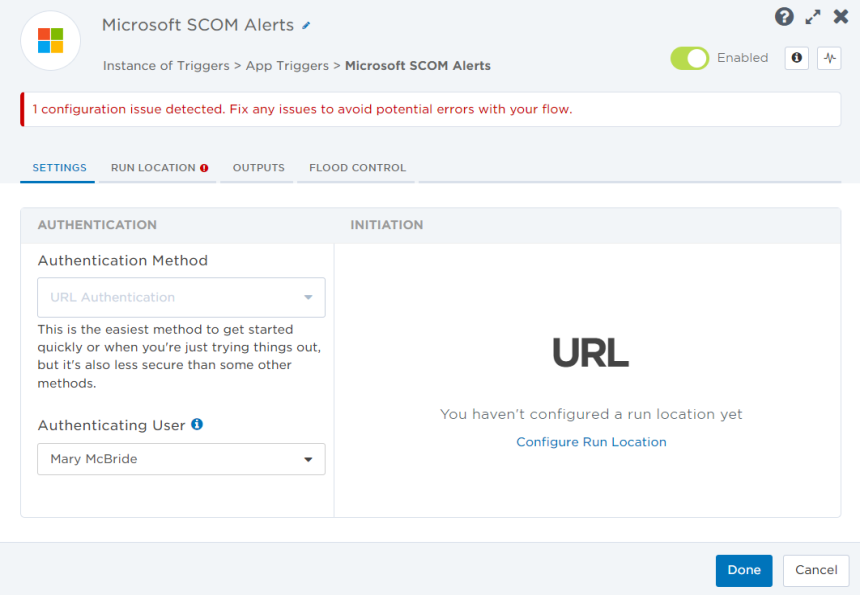
- Click the Run Location tab to select the Agent to use to send requests to Microsoft SCOM.
- Click the Flood Control tab to edit the trigger's default flood control settings. For more information about these settings, see Trigger Flood Control.
- Click Done.
- On the flow canvas, connect the steps you want to run when xMatters receives a request to that URL.
You're now ready to configure Microsoft SCOM to target the trigger.
Configure Microsoft SCOM to send requests to the trigger URL
To have Microsoft SCOM send alerts to the flow trigger, you need to download the command file, then configure notifications, subscriptions, and subscribers to use the trigger URL,
Download the xm_send_alerts.ps1 PowerShell script file to your Microsoft SCOM server. The full path for the script file is required for configuration further in the process.
Notification channels define how Microsoft SCOM delivers the information to xMatters, which alert attributes are sent, and when to remove the alert from xMatters.
- In the Administration pane in Microsoft SCOM, go to Notifications > Channels.
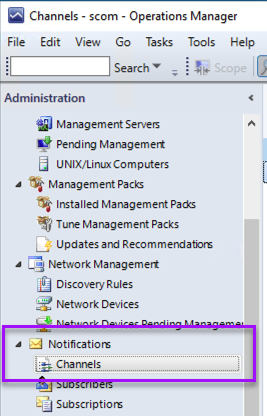
- Right-click the Channels pane, and then select New Channel. The Command Notification Channel window opens.
- On the Description tab, set the Channel Name to 'Send Alert to xMatters', then click Next.
On the Settings tab, fill in the following fields:
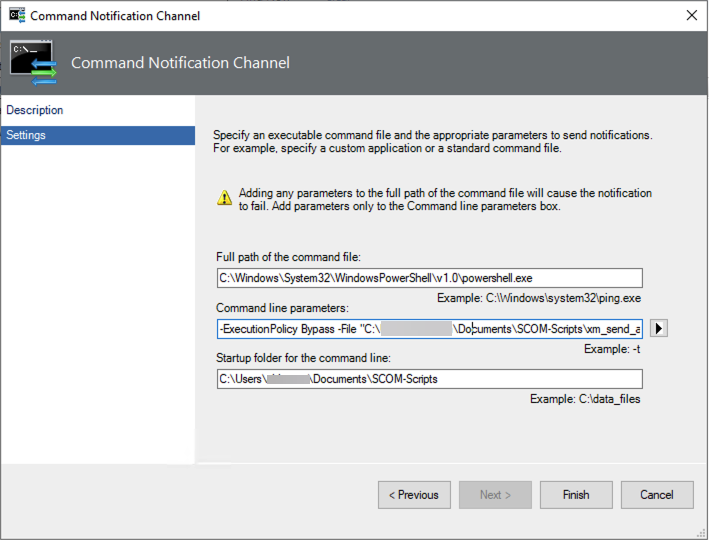
- Full path of the command file: Enter the path to the PowerShell file.
- Command line parameters: Paste the following command:
Copy
-ExecutionPolicy Bypass -File "<FULL_PATH_TO_POWERSHELL_SCRIPT>" "$Data/Context/DataItem/AlertId$" "$MPElement$" "<FLOW_DESIGNER_TRIGGER_URL>" "$Data/Context/DataItem/TimeRaisedLocal$" "$Data/Context/DataItem/TimeRaised$" - Replace the following parts of the command with valid paths:
- FULL_PATH_TO_POWERSHELL_SCRIPT: The entire path to xm_send_alerts.ps1 PowerShell file you downloaded to your Microsoft SCOM server.
- FLOW_DESIGNER_TRIGGER_URL: The URL to the Microsoft SCOM Alerts trigger from Flow Designer.
- In the Startup folder for the command line field, provide the full path to the folder where you want Microsoft SCOM to log all the details of the script execution information.
- The recommended path is: C:\Users\<user>\Documents\SCOM-logs as Microsoft SCOM is unable to create any logs in folders that require elevated write permission.
- Click Finish, then Close.
Microsoft SCOM notification subscribers allow you to specify who should be notified, and on which devices. You must configure subscribers to use the xMatters command channels, and set the xMatters recipient (the target user or group) as the delivery address.
- In the Administration pane go to Notifications > Subscribers.
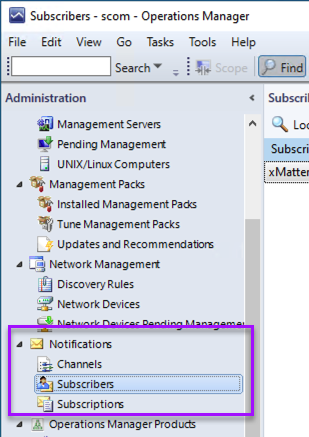
- Right-click in the Subscribers pane, and then select New Subscriber. The Notification Subscriber Wizard opens.
- On the Description tab, enter the user or group you want to be the notification recipient in xMatters in the Subscriber Name field.
- You can enter multiple recipients in a comma-separated list.
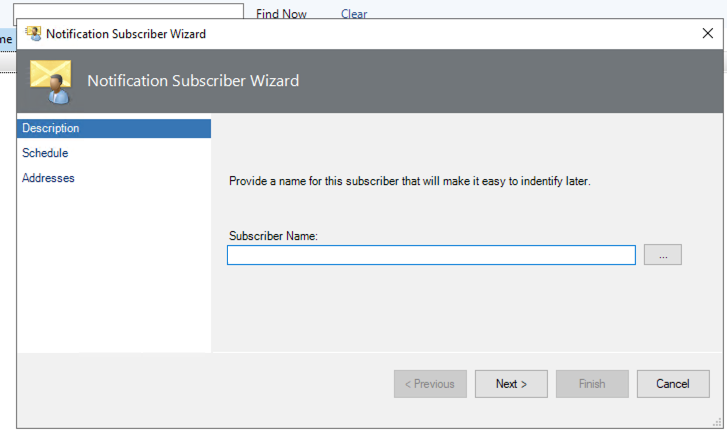
- Click Next.
- On the Schedule tab, select Always send notifications, then click Next.
- On the Addresses tab, click Add.
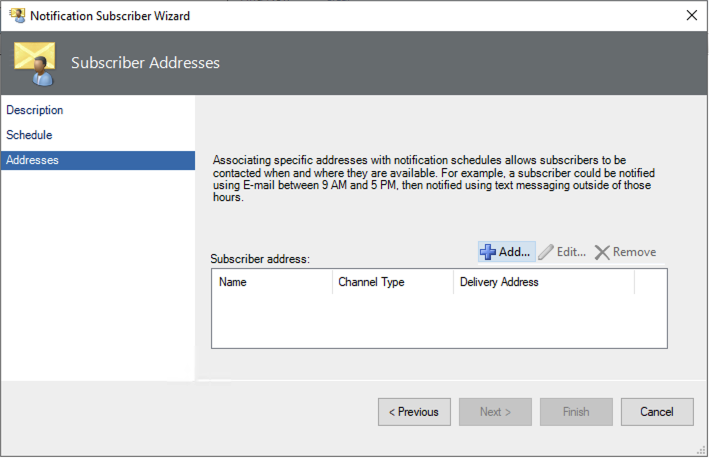
- On the Describe the Subscriber Address page, enter 'xMattersSCOMGroup' in the Address name field, then click Next.
- In the Delivery address for the selected channel field, enter 'xMattersSCOMGroup'.
- In the Channel Type drop-down list, select Command.
- In the Command Channel field, select Send Alert to xMatters, then click Next.
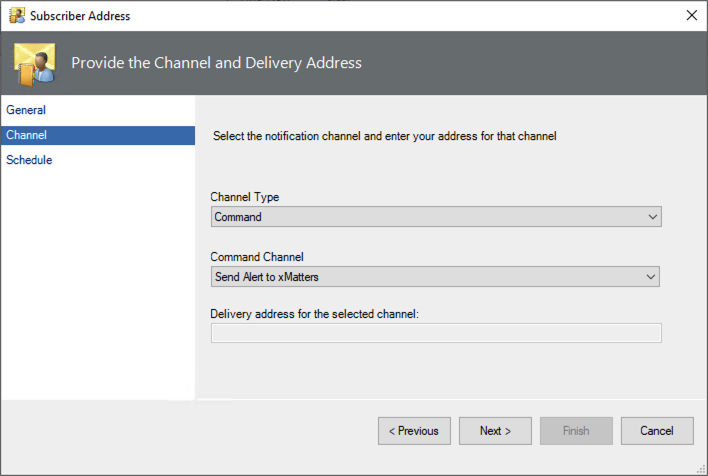
- Click Finish to complete the Schedule Notifications configuration and close the wizard.
- Click Finish, then click Close.
Once you have created the command channel and configured the subscribers, you can set up a subscription to allow xMatters to subscribe to Microsoft SCOM alerts.
While you can create subscriptions for many different kinds of alerts, the following instructions describe how to create a subscription with two criteria, and how to configure a subscription that will delete the corresponding alert in xMatters when an alert is closed.
- In the Administration pane, go to Notifications > Subscriptions.
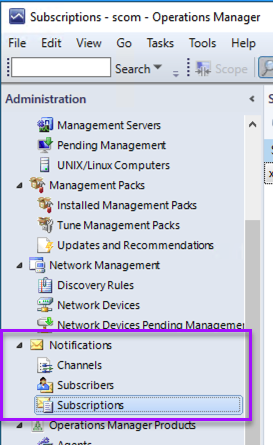
- Right-click in the Subscriptions pane, and then select New Subscription. The Create Notification Subscription window opens.
- On Description page, enter 'xMattersSubscription' in the Subscription name field, then click Next.
- Click Next to go past the Scope page.
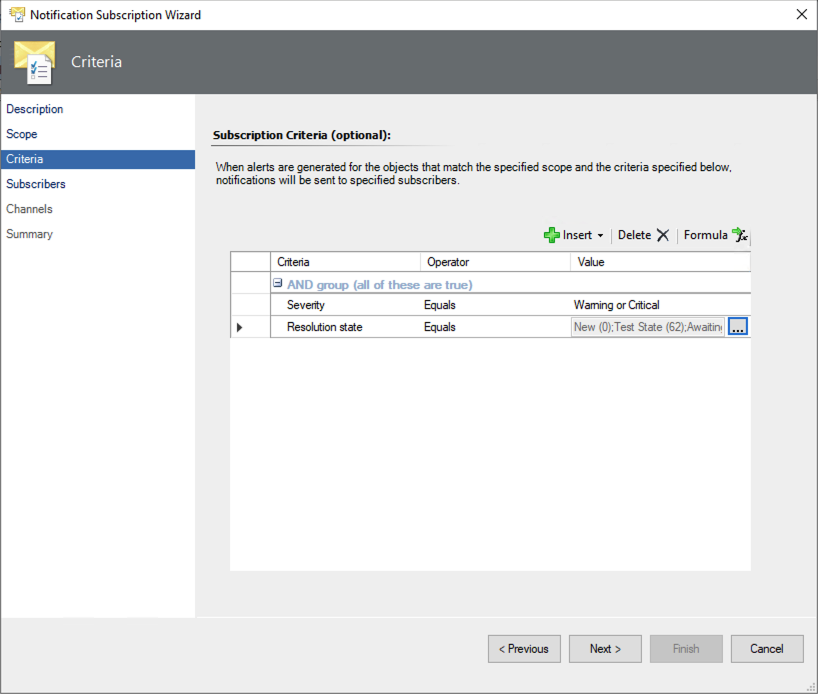
- On the Criteria page, create the following criteria:
- Severity Equals Warning or Critical
- Resolution State Equals Any
- Click Next.
- On the Subscribers page, add the xMatters subscriber you created, then click Next.
- To find the subscriber you created leave the search field blank, and click Search. All subscribers will appear in the Available subscribers field.
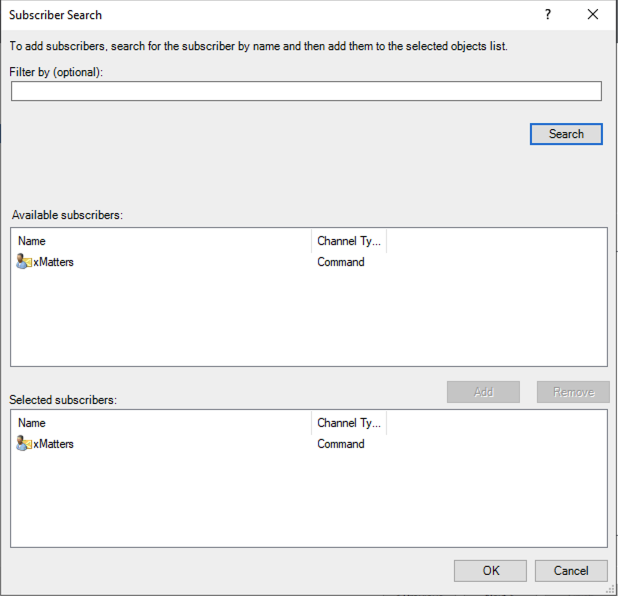
- To find the subscriber you created leave the search field blank, and click Search. All subscribers will appear in the Available subscribers field.
- On the Channels page, add the xMatters command channel you created, and then select Send notifications without delay.
- Click Next.
- Click Finish, and then click Close.
Test the configuration by triggering an alert in Microsoft SCOM
- Using the Windows Local Area Connection Properties dialog, force an IP conflict between two computers that Microsoft SCOM is monitoring.
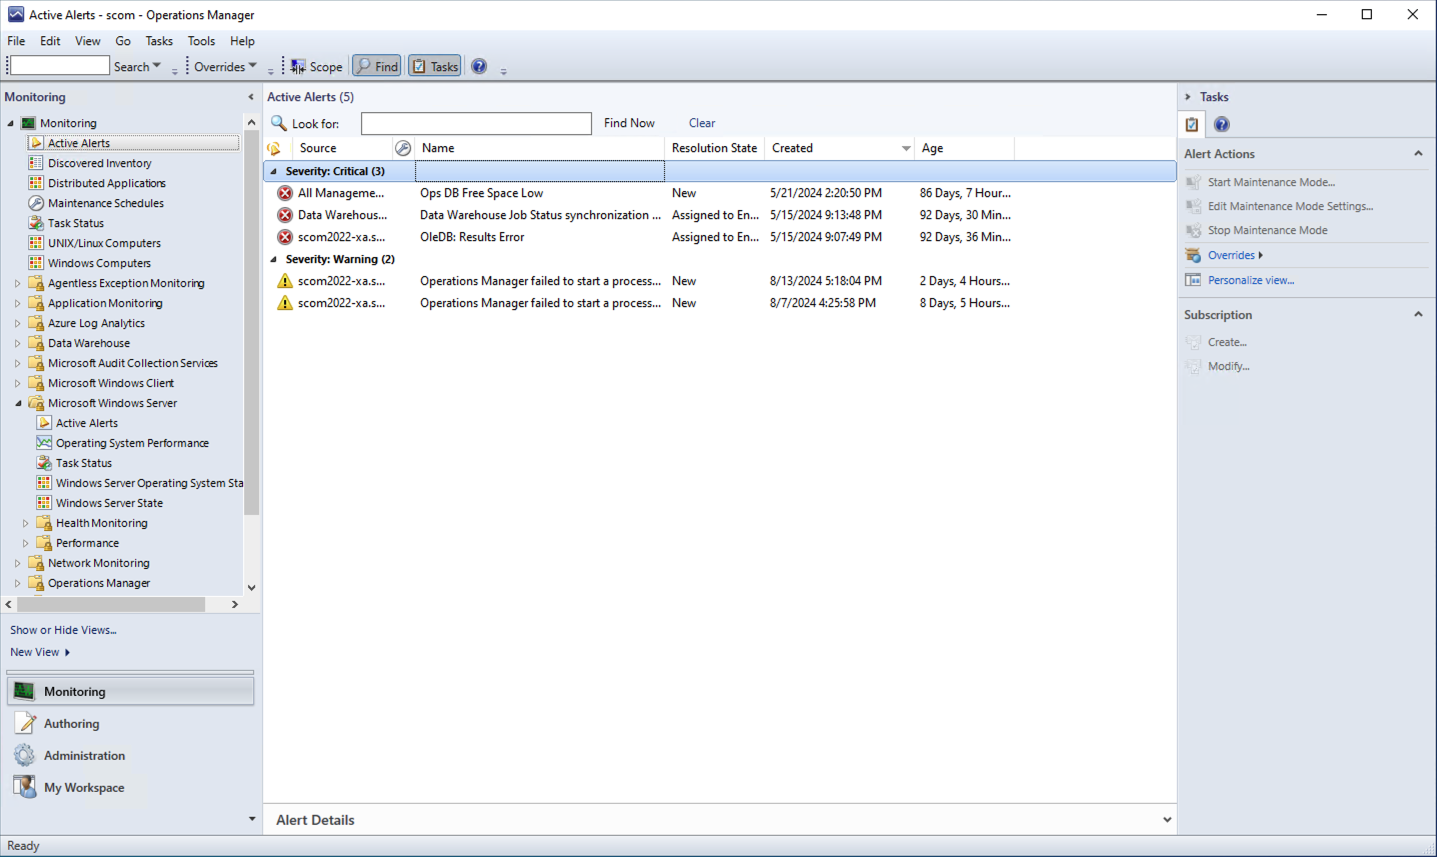
- Go to Monitoring > Active Alerts to see the alert when it is created by Microsoft SCOM.
- Microsoft SCOM passes the alert into xMatters and the alert properties dialog box displays the details for the alert.