Live Call Routing report
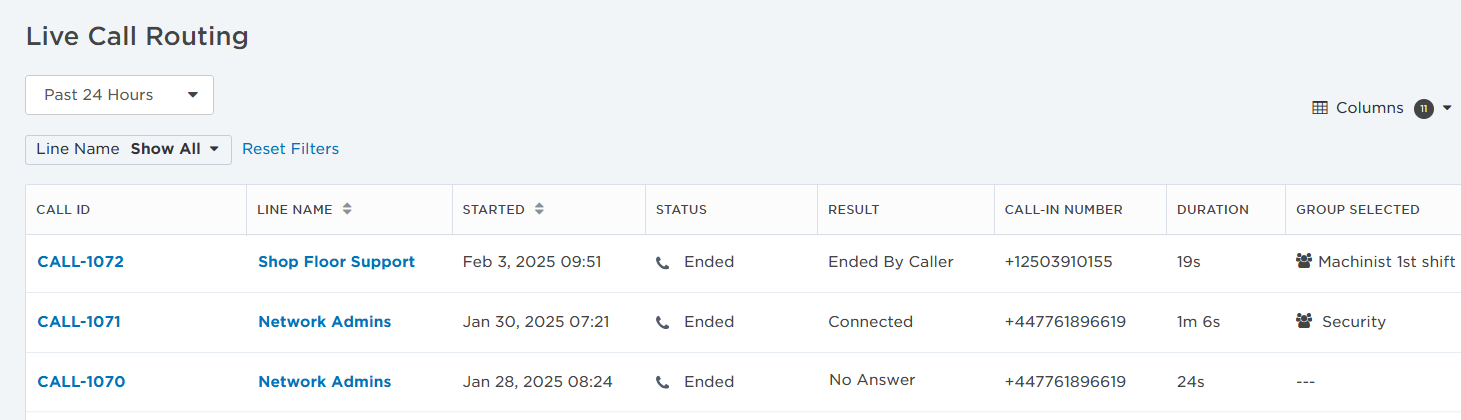
The Live Call Routing report lets you see all calls that have come in to your assigned Live Call Routing numbers. You can see the number that called in, what the result of the call was, how long the call lasted, and the number of escalations required by the group to answer.
The following sections describe the actions you can perform in the Live Call Routing report:
On the Reports menu, under Activity, click Live Call Routing.
To more easily view data in the table, do one or more of the following:
- To sort the content of a column in alphabetical or chronological order, click the column header. (Click the header again to reverse the sort order.)
- To change the width of a column, move the pointer over the edge of the column and when the re-size icon appears, click and drag the column to the desired size.
- To rearrange the columns, click and drag a column header to a new location on the table.
- If the list contains more entries or columns than can be displayed on your screen, scroll horizontally or vertically. The system automatically loads more data as scroll down the page.
- By default, the Live Call Routing report contains eleven columns of information, however most screens can't display all columns. To include or exclude information from the Live Call Routing report, click the Columns drop-down menu. Every column (with the exception of Call ID) can be hidden from view to give you more screen real estate to see the things that matter to you. If you hide columns, the counter beside the Columns drop-down menu adjusts to show you how many of the nine default columns are visible. When you've hidden a column and want to see it again, it is added as the last column of the table.
The Live Call Routing report includes the following columns:
|
Column |
Description |
| Alert ID | A direct link to the alert created when a caller leaves a voicemail for a Live Call Routing configuration. |
| Call ID | A unique identifier for each call that comes into your instance. Click the Call ID link to get detailed information about the current status of the call. |
|
Call-In Number |
Phone number of the user who called. |
| Duration |
The length of the call, from the time the user was connected to an available group member. |
| Escalations | The number of times the call was escalated before a group member accepted the call. |
| Group Selected | Name of the group the caller selected from the list of available options. |
|
Line Name |
Name of the Live Call Routing configuration. Users with appropriate permissions see the line name as a link that allows them to view and edit the configuration settings. |
| Respondent | Name of the group member who answered the call. |
|
Result |
The result of the call. Available options are:
|
| Started | The date and time when the user dialed into the Live Call Routing configuration number. |
| Status |
The status of the call. Available options are:
|
The Live Call Routing report displays calls for a specific timeframe. You can search by a number of days (Past 24 Hours, Past 7 Days, Past 30 Days, Past 60 Days, Past Year, or Past 90 Days), or specify a date and time range using the calendar and time pickers, and click Apply. The search results update to match your date range.
You can search by a date range to return all calls that were initiated within that timeframe. The search results will not include calls that were initiated outside of the timeframe, even if they were active during the specified timeframe.
For example: You set a date range of November 1, 2018 - December 1, 2018 and click Apply. A call initiated on October 30 that is still active on November 1 is not displayed.
As you add search criteria or apply filters, the Live Call Routing report automatically updates the results to display only the calls that match your criteria within the date range.
The available filters allow you to narrow the Live Call Routing list based on matching specific criteria. For example, you can use filters to show only the calls for a single status, the calls targeting a specific group, or all the calls matching a certain result.
You can apply one or more filters at once to narrow down the list of calls. If you apply multiple filters, xMatters only displays calls that match ALL of the specified filter criteria. For detailed instructions on how to use filters, see Filtering data tables.
The following table describes the available filters on the Live Call Routing page and their values:
| Filter | Values |
|---|---|
| Line Name |
|
Users with the appropriate permissions will see the Call ID number displayed as a link. Click the link to see the current status of a call.
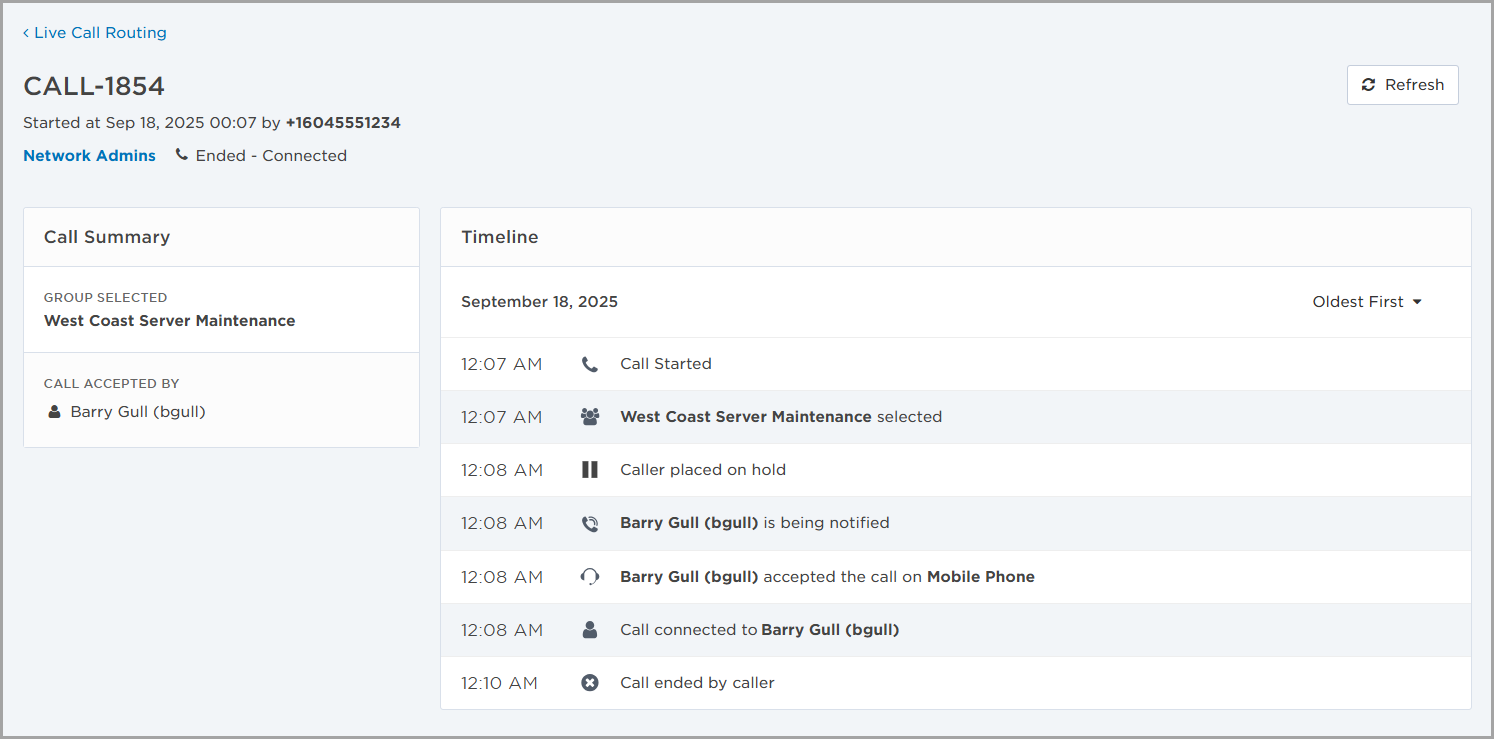
On the call record page you'll see an at-a-glance section to quickly show you the date and time when the call started, the number that called in, and the current status of the call. The Call Summary section shows you which group the caller selected, and the name of the group member who responded.
The Timeline section contains detailed information about the call. While the call record page provides you with the information about a call at the moment you clicked the Call ID number, it does not automatically update as an active call progresses. To see new information during an active call, click Refresh.
Users with permission to view or edit Live Call Routing configurations will see the name of the Live Call Routing configuration displayed as a link. Click the link to go to the Live Call Routing page where you can quickly make changes to the configuration.
You can export the contents of the Live Call Routing report as an .xlsx file. This is useful if you'd like to perform additional analysis on the data.
To export the report:
- Filter the report using the search bar, Columns drop-down, or both. All filters applied to the Live Call Routing report, such as changing column order, or alphabetically sorting a column, are preserved in the exported file.
- Click Export to download a spreadsheet containing your report data.