Inbound integrations
You can build an inbound integration to transform incoming web requests from an external application to take action in xMatters.
Why use inbound integrations?
Inbound integrations are primarily used to create an alert in xMatters using a workflow. The transformation script for an inbound integration can receive an incoming HTTP request, parse and modify its data, enrich the data using additional web requests, and finally create an alert to send notifications.
Where can you run inbound integrations?
Inbound integrations can be hosted in the xMatters cloud, or run in your own xMatters Agent or Integration Agent.
What actions can inbound integrations perform?
You can configure an inbound integration to perform one of the following actions:
- Create a new xMatters alert: Use the incoming request to create a new alert using one of the forms in the workflow.
- Transform content to create a new xMatters alert: Use JavaScript to transform the data of the incoming request to create a new alert using one of the forms in the workflow.
- Run a script: Execute a script, such as a SOAP or REST request, in xMatters or on an xMatters Agent.
How is an inbound integration triggered?
To trigger an inbound integration, use a tool or programming language that supports RESTful requests to make a POST request to the integration URL. For more information about available authentication methods and how to trigger inbound integrations, see Inbound integration service authentication.
When xMatters receives the request, it returns a result that indicates that the request has been accepted for processing. The request also returns the requestId attribute, which can be used to search the Alerts report for any xMatters alerts that were triggered as a result of this request. To view whether the integration was processed successfully, log on to the xMatters user interface and view the Activity panel for the corresponding integration.
The maximum number of requests you can submit within a one-minute period to xMatters is limited by your pricing plan. If you exceed this limit, your request will be rejected with a 429 error and will not be queued for processing.
Configure inbound integrations
The following sections describe how to configure inbound integrations that perform different actions in the cloud, or in your xMatters Agent or Integration Agent.
- In xMatters, access the Integration Builder tab in the workflow for which you want to create an integration.
- On the Integration Builder tab, in the Inbound Integrations area, click Add.
- If you have already created inbound integrations, expand the list to display the Add button.

- On the New Inbound Integration page, choose the action you want the integration to perform and the location where you want it to run:
- From the Action drop-down list, select Create a new xMatters alert.
- From the Location drop-down list, select Cloud to run the integration in the cloud or xMatters Agent to run it on an xMatters agent behind your firewall.

You must be a registered user of an xMatters Agent to select the xMatters Agent option from the location drop-down list.
- For integrations running on xMatters Agents, select one or more agents from the list of available agents.

The list displays all agents in your organization, but you can only select agents for which you are a registered user. To be able to select an agent, the version of the agent must support inbound integrations.
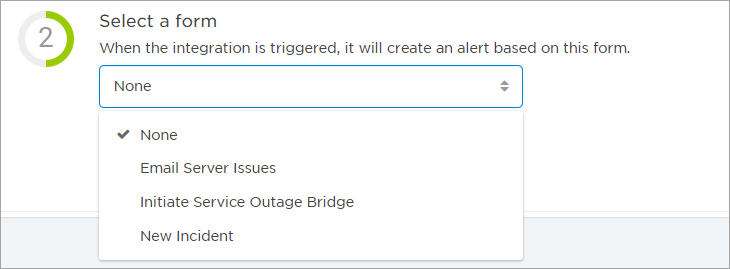
- In the Select a form drop-down list, select the form on which you want to base the new alert.
- You can select from any of the forms in the workflow. Forms do not have to be enabled to configure an integration, but must be enabled before you can use them to create alerts.
- In the Integration name field, type a name for the integration.
- This name is displayed in the list of inbound integrations on the Integration Builder tab, so be sure to call your integration something descriptive.

- In the Select authentication method drop-down list, select a method of authenticating requests to trigger the integration. Choose the most secure method the calling system supports.
- Alternatively, you can select Allow all methods to allow properly authenticated requests from any of the four listed methods to trigger the integration.
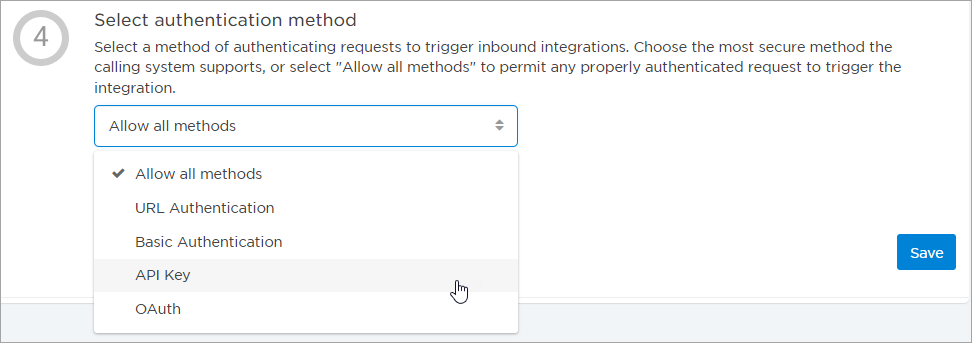
For more information about the available methods of authenticating inbound integrations, see Inbound integration service authentication.
- Click Save.
- xMatters displays instructions on how to trigger the integration using the selected authentication method. If you selected Allow all methods in the previous step, use the Select method drop-down list to select any of the available authentication methods to see how to trigger the integration using that method.
- For integrations running on an xMatters Agent, the Trigger section lists the known URLs for the agent. If the local address or hostname are different, replace the IP address portion of the URL.
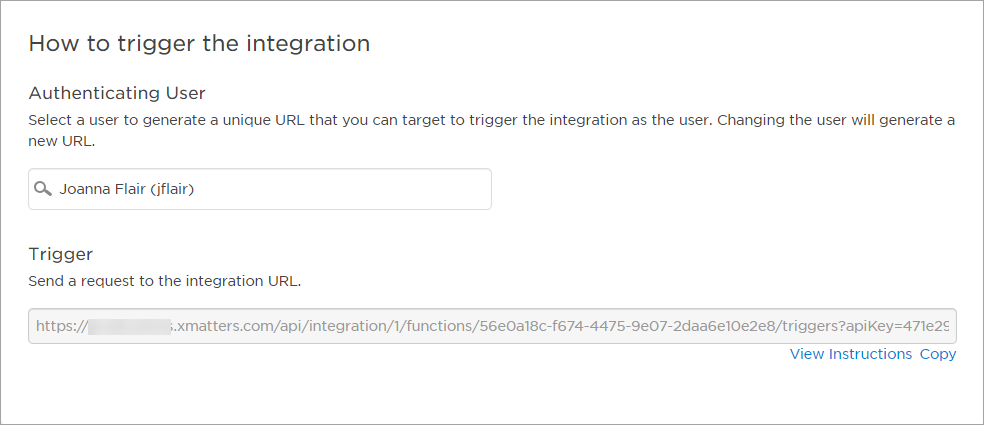
- Click the View Instructions link to see an example of the JSON payload that can be used as the body of the request, instructions on how to trigger the integration using the selected authentication method, and a sample cURL command to test the integration.
Inbound integrations can receive a maximum payload size of 200,000 bytes.
- In xMatters, access the Integration Builder tab in the workflow for which you want to create an integration.
- On the Integration Builder tab, in the Inbound Integrations area, click Add.
- If you have already created inbound integrations, expand the list to display the Add button.

- On the New Inbound Integration page, choose the action you want the integration to perform and the location where you want it to run:
- From the Action drop-down list, select Transform content to create a new xMatters alert.
- From the Location drop-down list, select Cloud to run the integration in the cloud or xMatters Agent to run it on an agent behind your firewall.

You must be a registered user of an xMatters Agent to select the xMatters Agent option from the location drop-down list.
- For integrations running on xMatters Agents, select one or more agents from the list of available agents.

The list displays all agents in your organization, but you can only select agents for which you are a registered user. To be able to select an agent, the version of the agent must support inbound integrations.
- In the Select a form drop-down list, select the form on which you want to base the new alert.
- You can select from any of the forms in the workflow. Forms do not have to be enabled to configure an integration, but must be enabled before you can use them to create alerts.

- In the Integration name field, type a name for the integration.
- This name is displayed in the list of inbound integrations on the Integration Builder tab, so be sure to call your integration something descriptive.

- In the Select authentication method drop-down list, select a method of authenticating requests to trigger the integration. Choose the most secure method the calling system supports.
- Alternatively, you can select Allow all methods to allow properly authenticated requests from any of the available methods to trigger the integration.

For more information about the available methods of authenticating inbound integrations, see Inbound integration service authentication.
- In the Transform the content section, click Open Script Editor to modify the transformation script to process the incoming request.
- xMatters automatically creates a default transformation script that forwards the request directly to the form. It also includes some commented-out examples of how to transform the data.

- Click Save.
- xMatters displays instructions on how to trigger the integration using the selected authentication method. If you selected Allow all methods in Step 4, use the Select method drop-down list to select any of the available authentication methods to see how to trigger the integration using that method.
- For integrations running on an xMatters Agent, the Trigger section lists the known URLs for the agent. If the local address or hostname are different, replace the IP address portion of the URL.

- Click the View Instructions link to see detailed instructions on how to send a request to the integration URL using the selected authentication method.
Inbound integrations can receive a maximum payload size of 200,000 bytes.
- In xMatters, access the Integration Builder tab in the workflow for which you want to create an integration.
- On the Integration Builder tab, in the Inbound Integrations area, click Add.
- If you have already created inbound integrations, expand the list to display the Add button.

- On the New Inbound Integration page, choose the action you want the integration to perform and the location where you want it to run:
- From the Action drop-down list, select Run a script.
- From the Location drop-down list, select Cloud to run the integration in the cloud or xMatters Agent to run it on an agent behind your firewall.

You must be a registered user of an xMatters Agent to select the xMatters Agent option from the location drop-down list.
- For integrations running on xMatters Agents, select one or more agent from the list of available agents.

The list displays all agents in your organization, but you can only select agents for which you are a registered user. To be able to select an agent, the version of the agent must support inbound integrations.
- In the Integration name field, type a name for the integration.
- This name is displayed in the list of outbound integrations on the Integration Builder tab, so be sure to call your integration something descriptive.

- In the Select authentication method drop-down list, select a method of authenticating requests to trigger the integration. Choose the most secure method the calling system supports.
- Alternatively, you can select Allow all methods to allow properly authenticated requests from any of the available methods to trigger the integration.
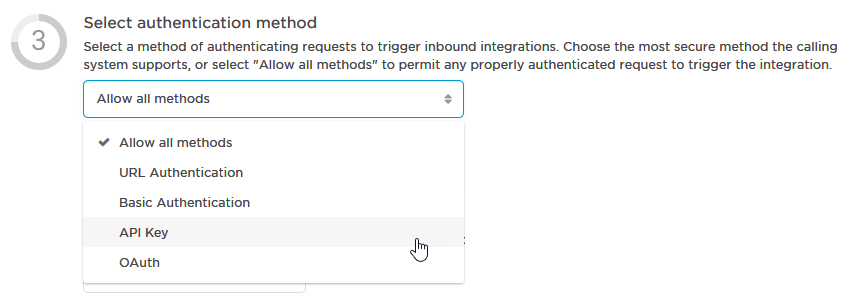
For more information about the available methods of authenticating inbound integrations, see Inbound integration service authentication.
- In the Transform the content section, click Open Script Editor to modify the transformation script to process the incoming request.
- xMatters automatically creates a default transformation script that forwards the request directly to the form. It also includes some commented-out examples of how to transform the data.

- Click Save.
- xMatters displays instructions on how to trigger the integration using the selected authentication method. If you selected Allow all methods in Step 3, use the Select method drop-down list to select any of the available authentication methods to see how to trigger the integration using that method.
- For integrations running on an xMatters Agent, the Trigger section lists the known URLs for the agent. If the local address or hostname are different, replace the IP address portion of the URL.

- Click the View Instructions link to see detailed instructions on how to send a request to the integration URL using the selected authentication method.
Inbound integrations can receive a maximum payload size of 200,000 bytes.
Inbound integration authentication
The Integration Builder includes four different methods for authenticating incoming web requests. URL authentication allows anyone with access to an integration URL to trigger the integration. More secure user-based authentication methods include Basic, API Key, or OAuth authentication.
Allow all methods
The default authentication setting for incoming web requests is "Allow all methods", which permits any of the available authentication methods to trigger the integration. You can also select a specific authentication method that's exclusively used to trigger the integration; it's recommended that you choose the most secure method the calling system supports.
Authenticating Users
For integrations configured to use URL or API Key authentication, you are required to select an authenticating user to trigger the integration. Any requests submitted to xMatters using one of these methods will have the same permissions within xMatters as that user in terms of workflow access, form sender permissions, user and group visibility, etc.
An authenticating user must be someone that you supervise with the REST Web Service User role.
URL authentication is the least secure method of authentication because anyone with access to the URL can trigger the integration. This authentication method is not recommended unless the integration does not need to be secured.
When you select this method, xMatters generates an API key unique to the selected authenticating user (this field defaults to the logged-in user), and appends it to the integration URL. Any requests submitted via this URL will have the same permissions as the authenticating user in xMatters. The URL does NOT grant permission to log into the web user interface.

The name of the authenticating user whose permissions were used to run an integration using URL authentication are included in the Activity panel's request logs. To learn more about the Integration Builder's request logs, see Activity panel.
To select a new authenticating user:
In the Authenticating User search field, do one of the following:
- Start typing a user name into the search field and select it when it appears (two characters are required).
- Type two spaces to view a list of all existing options and select a recipient from the list.
To trigger the integration:
To trigger an integration using URL authentication, use web services to send a POST request to the integration URL.
Basic authentication requires the calling system to store the credentials of an xMatters user. Any user who has permission to access this integration can authenticate the request using HTTP Basic Authentication and their user name and password.
To trigger the integration:
To trigger an integration using basic authentication, use web services to send a POST request to the integration URL using an xMatters user name and password.
If the user resets their password in xMatters, you must also update the calling system with the new password for the integration to continue functioning.
API Key authentication allows you to use a randomly generated user name and password that can only be used to trigger this integration and cannot be used to log on to the xMatters web user interface or to trigger other integrations.
This method requires you to select an authenticating user (this field defaults to the logged-in user). The generated user name and password will have the same permissions within xMatters as the user you select to be the authenticating user, in terms of workflow access, form sender permissions, user and group visibility, etc.
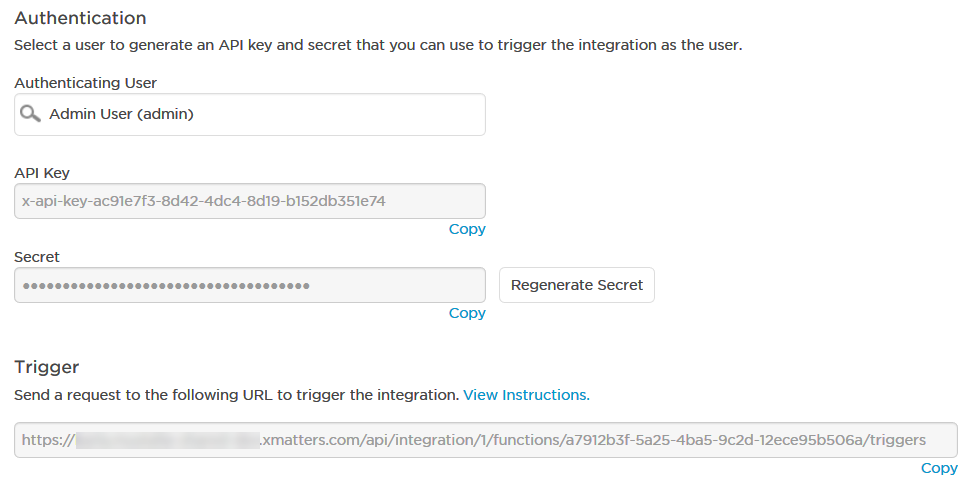
To select a new authenticating user:
In the Authenticating User search field, do one of the following:
- Start typing a user name into the search field and select it when it appears (two characters are required).
- Type two spaces to view a list of all existing options and select a recipient from the list.
To trigger the integration:
To trigger an integration using API Key authentication, authenticate the request using basic authentication and set the user name to the API key and the password to the secret.
To generate a new secret, click Regenerate Secret.
If you regenerate the secret, you must update the calling system to use the new secret. You do not need to regenerate a new secret or update the calling system if the authenticating user's password changes in xMatters.
OAuth authentication requires you to provide OAuth credentials of an xMatters user to trigger the integration.
To trigger the integration:
To trigger an integration using OAuth authentication, include an access token in the request header. A client ID is required to obtain and refresh access tokens in the xMatters REST API. To locate the client ID for your company, go to the Workflows tab and click OAuth.
For more information about using OAuth with xMatters, see OAuth authentication.
The authentication type is preserved when you copy an integration; for API key authentication, the copied integration will have a different secret value. If you import a workflow with inbound integrations, the authentication type will automatically default to URL authentication.
Notification Flood Control
xMatters includes a notification flood control setting that you can use to prevent users from being flooded with multiple notifications from an inbound integration when they’ve been notified about an incident and might be already working on resolving the issue from their mobile device. You can use this feature to control the maximum number of notifications that are delivered to specific device types during a defined period, such as: no more than two messages every ten minutes to SMS and mobile app devices.
For more information, see Enable notification flood control for an inbound integration.
Notification flood control is a company-level setting that applies only to individual integrations which have it enabled. The default configuration settings for this feature limit notifications to one message every three hundred seconds (or one message every five minutes) to mobile app, SMS, and voice device types.