Design example 3: tornado scenario
After working through the Tornado Warning design example, it may have occurred to you that it would be handy to be able to save your settings for reuse - or even to store multiple configurations to cover a broad array of situations. Workflow scenarios allow you to do exactly that. Form senders can then select the scenario that best matches the situation, allowing for quicker and more accurate communication.
If you're not already familiar with scenarios, take a few minutes to read through our topic on scenarios.
Since configuring scenarios is very similar to configuring forms, we think you'll find creating and editing scenarios intuitive and fast. In this design example, we're going to create a scenario to deal with a severely damaging tornado event in Kansas, based on the setting we used in Design example 1: tornado warning.
To begin, navigate to the Tornado Warning form, click the Edit drop-down list and select Scenarios.

Click Create Scenario and when prompted, name the scenario Damaging Tornado - Kansas, and then click Create Scenario.
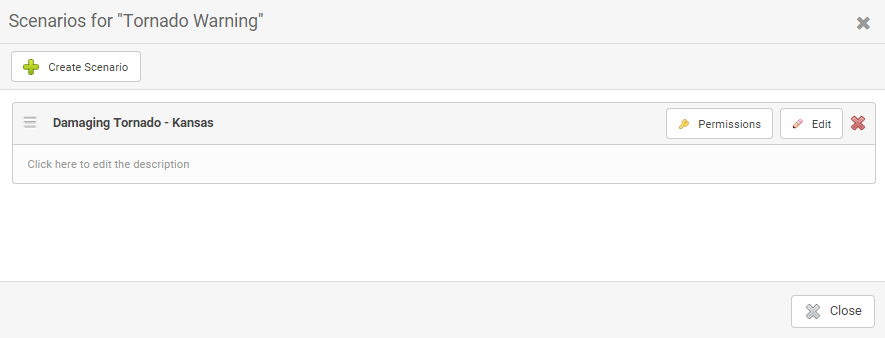
When you create the first scenario for a form, any values that have been predefined in the form (e.g., for recipients, properties, etc.) are used to populate the initial scenario. Note also that the order of scenario sections matches that of the underlying form.
Since we want to modify some of these form-level values for this scenario, click Edit to display the existing values.
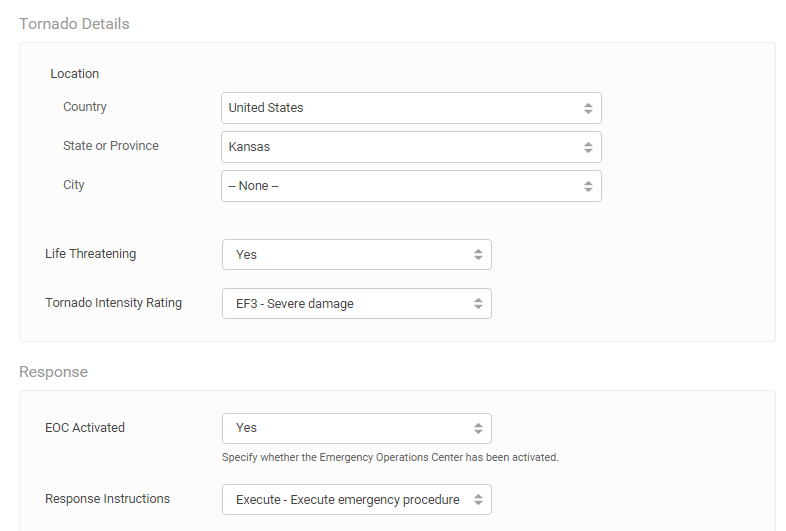
We can start by saving the form sender some time by configuring the properties for Kansas, the intensity of the tornado, and the response instructions.
In the Tornado Warning example, the form targets all devices. However, let's assume that our employees in Kansas all have company-issued mobile phones, so we only want to target SMS Phone, Mobile Phone, and Work Email Devices (you may have to scroll down in the dialog box to see the devices area).

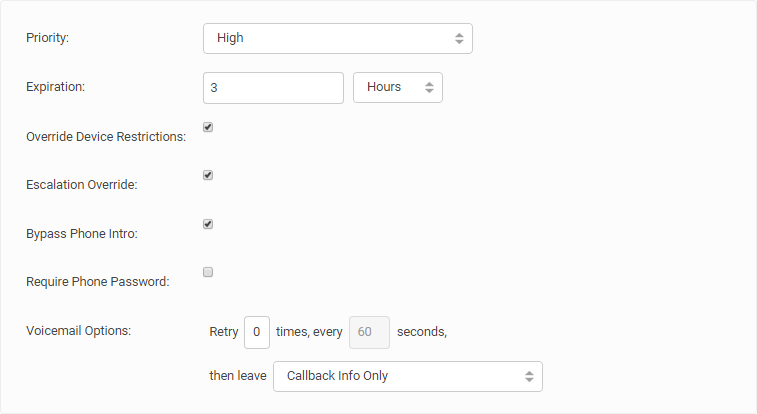
We'll also modify the handling options slightly so that the notifications expire after three hours rather than two, and such that message content and callback information is left when a voicemail system receives the call.
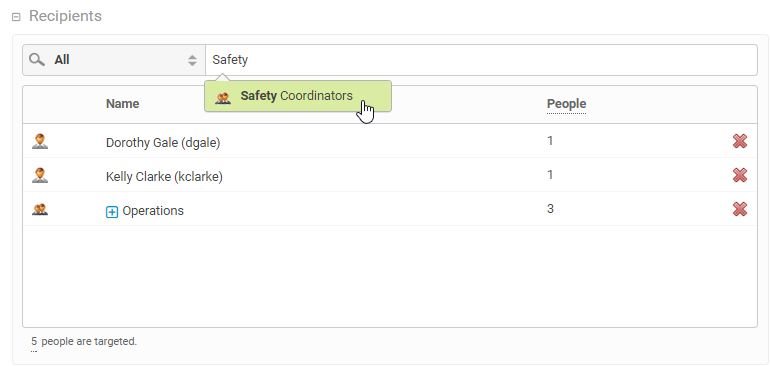
As a final customization, let's add Dorothy Gale and the Safety Coordinators Group as recipients.
Click Save and this scenario will immediately become available to form senders with the correct permissions.
There are two types of permissions that can be granted at the scenario level:
- Initiator: Roles and users that have access to the scenario when sending the form (that is, they can see and select the scenario so that its values are loaded into the form).
- Editor: Roles and users that can edit scenarios accessed from the Messaging tab.
Scenario permissions can also be granted more broadly at the form level.
For this example, let's assume that we want all users with the Scenario Initiator role to be able to initiate the Kansas Damaging Tornado scenario, and all users with the Scenario Supervisor role to be able to both initiate and edit the scenario. Additionally, let's add Thomas Sanderson as a user with the ability to initiate and edit the scenario.
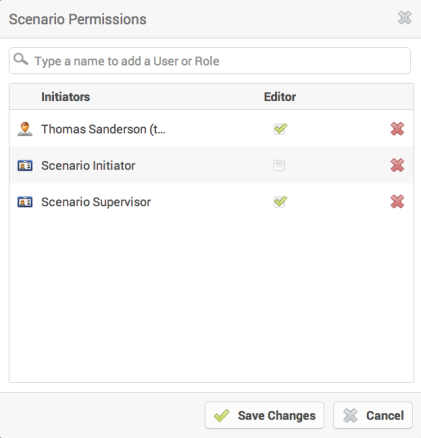
Click Save Changes to save the permissions you've granted for the scenario.
Next steps
Try creating a few more scenarios for the form based on different regions, recipients, devices and so on. When you have several scenarios completed for a form, navigate to the form on the Messaging tab and experiment with loading them into the form - notice that you can also modify them from the form page (for details, see Create and manage scenarios on a message form).