Design example 1: tornado warning
We're going to start with a fairly simple example, but we'll touch on many design elements typically used in more complex workflows. We want to design a workflow that deals with the following set of facts:
- Your organization operates in one or more locations that are subject to tornadoes, among other potential environmental events.
- In addition to yourself, users with the following roles need to be able to initiate the form: Developers, Scenario Initiators.
- The form should be simple for the form sender to fill out under pressure, with as much predefined information as possible, including message handling options.
- The Operations group and a user should be predefined as recipients, and the message sender should have the ability to modify the recipient list as required.
- Location, threat to life, tornado intensity, response instructions and other such information should be sent to recipients.
- The form should provide the ability to include attachments.
- By default, messages should be sent to all devices, but the message sender should be given the ability to modify the targeted devices.
- Messages should include information that provides context and information to the recipient.
- Responses should be simple, with a focus on whether the recipient can follow the response instructions.
- The Operations group should receive a notification when the form is initiated, and Terry Kent should receive notifications on form initiation and conclusion.
Now let's take these facts and use them to build a form called Tornado Warning.
Since forms are organized within workflows, we first have to create the plan that will 'store' the Tornado Warning form. We'll create a new workflow named Environment Event Response.
To create the new workflow:
- Log into xMatters and click the Workflows tab (if you don't see the tab, you do not have the permissions necessary to design workflows).
- On the Workflows page, click Create and select Create custom workflow.
- In the Create Workflow dialog box, type Environment Event Response as the name of the workflow.
- You can add an optional description.
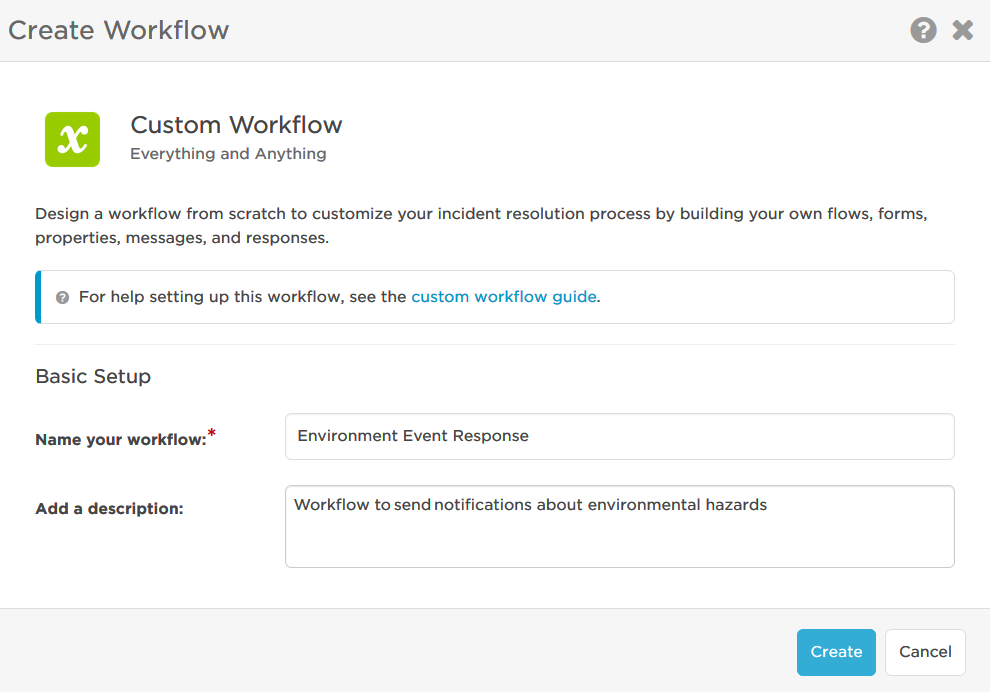
- Click Create.
- Click the Plan Disabled check box so that it displays a green check mark and the text changes to Plan Enabled.

Once a workflow is created, multiple forms can be added to it. The configuration of the form will be used to represent the fact set presented above.
To add and configure a new form:
- On the Workflows page, click the name of the Environment Event Response workflow.
- Click Create Form.
- In the Create a New Form dialog box, type Tornado Warning in the Name field.
- Click Create Form.
- Click the Not Deployed drop-down list and select Enable in Web UI.

- Click the drop-down list again and select Sender Permissions.
- In the Form Sender Permissions dialog box, use the search field to add the Developer and Scenario Initiator Roles to the list of initiators (just start typing the first few letters into the search field and then select these Roles when they appear).
- For this example, don't worry about the Manage Scenarios setting - but if you'd like to learn more, see Scenario Permissions.
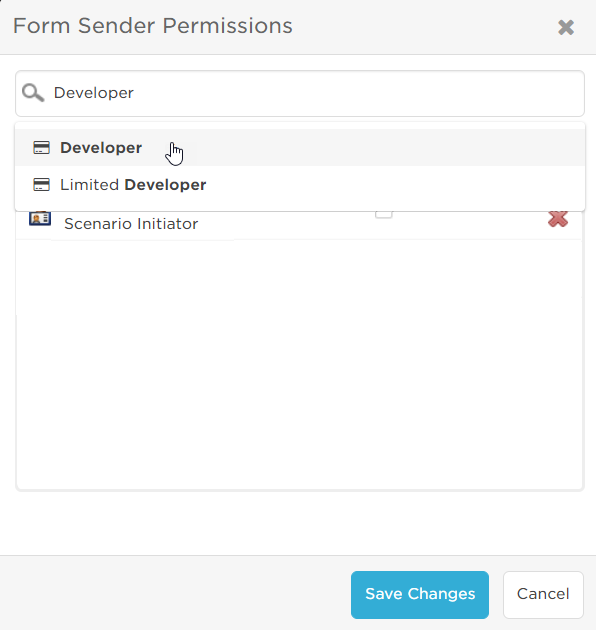
- Click Save Changes.
- Click the Edit drop-down list and select Activity Updates.
- Use the search field to add a group or users as update recipients (this example uses a group called Operations and a user Terry Kent).
- Select Ito notify Operations on Initiation, and to notify the user Terry Kent on Initiation and Conclusion.
- In the Devices to Notify area, select SMS Phone and Mobile Phone.
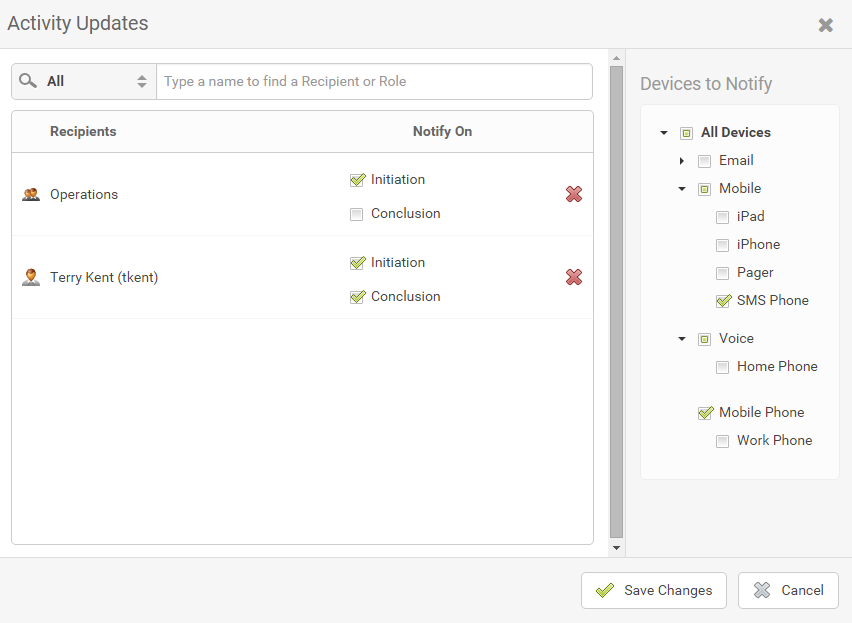
- Click Save Changes.
It's a good practice to think through and then create the properties you'll need to use when you design the messages that will be associated with this form. The fact set gives us a fairly good idea about what kinds of information we'll need, and it's up to the designer to use the type of property that makes the most sense for the information context. In this case, we'll create drop-down lists that provide clearly-defined choices to the message sender.
Be aware that although we'll use the Properties tab to create properties for this form, this can also be done directly from a form's Layout page once you're comfortable with the basic process.
Create a combo box (drop-down list) property
- On the Workflows Details page, click the Properties tab.
- Click Create Property.
- Click Combo Box, and then click Next.
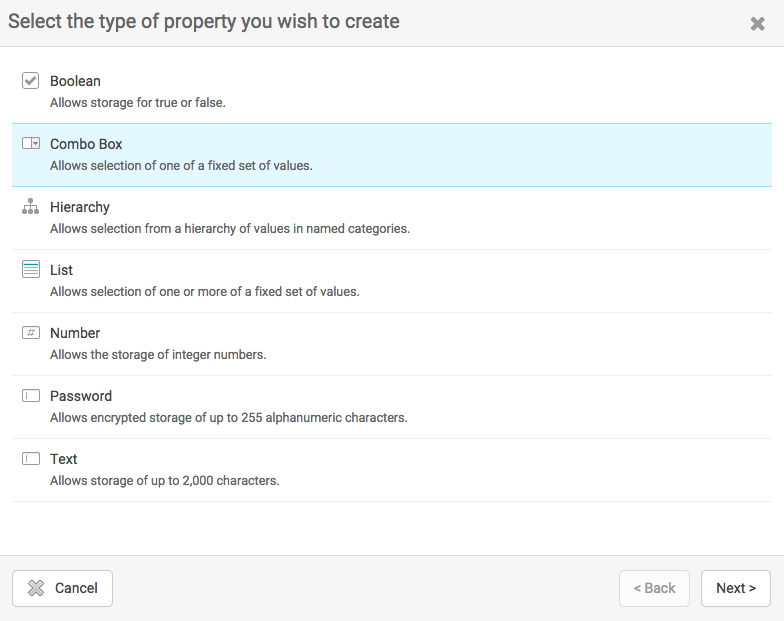
Configure the Combo Box property
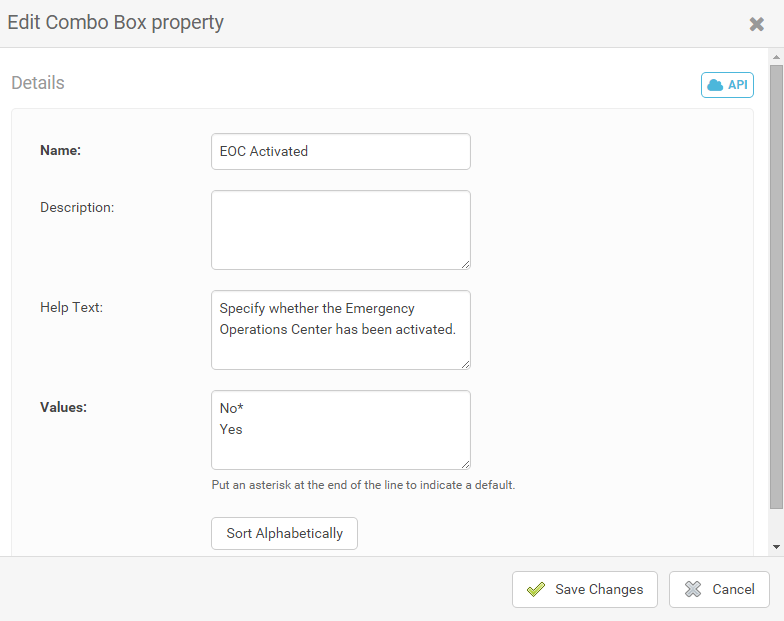
- In the Name field, type EOC Activated.
- Because someone under pressure might forget what "EOC" means, it's probably a good idea to include some Help Text such as Specify whether the Emergency Operations Center has been activated.
- In the values area, type No* on the first line, and then type Yes on the second line. (The asterisk designates "No" as the default value presented to the message sender.)
- Click Save Changes.

The latter steps represent the basic process for creating properties. The next set of steps follows the same pattern, but adds a variation on the drop-down list property in which each selected option dynamically updates the options available in the next drop-down list.
Create a Hierarchy Property
- On the Workflow Details page, click the Properties tab.
- Click Create Property.
- Click Hierarchy, and then click Next.
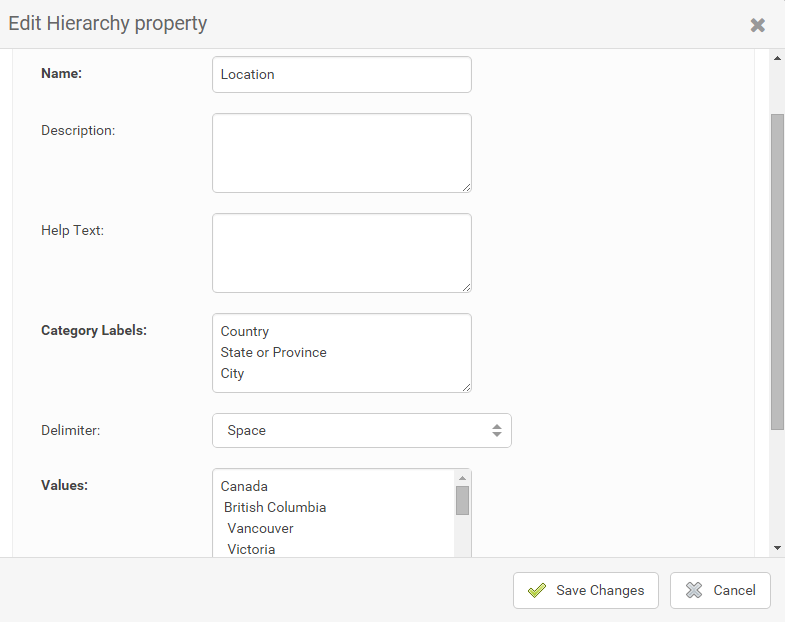
- In the Name field, type Location.
- In the Category Labels area, type the following values on separate lines: Country, State or Province, City.
- Ensure that the Delimiter value is set to Space, and then add the following text to the Values field, being careful to use exact spacing:
Canada
 British Columbia
  Vancouver
Victoria
 Alberta
  Calgary
Edmonton
 Saskatchewan
  Regina
Saskatoon
 Manitoba
  Brandon
Winnipeg
 Ontario
  Ottawa
Toronto
 Quebec
  Montreal
Quebec
United States
 Alabama
  Birmingham
Montgomery
 Arkansas
  Fort Smith
Little Rock
Florida
  Miami
Tampa-St.Petersburg
Georgia
Atlanta
Augusta
Kansas
  Overland Park
Wichita
Louisiana
  Baton Rouge
New Orleans
Mississippi
  Gulfport
Jackson
Oklahoma
  Oklahoma City
Tulsa
Texas
  Houston
San Antonia
- Click Create Property.
Add additional properties
Now that you understand the basic concept behind adding properties, add three more combo box properties based on the following labels and values:
- Life Threatening
- Unknown*
- No
- Yes
- Tornado Intensity Rating
- EF0 - Minor or no damage
- EF1 - Moderate damage
- EF2 - Considerable damage
- EF3 - Severe damage
- EF4 - Extreme damage
- EF5 - Total destruction of buildings
- Response Instructions
- Standby - Await further instruction
- Monitor - Monitor local radio, television, and internet for updates
- Prepare - Make preparations for the incident
- Shelter - Take shelter in place
- Evacuate - Relocate to the staging area immediately
- Execute - Execute emergency procedures
- All Clear - The subject event no longer poses a threat or concern, please return to workplace
- None - No action recommended
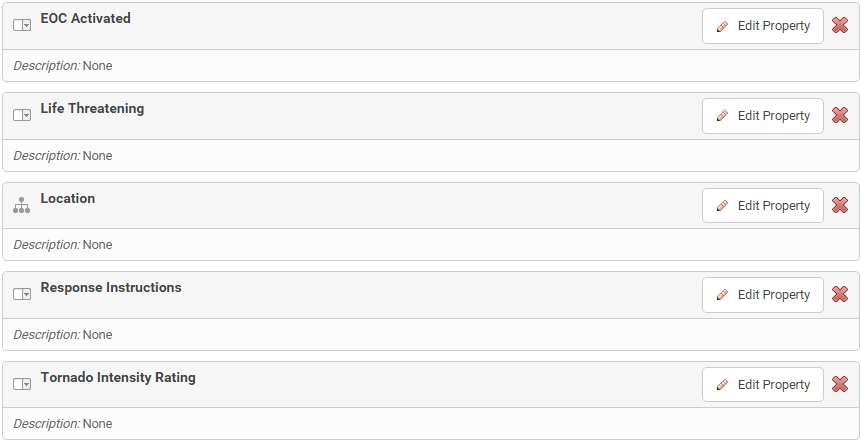
Once you have finished, the Properties tab will be populated with all of the new properties.
By default, the form layout includes the Recipients section and a Custom section. Beyond that, form elements and layout are very flexible, so we're going to organize this topic into subsections that reflect the available layout elements.
Properties
Let's start by adding the properties we just created to the form layout.
To add properties to the form:
- Click the Forms tab, and then click the Edit drop-down list and select Layout.
- Click the "Custom Section" text of the default custom section to modify the text to Tornado Details.
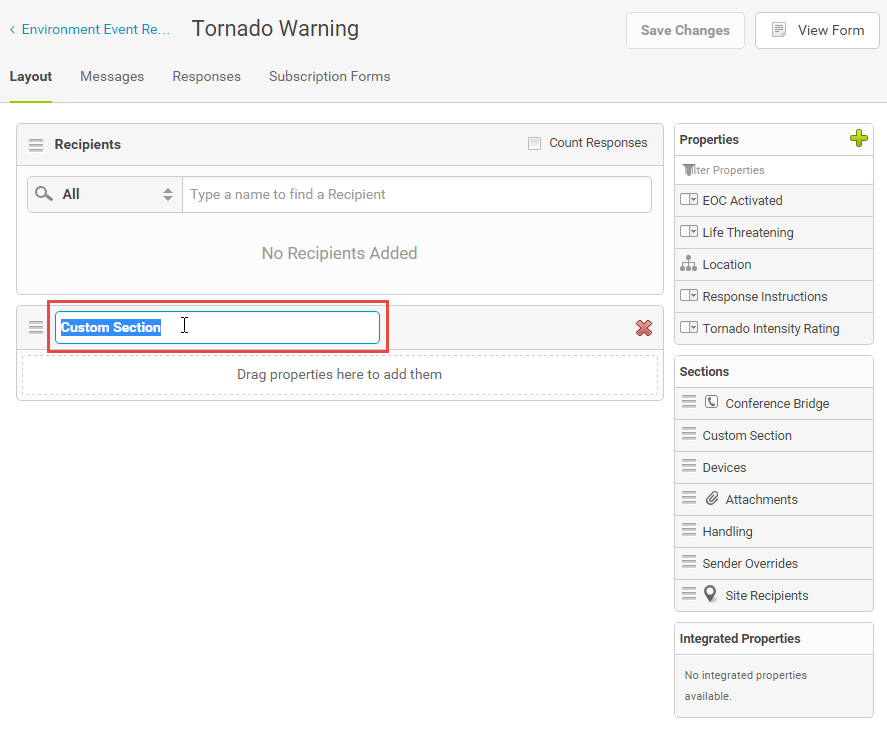
- Drag-and-drop a new Custom Section item from the Sections area so that it is below the Tornado Details section.
- Click the "Custom Section" and modify the text to Response.
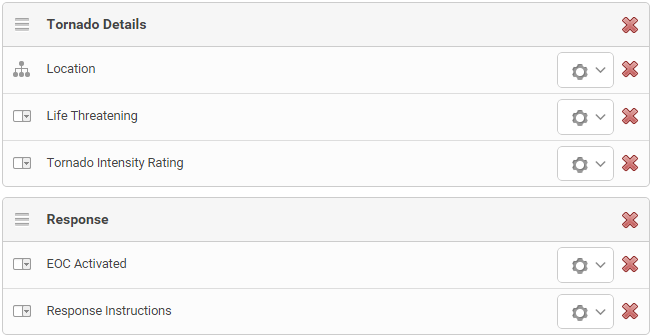
- Drag the Location, Life Threatening, and Tornado Intensity Rating properties to the Tornado Details section.
- Drag the EOC Activated and Response Instructions properties to the Response section.
Recipients
While it is not mandatory for a form to have any predefined recipients, it's a good practice to include likely recipients on your form, as it will improve the message sender's speed and accuracy.
To add predefined recipients to the form:
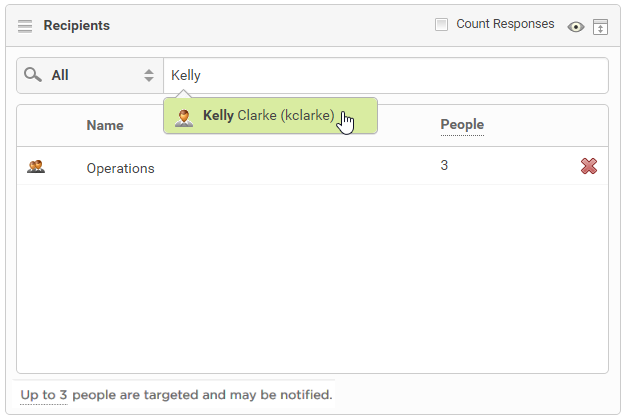
Use the search field in the recipients section to add the Operations Group and a User (here, Kelly Clarke).
Attachments
With the properties and predefined recipients now in place, you can provide message senders with the ability to add attachments like maps, documents, and procedure manuals to notifications.
To add the Attachments Section to the form:
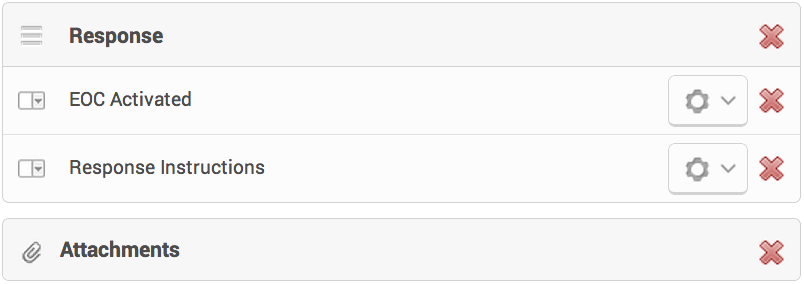
Drag Attachments from the Sections area to below the Response section in the layout designer.
Devices
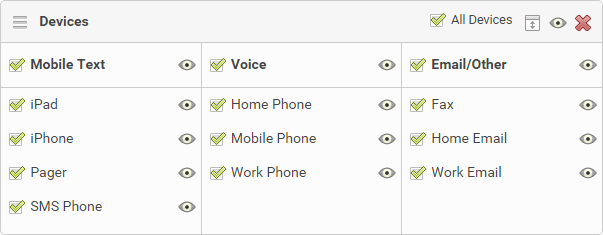
When you add the Devices section to the form layout, the default setting presented to the message sender is "All Devices", meaning that notifications will target all Device Types. However, the message sender retains the ability to change the Device settings during message initiation as long as the Visibility icon (the eye) is active for that Device
To add the Devices section to a form:
Drag Devices from the Sections area to the form layout designer.
Handling
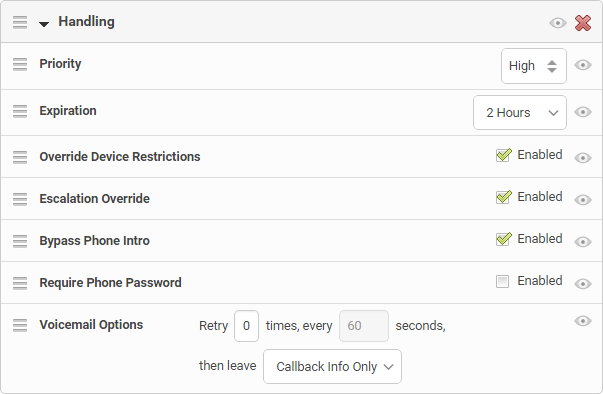
We want to predefine how the system handles various aspects of the message sending process, and then hide them from the message sender so that they can focus on the other elements of the form. (If you're not already familiar with these options, review the Handling section in Handling & sender overrides.)
To set Handling options:
- Drag-and-drop the Handling section from the Sections area to a location on the layout designer.
- To hide the section from message senders, click the Visibility icon (the eye) at the top level of the Handling section.
- Specify the options settings as follows:
- Priority: High
- Expiration: 2 Hours
- Override Device Restrictions: Enabled
- Escalation Override: Enabled
- Bypass Phone Intro: Enabled
- Require Phone Password: Disabled
- Voicemail Options: Callback Info Only
Review Your Work
When building out your forms, you'll want to review your work frequently so that you can ensure that what you're designing is exactly how you want the message sender to see it. With that in mind, click View Form to review the form layout.
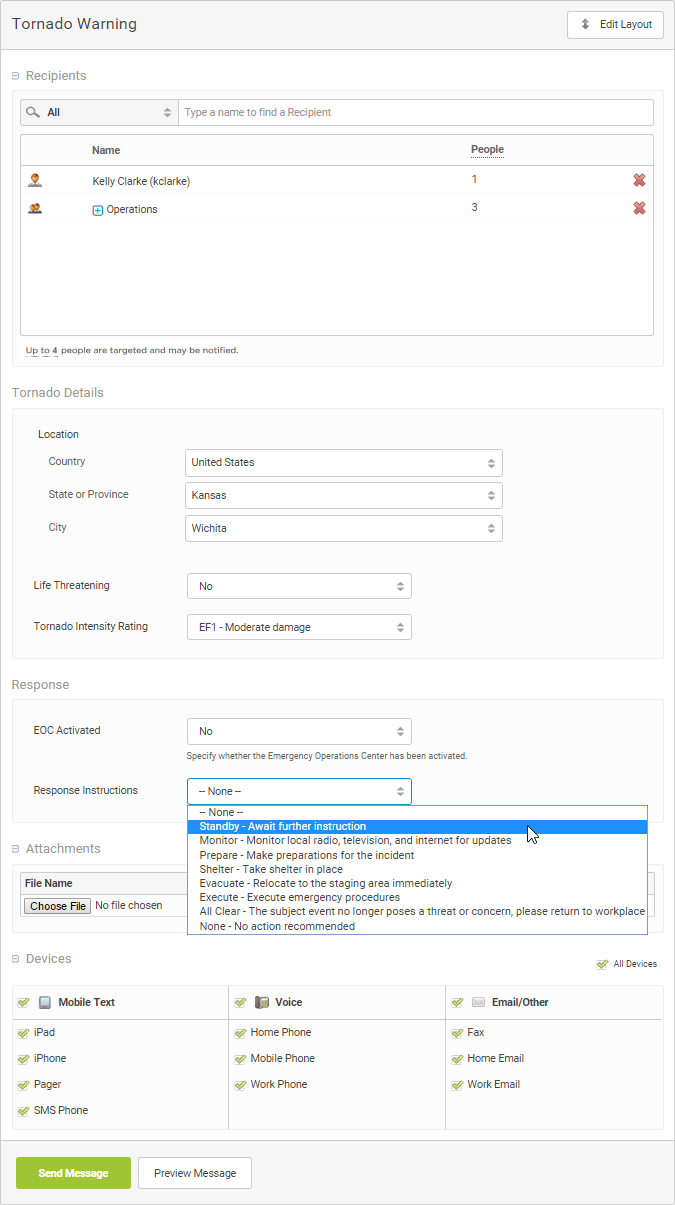
Try working with the settings and see whether they're functioning as you had expected. If not, click Edit Layout to return to the form and troubleshoot any issues you've found (note that you can edit properties directly from the layout designer).
With the form layout now in place, we can start designing the content of the email, text (SMS), and voice notifications that the form will be used to send. You'll recall that property variables added to these messages are replaced with the values configured on the form when it is initiated.
So, we'll be working with the properties already created for this form, but the context will be less abstract, as you'll be able to configure exactly how and where property values are presented to message recipients. Because there are three message types to design, we'll devote a subsection to each.
You can get started by navigating to the Form Details page and clicking the Messages tab. Then, click Edit for the type of message content you want to work with.

Email Message Content
The vast majority of us know how to construct an email message. So, try recreating the following message yourself by dragging properties where required, and using the text editor features to add formatting and a table (tip: hover the mouse pointer over the editor's icons to display a tool tip describing its function). Note that this content will also be used for messages sent to any configured fax or Apple Push devices.
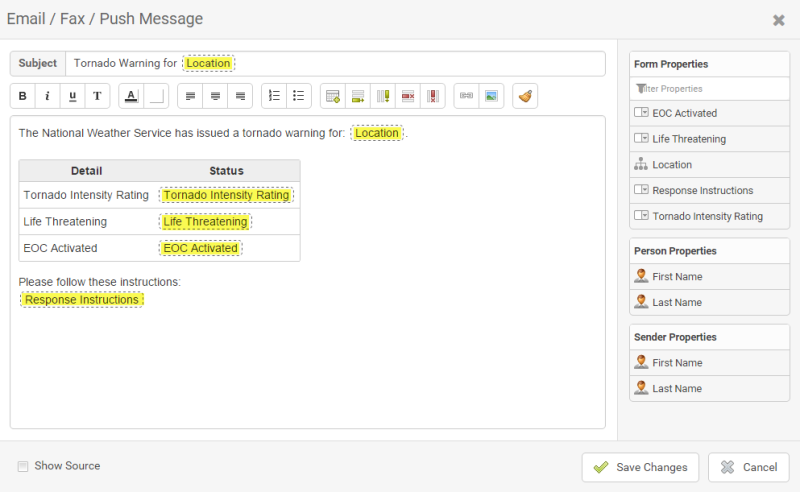
When you're done, remember to click Save Changes.
Text (SMS) Message Content
Due to its format, a text message is typically much more terse than an email message, but can still impart important content. Try recreating the following message using the same techniques as those discussed in the email content section above. Note that this content will also be used for messages sent to any configured generic devices.
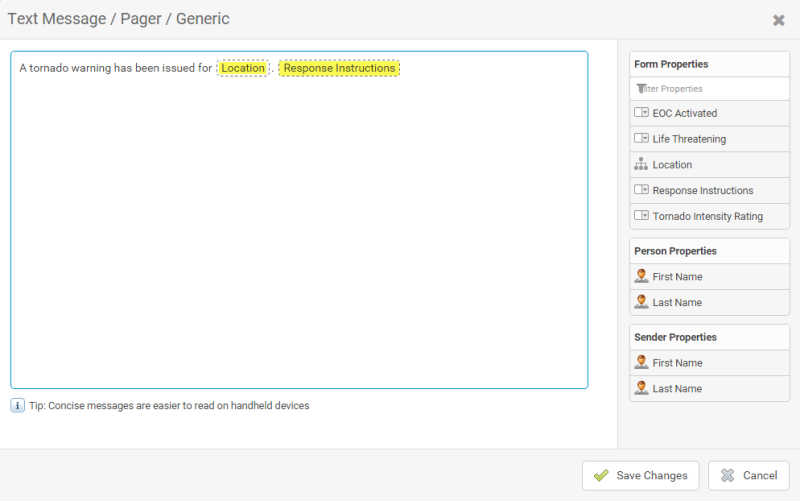
When you're done, remember to click Save Changes.
Voice Interaction Message Content
While most of us are fairly familiar with email and text message formatting, we're typically not as used to thinking about designing voice interaction. However, with its drag-and-drop interface and preview functionality, the Voice Interaction Editor greatly simplifies the creation of scripts so that you can them to sound exactly like you want. You can even create your own recordings.
After you read through Voice notification content, try recreating the following interaction. If you use the preview functionpreview function frequently, you'll find that your voice script creation skills improve quickly as you learn (and hear) the effect of the modifications you make in the editor.
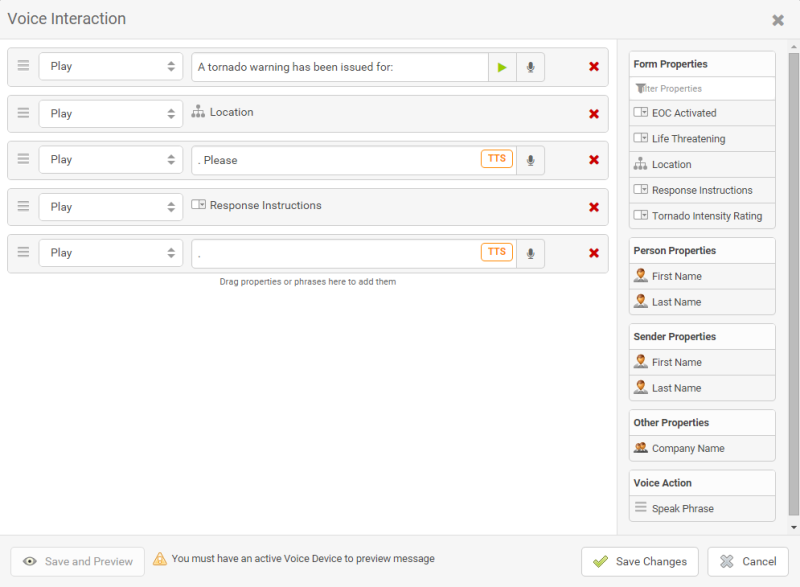
When you're done, remember to click Save Changes.
The final step is to create responses that can be selected by message recipients. Configuring response options is simple, but if you want to know what each response element meants, we recommend reading Defining Notification Response Options to give you an understanding of what each response element means.
For this example, we'll rely on the TTS (text to speech) engine to speak the responses to voice device recipients, but try having the system call you to record the phrases. Also, try thinking through the Contribution and Action choices and consider whether you would modify them and why.
To add response choices to the form:
- On the Form Details page, click the Responses tab.
- Click Create Response twice.
- Configure the Responses as they appear in the following screenshot. (If you get stuck, see Defining Notification Response Options.)
- For this example, you don't have to configure translations or recordings for Responses - but you can do so if you wish.

- Click Save Changes.
While not a formal step, you'll want to try adding yourself as a recipient and initiating the form. Check whether the message content you've created comes across to the message recipient as you intended. When you run into an issue that you cannot figure out by checking through the workflow settings, try locating the related reference section in this document.
While this example covers many features that you'll use again and again when designing workflow, it does not include every possible setting or feature. So, once you're comfortable with the concepts introduced in this example, try modifying the settings or create your own workflow from scratch, following the same basic steps.