Workflow templates
xMatters includes templates for workflows between xMatters and third-party applications that you can install in your deployment. Many of the available templates offer a low-code solution, allowing you to install an integration and start setting up your automation immediately.
This topic describes how to find and install workflow templates. For instructions on how to configure a specific workflow once you've installed a template, see the appropriate page in the xMatters integrations help.
Find workflows
The following sections describe how to access and search for workflow templates.
- In xMatters, click the Workflows tab.
- On the left menu, under Workflows, click Workflow Templates.
- Alternatively, on the Workflows tab, click Create, and then select Explore templates. For Free plans, click Add a Workflow to access the available workflow templates directly.
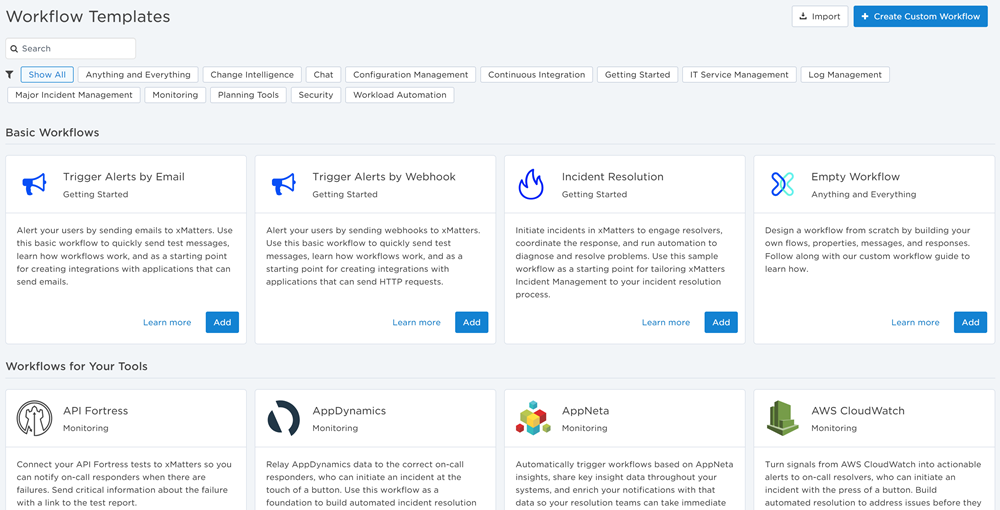
- The Workflow Templates page contains tiles for each available workflow.
You can also access workflow templates from the Workflow Templates widget in the Communication Center.
The search functionality on the Workflow Templates page lets you find available workflows that match search terms in a workflow's name, category (for example, Monitoring or IT Service Management), and description (the text that is visible when you move the pointer over an icon in the library). You can also use the filters below the Search field to view workflows by category.
To search for a workflow:
- On the Workflow Templates page, click the Search field.
- Start typing (a minimum of two characters is required).
- Every time you modify the contents of the Search field, the results update to include the items that correspond to the search criteria.
To filter for a workflow:
- On the Workflow Templates page, click the category you want to view from one of the available filters. You can only select one filter at a time.
- The page will display all the workflows in the selected category.
- Click the Show All filter to reset your view to all available workflows.
Didn't find what you're looking for?
If you don't see a template for the application you want to integrate with, you can create your own custom workflow instead or use the Trigger Alerts by Email, Trigger Alerts by Webhook, or Incident Resolution workflows as a starting point.
Install a workflow
When you choose a template from the list, the installation process is different depending on whether the workflow has an available low-code solution or requires a downloadable package from xMatters Labs on GitHub.
- On the Workflow Templates page, click Add on the tile of the workflow you want to install.
- In the Install dialog, give the workflow a name (this must be unique in your instance) and add an optional description. You can edit these later, if needed.
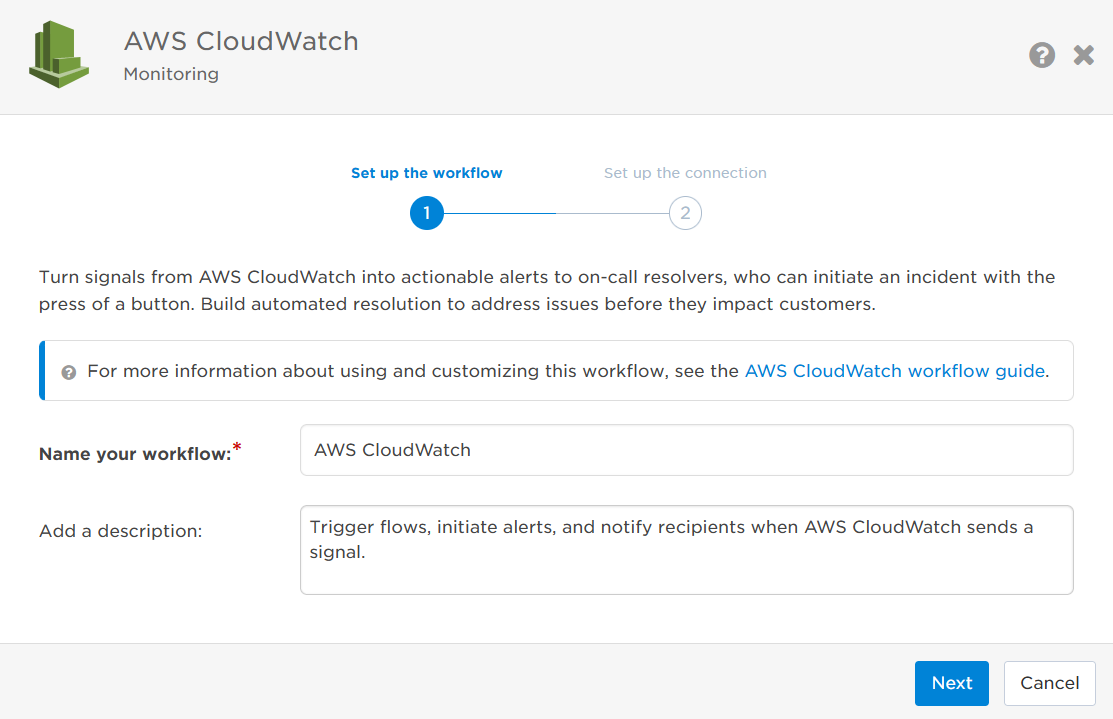
- Click Next.
- After the workflow is installed, the dialog will explain the next steps required to set up and test the connection.
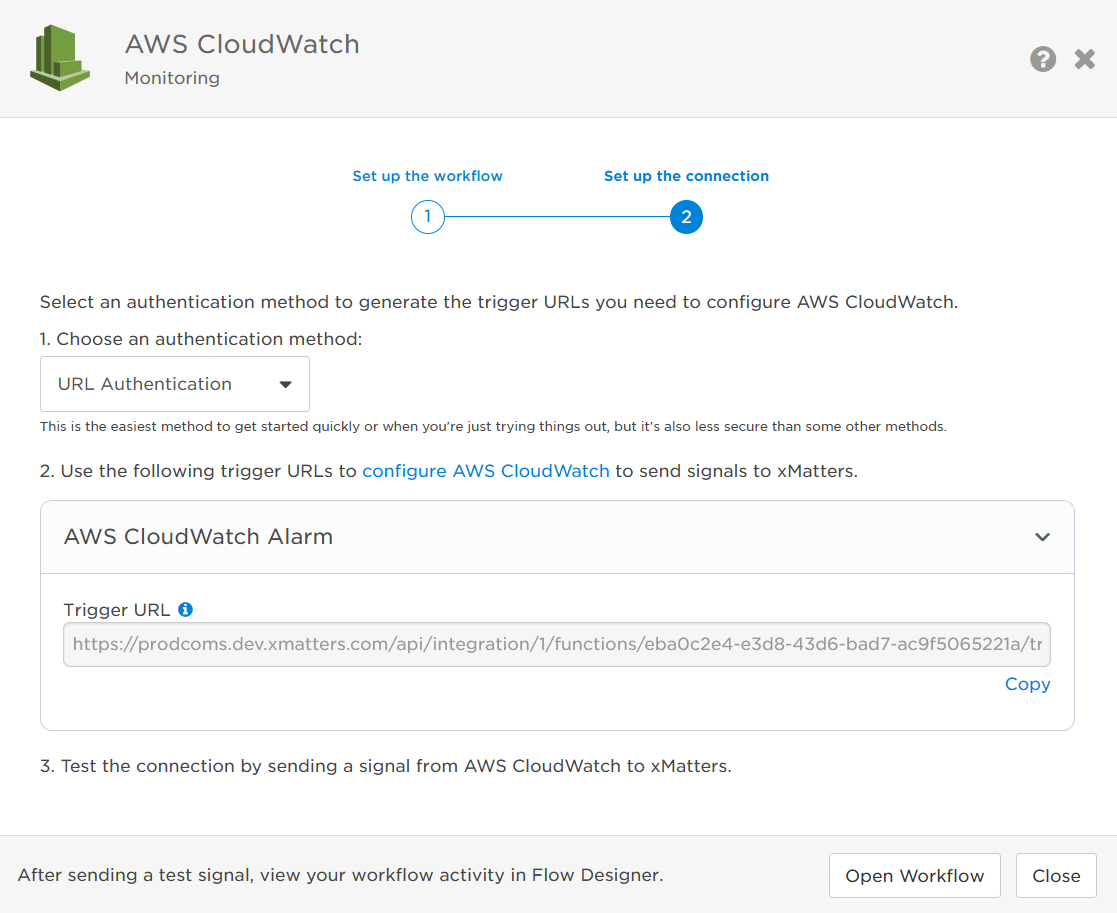
- Follow the instructions in the dialog to set up and test the connection. You can click the help link to see more detailed installation and configuration options for the workflow.
- Click Open Workflow to view the activity from any test signals and to customize the workflow, or click Close to return to the Workflows page.
To make sure you have as many possible options for getting signals from other applications into your xMatters instance, the xMatters Labs space on GitHub offers a host of workflow templates. These templates were built through collaboration between xMatters customers and the Engineering and Consulting teams. While these integrations only offer limited support, they're an excellent way to get started with applications that don't have a low-code option yet.
- On the Workflow Templates page, click Add on the tile of the workflow you want to install.
- In the Create Workflow dialog, click Get Package to open the workflow description page on the xMatters website. Click Get Started on GitHub to navigate to the repository for the selected application. From here, you'll be able to access detailed setup instructions and a downloadable package (zip file) with the workflow files.
- Once you've downloaded the package, click Import Workflow on the Create Workflow dialog to upload the workflow package to xMatters.
- You can also import a workflow by clicking the Import button on the main Workflow Template and Workflows pages.
- Click the Browse to select your workflow link to select the workflow zip file from your computer's file directory. Alternatively, you can drop your file on the Import Workflow dialog.
- The Import Workflow dialog displays the file to import. You can click the 'X' next to the workflow to remove the file.
- Click Import.
- If you import a workflow with a name that is already in use, xMatters requires that you give the workflow a new name before continuing.
- Review the import log messages.
- Click Open Workflow.
- For help setting up this workflow, click the custom workflow guide link below the description of the workflow.
For more information about managing workflows, see Create and manage workflows.