Example: Use an HTTP request to trigger a flow
The HTTP trigger in Flow Designer lets you initiate flows from any system capable of sending an HTTP POST request. This example walks through the basic steps of setting up a flow that receives the request, parses its payload, and passes the information to steps in the flow that look up users, create alerts, and update the source application.
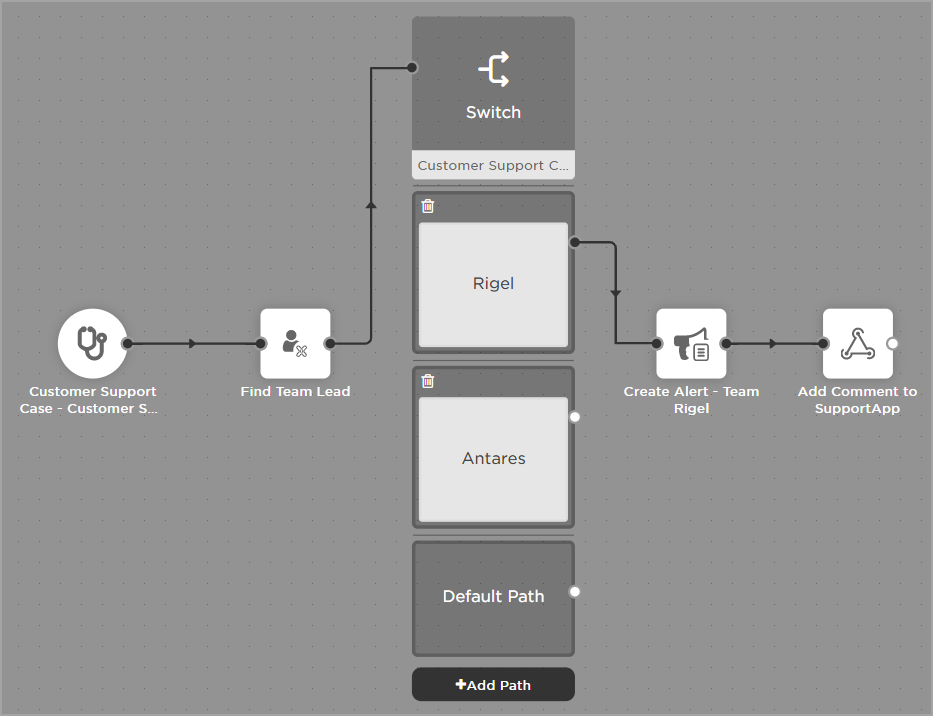
Here's the flow we're going to build. It's fairly basic but walks you through some of the steps available when creating flows.
Step 1: Create an HTTP trigger
The HTTP trigger receives the payload and parses it, making the information it contains available to steps in the flow. The only thing you need before you create an HTTP trigger is an understanding of the payload the calling system will send to xMatters
- Open the workflow associated with the alert you want to create. In this example, we'll use a generic IT Communications workflow with forms for notifying about planned network outages, issues with applications, and — the one we'll use in this example — new customer support requests.
- Go to the Flow Designer tab and open the associated canvas. In this example, we'll open our Customer Support Case canvas.
- On the Triggers tab of the palette, click Create HTTP Trigger.
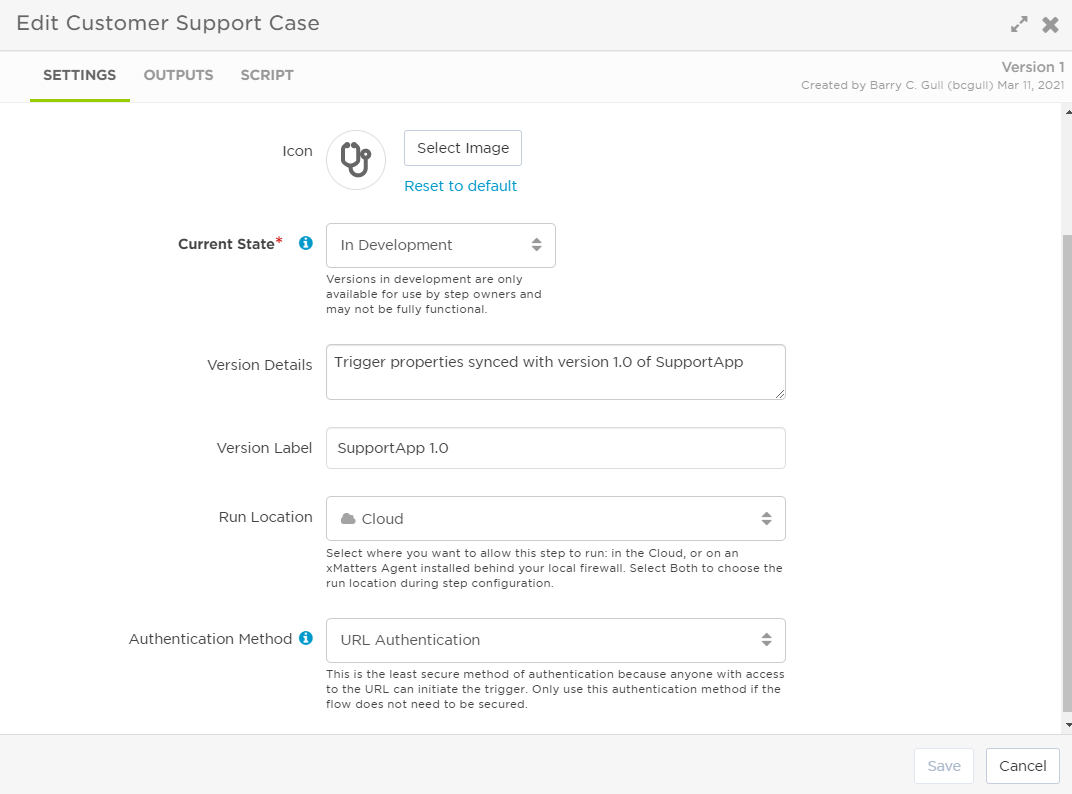
- Fill in the Settings. Here's how we filled in our example:
- Name: Customer Support Case
- Description: Notify appropriate team of a new customer support case affected the services they support.
- Icon: We selected the stethoscope...our service needs TLC.
- Current State: In Development (we'll go back and change this once we've tested our flow).
- Version Details: Trigger properties synced with version 1.0 of SupportApp
- Version Label: SupportApp 1.0
- Run Location: Cloud
- Authentication Method: API Key (we have a user set up specifically for our SupportApp so all requests are authenticated with that user's credentials).
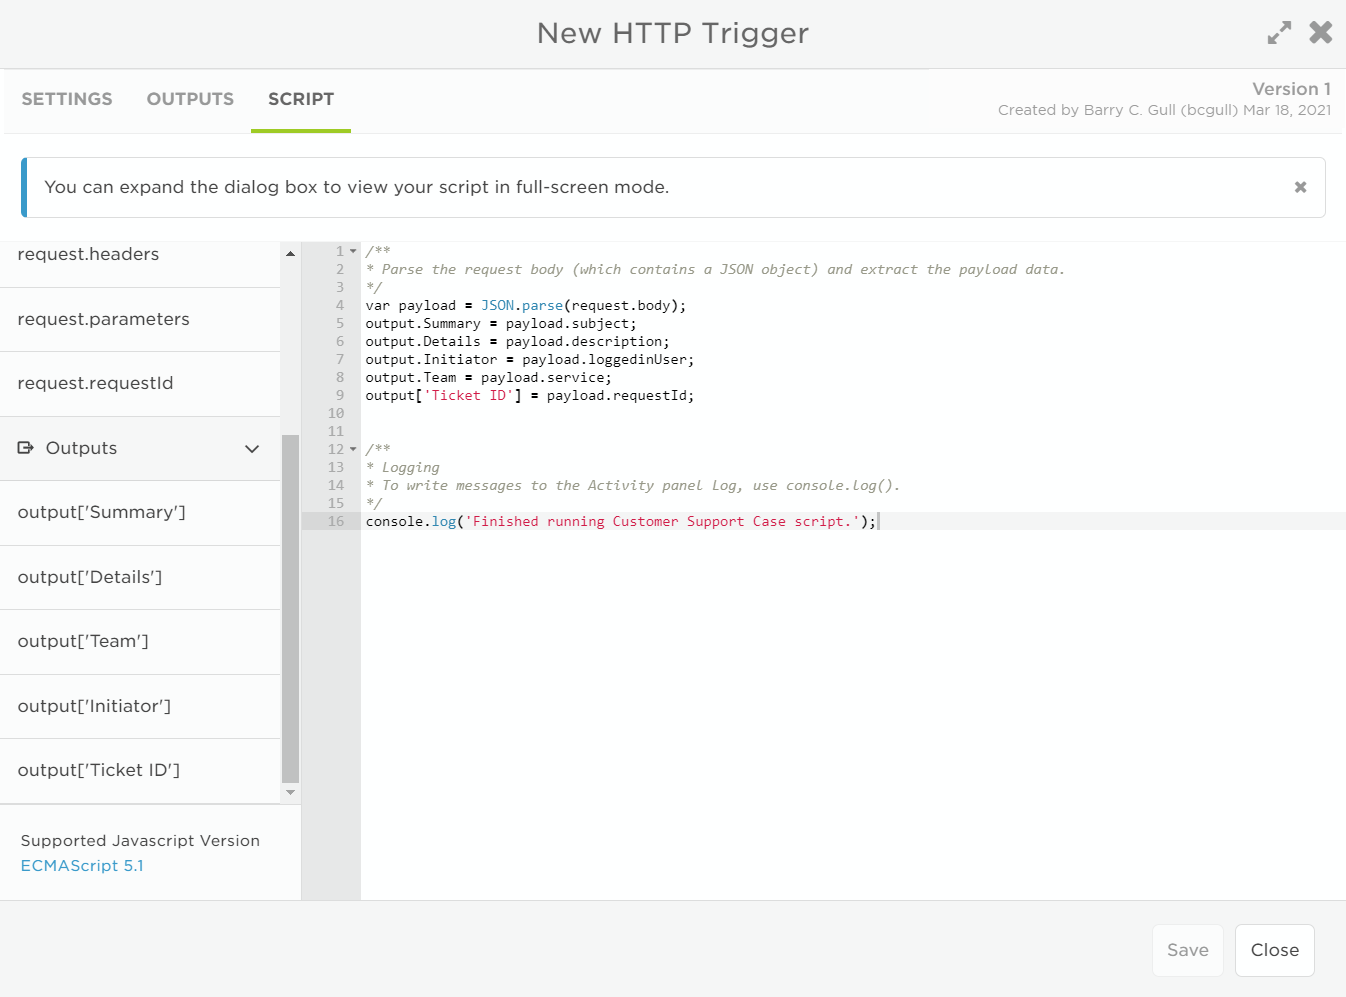
- Create the outputs to hold information you want to pass from the payload to steps in the flow. Here are the outputs we created for this example:
- Summary: the subject of the support request.
- Details: a detailed description of the issue.
- Initiator: the user who logged the request.
- Team: the team associated with the service that is the subject of the request.
- Ticket ID: the ticket ID generated by SupportApp.
- Use the Script tab to parse the request and map the payload properties to the outputs.
- Click Save.
- Drag your new HTTP trigger onto the canvas.
Step 2: Find a user based on a value from the trigger
The Find User step finds the user ID and target name of an xMatters user based on the value of a custom user property.
In our example, the team lead responsible for a slice of our Stellar application suite has their team name (Rigel or Antares) stored in a Team Lead custom field.
Step 3: Switch the path based on the application affected
Next, we'll add a switch step so the flow can take different actions based on which application is impacted.
- From the Tools tab, drag a switch step onto the canvas and connect it to the flow.
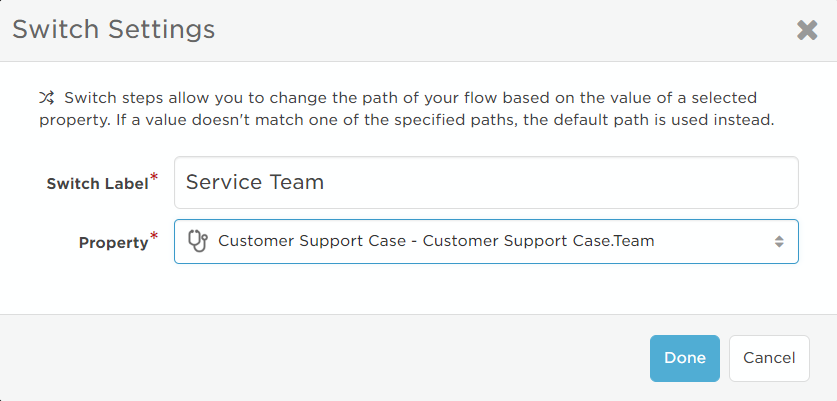
- Double-click the block to open its settings (or click the pencil icon).
- Update the label to reflect the purpose of the switch. In our example, we labeled it Service Team because it switches on the team responsible for the application.
- For the property, select the property that will pass the value you want the flow to switch on. In our example, we chose the Team output of our trigger.
- Click Done then click Add Path at the bottom of the switch block.
- Double-click the block and enter the value for the path. In our example, we'll add a block for Rigel and one for Antares.
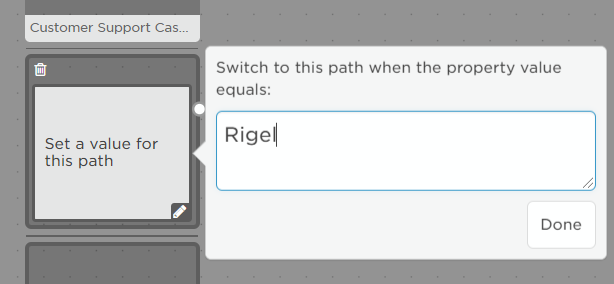
- Click Done.
Step 4: Create an alert
The next step in our example is to create an alert targeting the Rigel team lead to notify them there's a customer support case their team needs to look into.
- From the Tools tab, drag a Create Alert Using a Form step onto the canvas and connect it to the Rigel block of the switch step.
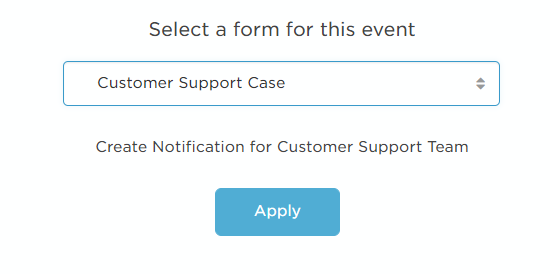
- Select the form you want the alert to target. In our case, we'll keep it simple and target the form associated with the flow — the Customer Support Case form.
- Update the step label to reflect the alert being created (we went with "Create Alert - Team Rigel").
- Enter the targeted recipients. In our example, we'll drag in the User Target Name output of the Find User step. We'll also enter Rigel in plain text to target the Rigel group, notifying the group member on call. If you're working in a flow with a lot of steps, you can also use the Search bar to quickly find outputs.
- Drag in the Details from the Customer Support Case trigger into the Event Details field.
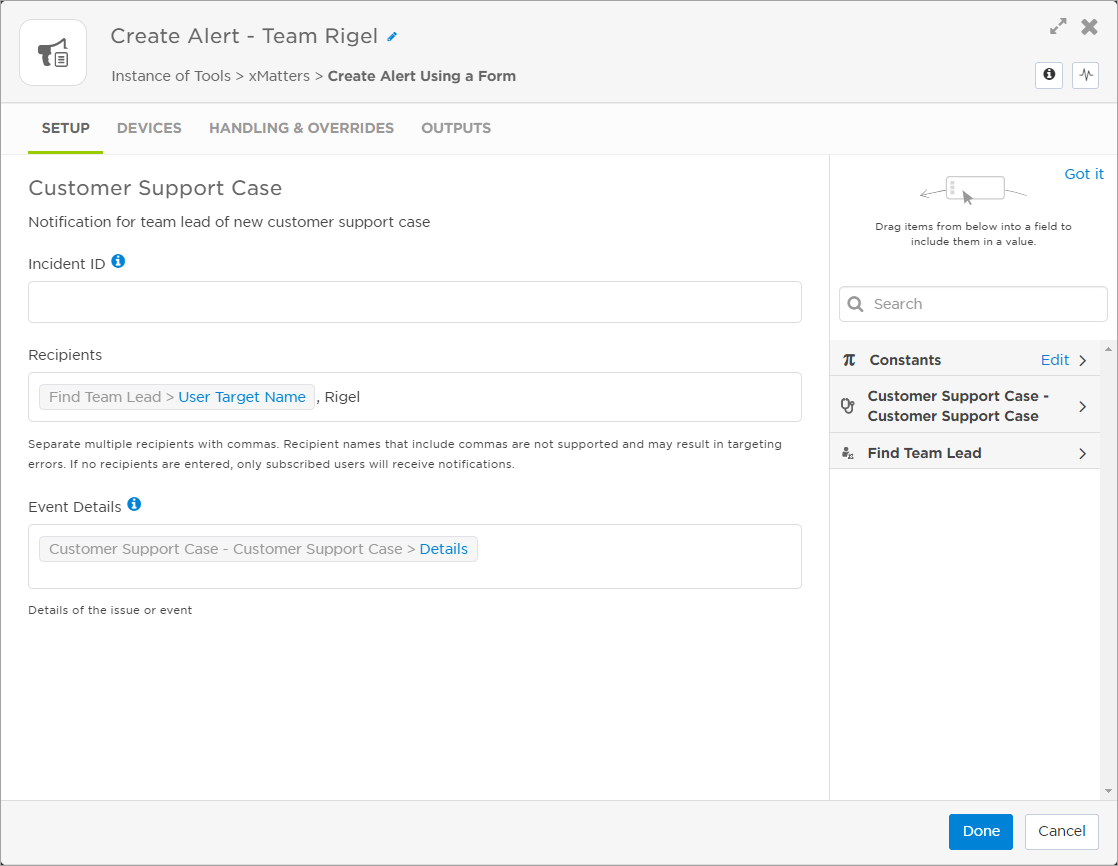
- Click Done.
Step 5: Update the SupportApp with xMatters alert information
For our final block, we'll add a step that adds a comment to the SupportApp record.
- From the Tools tab, drag a webhook step onto the canvas and connect it to the flow.
- Update the label to indicate what the step does (we changed our label to "Add comment to SupportApp").
- Go to the Endpoint tab to select the endpoint to target.
- To create an endpoint, click Edit Endpoints and configure the settings to match your needs. In our example, we added the base URL of our SupportApp site, set the authentication to Basic and entered the username and password of a SupportApp user.
- Back on the Setup tab, add a URL Suffix to append to the Base URL of the endpoint if needed. Since we want to update our ticket, we added the path to the ticket, using the Ticket ID output from the trigger in the path.
- Set the content type of the body you're going to send so your target system knows how to parse it. We left it as application/json.
- Use Webhook Body to provide the payload. For our example, the body is a comment parameter containing a note that the xMatters alert has been created. We included the alert ID and targeted recipients by dragging in outputs from the Create Alert Using a Form step.

- Click OK.
That's all we need to do for our example flow. The final step is to test it out.
Step 6: Test your flow
It's always a good idea to test your flow to make sure you're getting the results you expect.
- Double-click the HTTP trigger. If needed, select the authenticating user. For our example, because we set the trigger to use API Key authentication, we need to select the authenticating user (we'll leave it as ourselves for the test but, when we put this into production, we'll select the user we set up for the SupportApp). Then we copy the API Key and Secret to a temporary text file.
- Copy the trigger URL to that same file.
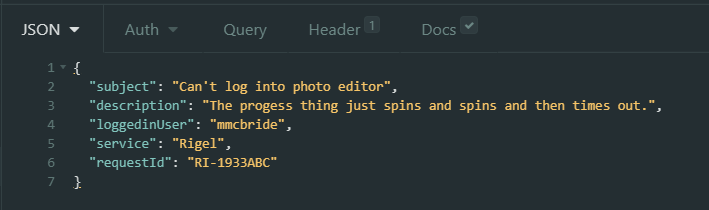
- Use a tool capable of sending a POST request, such as Postman, Insomnia or a web-based option to send a request to the trigger URL. Include the payload properties you set up in the trigger. Here's the payload we sent for our example:
- Make sure to set the authentication credentials if required by the authentication method you selected for the HTTP trigger. Since we selected API Key, we select Basic authentication and use the API Key for the username and the secret for the password.
- Send the request. Check the Activity panel in Flow Designer to see what happened.
If everything looks good, make sure to go back to the HTTP trigger in the palette and set the state to Deployed.
What's next
We created a pretty basic flow in this example. But, with the flexibility of Flow Designer, you can do much more.
- Do you want to create a Jira Cloud issue, create a Zendesk ticket, or post to a team chat? Connect one of our built-in apps to the flow.
- Maybe you want include the Rigel team lead's SupportApp user name in the comment? Try using the Find User Property Value step along with a "SupportAppID" custom user propery that holds their SupportAppID to look up and pass the ID to other steps in the flow.
- Or do you want to post information from the source application (and other steps in the flow) to your custom dashboard? Create a custom step tailored to your tools and your needs.