Manage incident types
Different kinds of incidents require unique responses. For example, the response to an IT service disruption will have different data requirements and procedures than a natural disaster response. For the most efficient incident response, it's important that the specific information and procedures needed to diagnose, mitigate, and resolve the issue at hand are easily accessible to resolution teams.
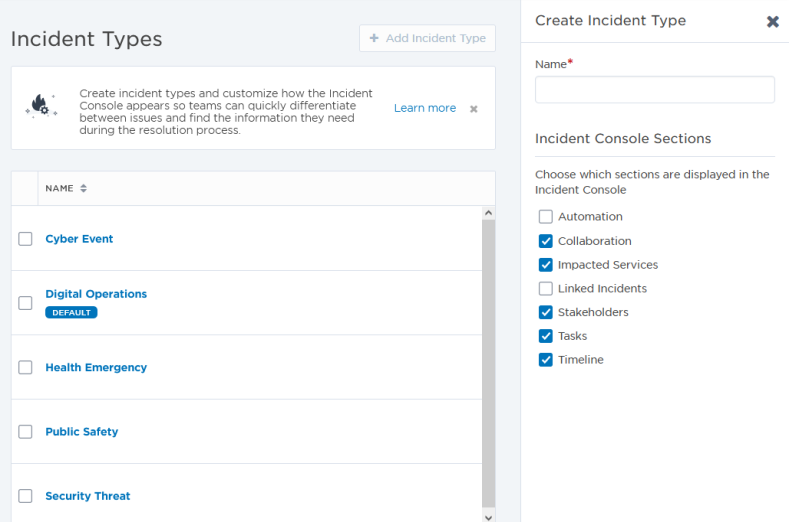
Incident types enable you to predefine the Incident Console sections and specific properties that are required for the different types of incidents your organization typically encounters. Predefining incident types is useful for establishing a more consistent approach to incident response and enabling more efficient incident resolution.
How does it work?
If your instance includes more than one incident type, the Initiate Incident step will ask which type of incident you want to initiate. Selecting a type automatically adds the corresponding incident properties as input fields to the Initiate Incident step.
You can populate the values of incident properties using the outputs of upstream flow steps or by enabling users to manually input values when they submit an Initiate Incident form. Incident properties are also available as outputs of the Initiate Incident step's built-in triggers, so you can integrate this information into your workflows and incorporate it into your resolver notifications and stakeholder updates.
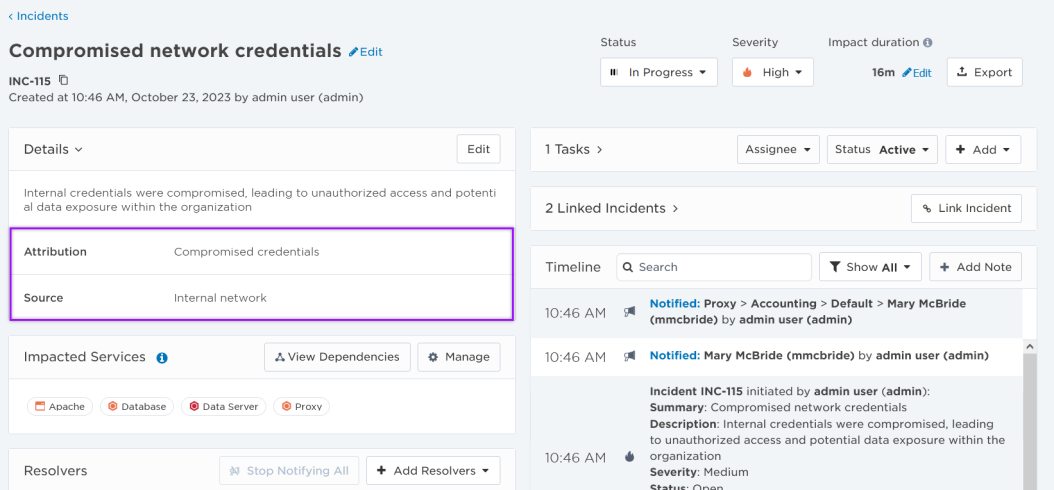
Resulting incidents will use the customized console layout specified for that incident type and include the incident properties and any of their defined values in the Details section of the console. Resolvers can manually update the values of incident properties as the incident progresses.
The following sections describe how to create and use incident types and properties:
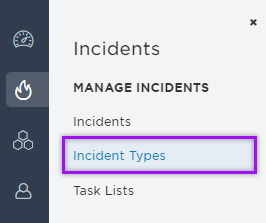
In the Incidents menu, under Manage Incidents, click Incident Types.
- On the Incident Types page, click Add Incident Type.
- Specify the following:
- Name: All incident types must have unique names.
- Incident Console Sections: Select which sections are currently visible in the Incident Console for this type of incident.
- The Details and Resolvers sections are not listed because they are displayed for every incident.
- Click Create.
- On the Incident Types page, click the name of the incident type you want to create an incident property for.
- On the Incident Properties tab, click Create Incident Property.
- In the Create Incident Property side panel that appears, configure the following settings:
- Name: All properties within an incident type must have unique names.
- Default Value: Initial value for the property.
- Description: Descriptive text that appears on the Incident Properties tab for the incident type in the web user interface. You can use this to explain anything about the property for anyone managing the incident properties for this incident type—it isn't shown in the Initiate Incident step.
- Help Text: Text that appears along with the property in the Initiate Incident step, intended to help users configuring the step.
- If you want to apply validation to the property value based on regular expressions, enable the Validate with regex toggle, and then do one of the following:
- Select a predefined regular expression from the Pattern Library.
- Select the 'Custom' option from the Pattern Library and then enter your own pattern.
- Click Create.
Incident properties are currently limited to text properties.
The order of incident properties in an incident type determines the order they're listed in the Initiate Incident step and in the Incident Console.
To change the order of incident properties:
- On the Incident Types page, click the name of the incident type you want to change the order of incident properties for.
- On the Incident Properties tab, grab the handle icon next to an incident property and drag it to a new position in the list.
You can automatically set the values of incident properties in the Initiate Incident step at the time the incident is initiated, or you can manually add or edit the values or properties in the Incident Console.
You can enter text strings as the values of incident properties, or automatically populate their values using outputs from upstream flow steps, such as App triggers or monitoring tools. For example, after you install one of our workflow templates that includes an Initiate Incident step, open this step on your canvas, select an incident type, and then drag outputs from upstream flow steps into its Incident Properties fields (make sure their values are text strings). If you're making modifications to an existing workflow, see the note below.
You can also configure a flow trigger form to enable users to provide the values of incident properties when they manually submit an Initiate Incident form—it takes a few steps to set this up:
Step 1: Install the workflow and specify the incident type
For this example, we're using a new installation of the Incident Resolution workflow.
- Install the Incident Resolution workflow and open the canvas. You'll notice the Initiate Incident step has a configuration issue.
- Double-click the Initiate Incident step to open its configuration screen (or select it and click the pencil icon).
- You are required you to select an incident type to configure the step. (The option to select an incident type only appears when you have more than one incident type configured in your instance.)
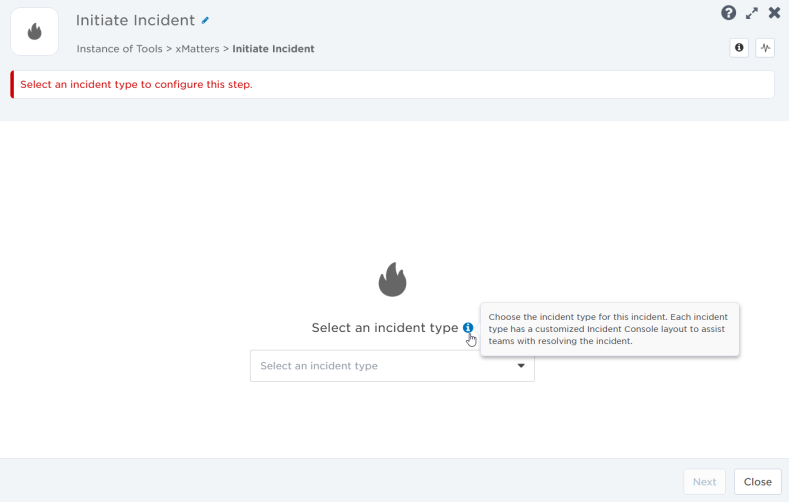
- Use the drop-down to select an incident type, then click Next.
- The Setup tab of the Initiate Incident step now includes an 'Incident Properties' section, which lists the incident properties predefined for the selected incident type.
Step 2: Create properties on your flow trigger form
Next, you need a place for users to enter information for a property in the Initiate Incident from. To do this, you need to create form properties and add them to your flow trigger form. These form properties will appear as input fields in the Initiate Incident form users manually fill out to initiate an incident.
- On your flow canvas, double-click the Incident Initiation trigger to open its configuration screen (or select it and click the pencil icon).
- On the Settings tab, in the Flow Trigger Form section, click Customize Form to open the associated form in a new browser window.
- On the right side of your screen, click the + symbol and create a Text property.
- Repeat this step to create additional text properties. You need one form property for each incident property that you want form submitters to provide the value for.
- Drag a Custom Section onto your form and then drag the text properties into that section.
- Click Save Changes.
- Close the browser window to return to your Initiate Incident trigger configuration screen.
- Click Close
- Save the canvas.
Step 3: Assign form properties as the value of incident properties
The values that users enter into the form property fields in the Initiate Incident form are available as outputs of the form trigger. You can now drag these outputs into the Incident Properties input fields on the Initiate Incident step.
- On your flow canvas, double-click the Initiate Incident step to open its configuration screen (or select it and click the pencil icon).
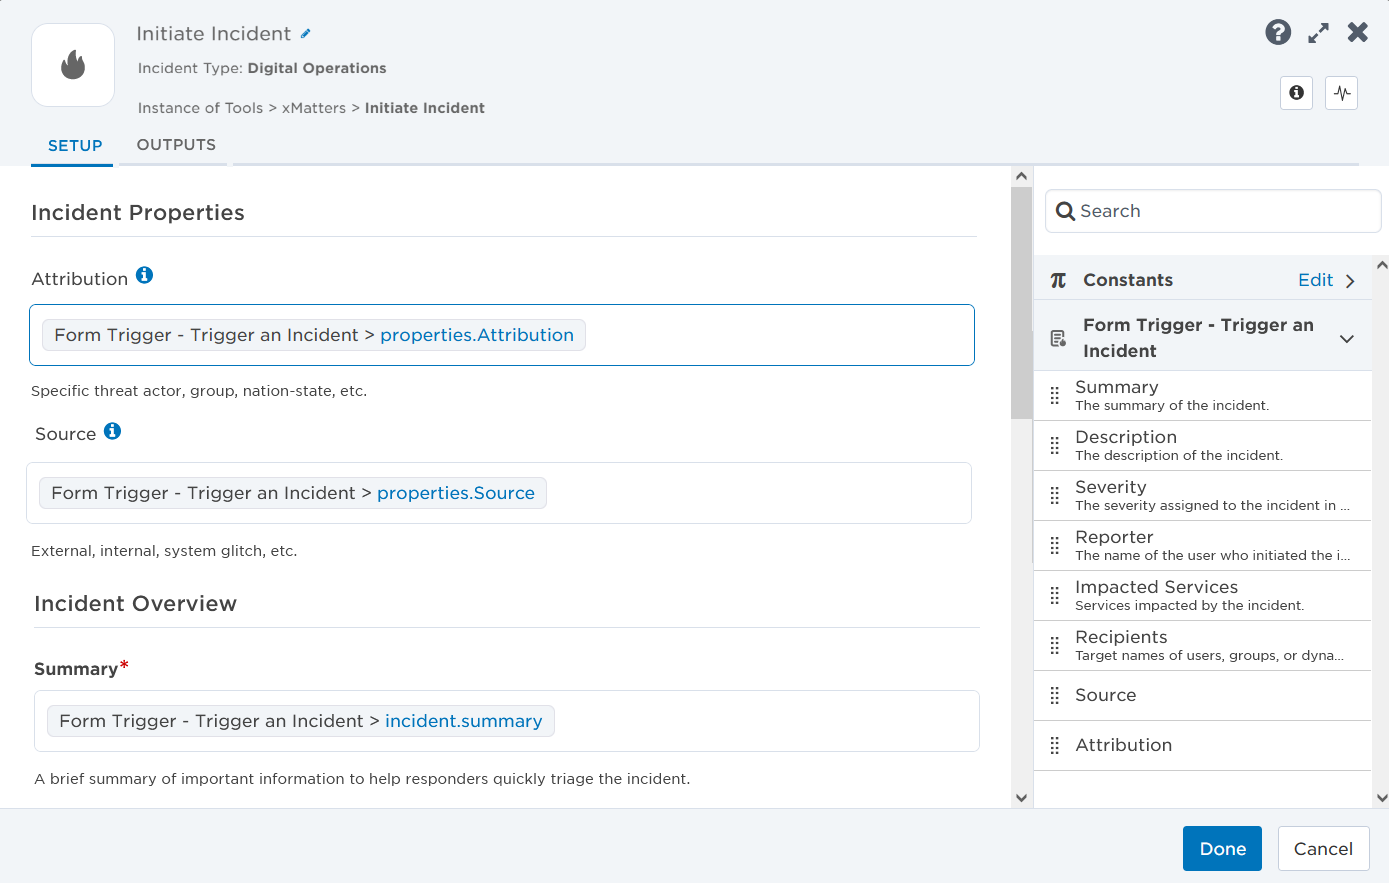
- On the sidebar, expand 'Form Trigger - Trigger an Incident' and drag the properties you created in the previous step into the corresponding Incident Properties fields.
- If you don't see your properties listed, try closing and reopening the canvas, or disconnecting then reconnecting the Form Trigger and Initiate Incident step.
- Click Done.
Now when you use this Incident Resolution workflow to initiate incidents, the values initiators submit on the form will be assigned as the value of incident properties and displayed in the Details section of the Incident Console.
Next steps:
- Provide more context to resolvers when you notify them to engage in the incident by including form properties in the 'New Incident Notification' Create Alert step message templates.
- Include additional steps upstream of the Initiate Incident step to include data from monitoring tools or other systems in incident property values.
- Provide more context when notifying additional resolvers to engage by including incident properties in the 'Engage Additional Resolvers' Create Alert step message templates. Or, include incident properties in stakeholder messages, them in collaboration channels, or use them as inputs to any downstream flow steps.
- Incident properties are available as Incident Trigger Context outputs to the Initiate Incident step's built-in incident activity triggers (status changes, severity changes, notifications to engage).
A note about existing workflows...
For the initial release of this feature, existing Initiate Incident steps are configured with a 'Digital Operations' incident type, and any existing incidents created by these steps display the current console layout configured for this incident type. Because you cannot modify the incident type configured for an Initiate Incident step, if you want to modify the type of incidents initiated by previously existing flows, replace any existing Initiate Incident step with a new one and select the incident type you want to use.
You can configure which incident type to use in the Initiate Incident step. When more than one incident type is configured in your instance, the Initiate Incident step includes the option to specify the type of incident you want to initiate.
When you import or install a new workflow that includes an Initiate Incident step, it will initiate incidents using the default incident type, until configured otherwise. This ensures Initiate Incident steps run successfully out of the box without having an incident type manually configured. To modify the step to use a different incident type, open the Initiate Incident step on your flow canvas and select an incident type.
To set the default incident type:
- On the Incident Types page, select the check box next to the name of the incident type you want to set as the default.
- Click Set as Default.

- In the Change Default Incident Type dialog window, confirm this action by clicking Change Default.
Any Initiate Incident steps included in flows prior to the release of the Incident Types feature are configured to use the 'Digital Operations' incident type. You cannot change the incident type configured for an Initiate Incident step. If you want modify the type of incidents initiated by previously existing flows, replace any existing Initiate Incident steps with a new one and select the incident type you want to use.
Does the built-in xMatters Incident Management Workflow use the default incident type?
The built-in xMatters Incident Management workflow is configured to always use the 'Digital Operations' incident type. Although you cannot modify the type of incidents this workflow creates, you can change the console layout of the Digital Operations type. This is useful if there are sections of the Incident Console your resolution teams don't use and you want to streamline the console layout.
Modifying the incident properties of the Digital Operations type has no effect on the built-in xMatters Incident Management workflow. However, you can access and use these incident properties in other flows you configure to use this incident type.
- On the Incident Types page, click the name of the incident type you want to update.
- Click Edit next to the current name, and then enter a new name for the incident type.
- Click outside of the name field to save your edits.
- On the Incident Types page, click the name of the incident type you want to edit the incident console layout for.
- Click the Incident Console Layout tab.
- Select or clear the check boxes next to the console sections you want to include or remove from the incident type.
- Click Save.
When you modify the console layout for an incident type, all existing incidents of that type are updated to reflect the new configuration.
- On the Incident Types page, click the name of the incident type you want to edit an incident property for.
- On the Incident Properties tab, click name of the incident property you want to edit.
- In the Create Incident Property side panel that appears, edit the property's settings.
- Click Save.
- On the Incident Types page, click the name of the incident type you want to delete a property from.
- On the Incident Properties tab, click name of the incident property you want to delete.
- In the Create Incident Property side panel that appears, click Delete.
- In the Delete Property dialog window that appears, click Delete.
Deleting an incident property removes it as an input field from any existing Initiate Incident steps. It is also no longer available as an Incident Trigger Context output from any of the Incident step's built-in triggers, and may result in configuration issues in flow steps using it. Any existing incidents that include a deleted incident property will continue to display the property name and its value in the Incident Console.
- On the Incident Types page, select the check box next to the name of the incident type you want to delete.
- You can delete only one incident type at a time.
- You cannot delete the Default incident type.
- If an incident type is being used by a step, you must first delete the step before deleting the incident type.
- Click Delete.
Deleting an incident type does not remove any existing incidents from your system. Instead, existing incidents will display their previous incident type crossed out in the 'Type' column of the Incidents list. Additionally, these incidents will retain the custom console layout and incident properties configured for their now-deleted incident type.