User Upload
User Upload is a simple way to perform bulk uploads or updates of user information in xMatters. The latest edition of this feature requires fewer clicks to send files, and provides you with more robust reporting features when file processing is complete.
Based on our xMatters REST API, the User Upload feature uses the User Upload Template v1.6; accepted file formats are .csv and .txt, and the maximum file size is 10,000 rows. To help avoid any potential issues with special characters in user names, we recommend encoding the file using UTF-8.
The previous version of the file, User Upload Template v1.5 is still valid for uploads, but changes to the Status, External Key, and Externally Owned fields will be ignored on upload. If you only need to add or update a few users, you can do so on the Users page of the web user interface. For more information, see Manage Users.
Upload files
Ensure you are using the User Upload Template v1.6 with the User Upload feature. You can download a copy of the template file, or create your own by exporting a list of existing users from the Users page of the user interface. For more information on modifying the template or downloading the file, see Modify the upload template file.
You can upload files from either the Reports or Users pages.
- From the main menu, select Reports > Company Reports > User Upload.
- On the User Upload page, click Create Upload.

- Give the upload a unique name, or use the default file name.
- If you do not set a unique name, the default file name will be: User Upload v1.x at {time/datestamp}.
- Drag and drop your upload file onto the Create Upload window, or browse to select it.
- When your file appears on the screen, click Submit.
- From the main menu, select Users > Users.
- On the Users page expand the Import menu located in the top-right side of the page, and select Create Upload.

- Give the upload a unique name, or use the default file name.
- If you do not set a unique name, the default file name will be: User Upload v1.x at {time/datestamp}.
- Drag and drop your upload file onto the Create Upload window, or browse to select it.
- When your file appears on the screen, click Submit.
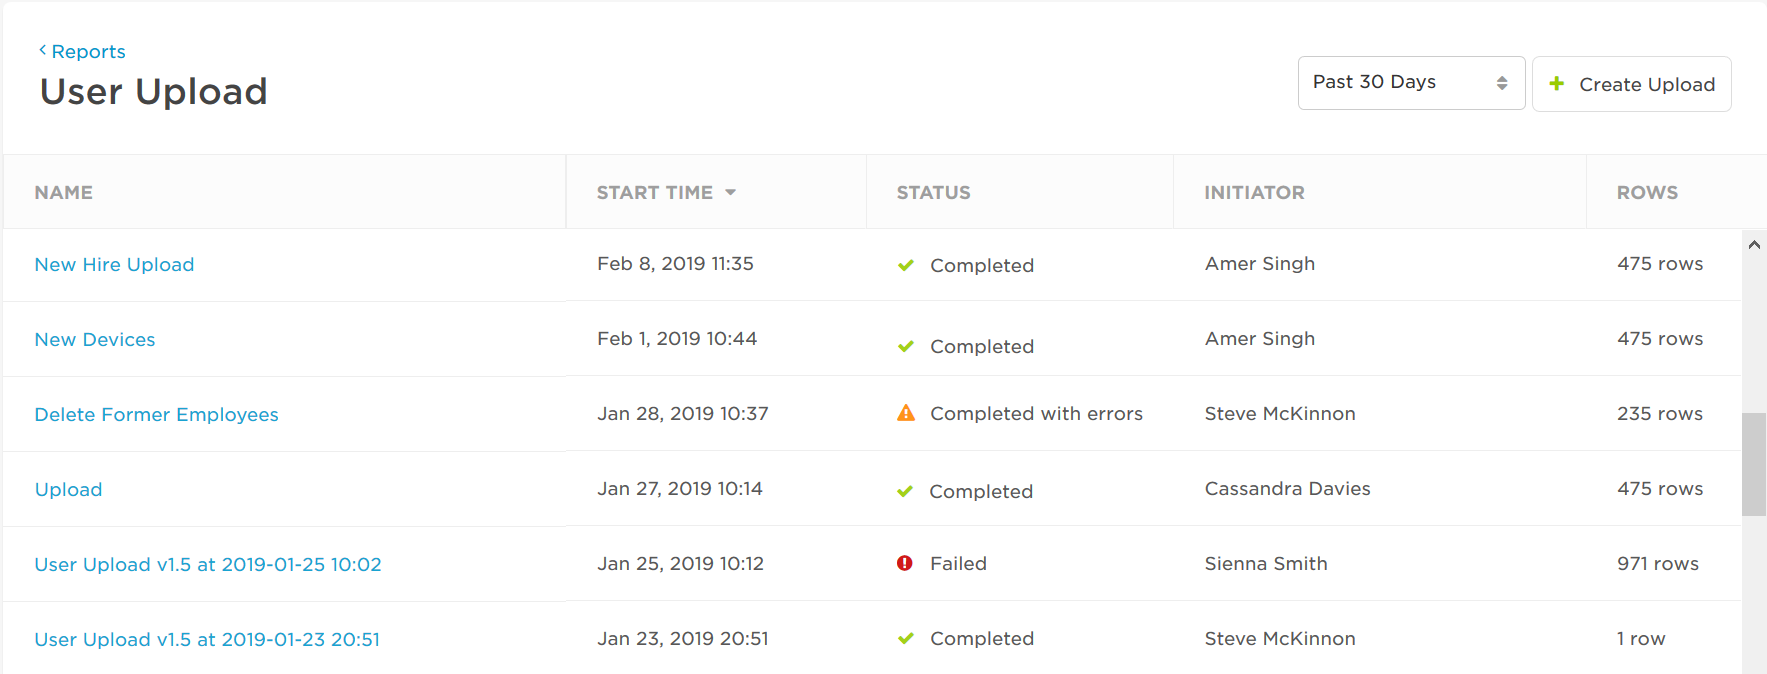
Once xMatters receives the file, you're taken back to the User Upload report page where you can see the file and review its progress. If you have other things to do while your file processes, go do them; we'll send you an email confirmation when the file has finished processing. For more information, see Subscribe to User Upload alerts.
When a file is successfully uploaded, it appears in a table on the User Upload page. The User Upload table contains the following fields:
|
Column |
Description |
|
Name |
The unique upload identifier created when the upload file was submitted. |
|
Start Time |
The date and time when the upload file was submitted for processing. |
|
Status |
The status of the upload. Values include:
|
| Initiator |
The name of the integration or the ID of the person who submitted the file for processing. |
| Rows | The number of rows in the file submitted for processing. |
To more easily view data in the table, do one or more of the following:
- To sort the content in alphabetical or chronological order based on a specific column, click the column header. (Click the header again to reverse the sort order.)
- To change the width of a column, move the pointer over the edge of the column and when the re-size icon appears, click and drag the column to the desired size.
- To rearrange the columns, click and drag a column header to a new location on the table.
- If the list contains more entries or columns than can be displayed on your screen, scroll horizontally or vertically. The system automatically loads more data as scroll down the page.
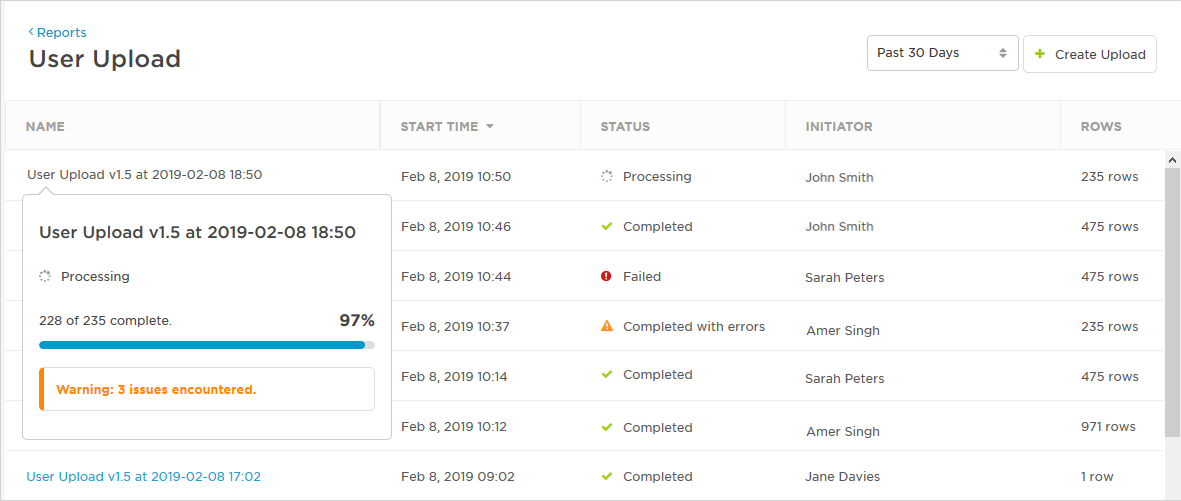
As soon as a file appears on the User Upload table, you can click its name to expand a status window. When the file begins processing, the window displays a status bar with the file load percentage, and a completion bar. Once a file is finished processing, you can click its name to see a detailed processing report.
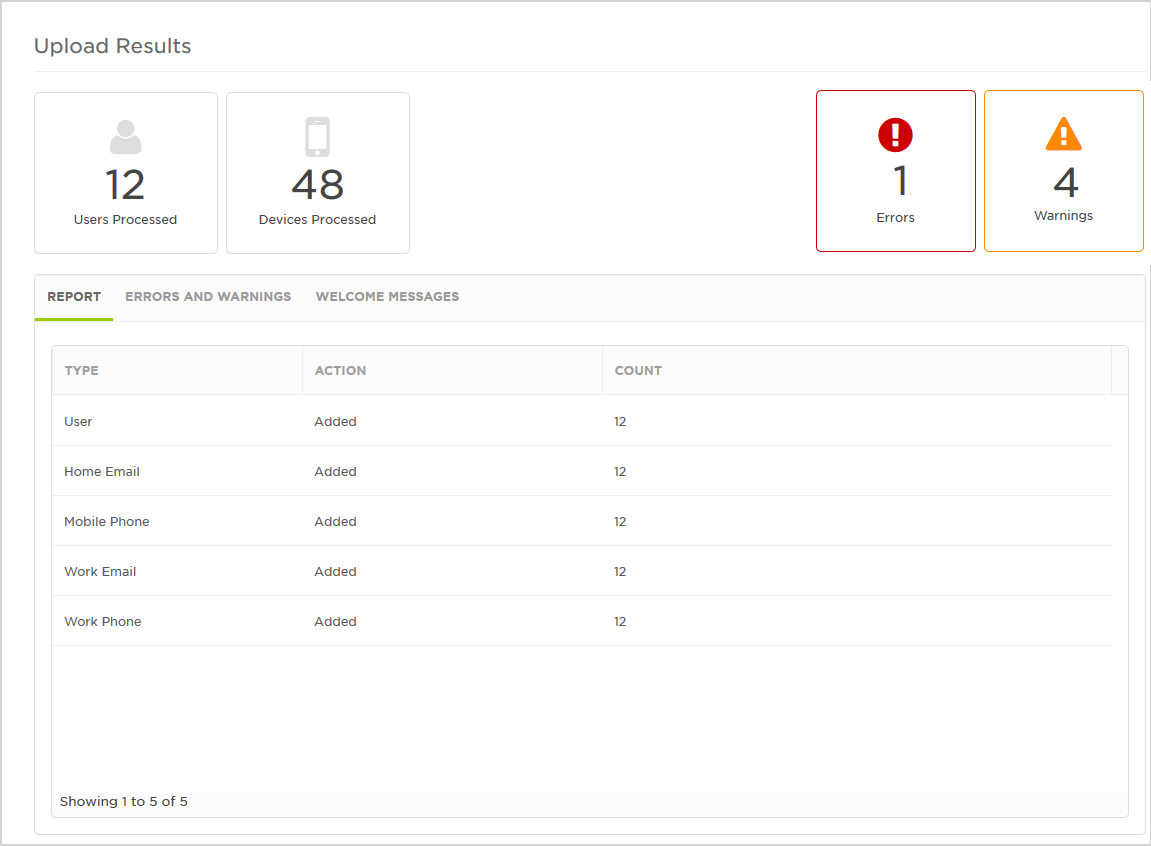
When a file has completed processing, you can click its name to view the User Upload report, which provides detailed information about the contents of the file and any errors or warnings encountered during processing.
The Upload Summary provides you with information on when the file submitted, information on the processing start and end times, and the status of the file.

The Upload Results section displays a report of the number of users and devices processed, and errors and warnings in the file. The Report tab details the contents of the file; such as the users and device types that were added, changed, or deleted.
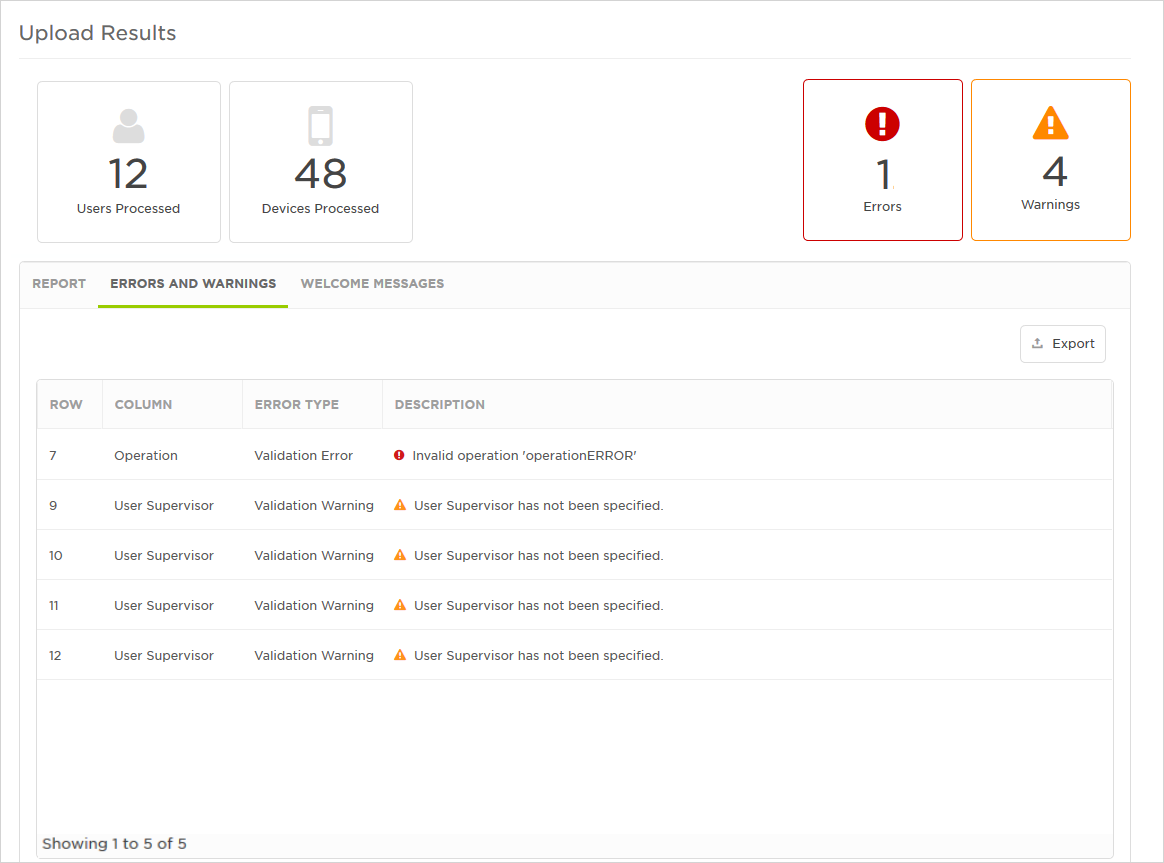
The Errors and Warnings table provides you with specific information on why each item was not processed. If you prefer to troubleshoot your file offline, click Export to download a .csv copy of the error list. For more information on specific errors, see Troubleshoot user upload validation errors.
Once you've added users, you probably want to let them know about their new xMatters account. With the Welcome Message drop-down, you can send a pre-populated or custom email message to newly added users. Both the default and custom email message contain helpful information and links on how to get started with xMatters.
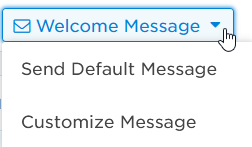
The Welcome Message feature is available when you upload users in bulk with the User Upload feature, or when you add them manually from the Users page.
The Welcome Message drop-down only appears as an option in the User Upload report when the processed file contains new users. If a file contains errors or warning messages, you can correct them and upload the file again, then go back to the first processed file to send the welcome message.
Send the default message
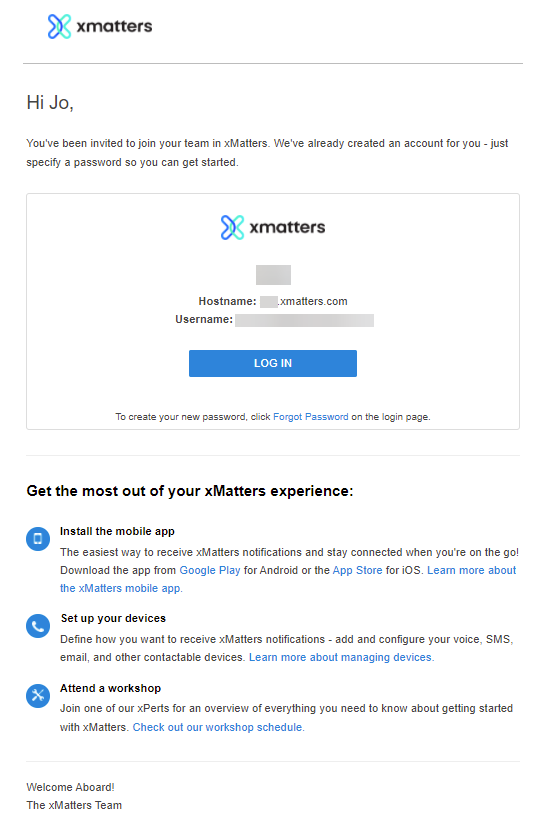
Select Send Default Message to send a generic email message to all uploaded users containing basic information about xMatters. The default message uses either the xMatters logo or your customized company logo (if it's been set by your administrator), and xMatters text to welcome users. You can preview the message prior to sending it. To confirm you'd like to send the default welcome message, click Send.
Here's an example of the default message:
Send a custom message
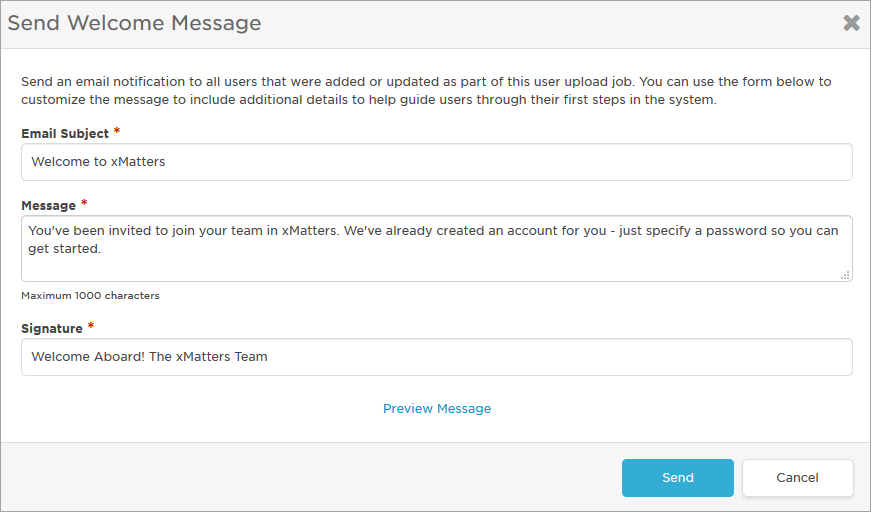
If the default message isn't quite right for your users, you can customize the message by selecting Customize Message from the Welcome Message drop-down menu. You can customize the following fields so the message sounds like it comes directly from your company, rather than from xMatters:
- Email Subject: Customize the subject field so users can find the email from xMatters easily in their Inbox.
- Message: Change the message to provide additional information that might not be covered by the default message. Message content is displayed above the box providing the user's login information.
- Signature: Change the signature line for a more personalized welcome. Signature content is displayed below the list of helpful xMatters links.
Modify the fields as required, then preview the message or click Send to send it to all users. If you do not modify one of the fields, the default value is used.
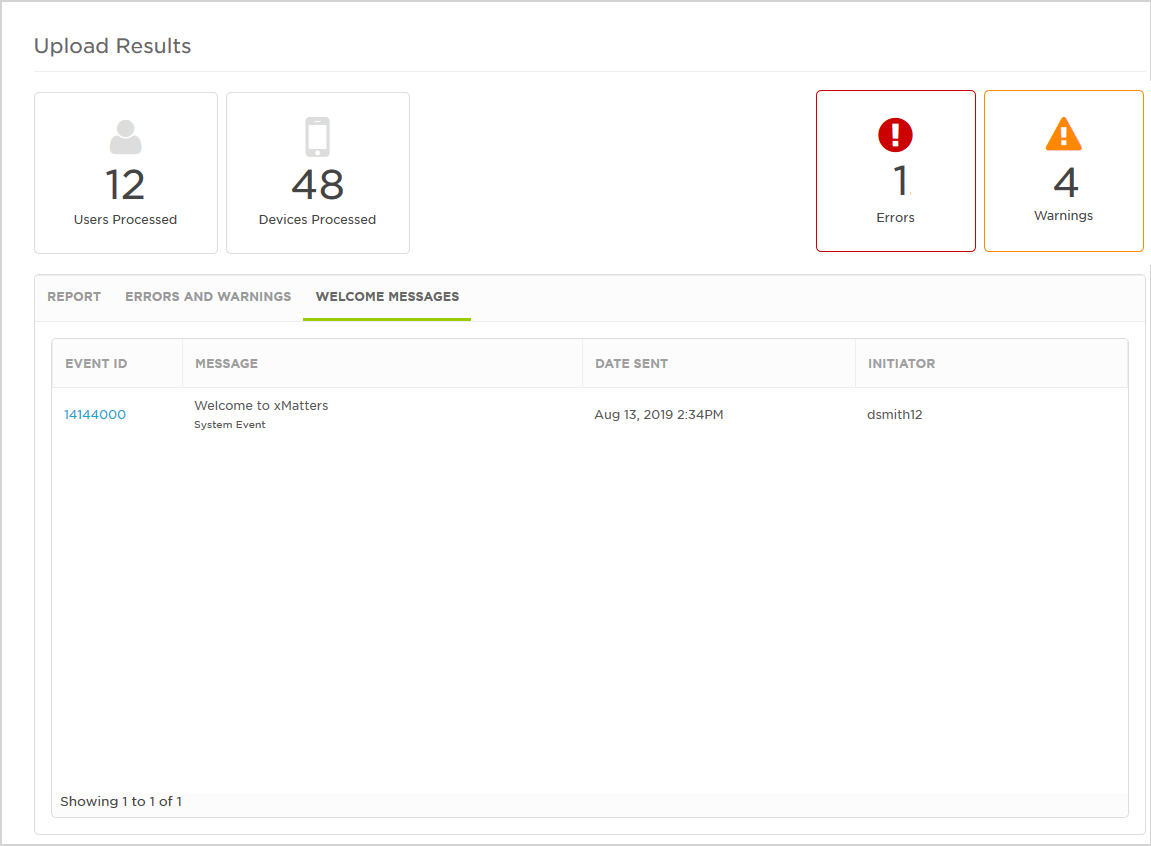
Each time you send a welcome message, xMatters creates a self-terminating alert, sends notifications to all users listed in the processed upload file, and stores a record of the alert and message on the Welcome Messages tab. This way you have a record of when the message was sent, but your report statistics aren't impacted by unresolved alerts.
The User Upload report displays uploaded files for a specific time frame. You can search by a number of days (Past 30 Days, Past 60 Days, or Past 90 Days), or specify a Date Range using the calendar and time pickers. The report dynamically updates as you set the search parameters.
If you search by a date range the report returns all files that were uploaded within that time range.
If you want to know when a job is finished processing, you can subscribe to job status alerts and xMatters will send you an email or SMS notification when processing is complete.
To subscribe to User Upload notifications:
- Go to your Profile and click the Subscriptions tab.
- On the Subscriptions page, click Add Subscription, and then select User Upload: Job Processed.
- On the Subscription Details page, give your subscription a name and description.
- Set the criteria for the subscription and the device you want to receive notifications on.
- Enter a jobName to subscribe to alerts for a specific job.
- Specify a jobStatus if you want to be notified when a job completes or if it fails.
- Click Subscribe.