Escalate alerts within a shift
The shift timeline enables you to space out notifications to shift members by enabling time for some members to respond to an alert before the remaining members are notified. This is accomplished by adding escalation delays to the timeline.
xMatters notifies shift members in the order they appear in the timeline. When xMatters encounters an escalation delay, it pauses notification delivery until the delay has elapsed. After this time has passed, xMatters then continues to send notification to the remaining members only if their participation is still required.
When xMatters encounters an inactive user, or a temporary absence without a defined replacement, it ignores the member and immediately notifies the next member in the escalation. If the escalation includes a delay after the inactive user or temporary absence, xMatters ignores the delay and immediately notifies the next scheduled member.
If no one acknowledges the notifications during the initial escalation timeline, groups admins also have the option to repeat escalations after a specified amount of time.
Escalations work in conjunction with rotations, which allow you to periodically rotate the members of the timeline. Depending on your license, you may not have access to advanced on-call group functionality such as rotations and escalations.
Example
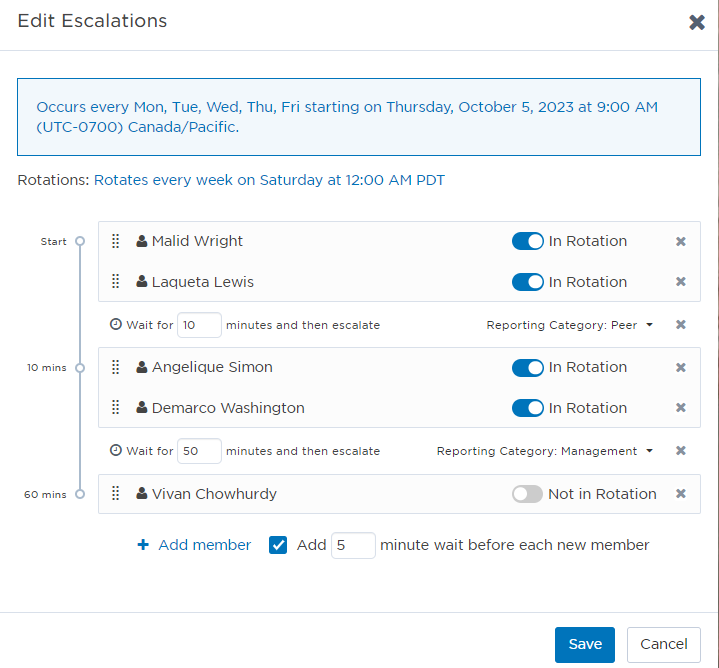
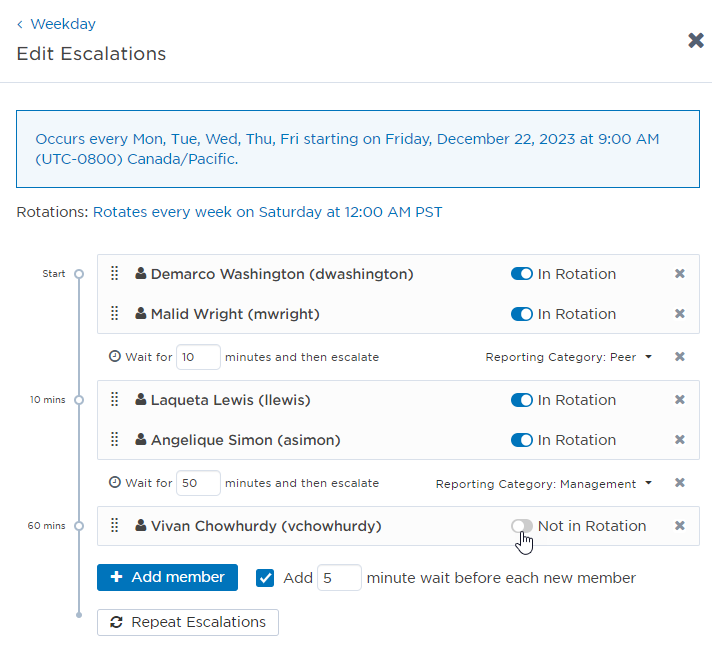
In the following example, notifications sent to this shift are delivered immediately to both Malid Wright and Laqueta Lewis. If neither of these members handle the alert within 10 minutes, xMatters notifies the next two members, Angelique Simon and Demarco Washington. If nobody has handled the response within 50 more minutes (60 minutes total), xMatters notifies their manager, Vivan Chowhurdy. You can see that this shift rotates every week on Saturday. However Vivan (the manager) is not in rotation and always remains at the end of the escalation timeline.
About escalations
The following topics provide more detail about escalation delays and types and some of the limitations of using escalations.
Escalation delays cause xMatters to stop sending notifications for a certain length of time to give the previous recipients time to handle the notification. After an escalation delay has elapsed, xMatters continues notifying recipients only if their participation is still required. Timelines may begin with an escalation delay but cannot end with an escalation delay or contain more than once consecutive escalation delay.
Determining escalation delay length
When you design your escalation timeline, ensure that each escalation delay is long enough to give members time to respond to the notification but is not so long that it impacts the time it takes to resolve the alert.
Remember that shift members may have configured device delays and may not receive notifications immediately on all of their devices. If a user's device delays are longer than a shift's escalation delay, the notification could escalate before it is delivered to all of the user's devices. In this case, reports may show that a user did not respond to an alert when they simply did not receive the notification on an appropriate device.
To review escalation delays for a single on-call group member by viewing their identity card, see View user contact details.
The escalation type area allows you to categorize escalations into one of three categories:
- None
- Peer
- Management
These categories are tracked for reporting purposes and do not correspond to roles within xMatters or have an effect on how an escalation functions. Your organization can assign its own meaning to these values and use them to represent different types of escalations.
Escalations and rotations are supported for shifts with less than 200 members.
If you would like to use escalations and rotations with a shift that has more than 200 members, you may be able to work around this limitation by dividing the group members into subgroups and adding each subgroup to the main on-call group.
Adjusting the shift timeline
You can add, remove, and reorder the members and escalation delays in the timeline.
The Shifts tab allows you to add a member directly to the shift timeline. From here you can adjust their location in the escalation order.
If you would like to add a member to multiple shifts you may want to use the on-call group roster, which allows you to view the shifts a member belongs to. For more information on the roster, see View and manage the on-call group roster.
To add a member to the timeline:
- On the Calendar or Shifts tabs, click the shift you want to edit.
- In the side panel, click Edit (if in the Calendar view, select Edit Series from the drop down menu).
- Click Edit Escalations.
- Click Add Member and type the name of the member you want to search for (a minimum of two characters is required).
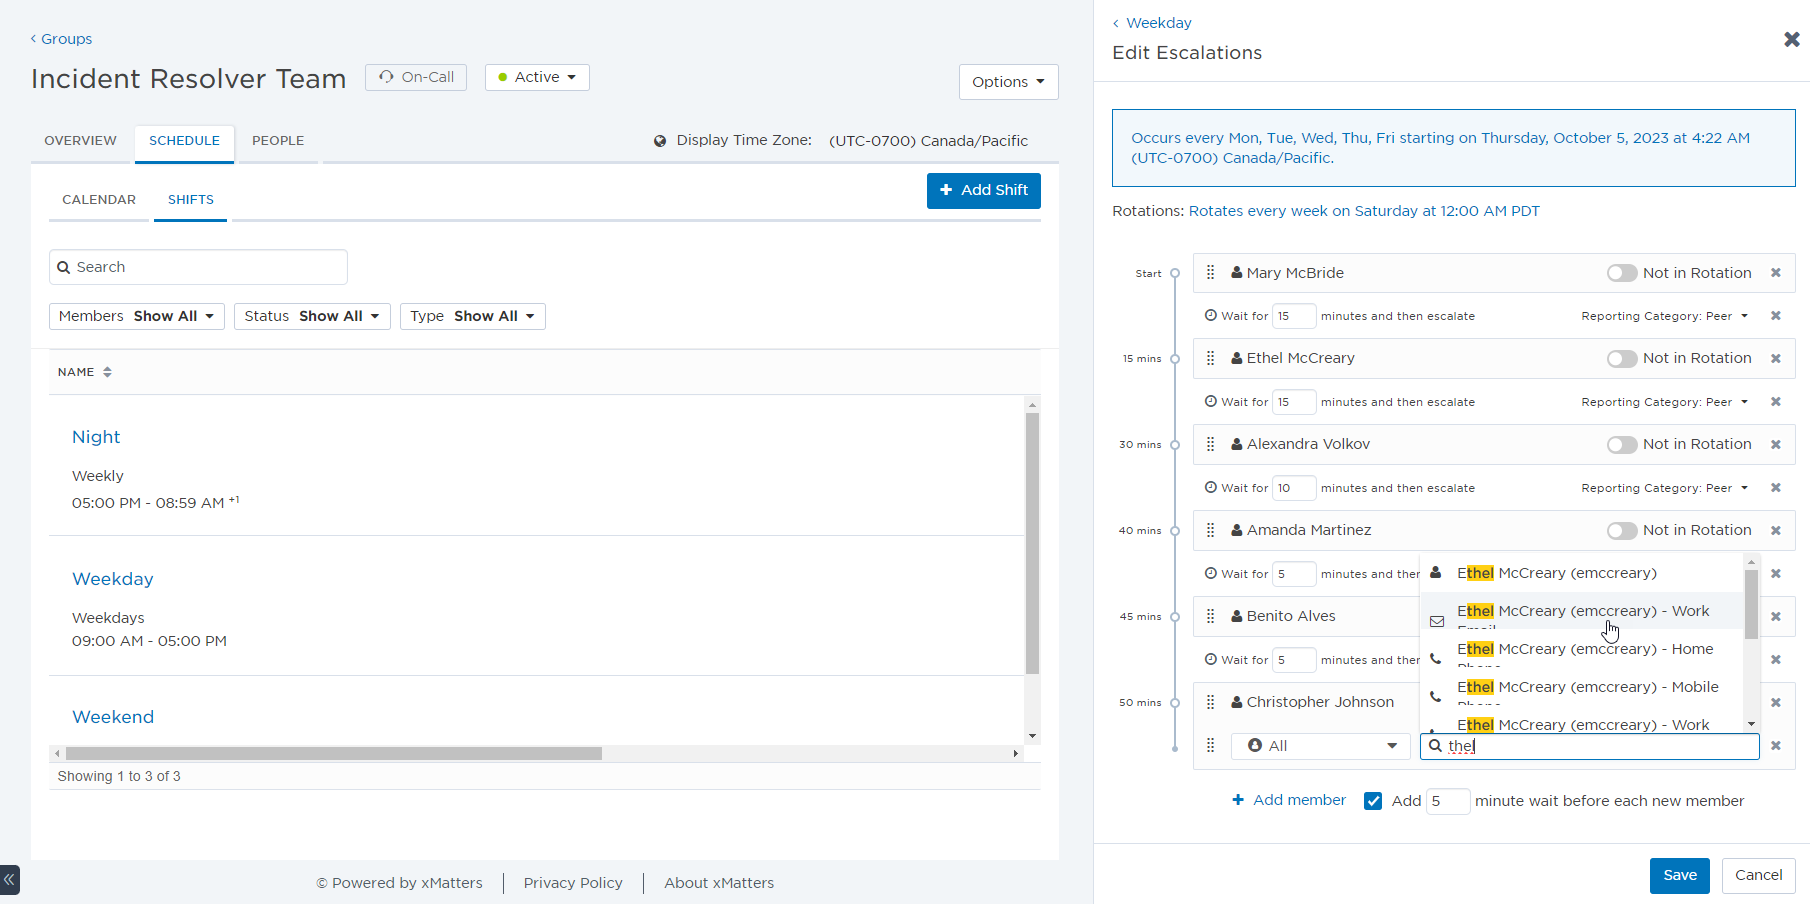
- Click the name of the member you want to add to the shift.
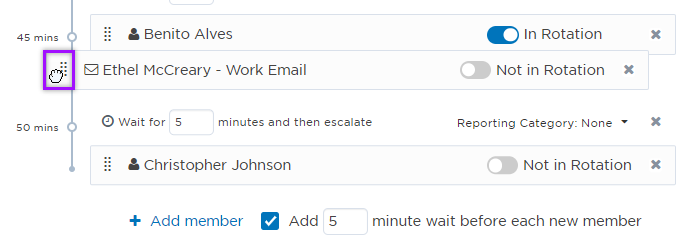
- If you do not want to add the member to the end of the timeline, use the drag handles to move them to a new location.
You can configure the shift's escalation timeline from the Shifts tab of the on-call group interface. From here you can add and remove escalations, set escalation delays, and reorder items on the timeline.
To add an escalation delay to the timeline:
- From the Calendar or Shifts tabs, click the shift you want to edit.
- In the side panel, click Edit (if in the Calendar view, select Edit Series from the drop down menu).
- Click Edit Escalations.
- Move the pointer over the timeline to where you want to add the delay and pause until the + Add Wait option appears.
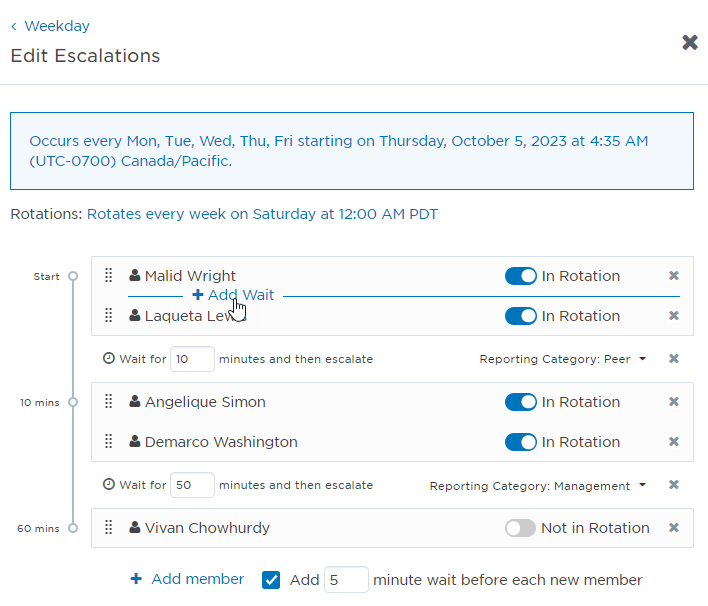
- Click + Add Wait to create a new delay and then set the following options:
- The number of minutes of the delay.
- Optionally set the type of escalation for reporting purposes: Peer, Management, or None.
- Once you have made the changes, click Save.
You can remove a member or escalation delay from the timeline. Removing a member from their last shift also removes them from the on-call group.
If you would like to remove a member from multiple shifts or remove them from the on-call group, you may want to use the on-call group roster, which allows you to view the shifts a member belongs to. For more information on the roster, see View and manage the on-call group roster.
To remove a member or delay from the timeline:
- From the Calendar or Shifts tabs, click the shift you want to edit.
- In the side panel, click Edit (if in the Calendar view, select Edit Series from the drop down menu).
- Click Edit Escalations.
- In the member list, locate the member or delay that you want to remove, and click the X on the right side of the entry.
- Ensure that the timeline does not end with an escalation and does not contain more than one adjacent escalation.
- Click Save.
If the shift is configured to use rotations, you can select which members are included in the rotation.
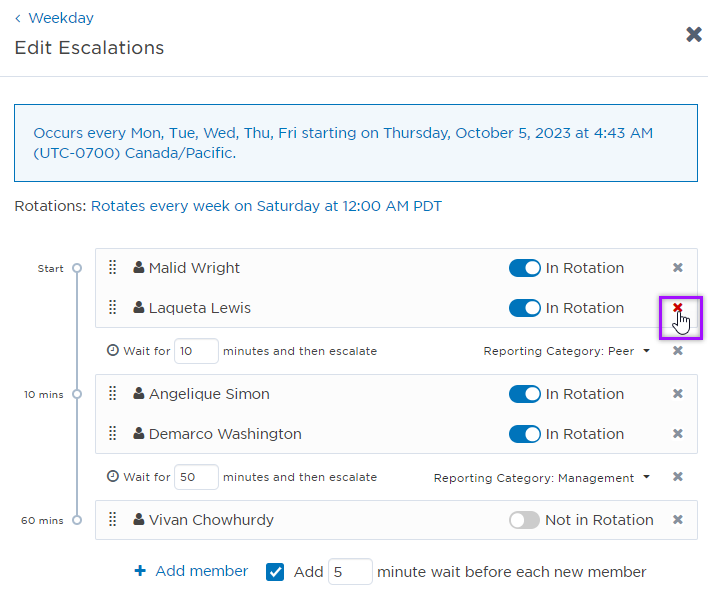
To remove a member from the shift's rotation:
- From the Calendar or Shifts tabs, click the shift you want to edit.
- In the side panel, click Edit (if in the Calendar view, select Edit Series from the drop down menu).
- Click Edit Escalations.
- In the member list, locate the member that you want to remove from the shift's rotation, and toggle offIn Rotation.
- Click Save.
For more information about rotations, see Rotate positions within a shift
The repeat escalations feature allows group admins to specify if the escalation timeline should be repeated if no response is received. This is useful in situations where members may have missed the original notification or were previously unavailable, and helps ensure notifications are acknowledged within a specific timeframe. Escalations can be repeated up to 9 times, with a wait time of up to 60 minutes between each repetition.
To add repeat escalations to the timeline:
- On the Calendar or Shifts tabs, click the shift you want to edit.
- In the side panel, click Edit (if in the Calendar view, select Edit Series from the drop down menu).
- Click Edit Escalations.
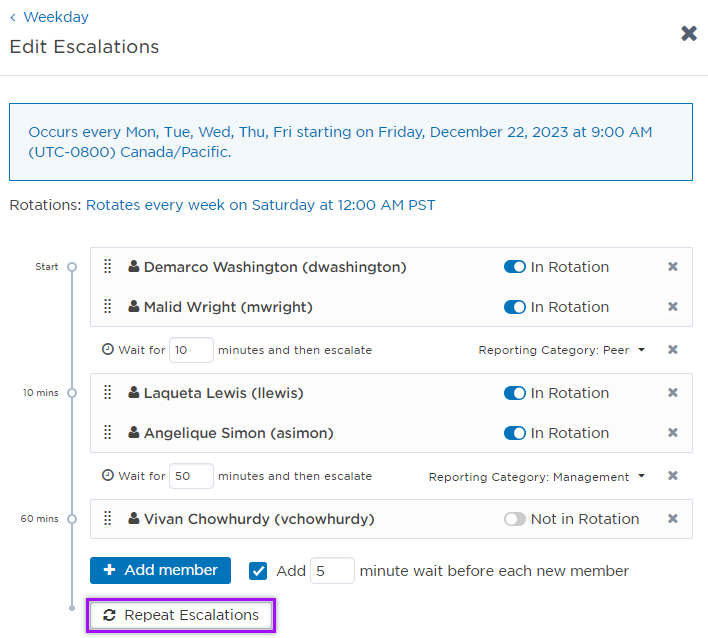
- At the end of the timeline, click Repeat Escalations.
- Type the number of minutes you want xMatters to wait before each repetition (between 1 and 60).
- Type the number of times you want the escalations to repeat (between 1 and 9).
- Specify the Reporting Category to use when the repeat escalation starts (None, Peer, or Management).
- If you want to see a preview of how the escalation timeline is configured, click Preview.
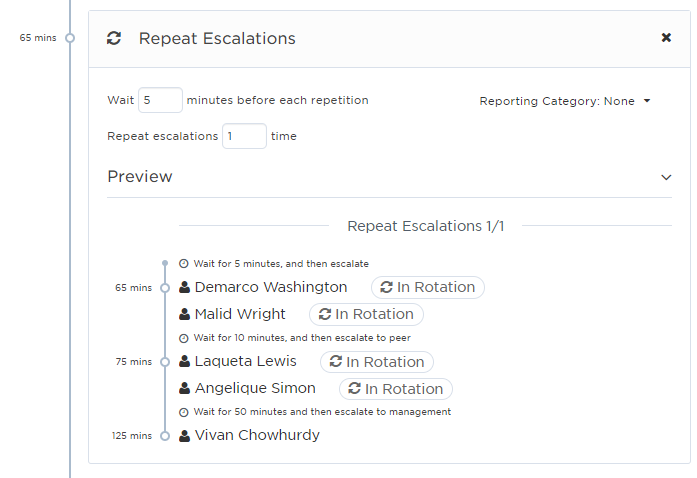
- Click Save.
If an escalation reaches the end of its sequence, you can send a message to a user or group so they can better understand why it happened. The notification contains important information about the alert (such as when it was initiated and the target group's name and on-call shift) as well a link to the Alerts report. This allows supervisors to assess any issues with scheduling and how to rectify them so it doesn't happen again.
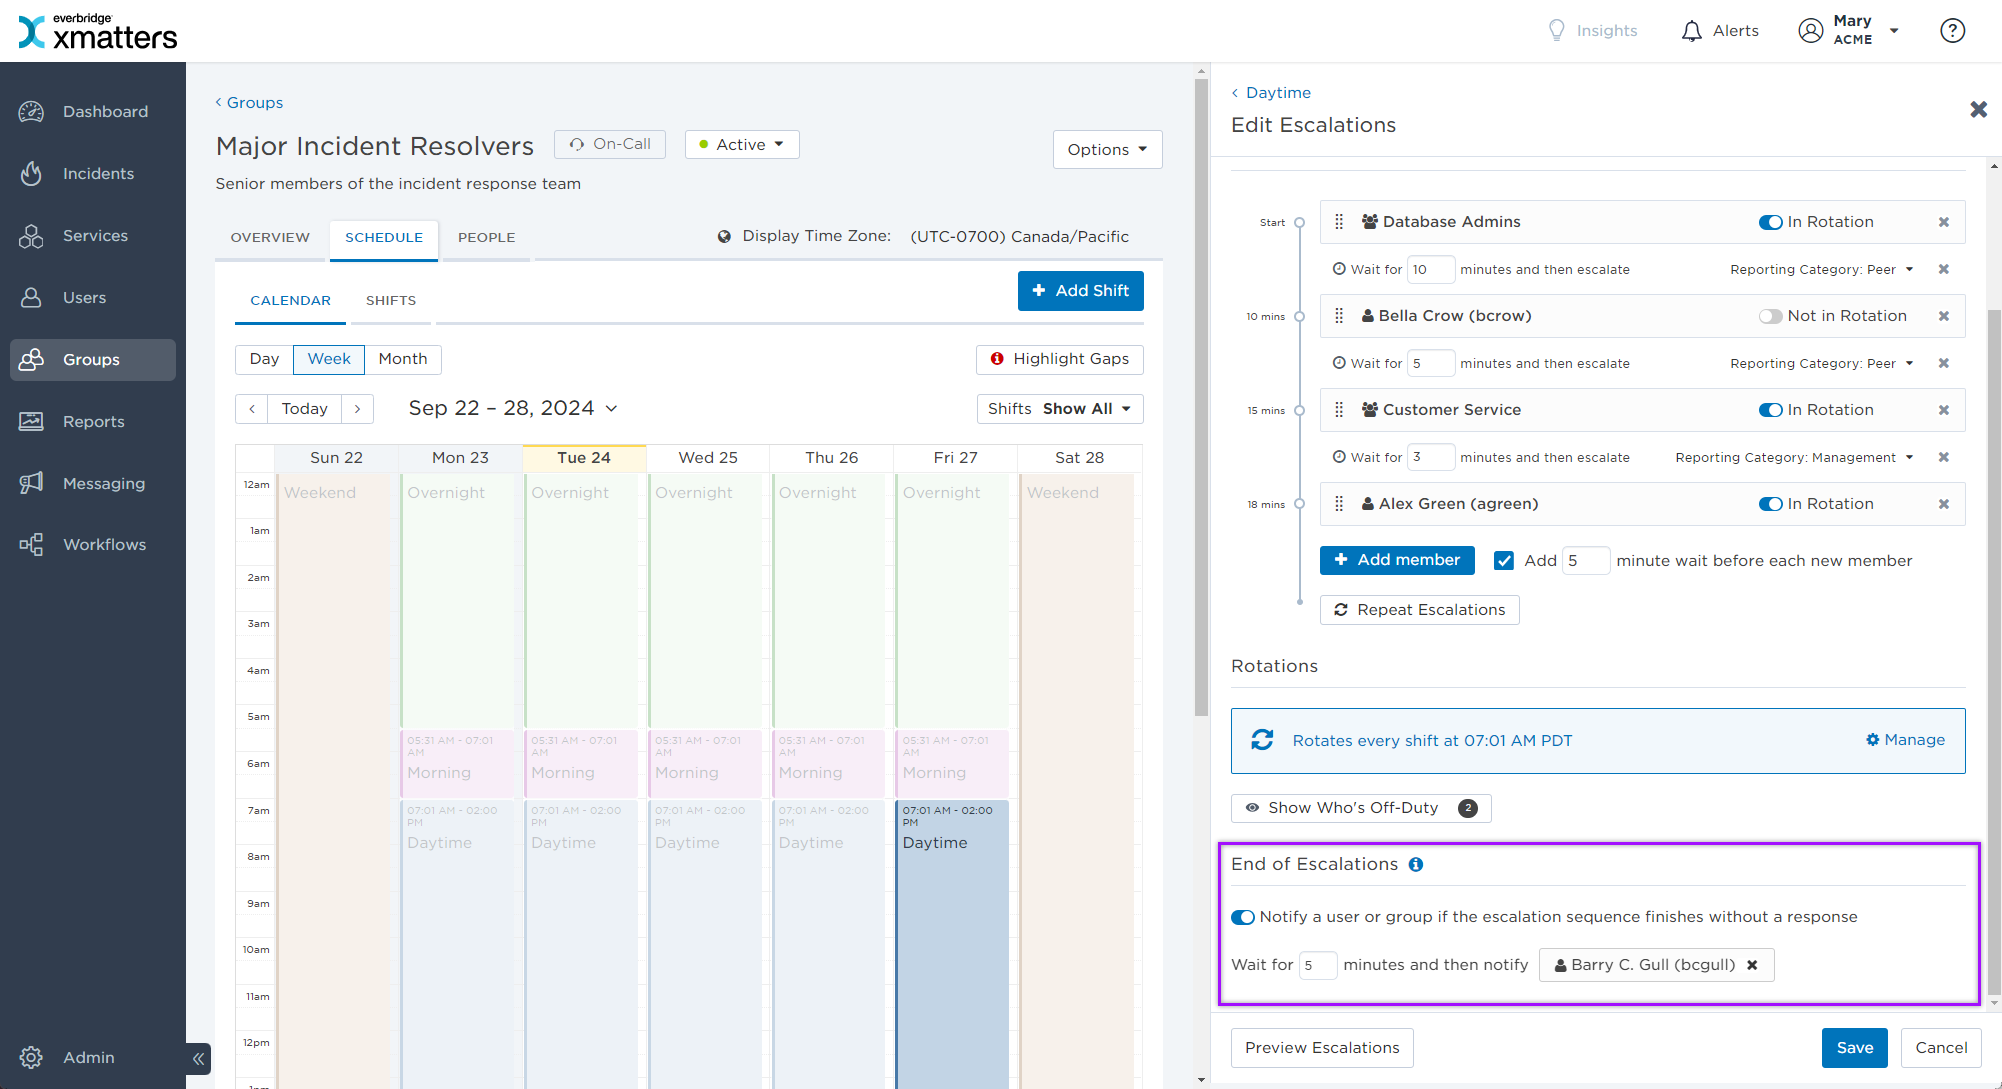
To add an end of escalation notification
- From the Calendar or Shifts tabs, click the shift you want to add an end of escalation notification to.
- In the side panel, click Edit (if in the Calendar view, select Edit Series from the drop down menu).
- Toggle on Notify a user or group if the escalation sequence finishes without a response.
- Set the number of minutes of the delay.
- Search for and select a user or group to notify.
- Click Save.