View and manage people
The People tab of the group user interface displays information about the Group Admins, Members, and Observers of the group. Use this tab to review and update the users, devices, and groups associated with the group.
Manage broadcast group members
For broadcast groups, the Members section of the People tab displays the name and status of all users and groups that are members of the group. Click the name of a member to view the user ID, site, time zone, devices, and other groups they are part of. To manage their devices, click Edit Devices to view the Devices tab of their user profile.
- In the Members section of the People tab, click Add Members.
- Do one of the following:
- To add a member to the group, select All or the type of member (Users or Groups) you want to search for and type their name to search the list. Select the check box beside their name in the Available area to move them to Selected area.
- To remove a member from the group, click the 'x' beside their name in the Selected area to move them to Available area.
- Once you're happy with your changes, click Add.
Manage dynamic group members
For dynamic groups, members are users based on specific search criteria. Group members don't need updating, as xMatters uses the specified criteria to determine who should belong to the dynamic group at the time of an alert. Like broadcast groups, all members of dynamic groups are notified at the same time when targeted by a notification. Current members of the group can be viewed by clicking Refresh on the Members section of the People tab or Overview. To learn more about setting the criteria for dynamic groups, see Manage Criteria.
Manage on-call group members
For on-call groups, the Members section of the People tab displays the roster and shift information for each member of the group. This allows you to review and adjust which members belong to each shift. You can use this view to verify that team members are assigned to the correct shifts and that no member has accidentally been overbooked. Group members may be users, devices, and other groups.
You can also add and remove members from the timeline view of an individual shift. You may prefer to work with the timeline view when you want to add a member to a specific location in a shift's timeline. For more information about working with the escalation timeline, see Escalate alerts within a shift.
Members can also use the On-Call Reminders option on the Schedule tab of their profile to set up reminders for when they have an upcoming shift.
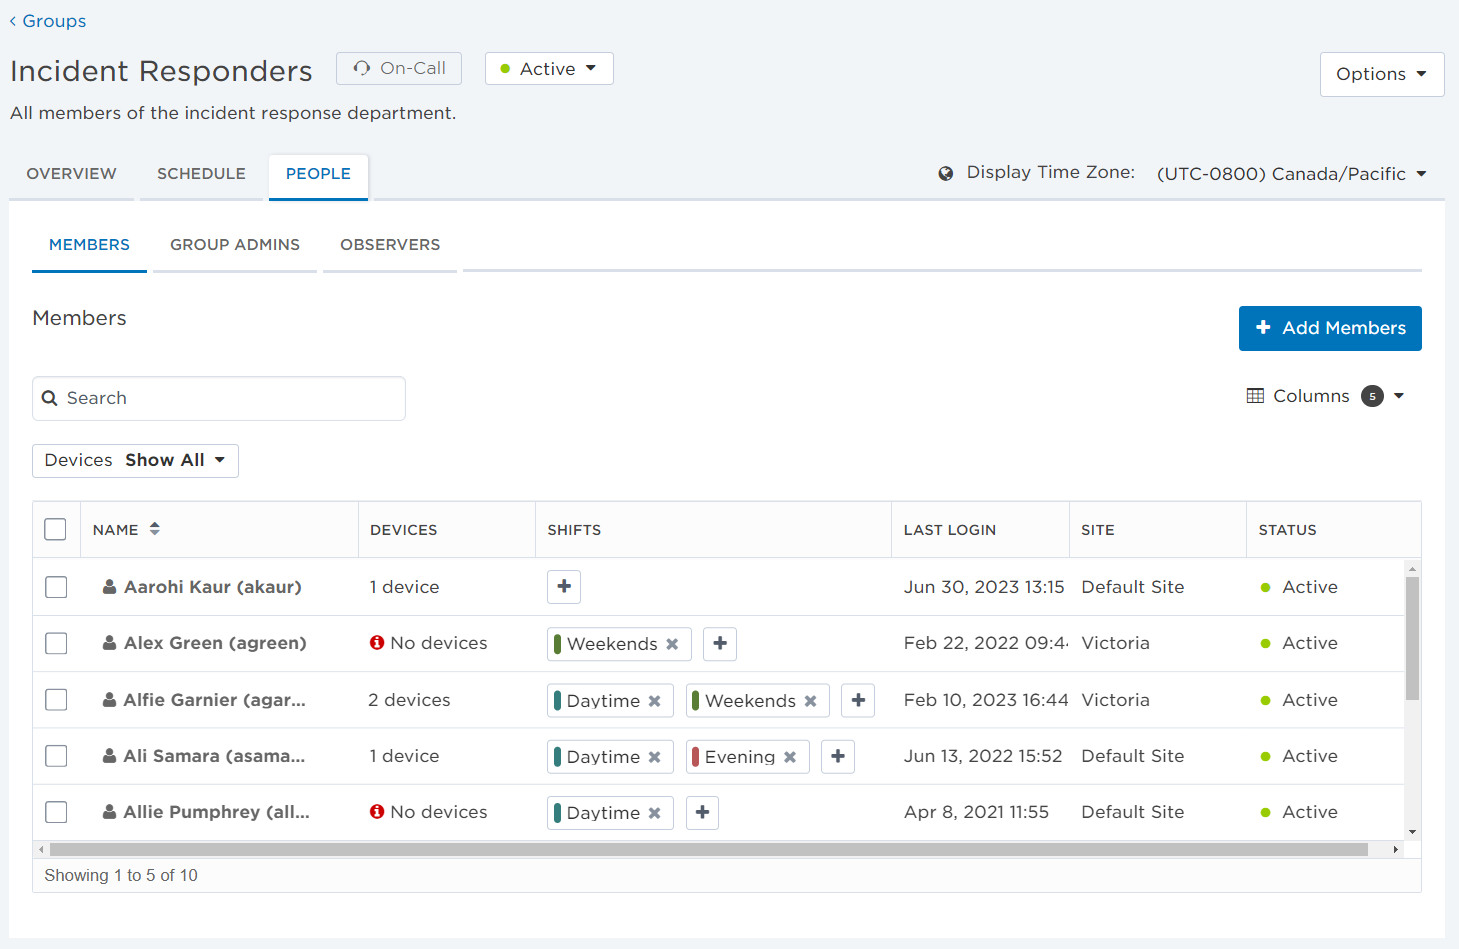
The Members list includes the following columns:
| Column | Description |
|---|---|
| Name | First and last name of the user, and their user ID. |
|
Status |
Whether the user is toggled as active or inactive on their user profile. |
| Devices | The number of active devices the user has configured (if any). |
| Shifts | The shift schedule for each group member. |
| Last Login | The last time the user logged into the web user interface. |
| Site | The user's primary location, which determines things like their time zone, default language, and site holidays. |
If you have a large group, you can easily search for members within the group. From the Members section of the People tab, start typing the name of a member in the search bar to view members that match your search term.
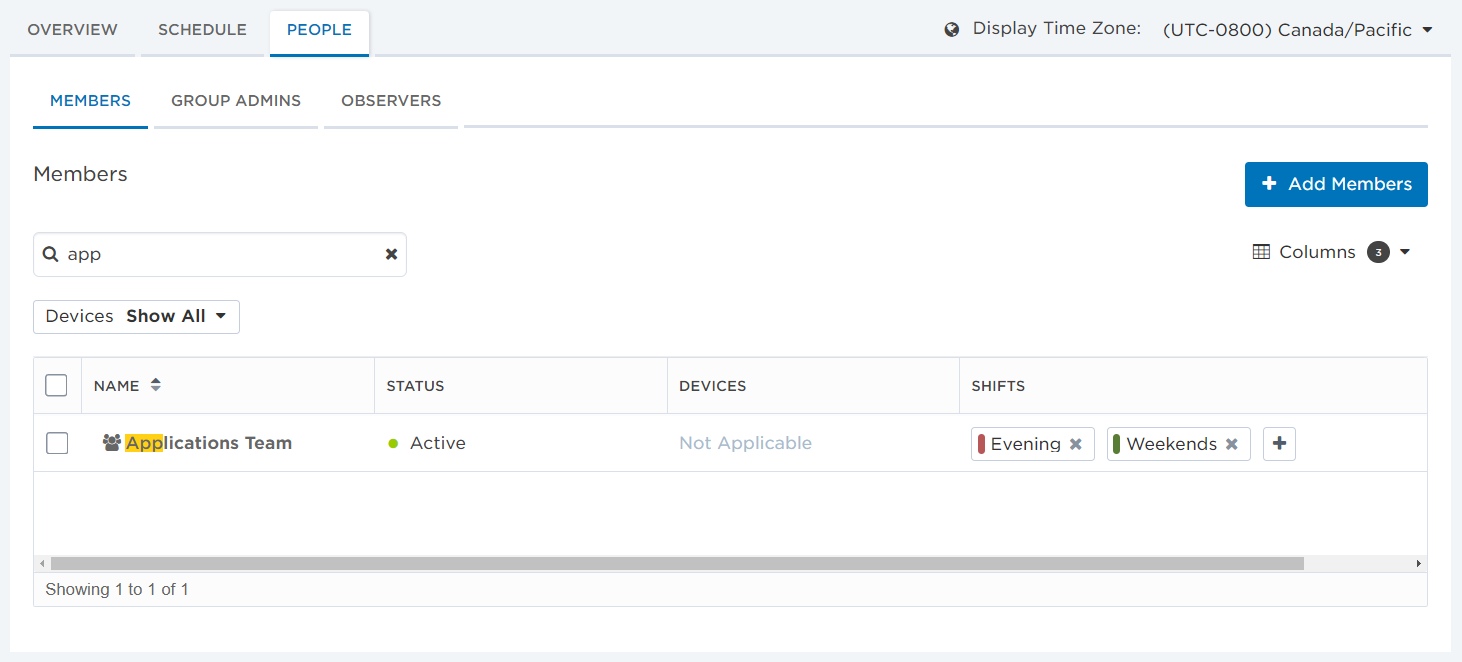
The Devices filter allows you to narrow the members list based on specific device configurations. For example, you can use filters to view all the users with devices, without failsafe devices, or without active devices.
The following table describes the available device filter values on the Members list:
| Filter | Values |
|---|---|
| Devices |
Additional filter options for users without specific device types:
|
You can add members to the group by assigning them to a shift or by adding them from the People tab.
To add a member to the group from the Shifts tab:
- Select the shift you want to add the member to.
- From the side panel, click Edit Escalations.
- Click Add member.
- In the search box, type the name of the member you want to add or type two spaces to see a list of all recipients.
- If you want to limit your search to a specific type of member, click the left drop-down list to select a type. Available types include: All, Users, Groups, and Devices.
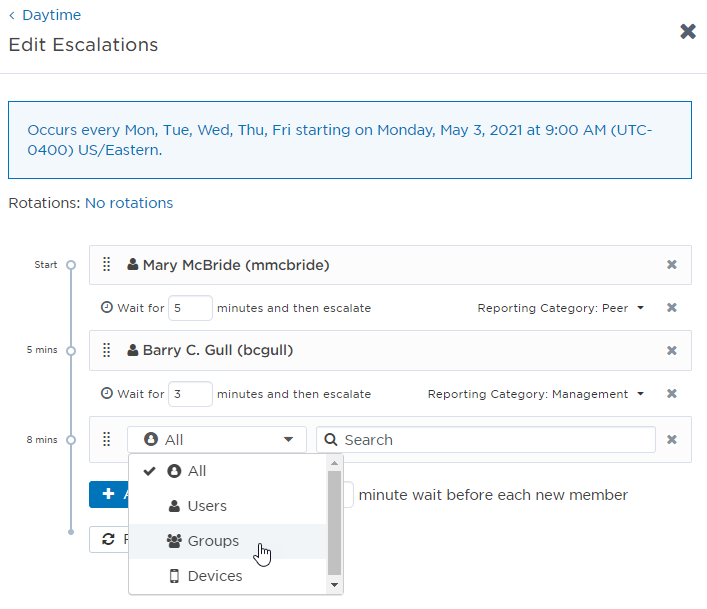
- Select the member name when it appears. The member is instantly added to the selected shift.
To add a member to the group from the People tab:
- In the Members section of the People tab, click Add Members.
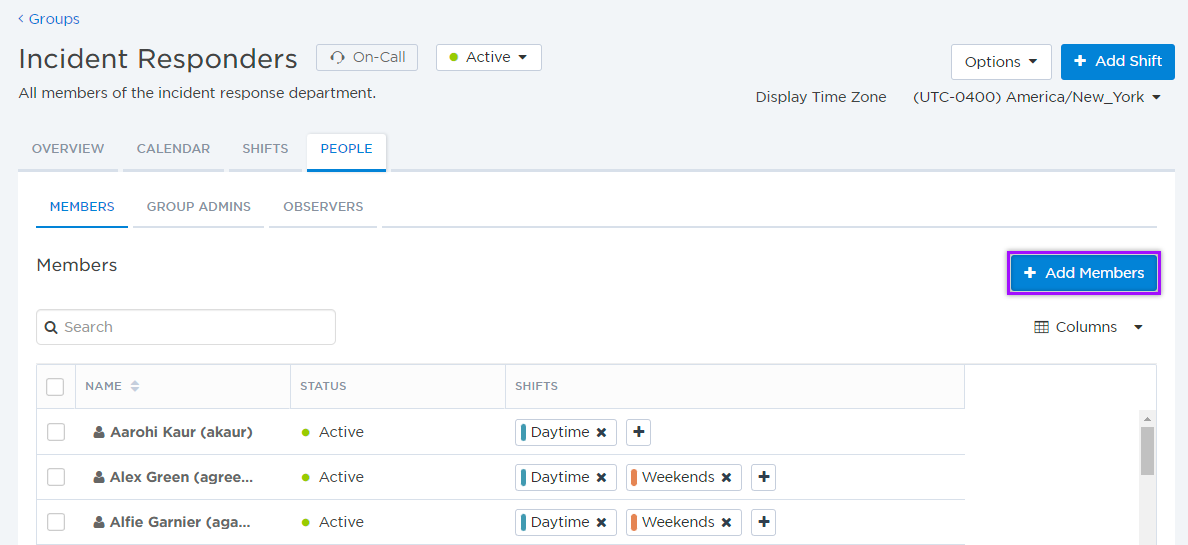
- In the search box, type the name of the member you want to add.
- Do one of the following:
- To add a member to the group, select All or the type of member (Usersor Groups) you want to search for and type their name to search the list. Select the check box beside their name in the Available area to move them to Selected area.
- To remove a member from the group, click the 'x' beside their name in the Selected area to move them to Available area, or click Remove All to remove all members from the group.
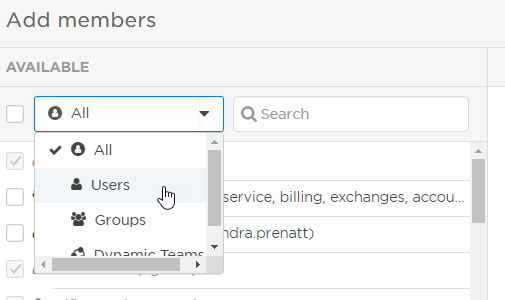
- Once you're happy with your changes, click Add.
If a member already belongs to the group and you want to assign them to another shift, first locate their name in the Members column. Click the plus symbol (+) in the Shifts column, and then select a shift from the list.

To remove a member from a shift, click the X next to the name of the shift.
If you remove a member that is associated with an escalation delay, the escalation delay is also removed from the shift timeline. In this situation you may prefer to work directly with the shift timeline to adjust shift membership. For more information about working with the shift timeline, see Escalate alerts within a shift.

You can remove members from the group from the People tab.
To remove a member from the group:
- From the Members section of the People tab, click the check box next to the users you want to remove from the group.
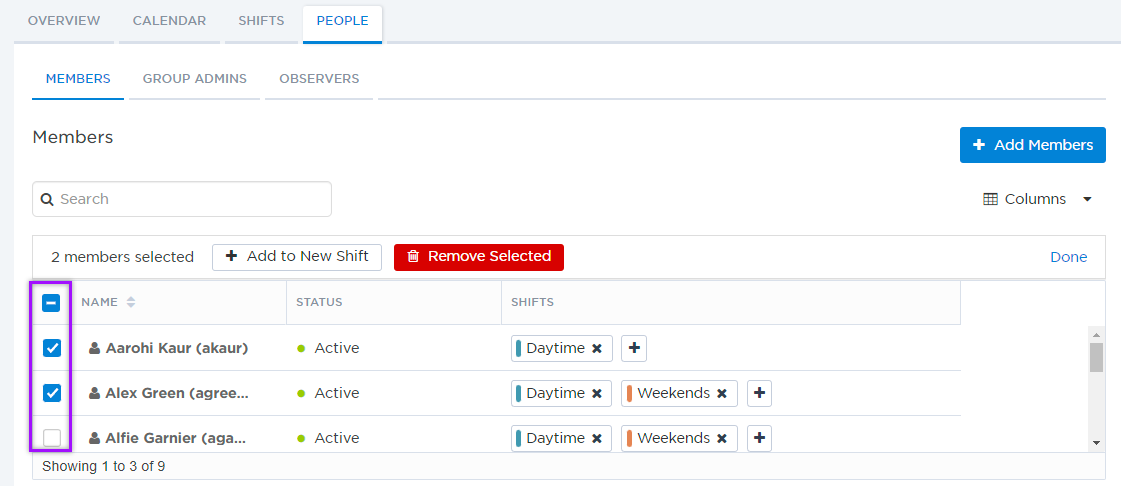
- Click Remove Selected, then Remove.
Removing a member from the group removes them from each of their shifts. If you remove a member that is associated with an escalation delay, the escalation delay is also removed from the shift timeline. In this situation you may prefer to work directly with the shift timeline to adjust shift membership. For more information about working with the shift timeline, see Escalate alerts within a shift.
When members are added to a group through the EPIC data synchronization process it is possible for them to be added to the group but not be assigned to a specific shift. After a data synchronization process completes, review the group roster and assign group members to the appropriate shifts.
For more information about the EPIC data synchronization process, see Synchronize user data with EPIC.
Manage group admins
Group admins have permission to manage the group, including adding and removing group members, adjusting shifts, and defining the shift escalation timeline. Admins of a group can also locate the group in searches and add it as a recipient to notifications.
Group admins are often real-world supervisors who are responsible for managing their team's performance. When groups do not follow a real-world hierarchy (such as groups that are used to broadcast emergency messages to large numbers of people), a senior xMatters user such as a company supervisor is typically assigned to be the group supervisor.
If you do not define a group admin when you create a group, you become the group admin. You can later add and remove group admins. For an xMatters user to be a group admin, they must be able to access the Groups page in the user interface. This means that they must have the Group Supervisor role (or the appropriate customized permissions). Groups must have at least one admin.
Group supervisors do not automatically receive notifications sent to the groups they supervise. To inform a group supervisor about all messages sent to a group, add them to a 24x7 shift. Alternatively, you can use subscriptions to notify a group supervisor about specific alerts. For more information about subscriptions, see Subscribe to alerts.
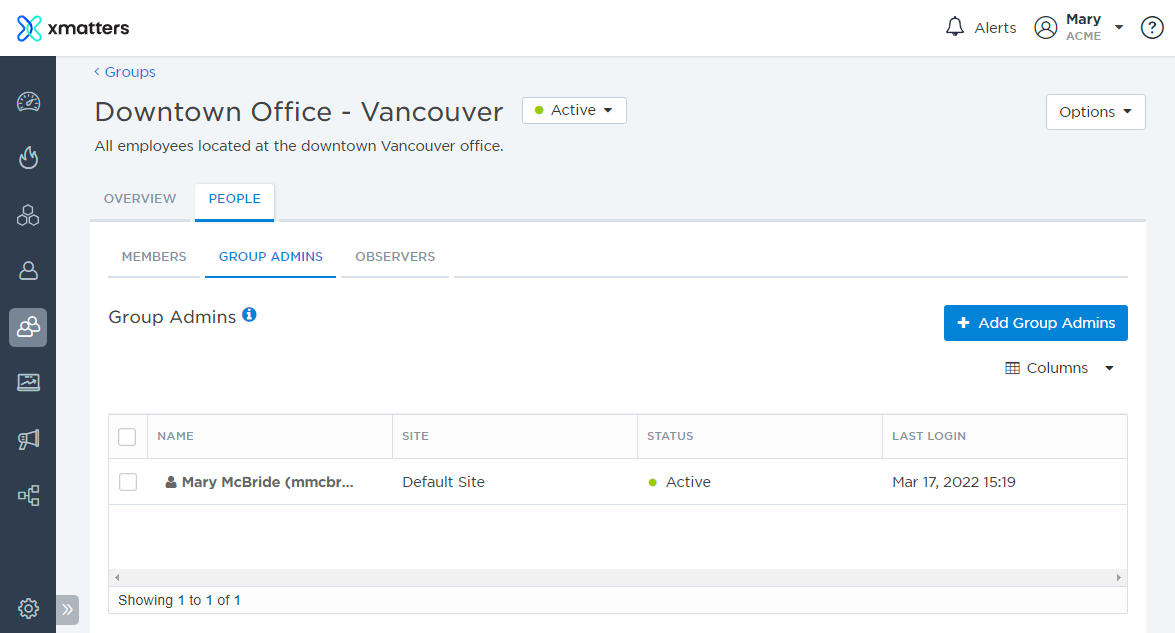
- In the Group Admins section of the People tab, click Add Group Admins.
- Do one of the following:
- To add an admin to the group, select the check box beside their name in the Available area to move them to Selected area (Only users with the correct permissions to be a supervisor will appear in the search results).
- To remove an admin from the group, click the 'x' beside their name in the Selected area to move them to Available area.
- Once you're happy with your changes, click Add.
Manage observers
Observers are roles who can see this group when searching for recipients and target it for notification. If a group observer has permission to view groups in xMatters they can also view the group's details from the Groups tab. They cannot modify the group unless they are also an admin of the group.
You define group observers by selecting the xMatters roles that are allowed to access the group. If a user is assigned any of the corresponding roles then they are able access and notify the group.
By default, new groups are configured to be observed by all roles. You may want to modify observers of sensitive groups to limit who is able to view group details and send notifications to the group; for example, you may want to allow all users to send notifications to the IT group but you may want to limit who can send notifications to the Company Executives group.
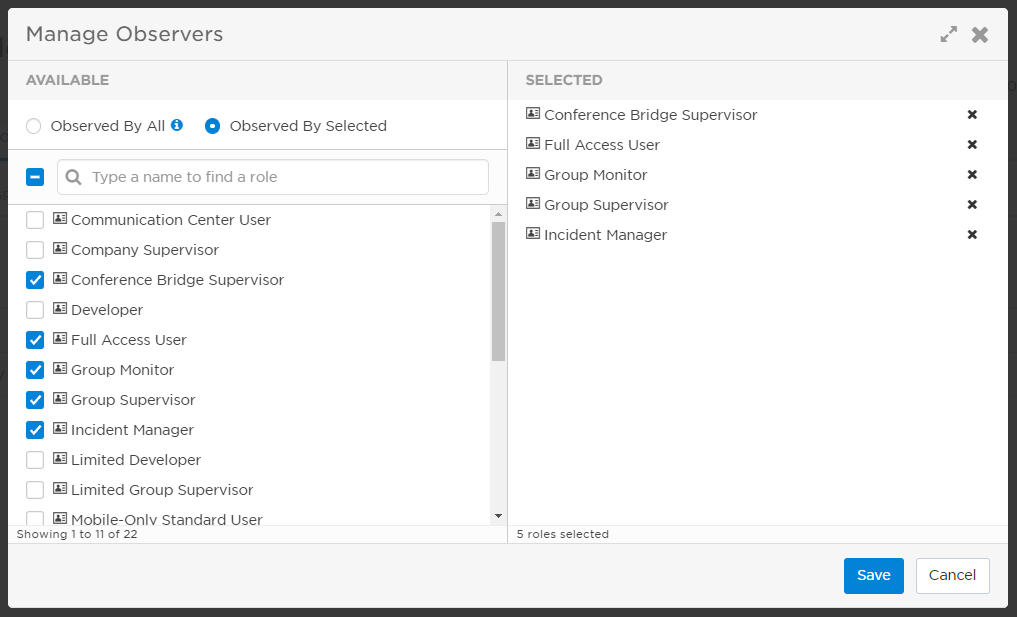
- In the Observers section of the People tab, click Manage Observers.
- Do one of the following:
- Select Observed By All so all roles can see this group when searching and target it for notifications.
- Select Observed By Selected and choose the roles that can see this group when searching and target it for notifications.

- Once you're happy with your changes, click Save.
If you select “Observed by Selected” and do not select any roles, the group becomes 'Private', this means only the group's members and admins can search for and target it for notification.