Alert flood control
During an alert flood, the first alerts to arrive typically contain the details you need to identify which of your systems need attention. Subsequent alerts that are generated during a flood add a lot of extra noise and they can result in processing delays if you exceed your licensed number of alerts per minute.
Alert flood control reduces the number of alerts that are generated in xMatters when you experience a flood or alert storm from one or more of your systems.
How does it work?
This feature compares incoming alert requests to recent alerts and suppresses correlated alerts that occur in too close succession to one another. When suppression kicks in, xMatters sends you a notification and logs the details of the flood on the Alerts report so you can track how many alerts were suppressed and why. These suppressed alerts aren't queued for processing and don't count against your licensed number of alerts per minute, which allows alerts from other sources to flow through xMatters without lengthy processing delays.
A default Alert Rate Filter rule applies to all new and existing inbound integrations. The default rule automatically suppresses incoming alerts from the same integration that target the same recipients when they occur at a rate that exceeds four alerts per minute.
This default rule is based on our analysis of actual customer alert flood data and provides a balance of effective protection against sudden influxes of alerts, while allowing real traffic to proceed as normal.
The Alert Rate Filter rule is designed to allow a reasonable number of alerts to be created in xMatters to indicate the type of activity that's occurring. This prompts users to view the source system for more information. In all customer cases that we reviewed, a recipient receiving more than four alerts per minute about an incident is able to gain better situational awareness by going to the source system and evaluating it there.
For more information on how you can edit the default rules, or create your own alert flood control rules, see Manage Alert Flood Control Settings.
If alerts from an integration with the same recipients exceed the rate specified in the Alert Rate Filter, alert flood control is triggered and the additional alert requests are suppressed beneath the most recently processed alert to which they correlate (the "parent" alert). This is indicated on the Alerts report by a stacked icon with a running badge count of the number of suppressed alerts.
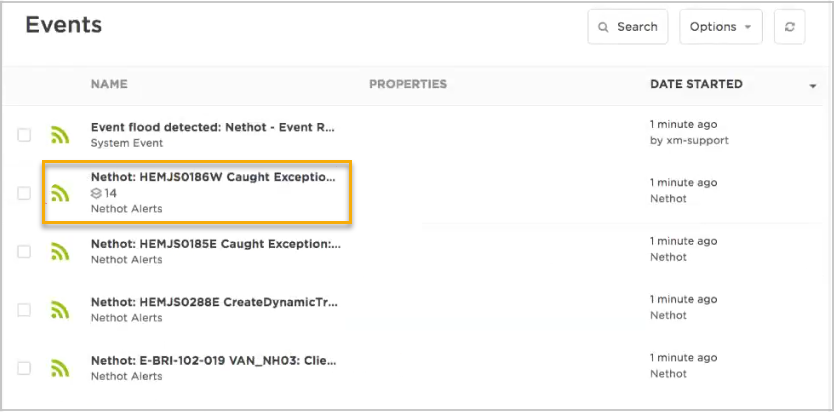
To view more information about suppressed alerts, click the stacked icon below the parent alert to view the Suppression report.
![]()
You can also use the xMatters REST API to retrieve data about alerts with a "SUPPRESSED" status using the GET /events endpoint.
Suppression remains in effect until the incoming rate of correlated alert requests drops below the rate specified by the trigger condition (e.g., four or fewer alerts per minute for the default rule). When the flood is over, xMatters resumes generating alerts as normal and lists them in the Recent Alerts report.
When alert flood control is triggered, the recipients who would otherwise have received a flood of alert notifications receive a single notification from xMatters to inform them that an alert flood was detected. They also receive periodic updates while the flood is ongoing.
These 'Alert flood detected' notifications are associated with system alerts initiated by xMatters, which you'll see listed in the Recent Alerts report.
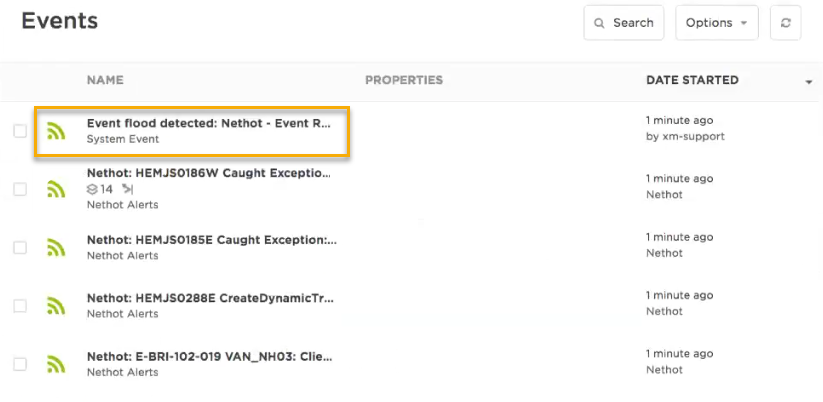
Notifications that xMatters sends to inform recipients that a flood has occurred or is ongoing include the following information:
- The name of the workflow and form used to create the alert.
- The name of the alert flood control rule that triggered alert suppression.
- The time the first alert was suppressed.
- The total number of alerts that have been suppressed so far.
- The alert ID of the parent alert.
The notification includes the following response options:
- Acknowledge: Stops notifying other users about the flood.
- Close: Stops notifying all recipients and terminates the flood notification alert.
- Escalate: Stops notifying the current user and immediately escalates the alert to the next scheduled recipient.
As long as the flood continues to meet the conditions of the alert flood control rule, xMatters will initiate a new system alert and send an updated version of the notification according to specified notification interval (by default, every 15 minutes, or for every 1000 suppressed alerts, whichever occurs first).
During a flood, xMatters automatically notifies and updates the targeted recipients of the alert that triggered the flood. If you're not a targeted recipient and want to be informed when alert floods occur and are ongoing in your system, you can subscribe to receive these notifications.
xMatters includes an internal workflow with a built-in one-way FYI subscription for alert floods. When you create a subscription, you can select a specific form or integration that you'd like to receive alert flood notifications about.
To subscribe to alert flood control alerts:
- Click your user name at the top-right corner of the page. A drop-down menu appears.
- In the drop-down menu, click Subscriptions.
- On the Subscriptions page, click Add Subscription, and from the drop-down list select Alert Flood Detected.
- On the Subscription Details page, give your subscription a name and description.
- Set the planName and integrationName criteria to specify the name of the workflow and integration to which you want to subscribe.
- To be notified about alert floods from any of the integrations in a workflow, specify the planName and leave the integrationName field blank.
- Set the remaining options to customize the subscription, and then click Subscribe.
xMatters will now send you a notification whenever alert flood control is triggered for the specified integration, and updates if the flood is ongoing.
Manage alert flood control settings
The Alert Flood Control page in the web user interface allows you to view and manage alert flood control rules for each alert source.
Required Permissions
To manage alert flood control rules for a workflow or built in integration, you require the following:
- A role with permission to manage alert flood control settings (this includes Company Supervisors, Full Access Users, and REST Web Service Users).
- Access permissions to the relevant workflow or built-in integration.
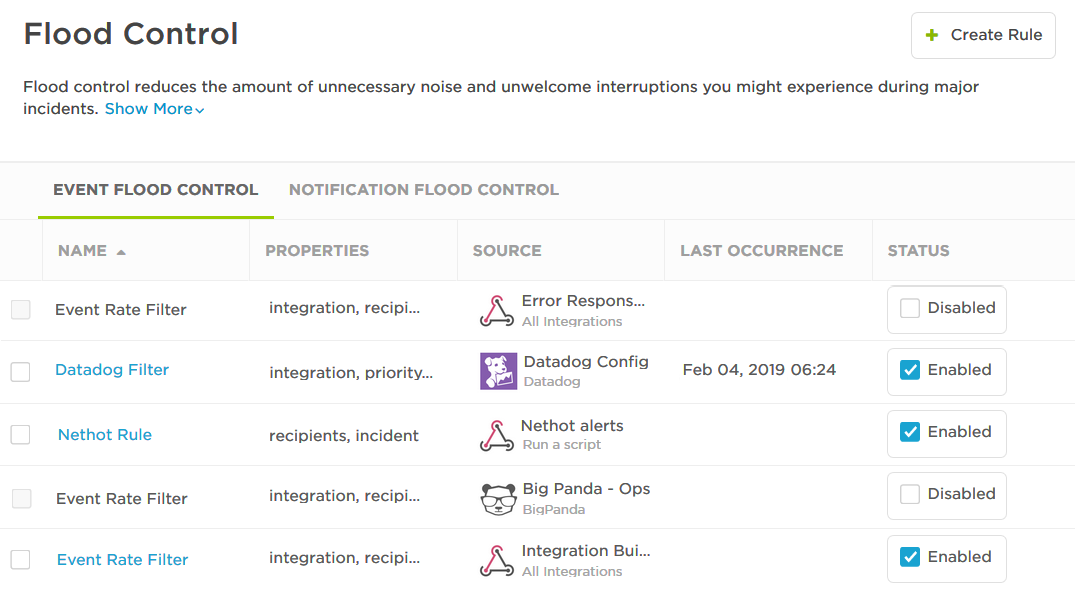
To view your alert flood control rules:
- Click the Workflows tab.
- In the menu, click Flood Control.
- In the flood control interface, click the Alert Flood Control tab.
- On the other tabs, you can access Notification Flood Control and Trigger Flood Control settings.
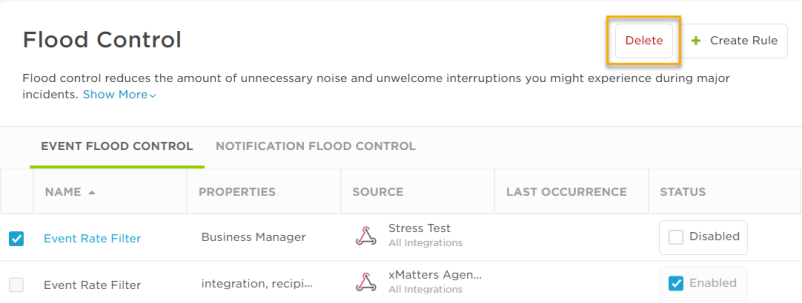
The following table describes the information displayed on the Alert Flood Control page.
| Column | Description |
|---|---|
| Name |
The name of the alert flood control rule. xMatters automatically creates a default "Alert Rate Filter" for each of your inbound integrations. |
| Properties |
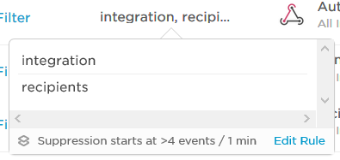
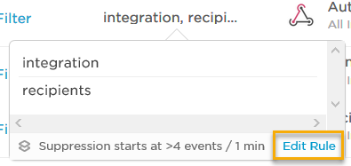
The properties used to correlate alert requests and the rate of incoming alert requests at which suppression begins. For the default filter, this includes alerts targeting the same integration and same recipients more than four times in one minute.
Click on the field's value to view the full list of properties and when suppression starts:
If you have permission to edit the settings for a rule, an Edit Rule hyperlink is visible. Click this link to navigate to the rule's configuration screen. |
| Source |
The workflow or built in integration whose inbound integrations the rule applies to.
|
| Last Occurrence | The date and time the rule last suppressed alerts. |
| Status | A check box to enable or disable the rule. |
To more easily view data in the table, do one or more of the following:
- To sort the content in alphabetical or chronological order based on a specific column, click the column header. (Click the header again to reverse the sort order.)
- To change the width of a column, move the pointer over the edge of the column and when the re-size icon appears, click and drag the column to the desired size.
- To rearrange the columns, click and drag a column header to a new location on the table.
- If the list contains more entries or columns than can be displayed on your screen, scroll horizontally or vertically. The system automatically loads more data as scroll down the page.
To enable or disable a flood control rule, do one of the following:
- From the main Alert Flood Control page, select or clear the check box in the Status column that corresponds to that rule.

- From the configuration page for a rule, select or clear the check box at the top of the screen. This check box appears after you save your alert flood control rule.

If the default Alert Rate Filter doesn't suit your needs, you have the option to create your own alert flood control rules. This allows you to customize the alert properties and trigger conditions used for alert suppression, as well as the settings for alert flood control notifications.
For example, if your system aggregates alert traffic before sending it to xMatters, you can create rules with different properties to apply alert flood control separately for your individual source systems.
To create a new alert flood control rule:
- In xMatters, access the Flood Control page.
- At the top of the Flood Control page, click Create Rule.

- In the pop-up window that appears, give your rule a unique name and select the source of alerts it applies to, and then click Create Rule.
- The name of a rule must be unique within a workflow.
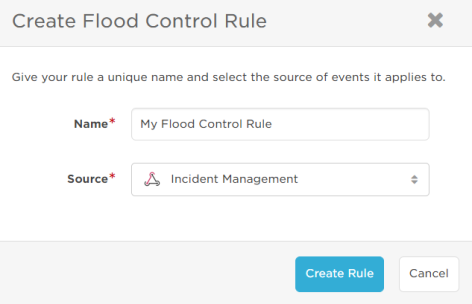
- Select the alert source for your rule.
- Source: This field is pre-populated with the workflow or built-in integration you selected when you created your rule. You can edit the source before you save your rule.
- Integration: The value for this field defaults to "All Integrations", or you can select a specific integration in your workflow or built-in integration.

Built-in integrations have a streamlined configuration process that is supported by an underlying workflows, which may consist of multiple forms and integrations. If you select a built-in integration as your source, the Integration drop-down will contain the names of the individual integrations the configuration is based on.
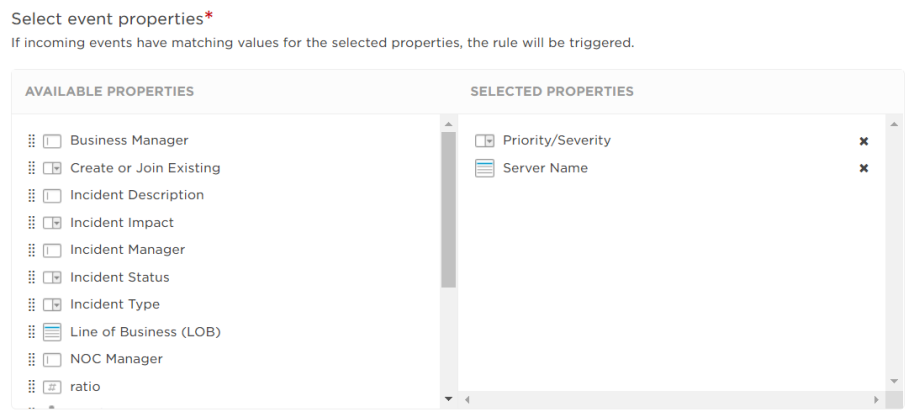
- Select the alert properties that you want xMatters to use to determine if incoming alert requests are correlated. If incoming alert requests have matching values for the selected properties, the rule will be triggered.
- Drag properties from the list of available properties to the Selected Properties column to include them in your rule.
- The list of available properties includes any properties that you've created in your workflow, and a set of system properties that are available for every workflow (Recipients, Priority, Initiator, Incident, and Integration).
- To remove a property from the selected properties list, click the "X" next to its name. This will return the property to the list of available properties.
- Set the trigger conditions for your rule. When these conditions are met, alert suppression will begin.
- This setting inherits the values of the default Alert Rate Filter, which triggers suppression when the rate of incoming alert requests is greater than 4 alerts within 60 seconds.
- You may specify between 1 to 999 alerts and 10 to 3600 seconds for the trigger conditions.

- Set the notification interval to notify recipients if the alert flood is still active after a set amount of time or number of suppressed alerts, whichever comes first.
- This setting inherits the values of the default Alert Rate Filter, which notifies recipients of an ongoing flood every 900 seconds (15 minutes), or 1000 alerts.
- You may select to notify users between 60 to 43200 seconds (1 minute to 12 hours), or for every 5 to 10000 alerts.

- Optionally, you can send a webhook to a specific URL over the duration of an alert flood. This can be useful if, for example, you want to send a list of suppressed alerts back to the source of the signals so that system can mark the alerts as closed. The webhook payload is described in the xMatters REST API under Alert Suppressions. Specify an interval in minutes, and provide the URL where you want to send the webhook.

- Click Save.
Once you save your alert flood control rule, you cannot edit the Source or Integration fields that define your alert source.
To access the configuration screen for a flood control rule and edit its settings, do one of the following:
- Click the name of the rule on the Alert Flood Control tab. If you do not have permission to edit a rule, its name will not be a hyperlink.

- Click Edit Rule from the rule's property list on the Alert Flood Control page, or on the Suppression report. If you do not have permission to edit the rule, this text will not appear beneath the list of properties.
For more information about the configuration settings for an alert flood control rule, see Create a rule.
Select the check box next to the name of the rule, and then click Delete. The Delete button only appears after you select a rule from the list.
