Sites
In xMatters, sites represent physical locations like street addresses or geographic coordinates. Every user in the system belongs to a single site and it controls some default settings on their profile page, such as their language and time zone.
We strongly recommend that you do not use sites as a substitute for custom user properties when defining dynamic groups (for more information. As a best practice, sites should be used for larger concepts such as “Building 5” or “San Francisco Campus”; conversely, sites should not be used for defining relatively small groupings such as “Marketing Office” or “Fifth Floor East”.
The Sites page
The Sites page displays a list of all the sites in your system. The sites list includes information about each site, including the site's name, its street address and country, if its location is geocoded, and whether it's active or disabled. Geocoding the location of your sites enables you to notify users based on their geographic location.
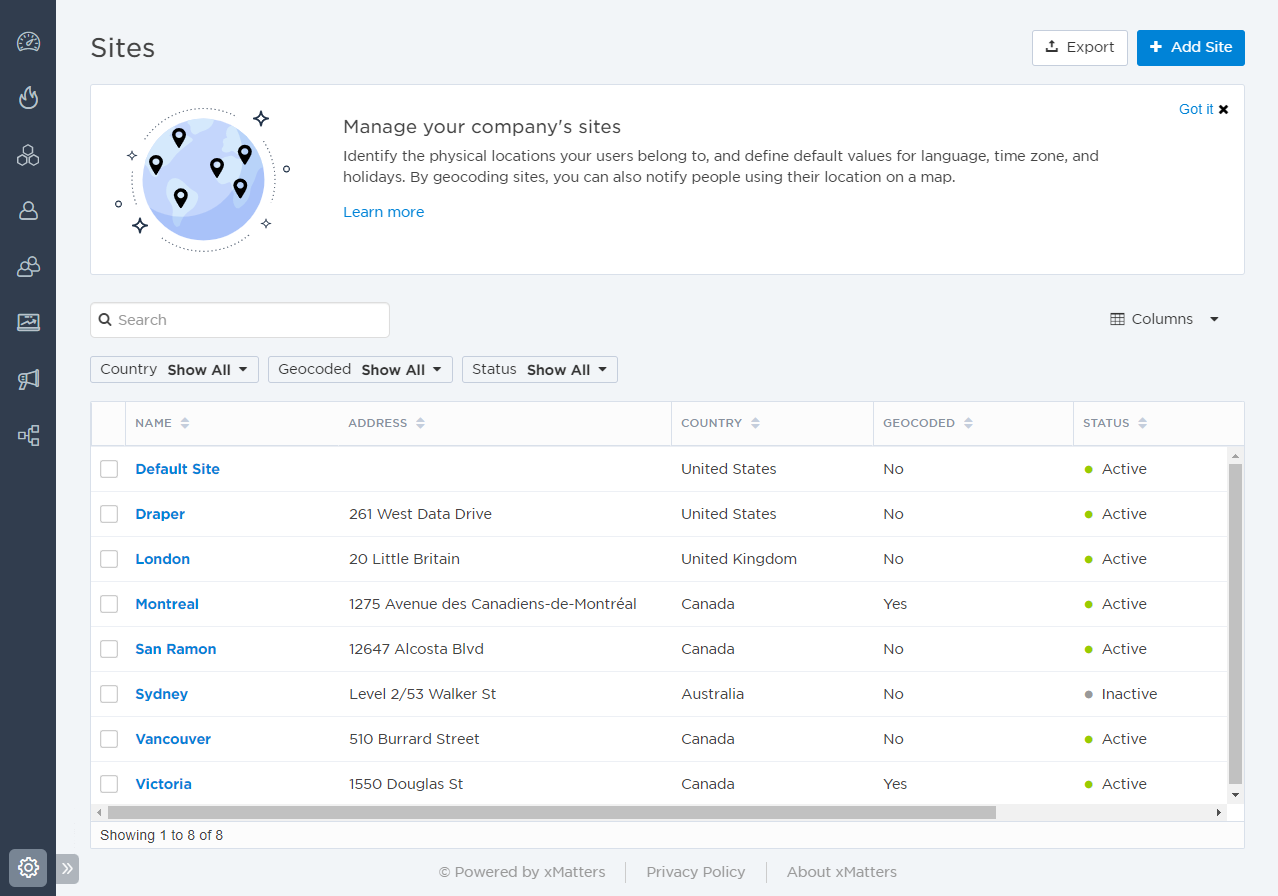
You can use the search bar and filters to refine the list of sites displayed in the table. You can also export the list of currently displayed sites to a spreadsheet.
The following sections describe the actions you can perform on the Sites page:
On the Admin menu, under Location, click Sites.
To more easily view data in the list, do one or more of the following:
- To sort the content of a column in alphabetical or chronological order, click the column header. (Click the header again to reverse the sort order.)
- To change the width of a column, move the pointer over the edge of the column and when the re-size icon appears, click and drag the column to the desired size.
- To rearrange the columns, click and drag a column header to a new location on the table.
- If the list contains more entries or columns than can be displayed on your screen, scroll horizontally or vertically. The system automatically loads more data as you scroll down the page.
- To include or exclude columns, click the Columns drop-down menu and select or clear the columns that are included. When you've hidden a column and want to see it again, it is added as the last column of the table.
The Sites list includes the following columns:
| Column | Description |
|---|---|
| Name | The name of the site. If you have permission to view or edit the site's details, its name appears as a hyperlink. |
|
Address |
The street address of the site. |
| Country | The country the site is located in. |
| Geocoded | Whether the site has its latitude and longitude coordinates defined. |
| Status | Whether the site is active and ready to receive notifications, or if it's inactive. |
You can use the search bar to find sites that contain the search term in their name or address.
Start typing in the search bar (a minimum of two characters is required). xMatters automatically updates the list to display items that contain (partially match) the search term, and highlights the portion of each item that matches the specified criteria. If you search multiple terms, xMatters returns sites that match all of the terms.
To clear your search, click the 'x' in the right corner of the search bar.
The available filters allow you to narrow the sites based on matching specific criteria. For example, you can use filters to locate sites in specific countries, sites that are disabled, and sites that haven't been geocoded yet.

You can apply one or more filters to narrow down the list of sites. If you apply multiple filters, xMatters only returns sites that match all of the specified filter criteria. For detailed instructions on how to use filters, see Filtering data tables.
The following table describes the available filters on the Sites page and their values:
| Filter | Values |
|---|---|
| Country |
|
|
Geocoded |
|
| Status |
|
- On the Sites page, click the name of the site you want to modify, or click Add Site to create a new site.
- xMatters displays the Add Site or Edit Site side panel.
- Define the site's details:
| Detail | Description |
|---|---|
| Enabled |
Select this check box to make the site active (i.e., ready to receive notifications) as soon as the details are saved. If you do not want this site to be immediately active, clear the check box.
Note: Users assigned to an inactive site cannot log in to xMatters or receive notifications. |
| Name | Type a descriptive name for the site. This name is used to identify the site throughout xMatters. |
| Language | Select a language to associate with this site from the list. The available choices are limited to the languages defined for your company. |
| Time Zone | Select the time zone this site uses. (Additional time zones can be added to the list from Region Settings.) |
- Define the site's address:
| Field | Description |
|---|---|
| Address Line 1 | Type the physical location of the site. |
| Address Line 2 | Type the physical location of the site. |
| City | Type the name of the city the site is located in. |
| State/Province | Type the region, state, or province where the site is located. |
| Country | Select the country the site is located in. The available choices are limited to the countries defined for your company. |
| ZIP/Postal Code | Type the ZIP or postal code for the site. |
- Optionally, geocode the site's location manually by clicking Geocode Address (you can alternatively geocode multiple sites at a time from the sites list). The site's latitude and longitude coordinates are updated automatically based on the World Geodetic System Standard. If required, drag and drop the pin that appears on the map to a more precise location or click Clear Location to remove the geocode.
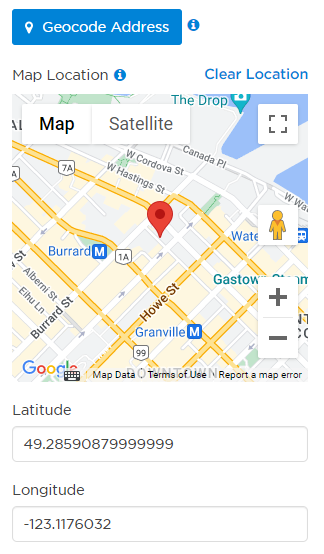
- Click Save.
If you click Use Address and then move the map pin, the site's geocoded location will be based on the pin's new location, not the address you specified.
Geocoding allows you to notify users based on their geographic location when you add the Site Recipients section to your messaging forms; this form section lets you choose which sites to notify by selecting their locations on a map.
You can manually geocode individual sites, or you can quickly geocode multiple sites at a time based on their address information. For best results, provide complete address information when configuring your sites.
To geocode sites in bulk:
- On the Sites page, use the search bar and filters to find the sites you want to geocode.
- Select the check box beside each site's name. You can select up to 100 sites at a time.
- Click Geocode Address.
- xMatters displays the log of any success or error messages encountered while attempting to geocode the selected sites.
- Click Close.
- Click Done to close the task bar and clear the selected sites.
- On the Sites page, click the name of the site you want to update the holidays for.
- Under Holidays, select or deselect the check boxes next to the available holidays in the list. (Holidays are based on the company's country. Additional holidays can be added to countries from the Holidays page.)
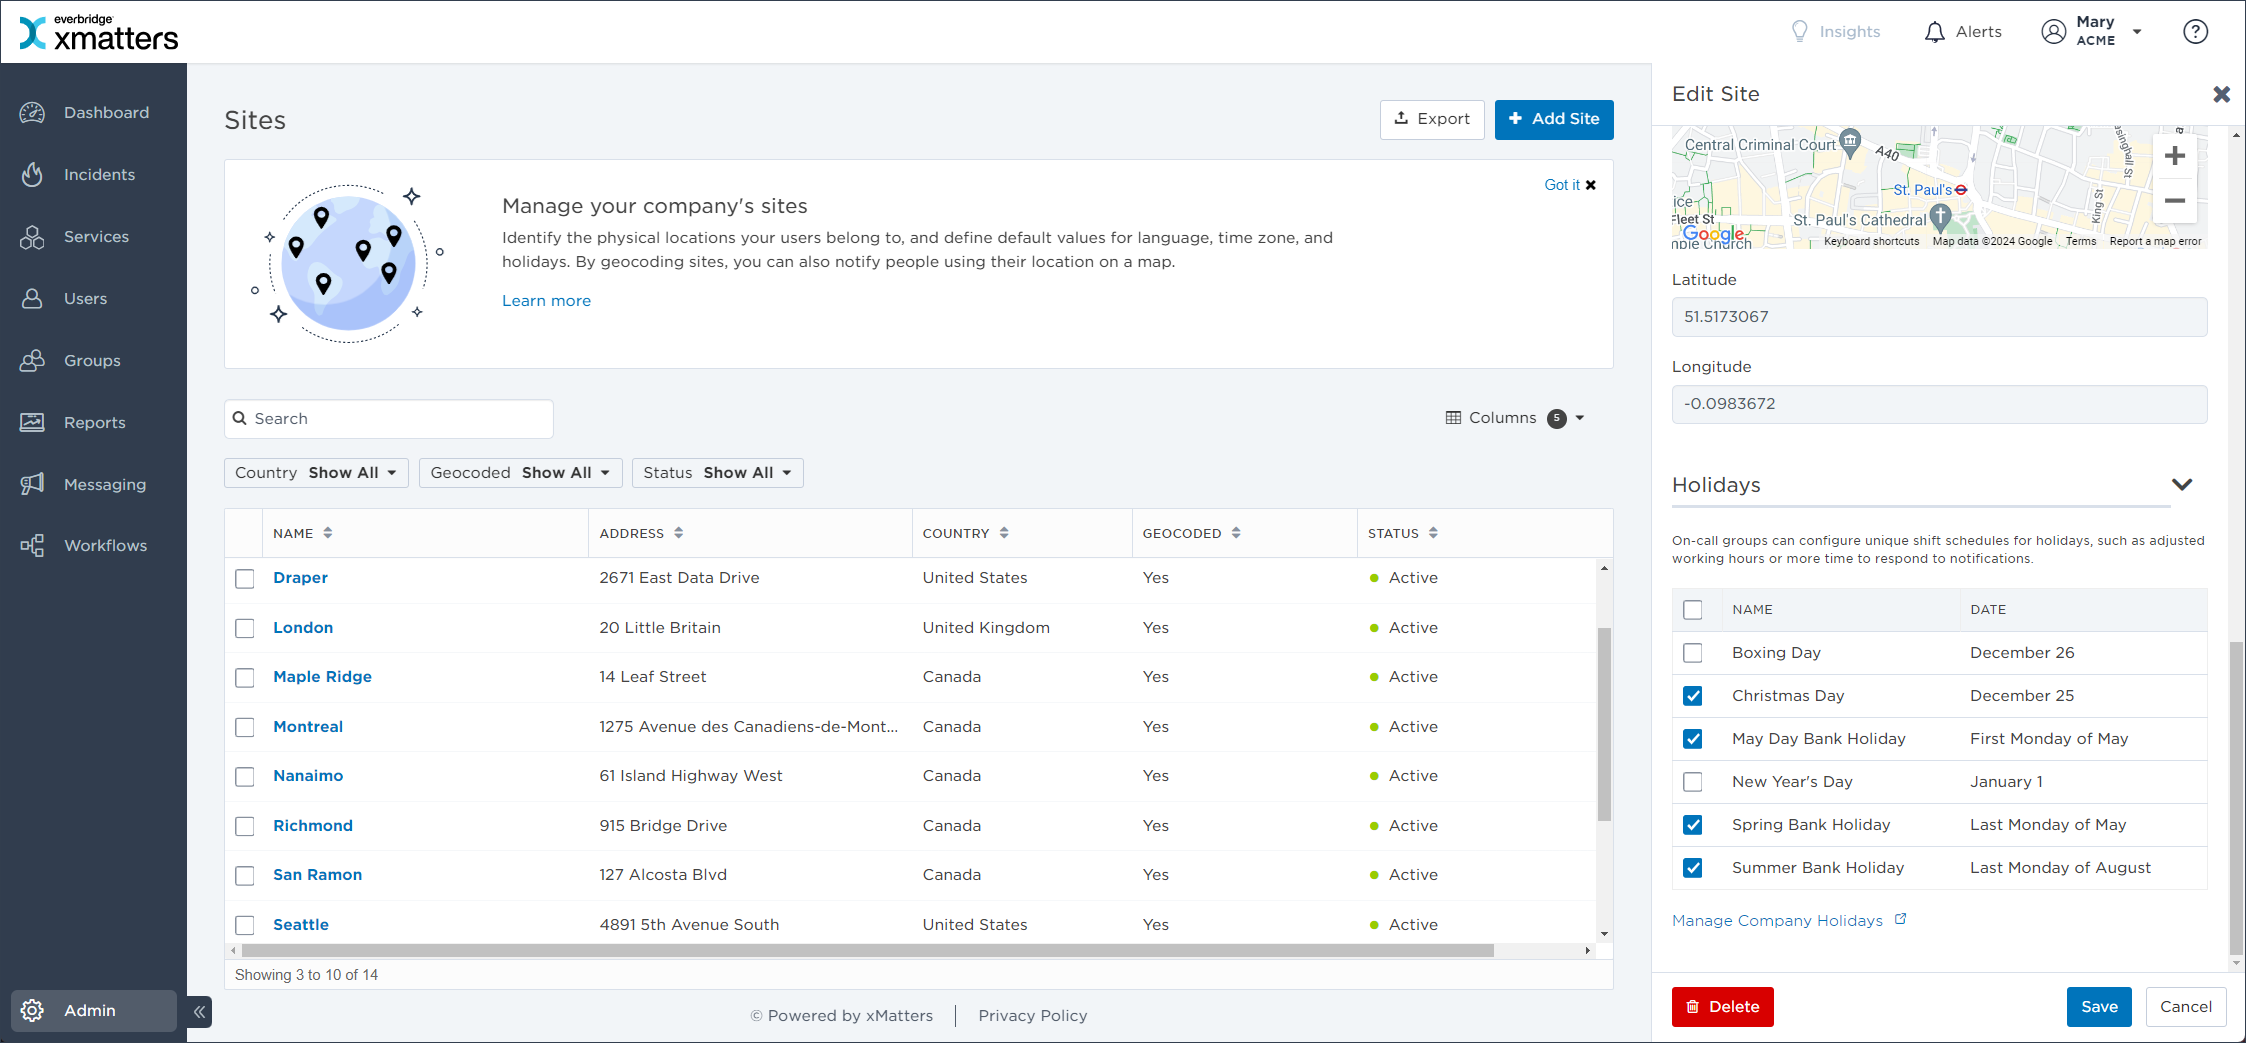
- Click Save.
- Select the check box beside the site or sites you want to delete. You can select up to 100 sites at a time.
- Click Delete.
- In the warning dialog box that appears, click Delete.
- xMatters displays the log of any success or error messages encountered while attempting to delete the selected sites.
- Click Close.
- Click Done to close the task bar and clear the selected sites.
You can use the Export feature to generate a comma-separated list of all the sites in the system (or a subset of sites).
To export a list of sites:
- On the Sites page, use the search bar and filters to find the sites you want to export.
- All sites in the results will be exported. The selection check boxes for individual sites do not affect the Export feature; they are used to select sites for geocoding or deletion.
- To export the currently displayed list of sites, click Export.
- xMatters creates a file named Sites Export <date/time>.csv where <date/time> is a timestamp of when the file was created.