Identify impacted services
The Impacted Services section of the Incident Console lists services reported as affected by the incident. You can use this section to easily review information about the services, such as their owner, description, type, tier, if they're reported in any other active incidents, when they were last changed, and if their owner is engaged as a resolver. You can view service dependencies for the incident, explore its potential root cause, and identify if any services were recently changed.
Impacted services are reported when an incident is initiated, but can be updated as the incident progresses.
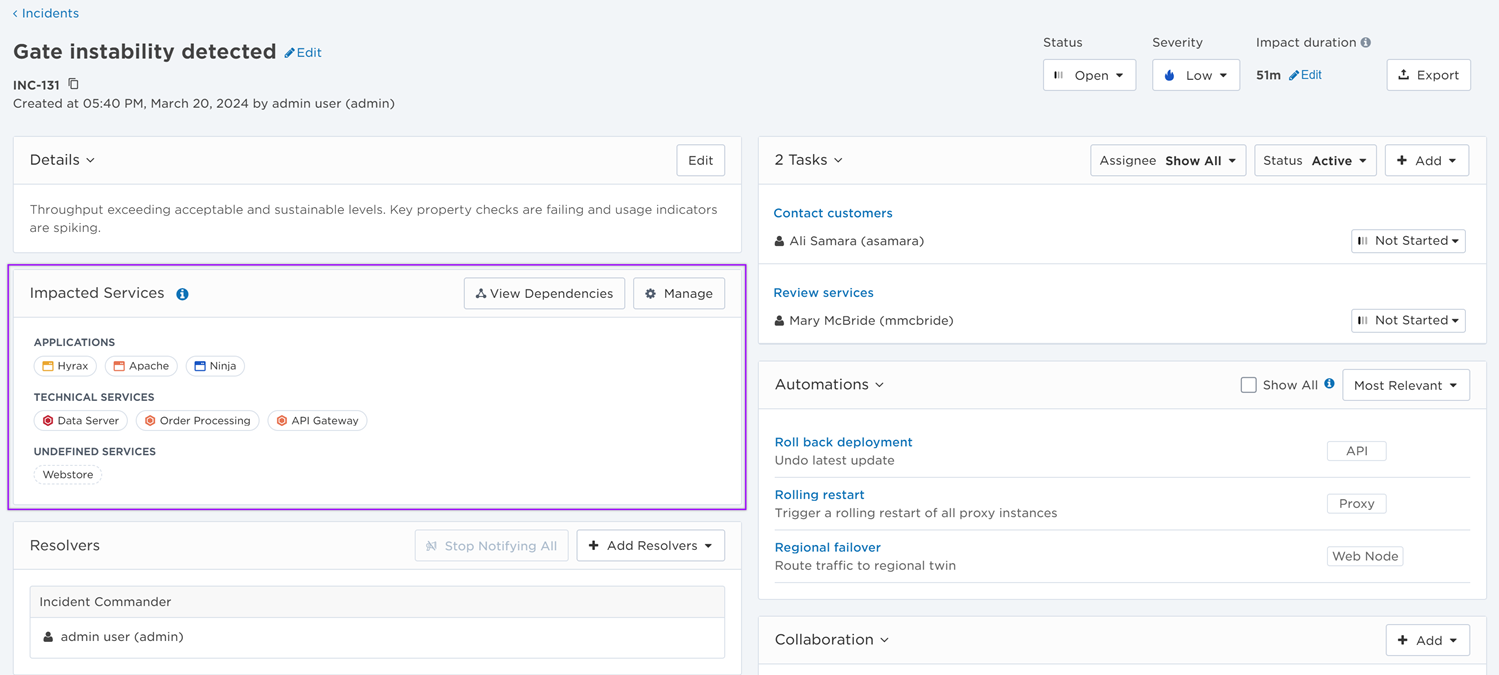
Impacted services information is also included in the Incidents list, resolver notifications, stakeholder updates, incident exports, and the Post-Incident Report.
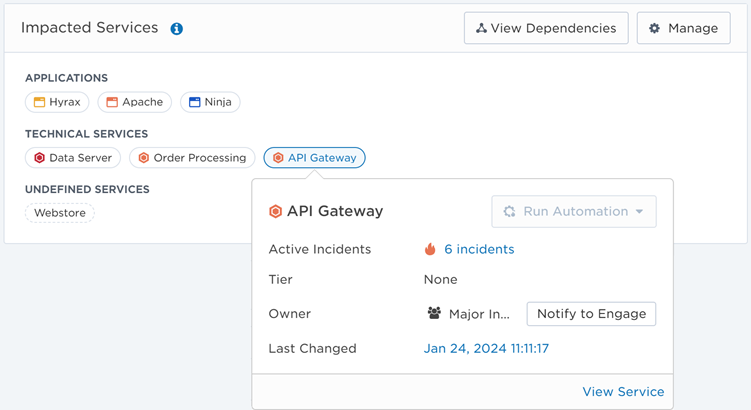
Click a service to view an info card with its name, description, active incidents, tier, owner, links, and when it was last changed.
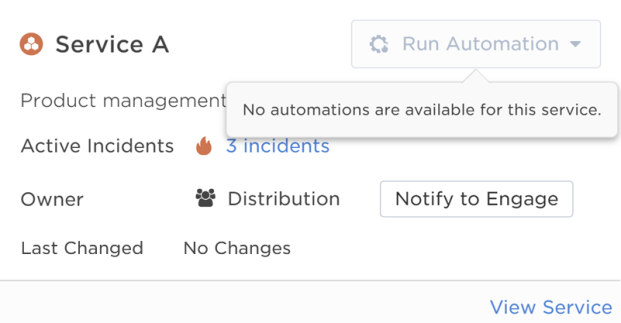
The service info card also includes a link to view the service in the Service Catalog, the ability to notify the service owner to engage an incident resolver, and a 'Run Automation' drop-down menu to view all the automations related to a service.
If a service is undefined (not included in the Service Catalog), no additional information is included.
To view changes to a service:
Click the date the service was last changed to open the incident's service dependencies map with the change panel expanded to display a list of recent changes to the service.
To view who is on call for a service:
Click the Owner group to view who is currently on call (including shifts, members, and escalations).
To view active incidents associated with a service:
The service info card includes a count of the number of active incidents currently impacting that service, and the highest severity. (Incidents are considered active if their status is 'Open' or 'In Progress'.) In the example above, the service has 6 associated active incidents and the highest severity level of one or more of those incidents is 'Critical'. You can click the incident count to drill through to a filtered view of those incidents in the Incidents list.
Services at a glance
The Impacted Services section categorizes services by their assigned service type: Applications, Technical Services, or Undefined Services. Within each type, services are sorted by their tier from highest to lowest.

A service's appearance in the Impacted Services section of the console conveys information about the service.
| Appearance | What does this mean? | |
|---|---|---|

|
Check mark | Service owner is engaged as a resolver |

|
Regular outline | Service owner has not been notified to engage |

|
Blue dot | Service was changed within the last 24 hours |

|
Dashed outline | Service was reported as impacted but does not exist in the Service Catalog |

|
Grayed-out & struck-through | Service has been deleted from the Service Catalog |
Any user who has access to the Incident Console can manually add or remove impacted services for an incident. (You can also automatically add impacted services to an incident when it is initiated as part of an automated workflow.)
To add or remove impacted services:
- In the Impacted Services section of the Incident Console, click Manage.

- Do one of the following:
- Search: Search and select an existing service to add to the incident. If you don't see the service you need, you can add a new one from this dialog window.
- Remove: Click the X next to the name of the service you want to remove from the incident. (This does not delete services from the Services Catalog.)
- Click Save.
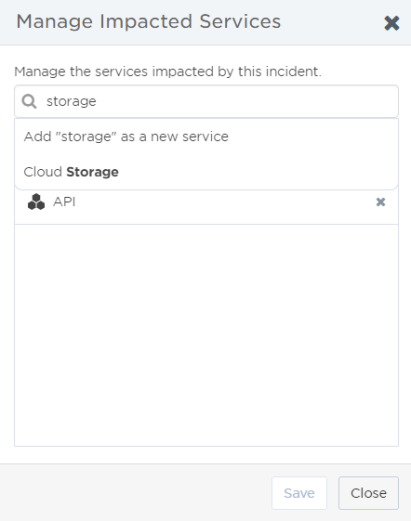
If an impacted service doesn't currently exist in the Service Catalog, or wasn't defined when the incident was initiated, you can easily add it from the Incident Console.
To add a new service from the Incident Console:
- In the Impacted Services section of the Incident Console, click Manage

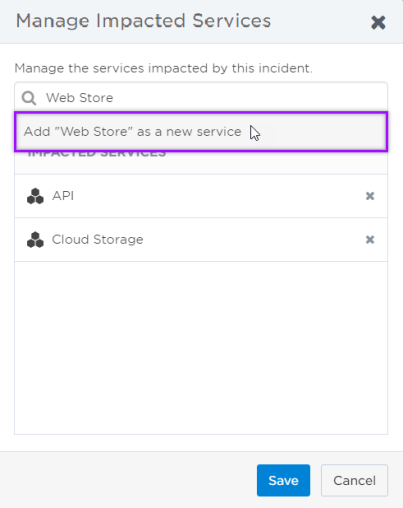
- In the Search bar, type the name of the service you want to add and select to add it as a new service from the drop-down that appears.
- In the Add Service dialog window, edit the Name of the service if you need to.
- Add an optional Description.
- Select the type of service you want to add (Technical or Application).
- Select the service tier you want to assign ('None', '1 - Platinum', '2 - Gold', '3 - Silver', or '4 - Bronze').
- In the Owner field, type the name of the group you want to assign as the owner and select them from the drop-down list that appears.
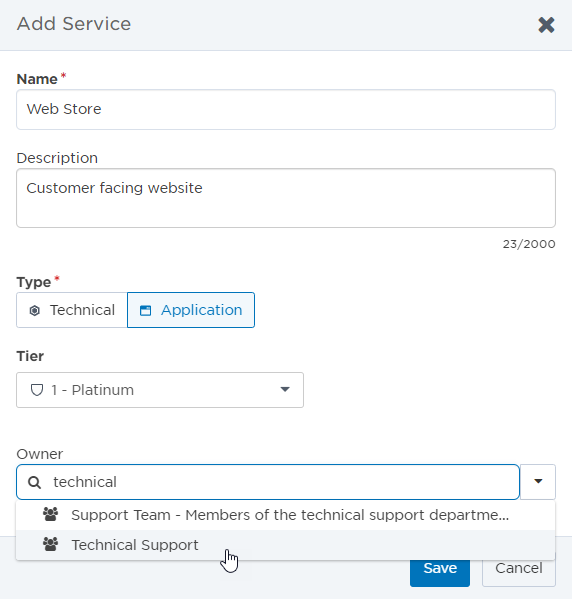
- Click Save to add the new service to the incident and the Service Catalog.
You can add impacted services as part of your automated workflows with the Initiate Incident step.
An undefined service is any service reported as impacted in the initiate incident process that does not exist in the Service Catalog. When a service is undefined, no additional information (such as description or owner) is visible from the Incident Console. Undefined services are grouped together in the Incident Console and are identified by a dashed outline:

Undefined services can be added to the Service Catalog through the Incident Console or Suggested Services screen. Adding services to xMatters allows them to be easily selected when initiating an incident, and any associated active incidents can be reviewed at a glance.
To add an undefined service from the Incident Console:
- In the Impacted Services section of the Incident Console, click Manage.
- From the list of impacted services, click Add next to the name of the undefined service you want to add.
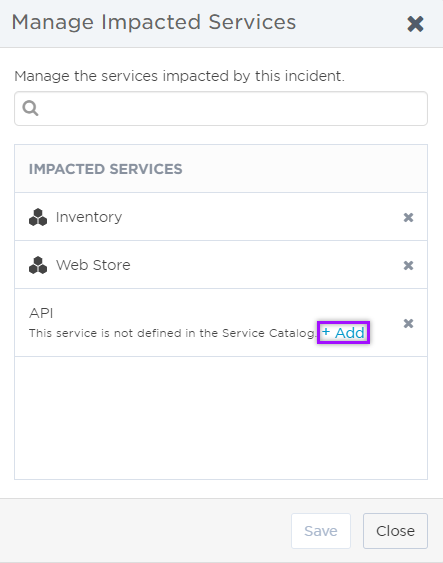
- Add an optional Description. (The Name can be edited in the Service Catalog once it's added.)
- In the Owner section, type the name of the group you want to assign as the owner and select them from the drop-down list that appears.
- Click Save to add the service to the Service Catalog.
When a service is identified as impacted, it's important to engage the right teams to ensure the incident can be resolved as quickly as possible. The service info card accessible from the Impacted Services section of the console and the incident dependencies map includes a 'Notify to Engage' option that you can use to easily engage the owners of impacted services as resolvers.
You can also notify service owners to engage from the Resolvers section of the console. This is useful if you want to engage the owner of a service that's not in the Impacted Services list.
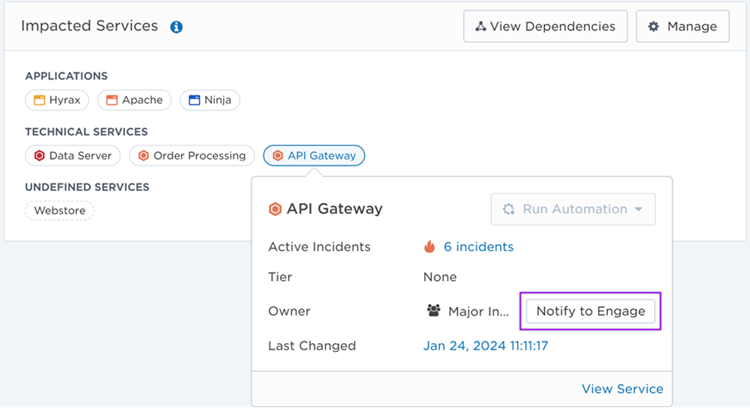
To notify an impacted service owner to engage:
- In the Impacted Services section of the console, click the name of the service to open its info card.
- Click Notify to Engage next to the name of the group that owns the service (this only appears if the service has an owner).
- The group is added to the Resolvers section of the console and the first on-call resource to respond to the notification will be listed below the name of the group. The name of the service will automatically be added as a resolver role at the top of the group resolver card.
Once the owner of an impacted service is engaged, the 'Notify to Engage' button on any of the impacted services they own is replaced with a link to see the resolver in the Resolver's list.
What if more than one service has the same owner?
If multiple impacted services are owned by the same group, you only need to notify the owner to engage once. The names of all the impacted services a group owns are displayed below the group's name in the Resolver's section of the console:
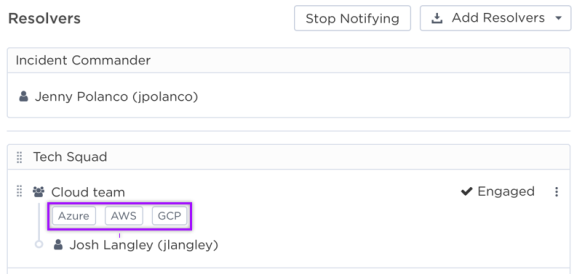
You can identify which impacted services are engaged by a checkmark beside the service name in the Impacted Services section of the console:

Click View Dependencies to view the service dependencies map for the incident and explore its recently changed services and potential root causes.

The incident service dependencies map is read only. To manage dependencies, open the service dependencies map for a specific service.
Automations may be available for common tasks related to a service, such as rolling back a previous deployment, running health checks, and collecting logs for information purposes. Beside the name of the service on the service info card, open the Run Automation drop-down menu to view the available automations the service is associated with. Select the automation you want to run and fill out the form that pops up with the required details. Click Submit to run the automation.
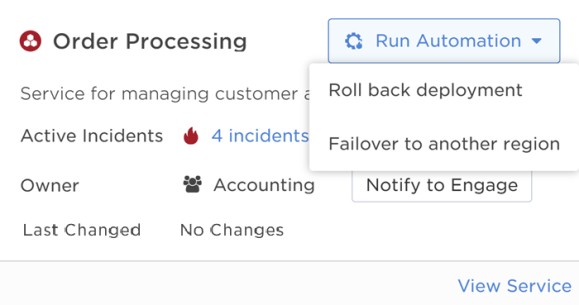
If the service is not associated with any automations, the Run Automation menu will be disabled.
